
💻 대광건영 clone coding
- 사이트명 : 대광건영
- 사용언어 : html / scss / js
- 분류 : 적응형 PC
Check Point
- swiper-pagination - fraction
- swiper-navigation - gauge
- slide영역 width값 잡기
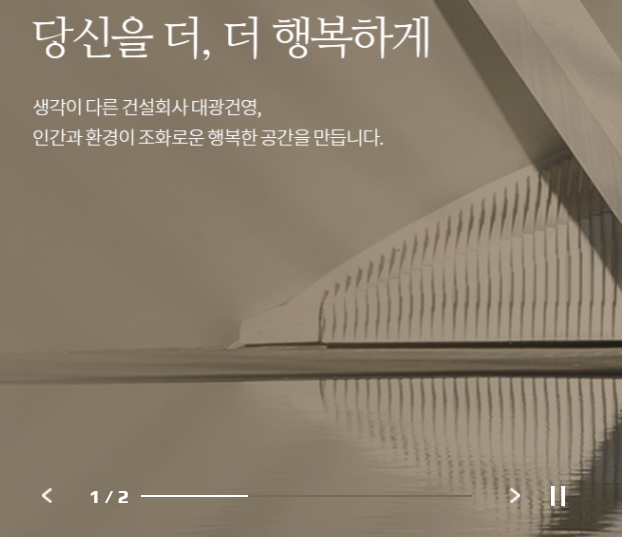
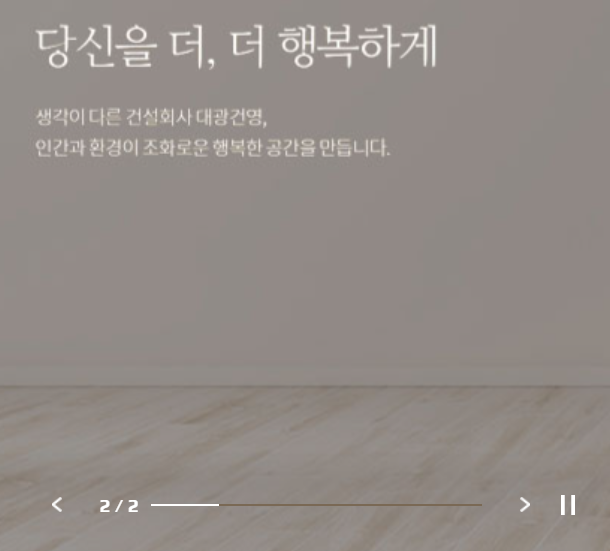
1. swiper-pagination - fraction
🎈 기본원리
- control해줄대상을 하나로묶음
<div class="fraction">
 <em class="count num">1</em>
 <span class="slash num">/</span>
 <em class="total num">1</em>
</div> - 스크립트작성

✔ swiper에도 custom은 있지만 소스가 정해져있기때문에 스타일적용이 힘듬 ex)slash
pagination: {
   el: ".fraction",
   type: "custom", 👈🏻 만들어서 사용
   renderCustom:function(swiper, current, total){
         return `
         <em class="count num">1</em> 👉🏻 current
         <span class="slash num">/</span>
         <em class="total num">1</em>`; 👉🏻 total
   },
}
✍🏻 코드작성
pagination: {
   el: ".fraction",
   type: "custom", 👈🏻 만들어서 사용
   renderCustom:function(swiper, current, total){
         return `
         <em class="count num">${current}</em>
         <span class="slash num">/</span>
         <em class="total num">${total}</em>`;
   },
}
.fraction{width: auto;} 👈🏻 width값이빠짐🎈 구현화면
2. swiper-navigation
- gauge만들기
🎈 기본원리
✍🏻 코드작성
function auto(){
   $('.gauge span').css('width',0).animate({width:'100%'},2000,function(){
     swiper1.slideNext(); ☝🏻 width값 초기화 후, 다음 슬라이드로 넘어감
   })
}- slide-Change후 호출
swiper1.on('slideChange',function(){
   auto(); // 슬라이드가 바뀌었을때 다시실행
})

function auto(){
   $('.gauge span').css('width',0).animate({width:'100%'},2000,function(){
       swiper1.slideNext();
   })
}
auto();
문제점: 일시정지를 눌렀을때 gauge도 중간에 멈춰야하는데 구현하기어려움
🎈 gsap로 하는방법
 const auto = gsap.to('.gauge span',3,{
        ease:'none',
        width:'100%',
        onComplete:function(){👈🏻 완료되었을때
          gsap.set('.gauge span',{width:0}) 👈🏻 기초값셋팅
          swiper1.slideNext();
        },
        paused:true,
})

auto.play();

swiper1.on('slideChange',function(){
    auto.restart(); 👈🏻 슬라이드 넘어가고 재실행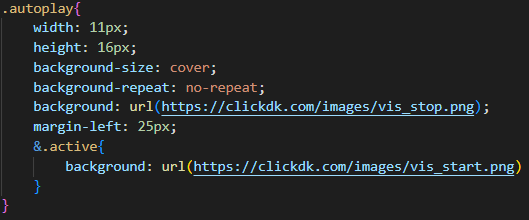
})- 재생/멈춤
$('.autoplay').click(function(){
      if($(this).hasClass('active')){
        $(this).removeClass('active')
        auto.resume(); 👈🏻 진행
      }else{
        auto.pause();
        $(this).addClass('active')
      })
active는 가상으로 만든 클래스 > 스크립트 컨트롤용도로 만듬
(위 사이트에서는 클릭이벤트시 재생/멈춤으로 'active'사용)
3. slide영역 width값 잡기
🎈 기본원리
- .project-content와 .project-img의 width:50%와 float를 이용해 영역을 잡는다.
.project-content{
        width: 50%;
        float: left;
        display: flex;
        justify-content: flex-end;
}
 .project-img{
        width: 50%;
        float: right;
} 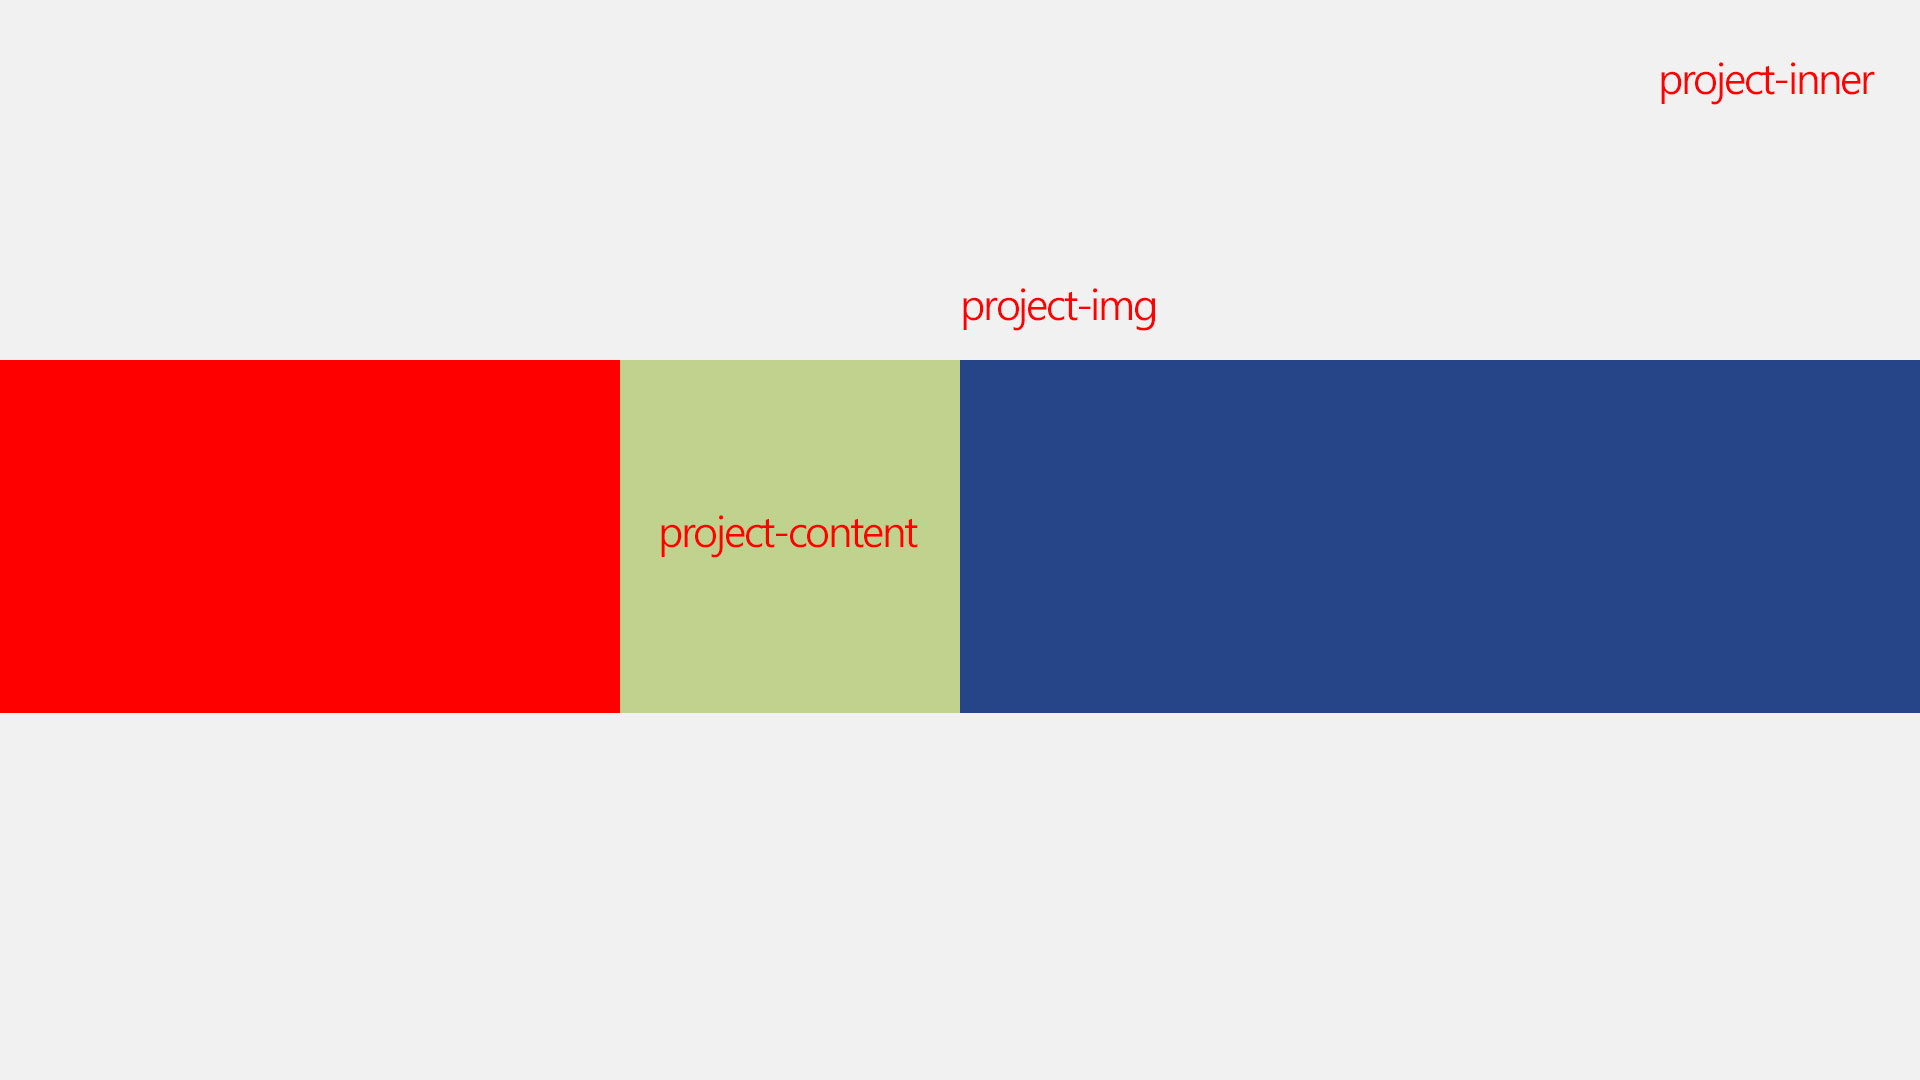
- content의 영역만큼 양쪽을 밀어준다.
.project-content{
        width: calc(50% - 340px);
        float: left;
        display: flex;
        justify-content: flex-end;
}
 .project-img{
        width: calc(50% + 340px);
        float: right;
} 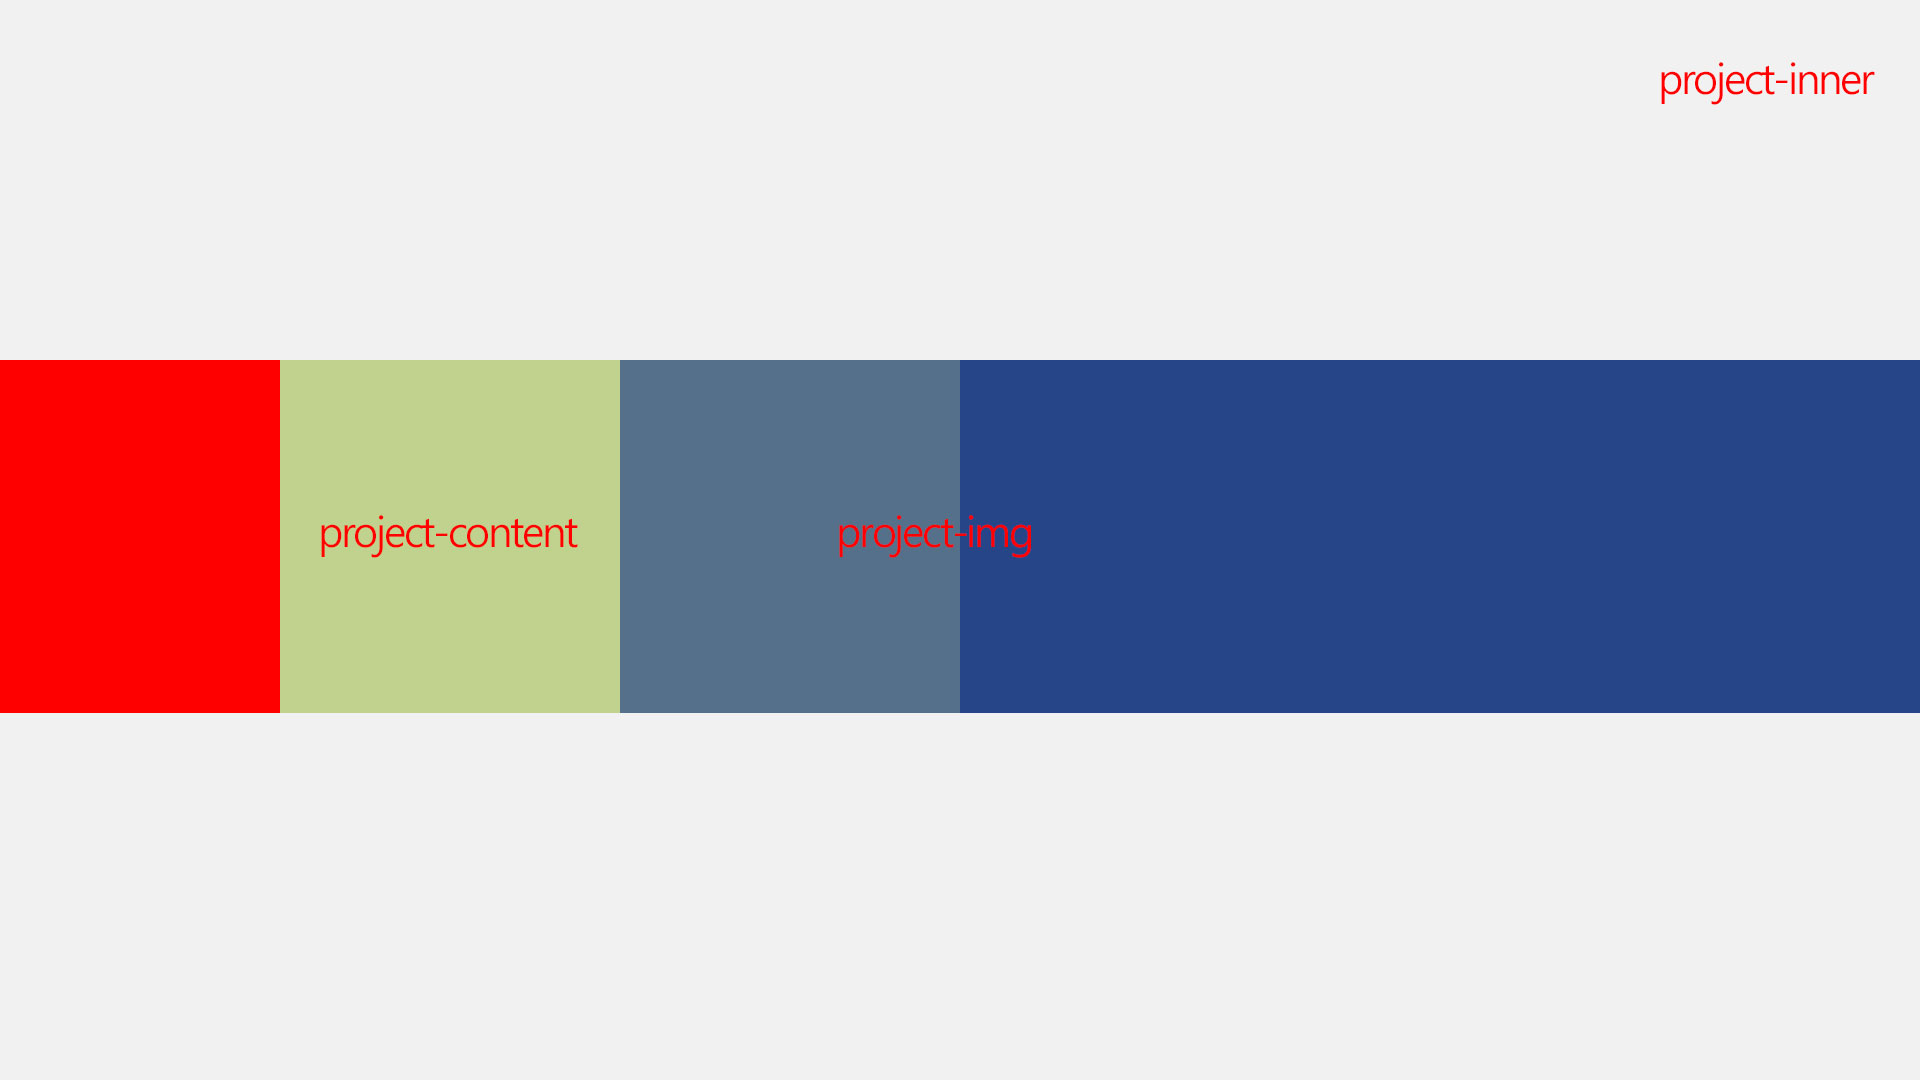
- 각각의 여백값을 계산해서 레이아웃을 완성시켜준다.
(box-sizing이 들어가있기때문에 margin으로 여백주면됨)
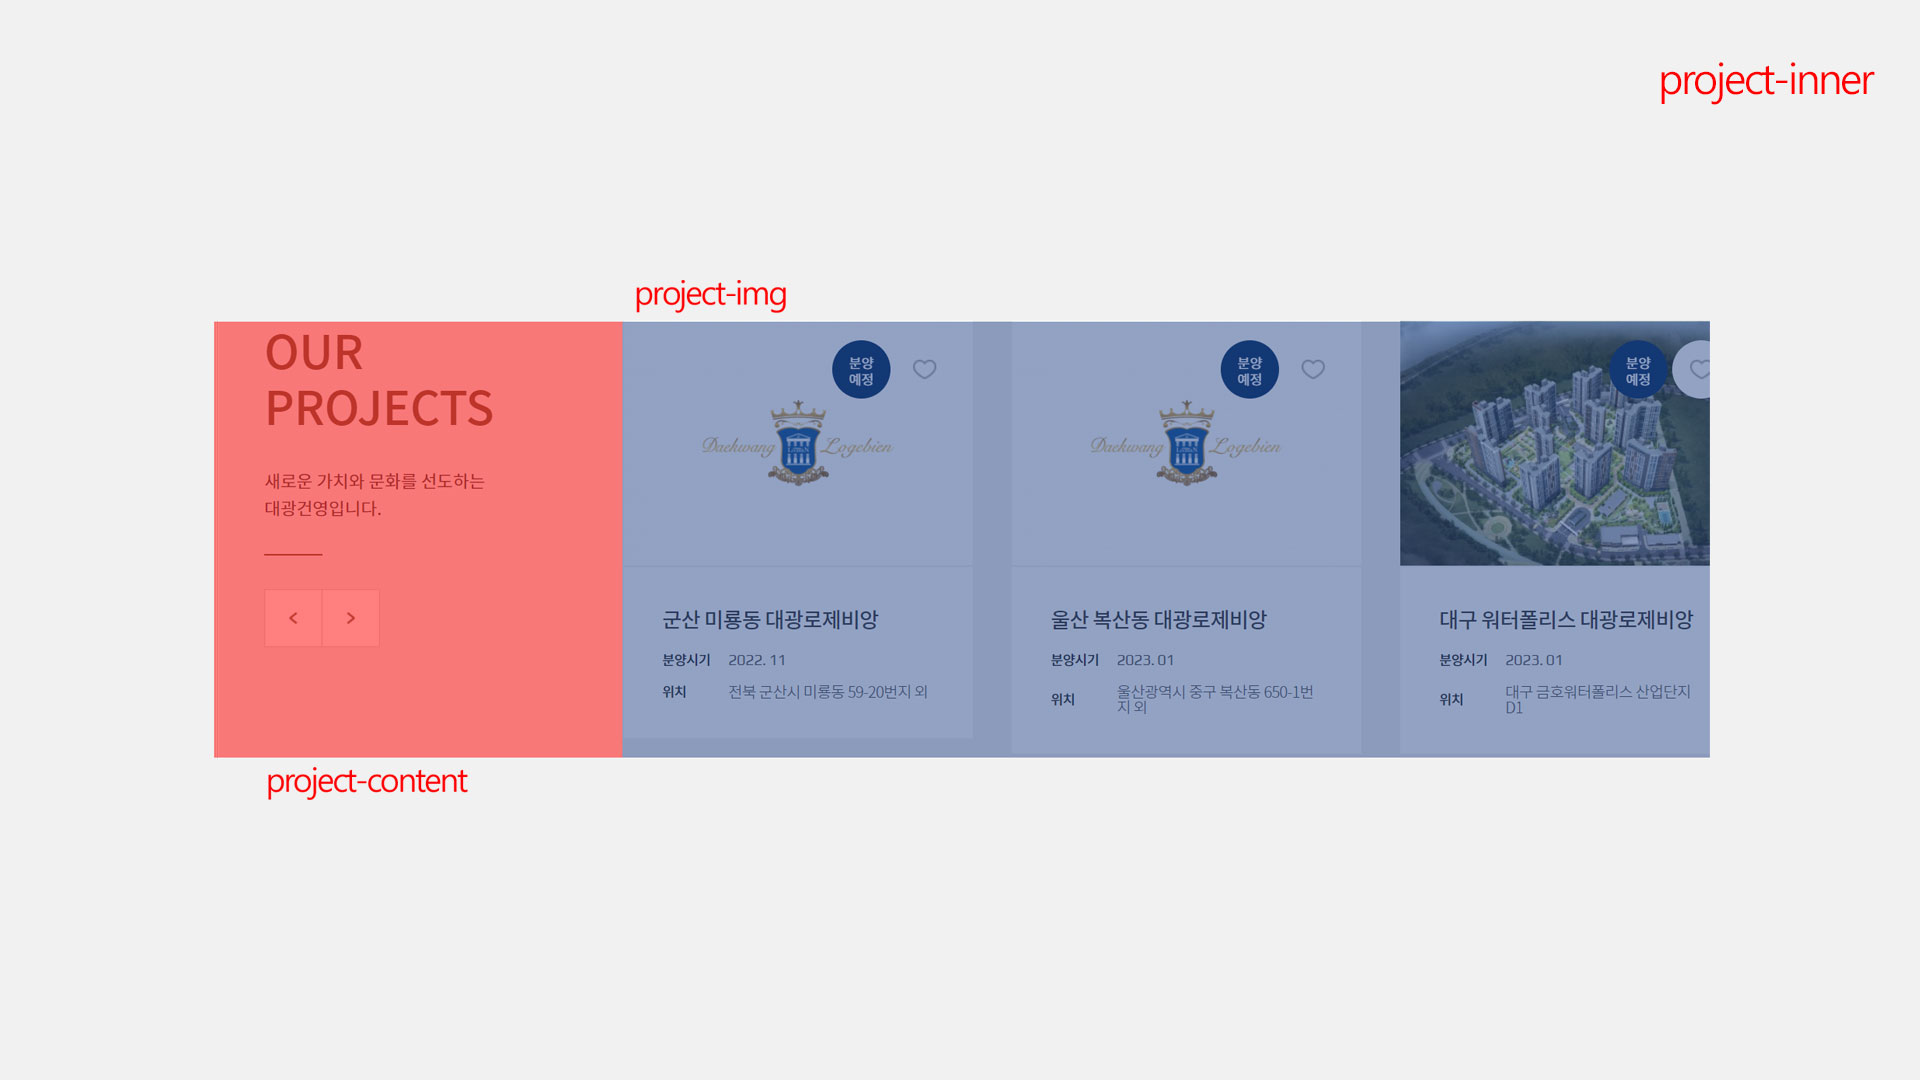
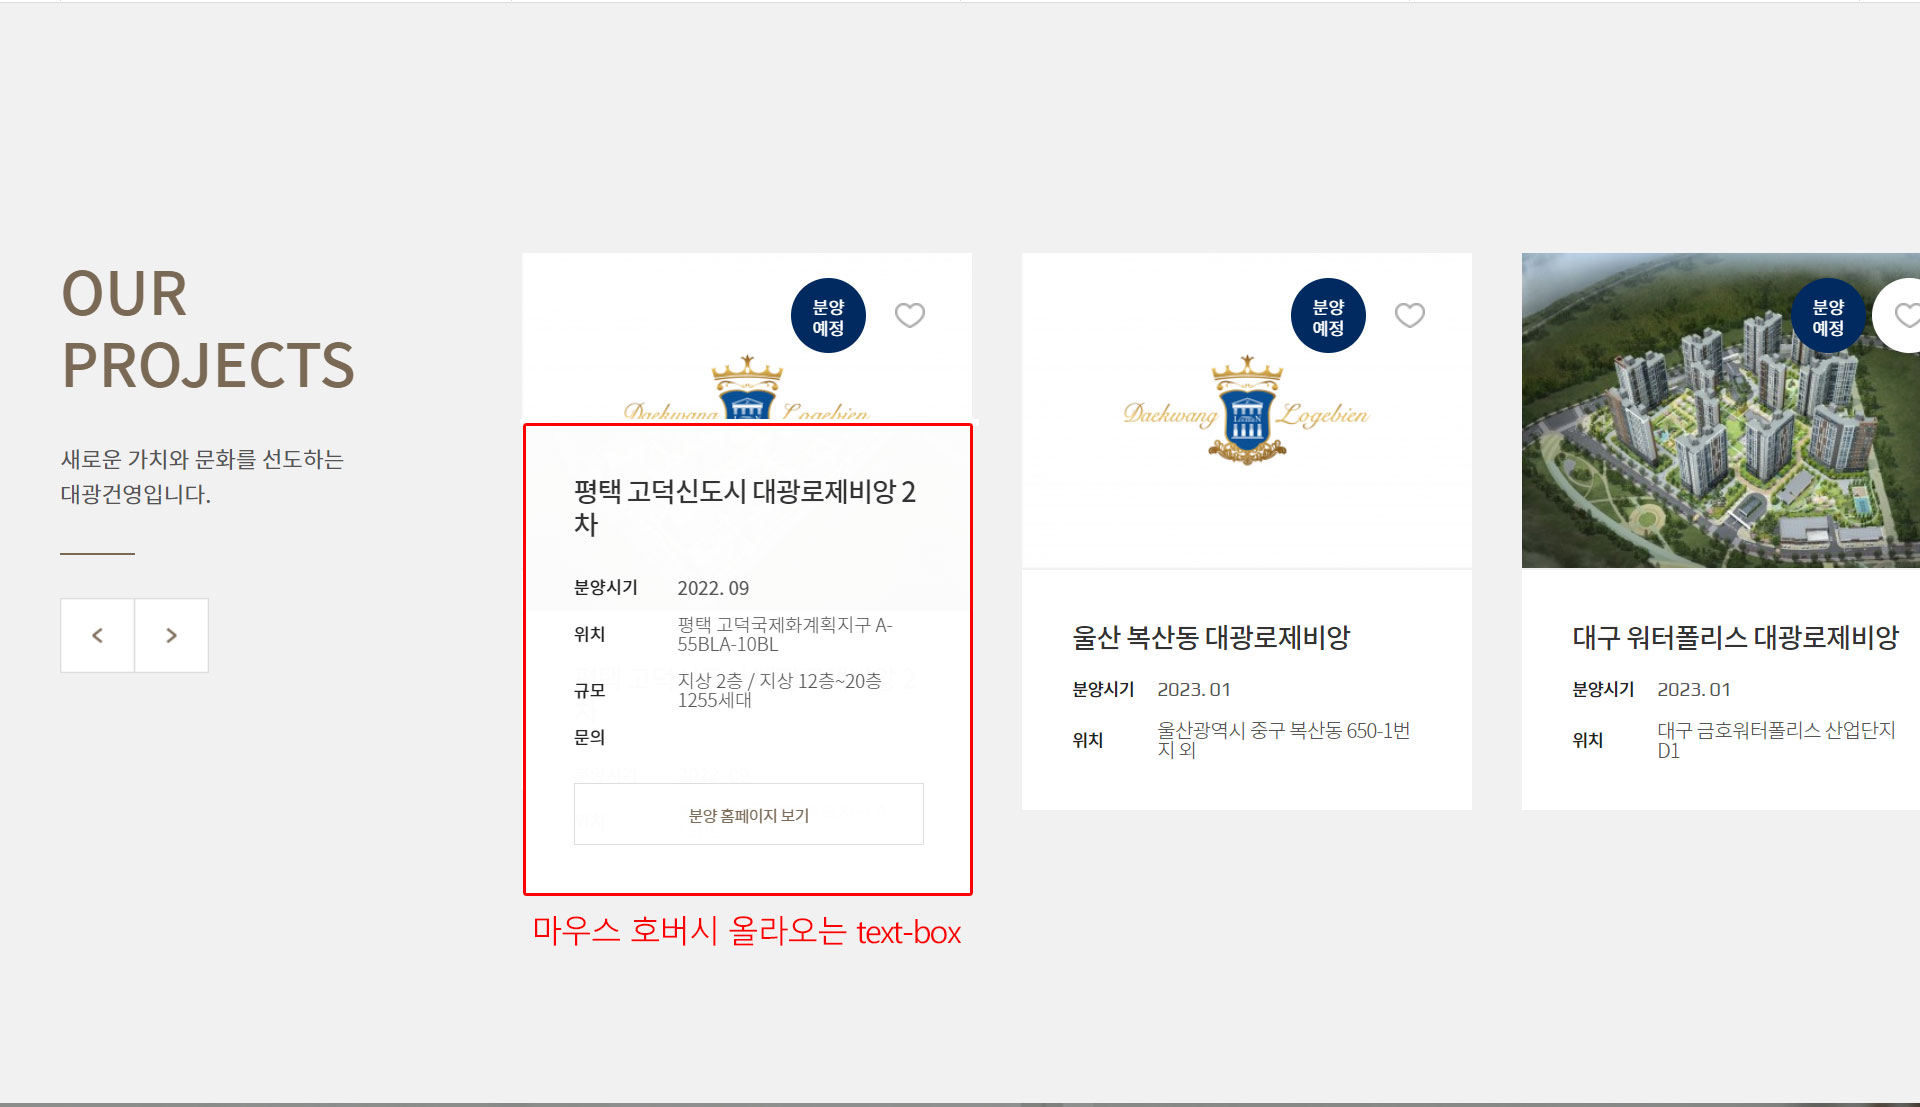
✍🏻 마우스 호버시 영역이 잘리는경우
-> swiper에는 overflow:hidden수치가있기때문에 여백을 만들어주면됨
 .swiper{
        padding-bottom: 60px;
} 
Issue Point
- serch-box
- menu-list
- scss 미디어쿼리 적용방법
1. serch-box
🎈 기본원리
:호버나 클릭했을때 나오는 대상의 좌표값만 잘잡아주고 이벤트를 걸어주면됨

<div class="util-area">
  <a href="" aria-label="검색" class="btn-search icon"></a>
    <div class="search-box1">
       <button type="submit" aria-label="검색" class="serch-icon"></button>
       <input class="search-bar" type="text" placeholder="SEARCH">
    </div>
  <a href="" aria-label="마이페이지" class="btn-mypage icon"></a>
  <a href="" aria-label="메뉴" class="btn-menu"></a>
  <a href="" class="btn-login sub">LOGIN</a>
</div>
✔ html코드는 동일
문제점: z-index값이 낮아선택이되지않아 이벤트자체가 적용이 안되었음
-> 이벤트 대상자인 .btn-search의 z-index값을 조절해 해결함
function menuSearch(){
$('.menu-area .btn-search').click(function(e){
e.preventDefault();
$('.search-box2').css({'display':'block'})
});
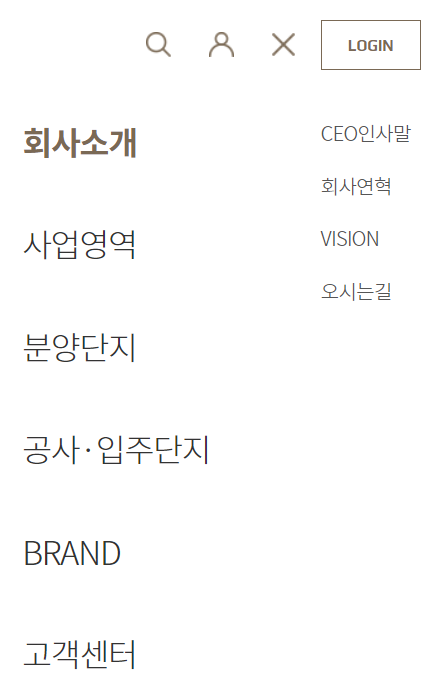
}2. menu-list
🎈 기본원리
: click -> side-menu가 나올수있도록
✍🏻 코드작성
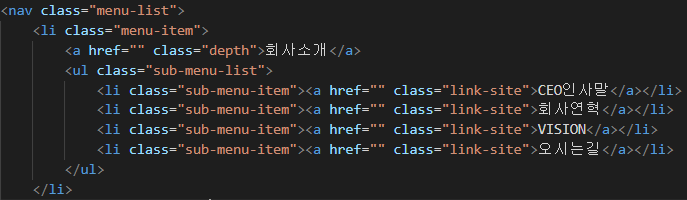
  $('.depth').click(function(e){
    e.preventDefault();

    if ($(this).siblings('.sub-menu-list').css('display')=='none') {
      $('.depth').removeClass('active');
      $(this).addClass('active');
      $('.sub-menu-list').removeClass('show');
      $(this).siblings('.sub-menu-list').addClass('show');
     } else {
      $('.sub-menu-list').removeClass('show');
      $('.depth').removeClass('active');
    }
})
문제점: 대메뉴를 클릭했을때, 소메뉴가 계속 겹쳐서나옴
-> .depth가 'active'될때, 전체에 .removeClass를 주고 클릭한메뉴의 소메뉴만 나오게함
🎈 최종화면
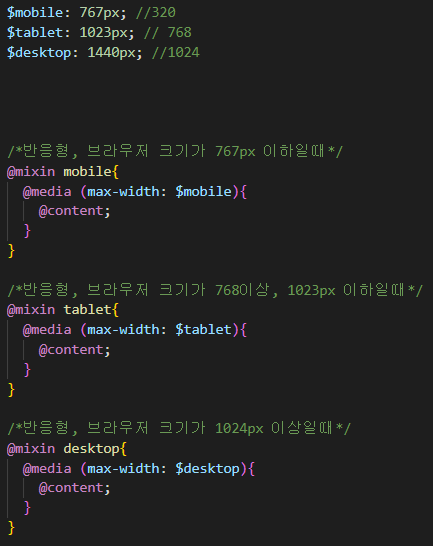
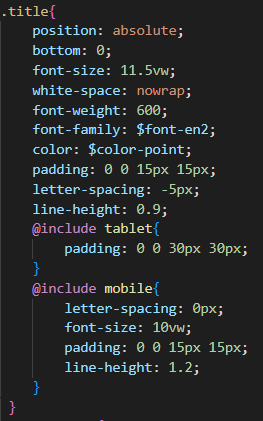
3. scss 미디어쿼리 적용방법
- mixins.scss폴더에 mediapoint를 변수로 할당하고, 미디어쿼리 기본 문법을 작성해준 뒤, 다른 scss폴더에서 적은 스타일이 적용되도록 @content를 같이 적어준다.
🎈 예시
🎈 미디어쿼리 적용예시

光而不耀 :) 퍼블리싱-ing