
강의 목표
체인링크 기능 (VRF, Automation, Data feed)들을 활용한 디파이 스마트 컨트랙트들을 작성해보자.
사전 준비
- Sepolia ETH
- LINK token
1. Token.sol
// SPDX-License-Identifier: MIT
pragma solidity 0.8.19;

import "@openzeppelin/contracts/token/ERC20/ERC20.sol";
import "@openzeppelin/contracts/access/AccessControl.sol";

contract Token is ERC20, AccessControl {
    bytes32 public constant MINTER_ROLE = keccak256("MINTER_ROLE");

    constructor() ERC20("Chainlink Hack Token", "CHT") {
        _grantRole(DEFAULT_ADMIN_ROLE, msg.sender);
        _grantRole(MINTER_ROLE, msg.sender);
    }

    function mint(address to, uint256 amount) public onlyRole(MINTER_ROLE) {
        _mint(to, amount);
    }

    function decimals() public pure override returns (uint8) {
        return 2;
    }
}
위 컨트랙트 코드는 창조한 것이 아닌 https://wizard.openzeppelin.com/ 에서 옵션을 선택해 나온 코드일 뿐이다.
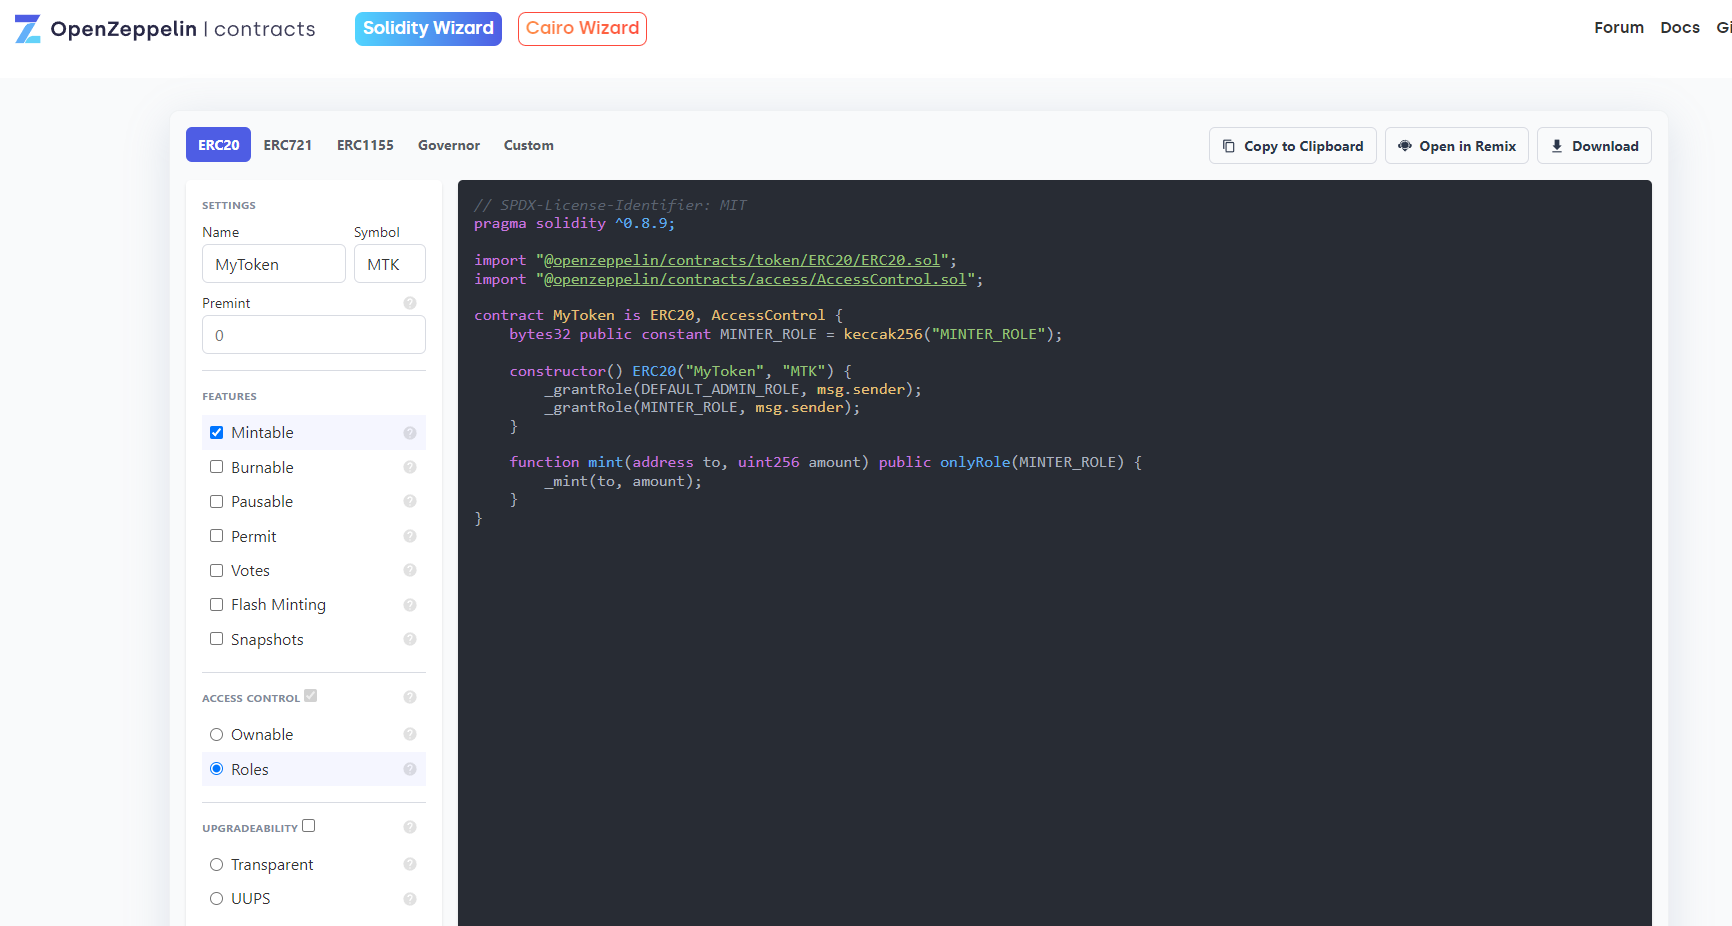
여기서 주목할 점은
- 토큰을 민팅하는게 오너 뿐 아닌 '권한을 부여받은 이' 들도 할 수 있다.
- 컨트랙트를 배포할 때 토큰을 민팅하는 것이 아니라 추후에 한다.
컨트랙트를 배포한 후에 owner 주소로 100 CHT을 보내자.
(컨트랙트에 decimal을 2로 해놨기 때문에, 100 amount = 1 CHT라는 것이다, 100을 보내려면 amount가 10000이어야 겠지?)
2. Tokenshop.sol (data feed 실습)
사용자가 ETH으로 >>> CHT을 구매할 수 있는 컨트랙트다.
여기까지만 보면 ㅈㄴ 하찮은데,
CHT 가격은 2USD라고 가정한다.
즉 현재 2USD가 몇 ETH인지 계산이 필요하다는 점이며,
여기서 체인링크 data feed 기능까지 사용할 수 있는 것이다.
예를 들어, 현재 ETH/USD가 1000이라고 하자. (1ETH = 1000USD)
구매자가 1ETH로 CHT를 구매하려고 한다면, CHT 1개가 2USD이기 때문에 500CHT를 받을 것이다.
// SPDX-License-Identifier: MIT
pragma solidity 0.8.19;

import "@chainlink/contracts/src/v0.8/interfaces/AggregatorV3Interface.sol";

interface TokenInterface {
    function mint(address account, uint256 amount) external;
}

contract TokenShop {

    AggregatorV3Interface internal priceFeed;
    TokenInterface public minter;
    uint256 public tokenPrice = 200; //1 token = 2.00 usd, with 2 decimal places
    address public owner;

    constructor(address tokenAddress) {
        minter = TokenInterface(tokenAddress);
        /**
        * Network: Sepolia
        * Aggregator: ETH/USD
        * Address: 0x694AA1769357215DE4FAC081bf1f309aDC325306
        */
        priceFeed = AggregatorV3Interface(0x694AA1769357215DE4FAC081bf1f309aDC325306);
        owner = msg.sender;
    }


    /**
    * Returns the latest price
    */
    function getLatestPrice() public view returns (int) {
        (
            /*uint80 roundID*/,
            int price,
            /*uint startedAt*/,
            /*uint timeStamp*/,
            /*uint80 answeredInRound*/
        ) = priceFeed.latestRoundData();
        return price;
    }


    function tokenAmount(uint256 amountETH) public view returns (uint256) {
        //Sent amountETH, how many usd I have
        uint256 ethUsd = uint256(getLatestPrice());     //with 8 decimal places
        uint256 amountUSD = amountETH * ethUsd / 10**18; //ETH = 18 decimal places
        uint256 amountToken = amountUSD / tokenPrice / 10**(8/2);  //8 decimal places from ETHUSD / 2 decimal places from token
        return amountToken;
    }

    receive() external payable {
        uint256 amountToken = tokenAmount(msg.value);
        minter.mint(msg.sender, amountToken);
    }


    modifier onlyOwner() {
        require(msg.sender == owner);
        _;
    }


    function withdraw() external onlyOwner {
        payable(owner).transfer(address(this).balance);
    }

}
여기서 중요한 부분은
    constructor(address tokenAddress) {
        minter = TokenInterface(tokenAddress);
        /**
        * Network: Sepolia
        * Aggregator: ETH/USD
        * Address: 0x694AA1769357215DE4FAC081bf1f309aDC325306
        */
        priceFeed = AggregatorV3Interface(0x694AA1769357215DE4FAC081bf1f309aDC325306);
        owner = msg.sender;
    }


    /**
    * Returns the latest price
    */
    function getLatestPrice() public view returns (int) {
        (
            /*uint80 roundID*/,
            int price,
            /*uint startedAt*/,
            /*uint timeStamp*/,
            /*uint80 answeredInRound*/
        ) = priceFeed.latestRoundData();
        return price;
    }
여기인데,
내가 필요한 데이터인 ETH/USD data feed를 제공하는 address를 연결하는 것이다.
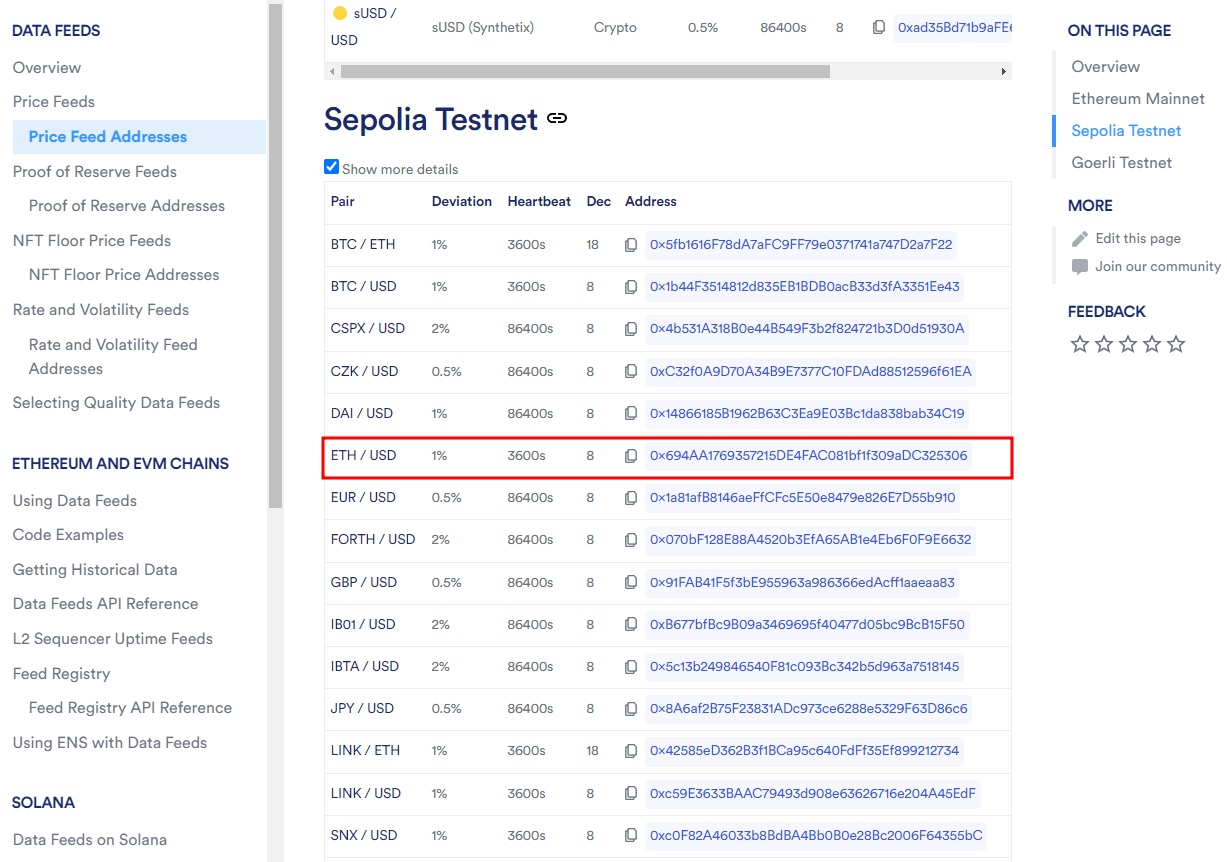

위 내용들을 참고했을 때 아마 저 address는 체인링크의 노드 주소 혹은, ETH/USD data feed를 지칭하는 식별자다.
(더 알아봐야 겠다)
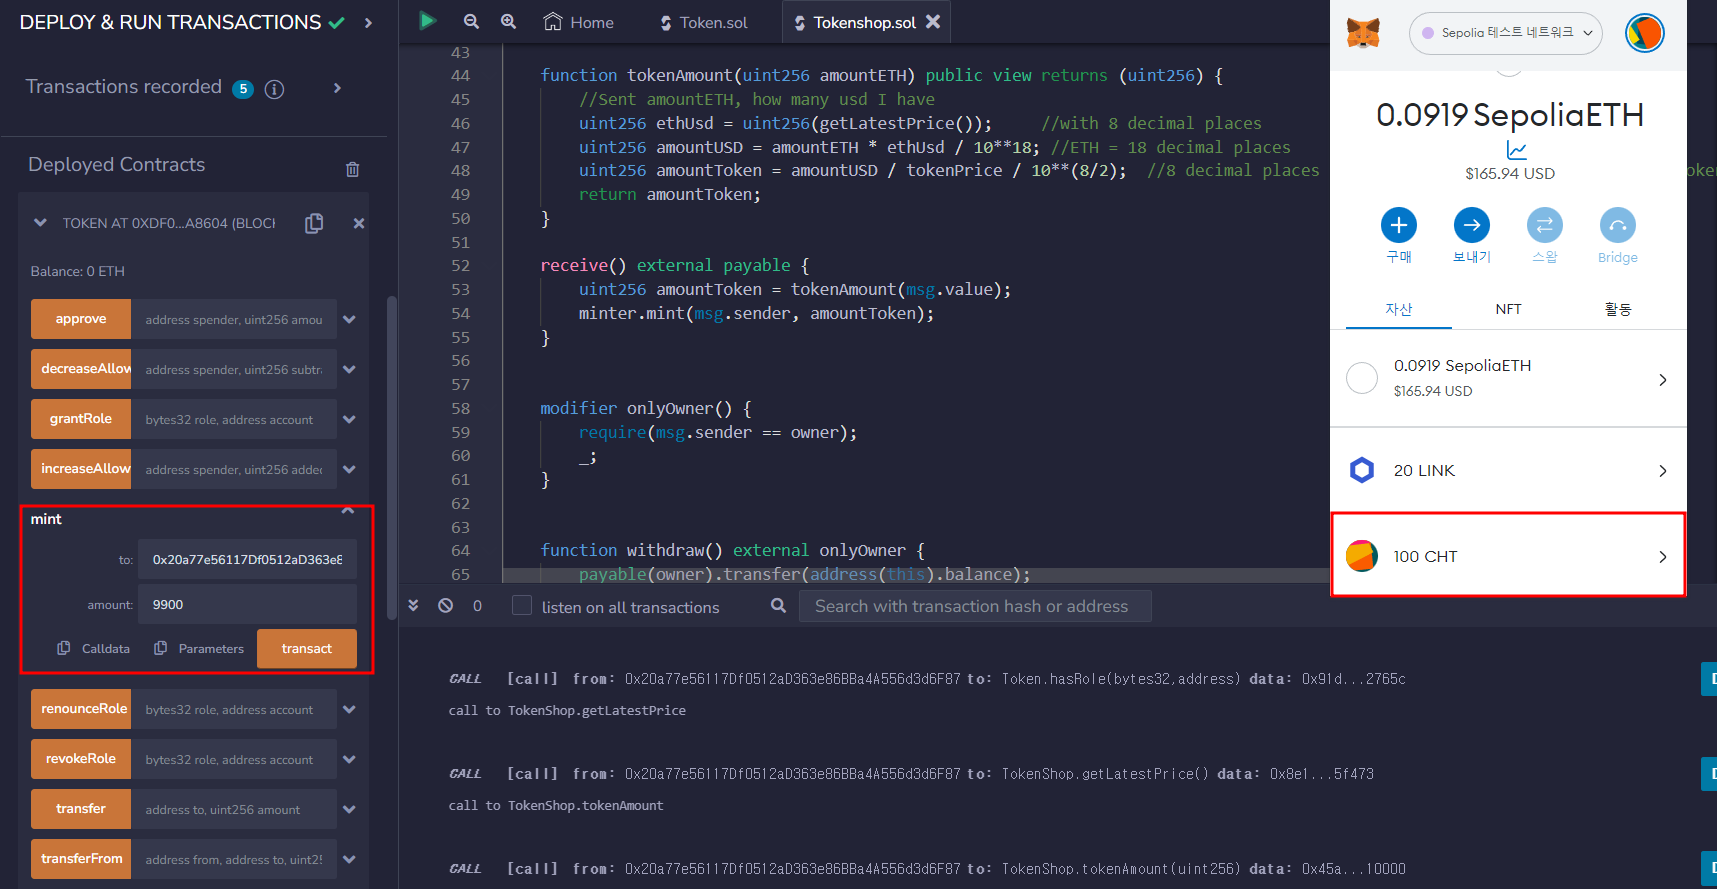
다시 코드로 와서, shop.sol이 CHT 토큰을 민팅할 수 있게 Token.sol에서 shop.sol 주소에 민팅 권한을 줘야 한다.
MINTER_ROLE을 복사해 grandRole에 role에 복붙하고, 주소는 shop CA를 쓰자.
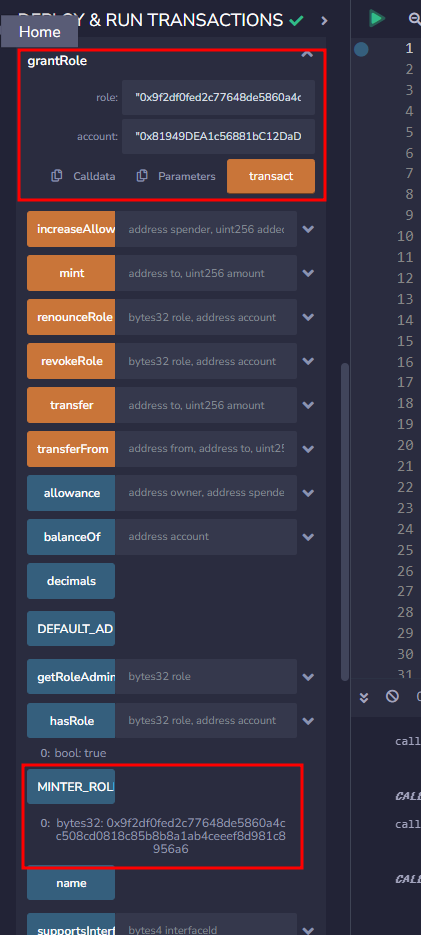
그리고 shop.sol을 보자.
getLatestPrice : 체인링크가 제공하는 ETH / USD 가격 비율이다. 현재 $1804라는 뜻
tokenAmount : 계산기다. 내가 만약 0.01ETH를 보낸다면? 903CHT를 받을 수 있다는 뜻
(wei가 기준이라 0이 ㅈㄴ 많은거다, 이거 ㅈㄴ 불편한 거 ㅇㅈ)
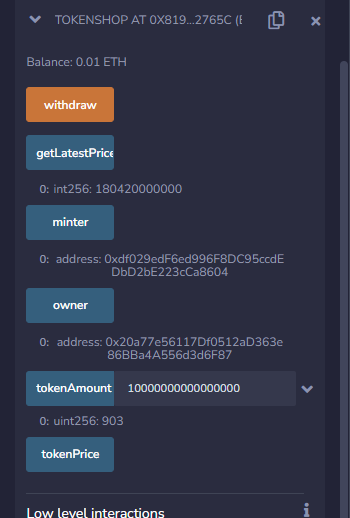
실제 구매하려면 ? 그냥 ETH를 shop.sol CA에 보내면 알아서 보내준다.
    receive() external payable {
        uint256 amountToken = tokenAmount(msg.value);
        minter.mint(msg.sender, amountToken);
    }
컨트랙트가 ETH를 받으면 receive()함수를 실행시켜 토큰을 최신 비율만큼 민팅해서 주는 것이다.

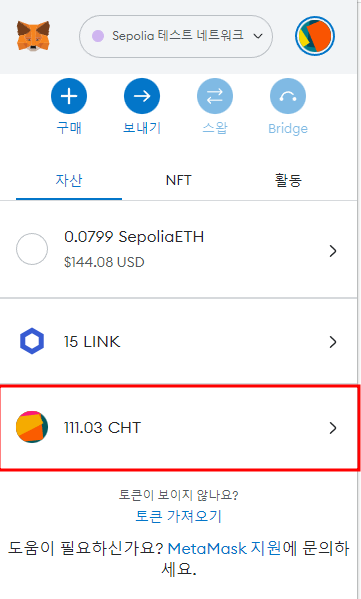
903 CHT가 들어왔다.
메타마스크에서 무슨 사람끼리 송금하듯이 컨트랙트를 작동시키고, 구린 부분이 몇몇 보이지만, 체인링크 기능을 실습했다는 의의를 가지자.
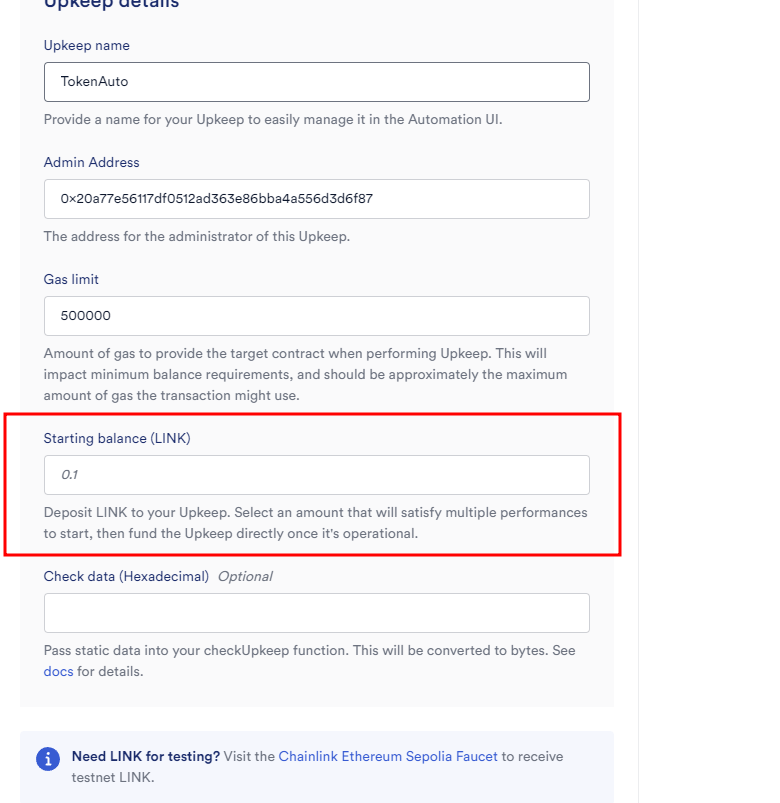
3. TokenAuto.sol (Automation 실습)
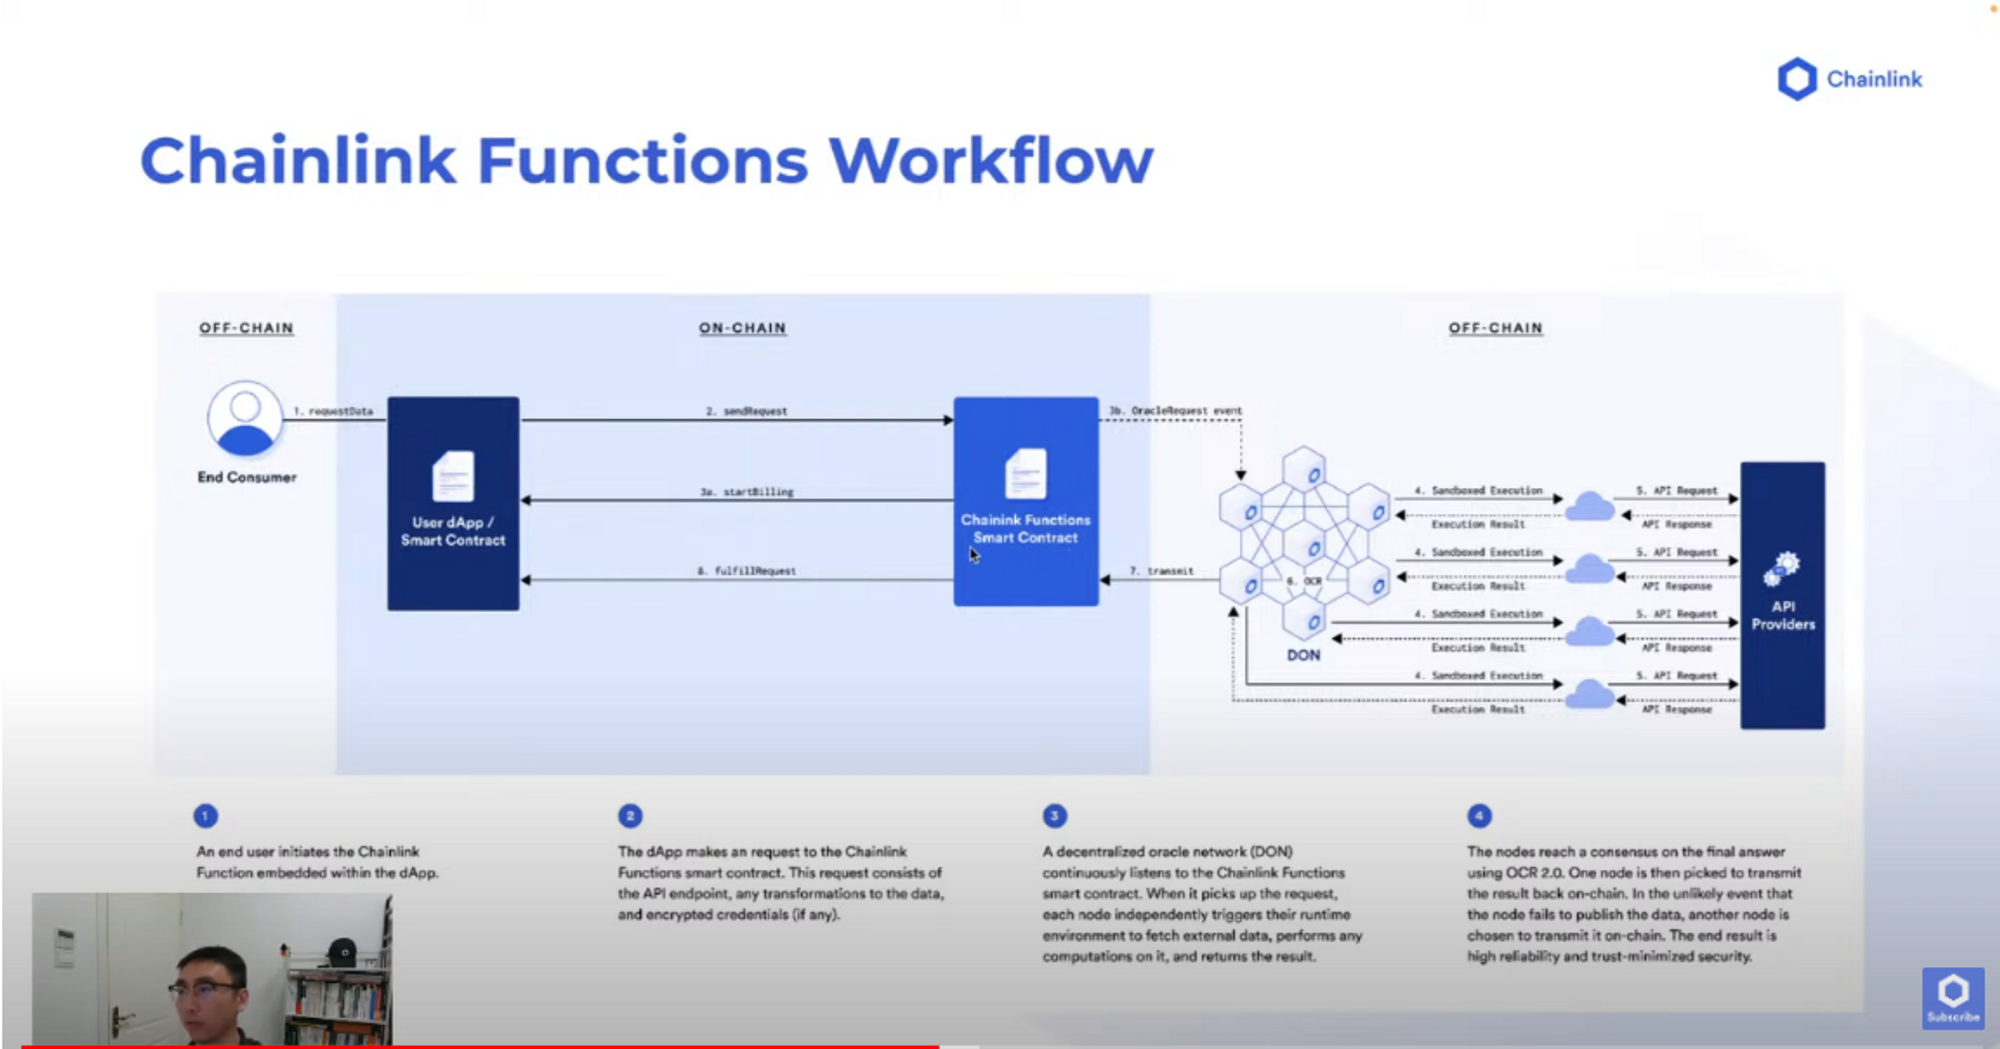
Chainlink Automation을 이해하기 위해 아래 짤을 보고 가자.
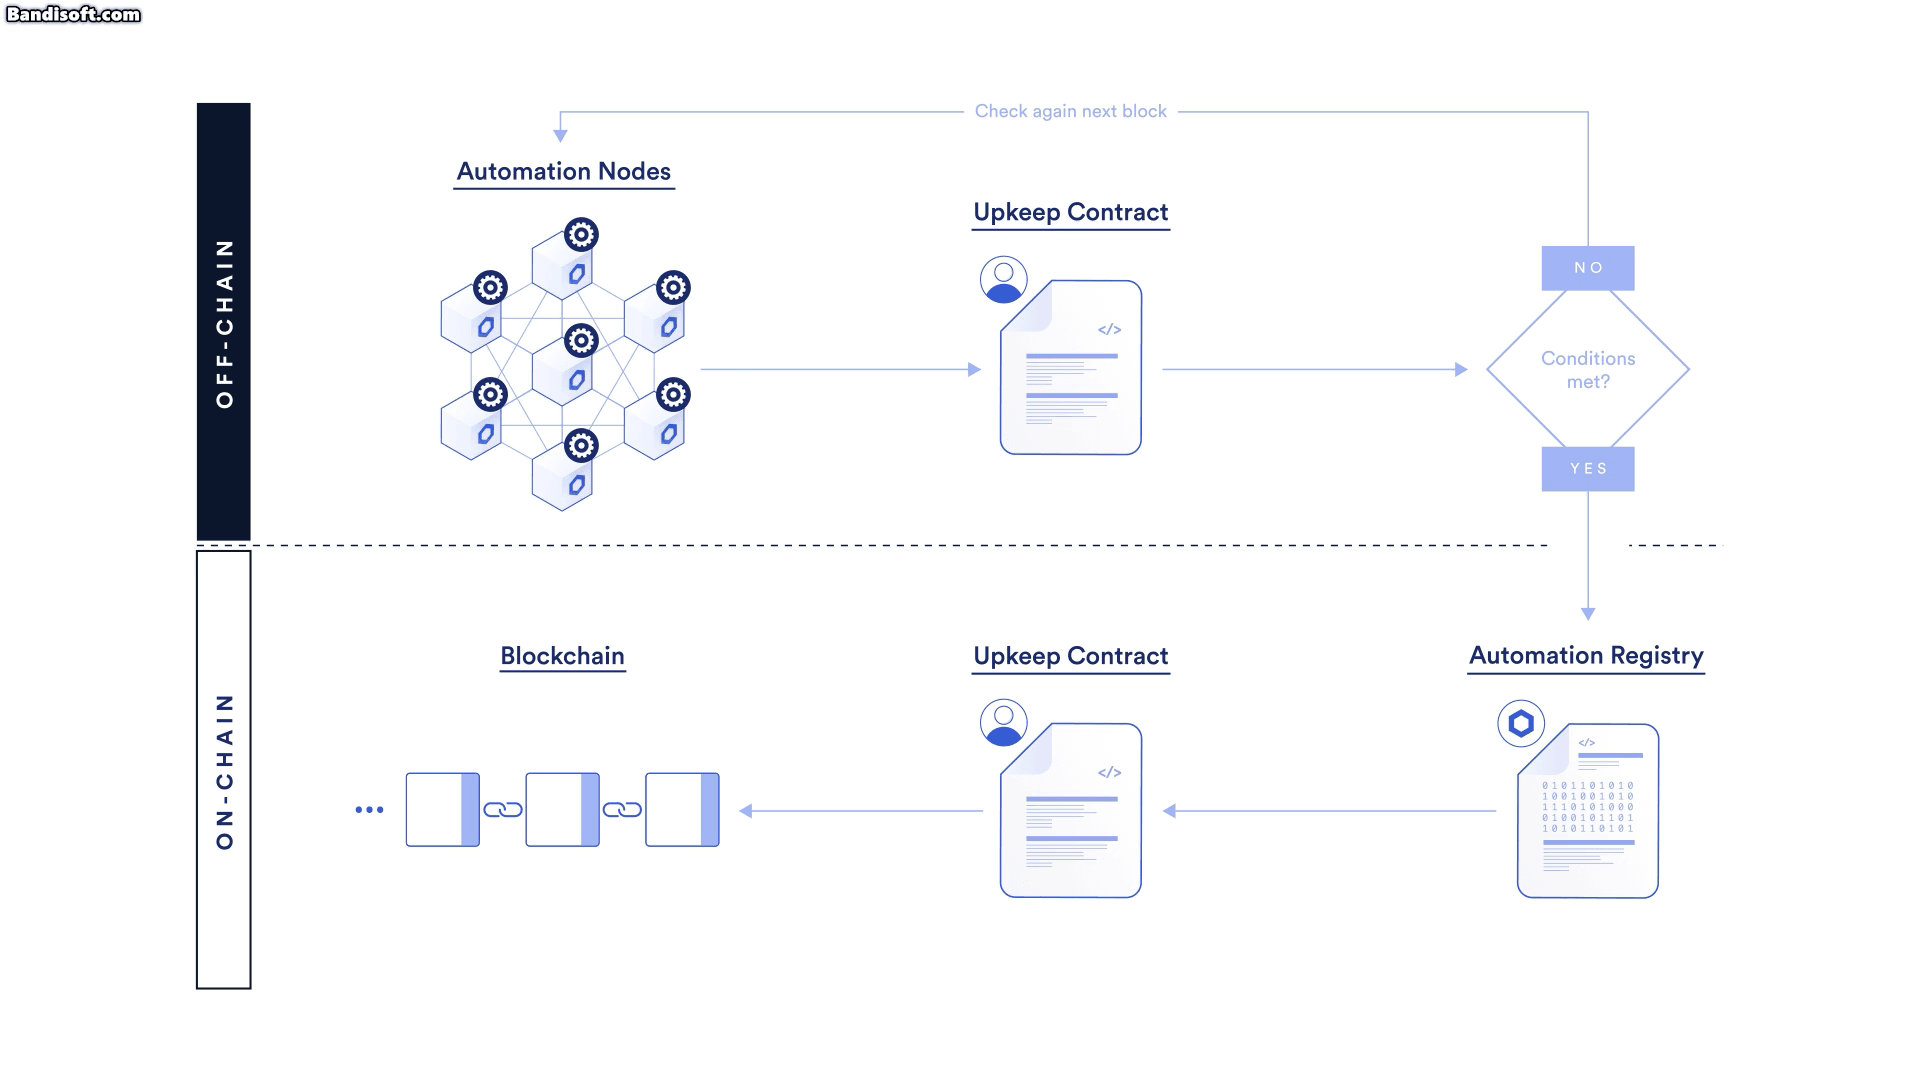
"오프체인"의 오토메이션 노드들이 컨트랙트를 블록마다 체크하고, 조건이 충족되면 특정 작업을 수행하는 것이다. 기억해두자.
TokenAuto.sol
내가 정해둔 간격마다(1분) 내 주소로 CHT 토큰 1개를 보내고 싶다.
// SPDX-License-Identifier: MIT
pragma solidity 0.8.13;

// AutomationCompatible.sol imports the functions from both ./AutomationBase.sol and
// ./interfaces/AutomationCompatibleInterface.sol
import "@chainlink/contracts/src/v0.8/AutomationCompatible.sol";

interface TokenInterface {
    function mint(address account, uint256 amount) external;
    function balanceOf(address account) external returns (uint);
}

contract tokenAuto is AutomationCompatibleInterface {

    uint256 public amountToken;
    address public to;
    TokenInterface public token;

    uint public counter;
    uint public immutable interval;
    uint public lastTimeStamp;

    constructor(uint updateInterval, address tokenMinter) {
        token = TokenInterface(tokenMinter);
        to = msg.sender;
        amountToken = 100;

        interval = updateInterval;
        lastTimeStamp = block.timestamp;
        counter = 0;
    }

    function mint() public returns (bool) {
        token.mint(to, amountToken);
        return true;
    }
    function checkUpkeep(
        bytes calldata /* checkData */
    )
        external
        view
        override
        returns (bool upkeepNeeded, bytes memory /* performData */)
    {
        upkeepNeeded = (block.timestamp - lastTimeStamp) > interval;
        // We don't use the checkData in this example. The checkData is defined when the Upkeep was registered.
    }

    function performUpkeep(bytes calldata /* performData */) external override {
        //We highly recommend revalidating the upkeep in the performUpkeep function
        if ((block.timestamp - lastTimeStamp) > interval) {
            lastTimeStamp = block.timestamp;
            counter = counter + 1;
            mint();
        }
        // We don't use the performData in this example. The performData is generated by the Automation Node's call to your checkUpkeep function
    }
}
여기서
checkUpkeep, performUpkeep
만 주목하면 된다.
    function checkUpkeep(
        bytes calldata /* checkData */
    )
        external
        view
        override
        returns (bool upkeepNeeded, bytes memory /* performData */)
    {
        upkeepNeeded = (block.timestamp - lastTimeStamp) > interval;
        // We don't use the checkData in this example. The checkData is defined when the Upkeep was registered.
    }

    function performUpkeep(bytes calldata /* performData */) external override {
        //We highly recommend revalidating the upkeep in the performUpkeep function
        if ((block.timestamp - lastTimeStamp) > interval) {
            lastTimeStamp = block.timestamp;
            counter = counter + 1;
            mint();
        }
        // We don't use the performData in this example. The performData is generated by the Automation Node's call to your checkUpkeep function
    }
checkUpkeep에서 upkeepNeeded가 미리 세팅한 interval이 지나서 true가 되면
performUpkeep을 실행한다.
(한번 더 re-check를 하고) 조건이 맞으면 mint를 해서 토큰 1개를 보내준다.
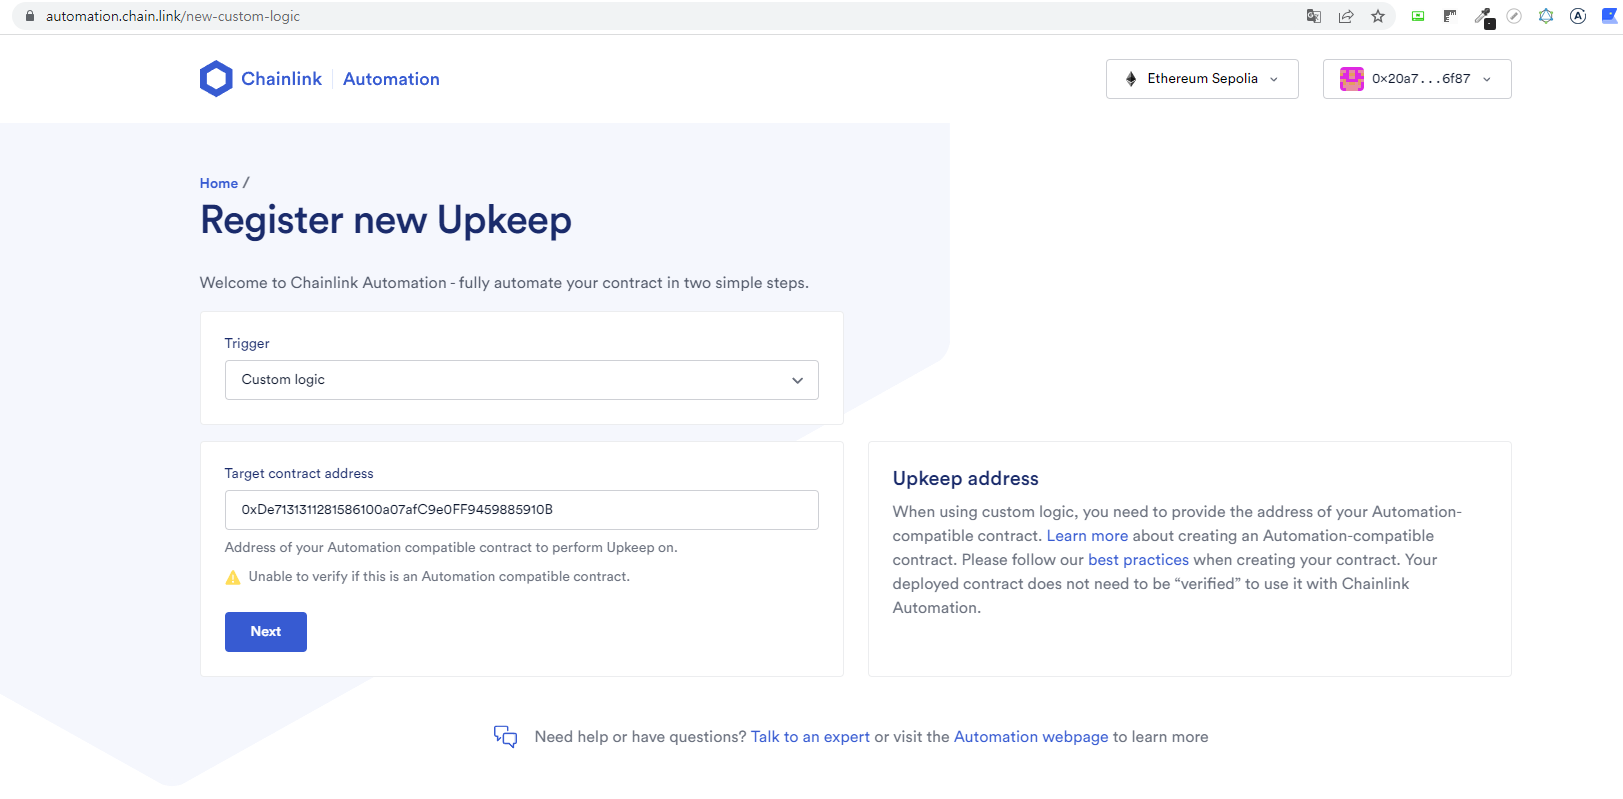
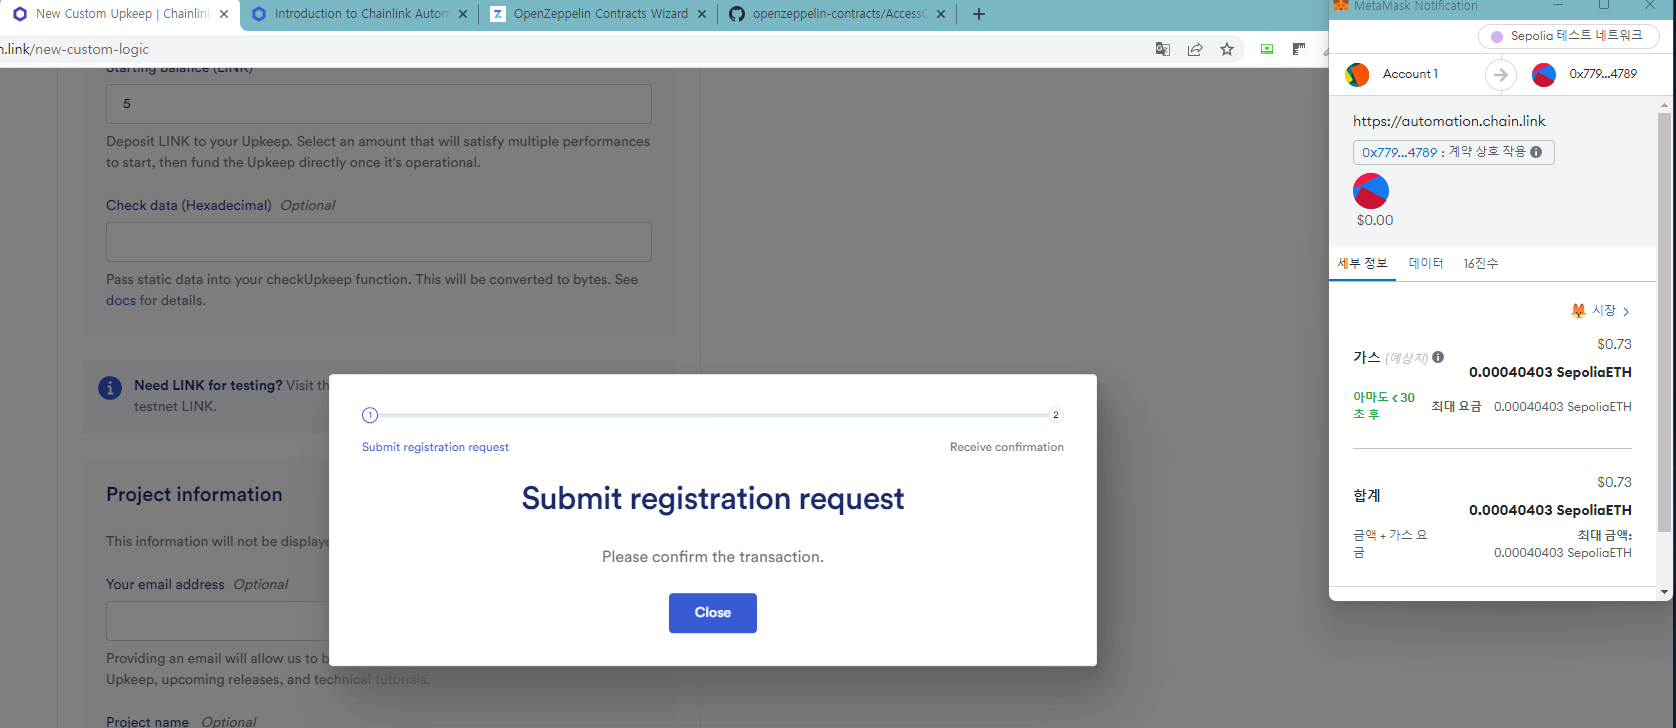
컨트랙트 배포 후
https://automation.chain.link/
여기서 Register new Upkeep을 해준다.
여기에 CA를 넣어주면 automation node들이 블록 생성될 때 마다 automation function들을 체크하나보다.
(미리 약속한 checkUpkeep, performUpkeep 이름의 함수들 일테다)
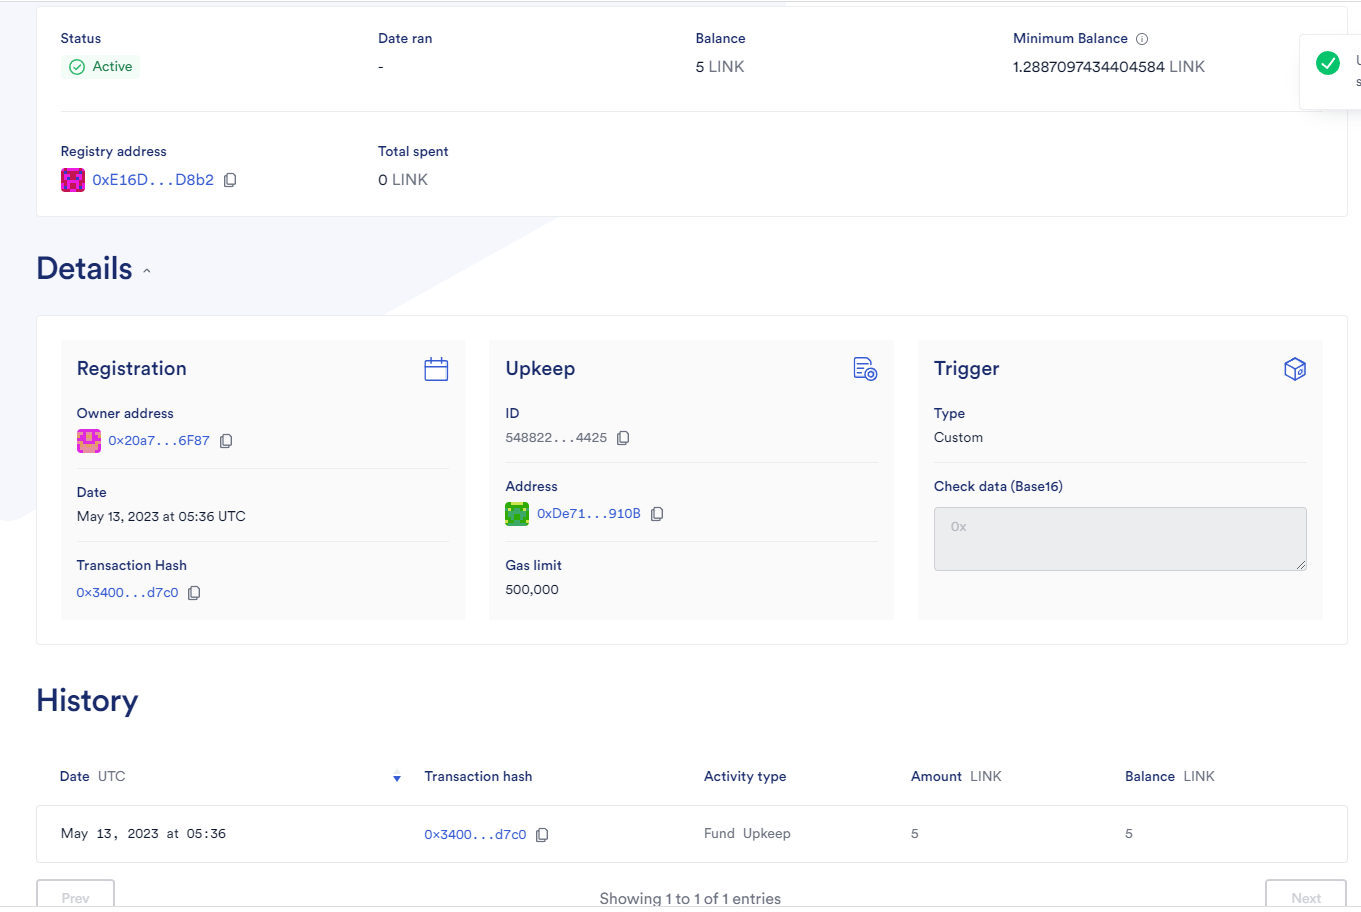
data feed 처럼 public한 기능이 아니다.
체인링크에서 자체적으로 만든 모두가 사용하는 가격 비율들이 아닌
only 내 컨트랙트를 위한 기능을 사용하는 것이다. 돈을 내야겠지?
완료가 되었다. 이제 1분 마다 history가 업데이트될 것이다.
여기서 강사님이 좋은 에러를 보여주셨는데, 1분이 지나면 항상 토큰을 보내주는 걸까? 정말 조건이 1분 밖에 없나?
아니다. Token.sol에서 role을 받아야 하는데 안 받았다.
Chainlink Automation이 ㅈㄴ 멋진 점은 먼저 시뮬레이션으로 실행해서 성공하면 진짜 트랜잭션을 보낸다고 한다.
그래서 1분이 지났는데 시뮬레이션이 실패하면 비용 지불도 안되고 가만히 있는다고 한다.
role을 부여하고 다시 기다리면
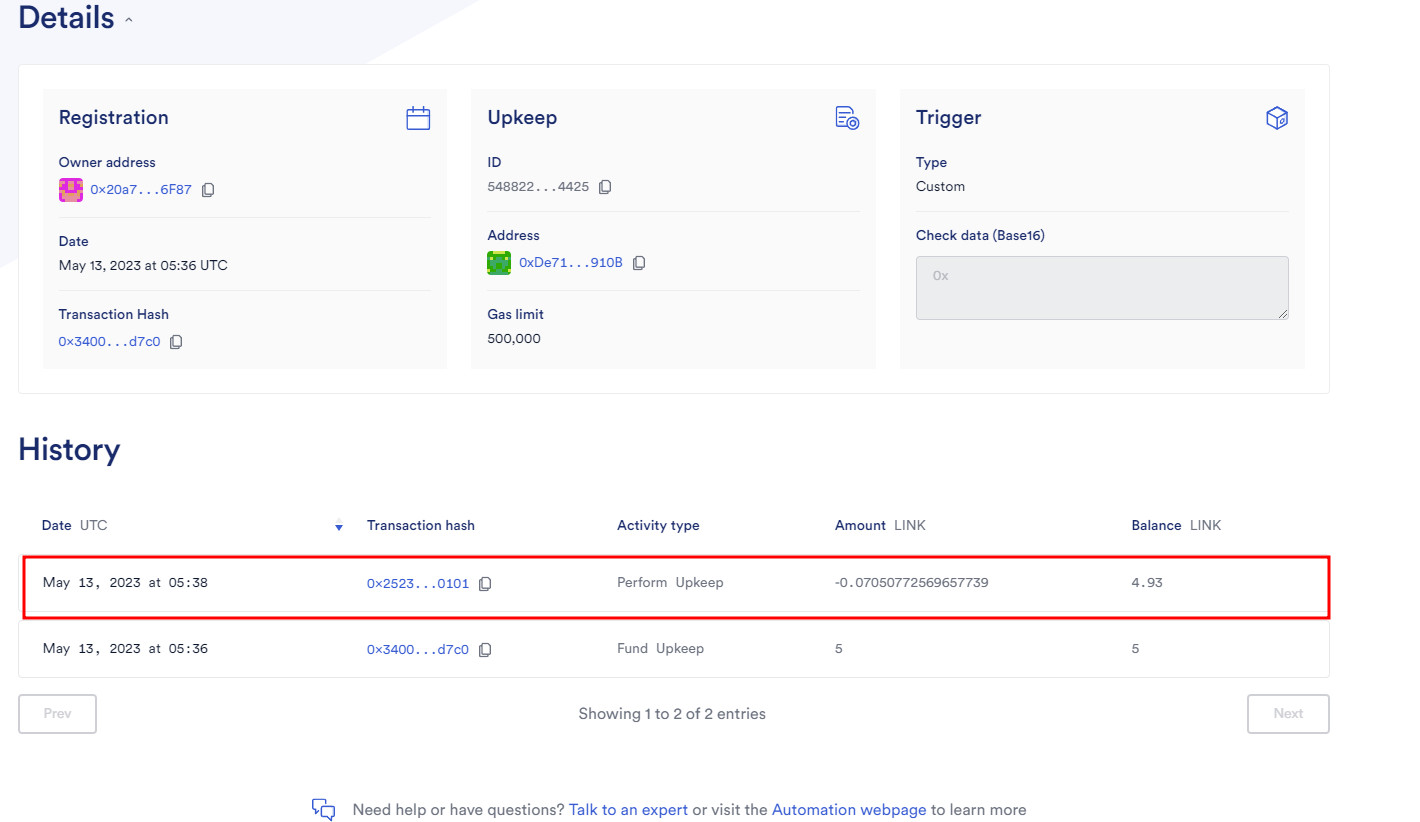
토큰이 늘어나고
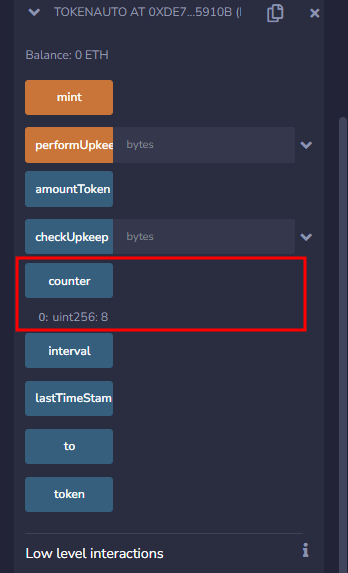
카운터도 늘어난 것을 볼 수 있다.
TokenRaffle.sol (VRF 실습)
체인링크의 VRF를 이용해서 1~10 사이의 랜덤 숫자를 뽑고 그만큼 토큰을 전송하자.
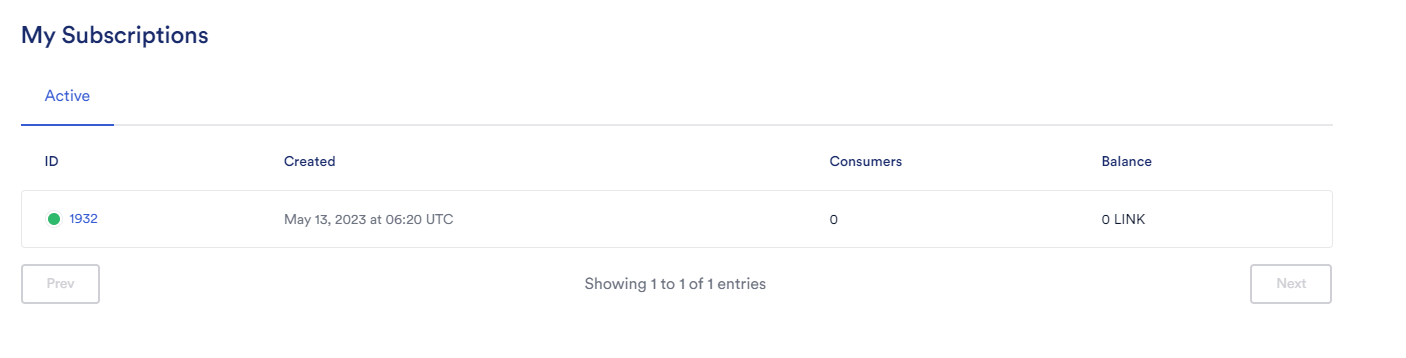
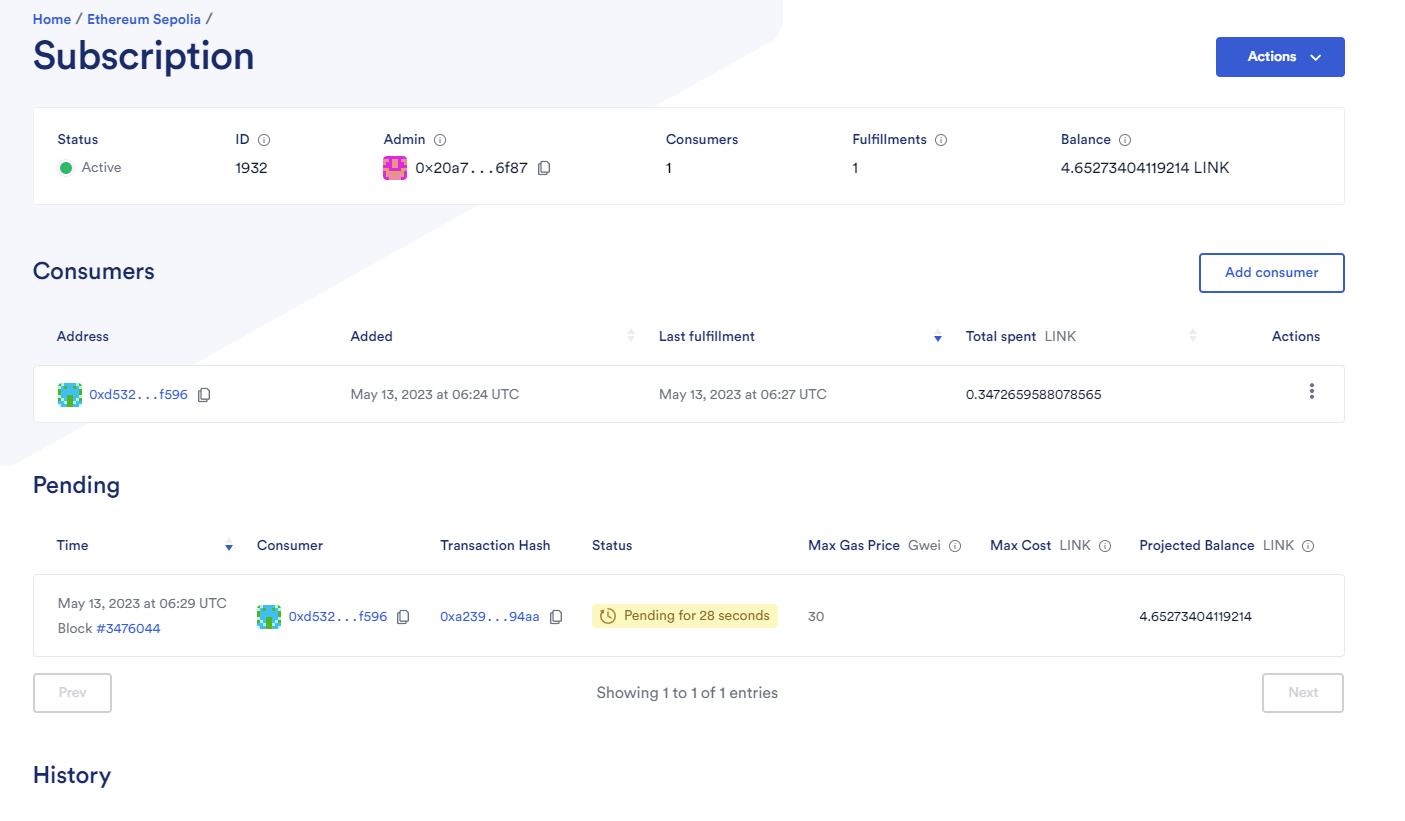
먼저, 체인링크 VRF에 내 지갑 주소로 구독을 해야 한다.
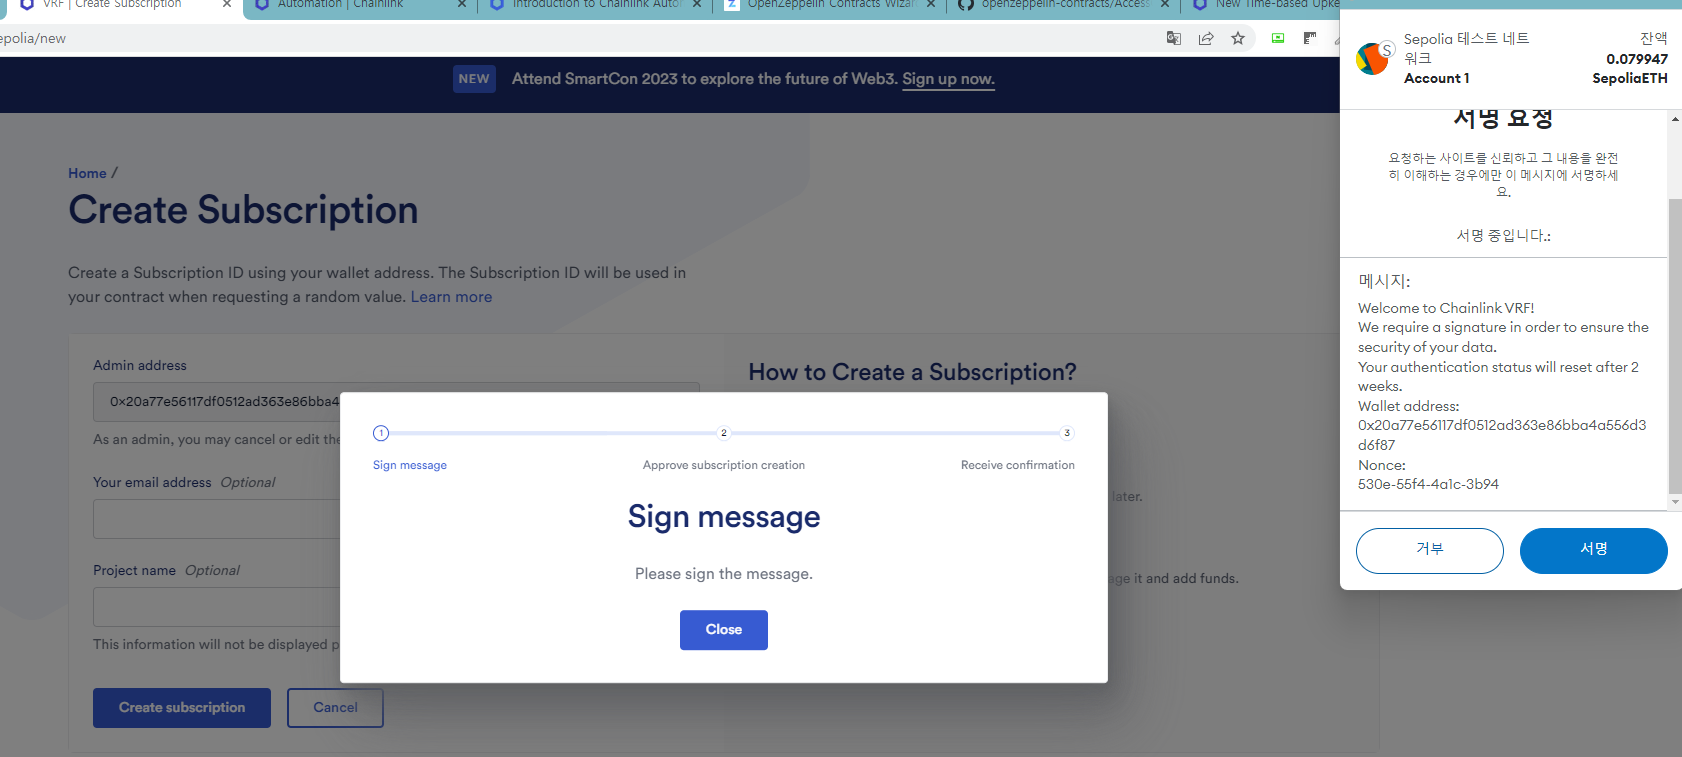
그러면 1932처럼 subsId를 주는데, 이를 컨트랙트를 배포할 때 입력해야 한다.
TokenRaffle.sol
배포시 Token.sol CA, subsId를 올바르게 입력하자.
// SPDX-License-Identifier: MIT
pragma solidity 0.8.19;
import "@chainlink/contracts/src/v0.8/interfaces/VRFCoordinatorV2Interface.sol";
import "@chainlink/contracts/src/v0.8/VRFConsumerBaseV2.sol";
interface TokenInterface {
function mint(address account, uint256 amount) external;
}
contract tokenRaffle is VRFConsumerBaseV2 {
//VRF
VRFCoordinatorV2Interface COORDINATOR;
// Sepolia coordinator
address vrfCoordinator = 0x8103B0A8A00be2DDC778e6e7eaa21791Cd364625;
bytes32 keyHash = 0x474e34a077df58807dbe9c96d3c009b23b3c6d0cce433e59bbf5b34f823bc56c;
uint32 callbackGasLimit = 2500000;
uint16 requestConfirmations = 3;
uint32 numWords = 1;
uint64 public s_subscriptionId;
uint256[] public s_randomWords;
uint256 public s_requestId;
address s_owner;
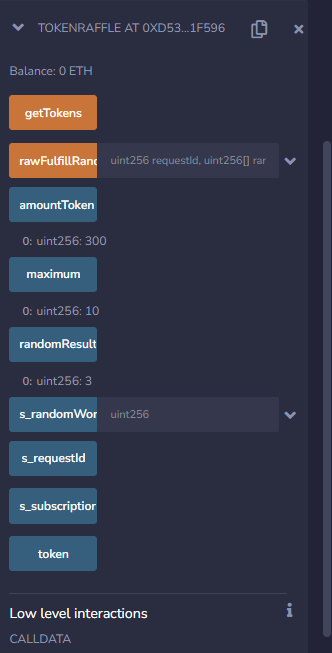
uint256 public randomResult;
uint256 public maximum = 10;
uint256 public amountToken;
TokenInterface public token;
constructor(address tokenMinter, uint64 subscriptionId) VRFConsumerBaseV2(vrfCoordinator) {
COORDINATOR = VRFCoordinatorV2Interface(vrfCoordinator);
s_owner = msg.sender;
s_subscriptionId = subscriptionId;
token = TokenInterface(tokenMinter);
}
function getTokens() public{
s_requestId = COORDINATOR.requestRandomWords(
keyHash,
s_subscriptionId,
requestConfirmations,
callbackGasLimit,
numWords
);
}
function fulfillRandomWords(uint256 requestId, uint256[] memory randomWords) internal override {
s_randomWords = randomWords;
randomResult = s_randomWords[0] % maximum + 1;
amountToken = randomResult * 100; //2 decimal places
token.mint(s_owner, amountToken);
}
}
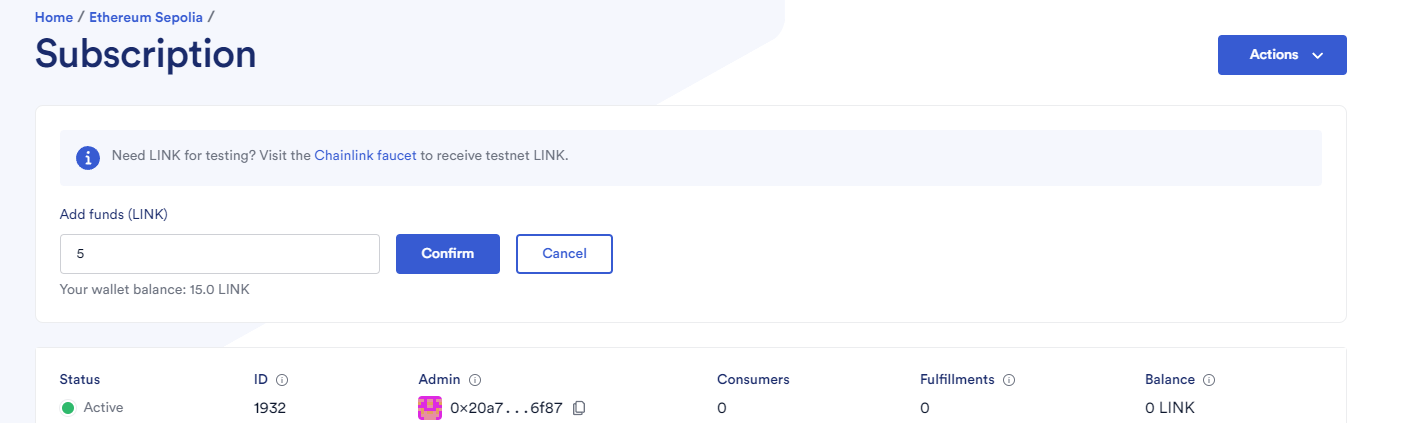
이제 다시 VRF 사이트로 돌아가 LINK를 좀 넣어 놓고
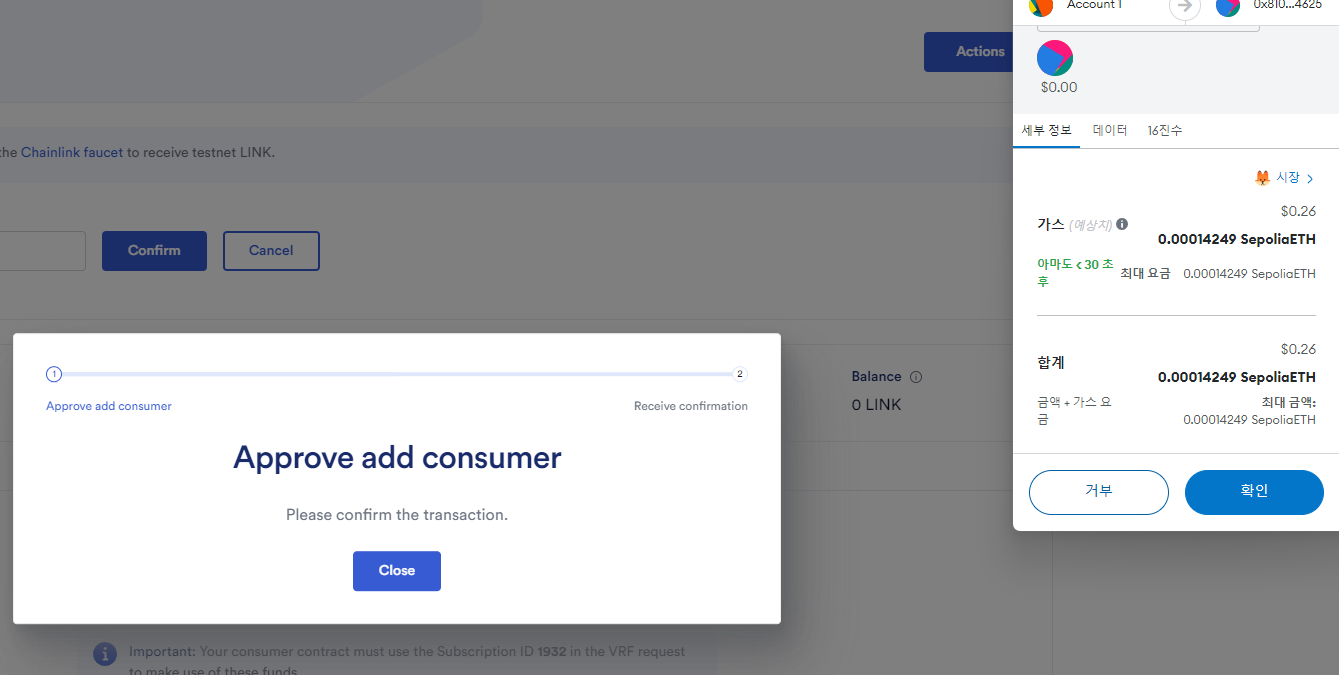
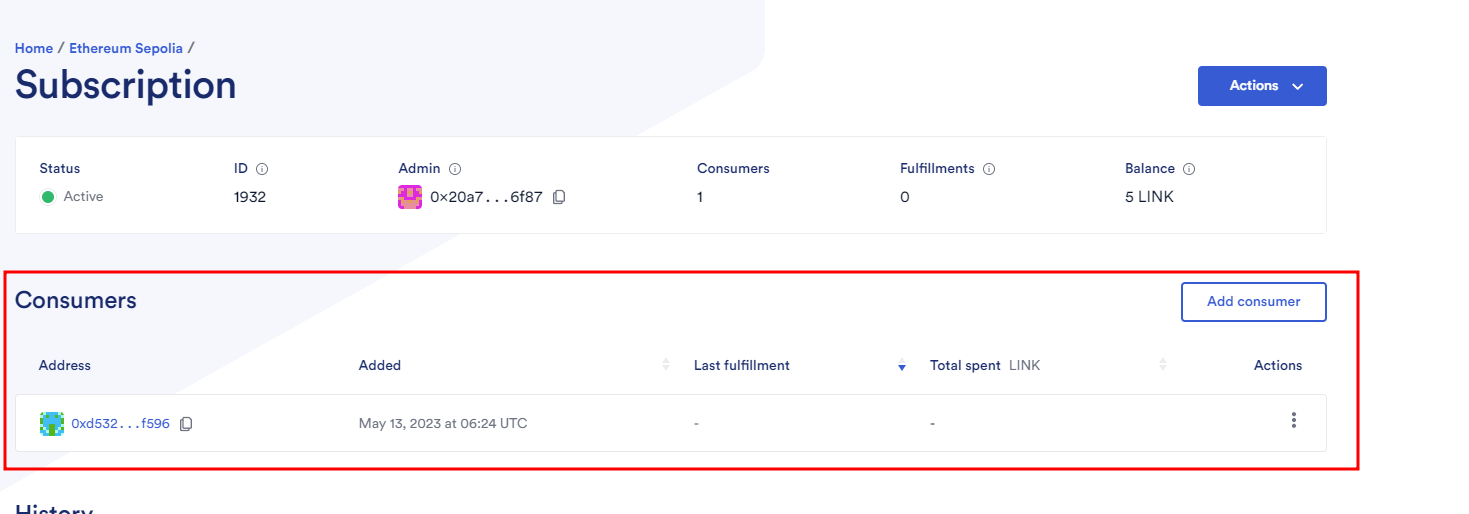
add consumer에 TokenRaffle.sol CA를 입력한다.
이제 다시 remix로 돌아가 getToken을 클릭하면, VRF에서 랜덤값을 불러오고 그 값 만큼 토큰을 보내줄 것이다.
이렇게 Defi app을 체인링크 기능을 이용해 만들어 보았다.
반드시 코드를 쓰고 실습을 해보며 학습하자. 눈으로 읽는 건 10점짜리 학습이다.

Building a DeFi app requires careful planning and understanding of blockchain technology. Knowing how to create a defi project step-by-step is essential for success in this evolving market. Find detailed guidance on how to create a defi project here: how to create a defi project.