
2.23 요약
클라이언트(컴퓨터.폰.tv등 다양한 종류의 디바이스) ------------------- 서버(컴퓨터)
html데이터 ---> 브라우저-->url(get(보통 브라우저 방식)/post방식으로 요청)--웹서버(서버제공자) --> 웹서버가 html 보안해제 --> 인터넷을 통해 보여짐 --> 렌더링(html로 써져있는 것을 화면에 그림상으로? 보여주는 것)
웹서버 구축(테스트)
jsp, apache-tomcat(jdk가 있어야 됨, JAVA_HOME,Path 환경변수 하기) (웹서버 구축하기 위한 프로그램들)<br>
apache-tomcat은 실행방법 중요 (cd bin위치 복사 -> catalina.bat입력 -> catalina.bat run을 추가로 입력하여
실행) -> 웹 서버 구동 테스트를 할 때 자주 씀(잘 작동하는지)
웹서버 구축(실행)
1. catalina가 아니라 startup.bat을 통하여 실행을 시킨다.(새창열리고 실행됨,run x)
2. 끄는법은 (shutdown.bat or ctrl+c)  -> 단어 치고 tab키 누르면 자동완성 기능 제공
html - 사용자 입력(form, input, textarea, select 등등) 중요
html 입력 기능
<form action="url" method=get or post>
input type="submit" value="" -> 입력하면 전송되는 버튼 생성
<button></button> = input type="submit"기능과 동일
input type="image" src="경로" -> 버튼 대신 이미지를 누르면 동일한 기능 적용
input type="button" -> 버튼 기능이 없는 버튼 아이콘 생성(자바 스크립트에서 쓰임)
input type="초기화" -> 입력한 데이터를 지워주는 기능
</form>
css(Cascading Style Sheet)
1. web design, 점진적으로 적용되는 스타일 시트
2. 색, 크기, 폰트 등 디자인적 모든 부분을 적용할 수 있다.
css 적용하는 방법
1. inline : tag 옆에서 효과를 내주는 것ex> <body style="background-color:rgba(16, 221, 125, 0.877)">
Hello CSS!
</body>2. head쪽에서 미리 정의 한 후 적용하기ex> <head>
...
<style type="text/css">
body {background-color: aquamarine;} <!-- body=셀렉트 -->
</style>
...
</head>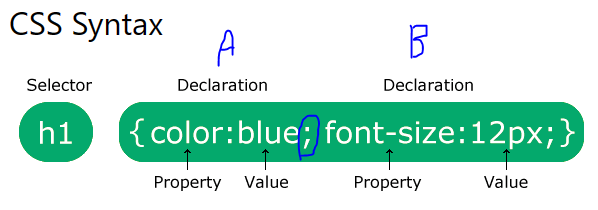
A, B 효과 동시에 줄 때는 ;(세미콜론) 사용3. 외부 파일에 저장
-> 1. default.css 파일 만들기여긴 ex3.html 파일
<head>
...
<link rel="stylesheet" type="text/css" href="./default.css">
...
</head>default.css 파일을 만들어 스타일한 후 html 파일에서 가져온다.
여러가지 파일에 동시에 쓰고 싶을 때 주로 사용-> body는 가장 가까이 있는 곳 기준으로 적용(외부<head<body 순으로)
외부에서 색깔을 적용해도 head에 새로 적어두면 head에 있는 것이 적용된다.
head부분에서 두 번 적어도 오류가 나지 않는다. 이 경우 맨 아래에 있는 것이 적용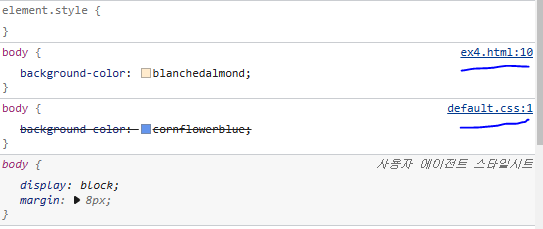
데이터와 디자인이 분리된 상태
$( 'style, link[rel="stylesheet"]' ).remove()
select
태그
* - 전체 (태그) 선택자(태그 전체를 적용시키는 것)

<head>
    <style type="text/css">
        /* * : 전체선택 */
        /*특정 태그 선택자*/
        p   {color:blue;}
        div {color:crimson; background-color:aquamarine;}
        p   {color:rgba(228, 15, 228, 0.301);}
    </style>
</head>
<body>
    <p>Hello css</p>
    <div>Hello css</div>
    <p>Hello css</p>
    <div>Hello css</div>
    <p>Hello css</p>
    <div>Hello css</div>
</body>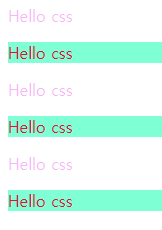
    div:first-child {color:red;} -->첫번째 div 바뀜
    div:last-child {color:green;} -->마지막 div 바뀜
    div:nth-child(2) {color:blue;} -->()안의 div 바뀜(예시는 2, 2n등으로 반복적으로 줄 수도 있다.)

    ->모두 ;으로 다른 작업과 병행 가능(배경 등)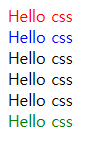
클래스(class)
그룹지어 적용시키는 기능(기능과 같이 중첩해서 그룹 가능)ex> <head>
...
<style type="text/css">
.c1 {color:blue;}
.c2 {color:blueviolet;}
.c3 {color:aqua;}
div.c1 {color:green;}
</style>
...
</head>
<body>
...
<p class="c1">Hello css</p>
<div class="c1">Hello css</div>
<p class="c2">Hello css</p>
<div class="c3">Hello css</div>
...
</body>ex>
Hello css
Hello css
Hello css
Hello css
Hello css
Hello css
pseudo class(수도 클래스)
<head>
    <style type="text/css">
        /* pseudo class */
        /* 원본 링크 */
        a:link {color:#ff0000;}
        /* 방문 시 색깔변화 */
        a:visited {color:#00ff00;}
        /* 마우스를 가져다놓았을 때 */
        a:hover {color:#ff00ff;}
        /* 클릭시 */
        a:active {color:#0000ff;}
    </style>
</head>
<body>
    <a href="https://m.naver.com">모바일 네이버</a>
    <br><br>
    <a href="https://m.nate.com">모바일 네이트</a>
</body>
pseudo element(::)
           /* 첫 문장 바꾸기 */
    div::first-line {color:#ff0000;}
    /* 첫 글자 바꾸기(font-size는 글자크기 조정) */
    div::first-letter {color:blue; font-size:xx-large;}
아이디
하나의 태그에 하나만 줄 수 있는 것ex>
<head>
...
<style type="text/css">
#i1 {color:rebeccapurple;}
#i2 {color:antiquewhite;}
#i3 {color:aquamarine;}
#i4 {color:rgba(26, 29, 173, 0.747);}
#i5, #i6 {color:coral;}
...
</style>
</head>
<body>
<p id="i1">Hello css</p>
<div id="i2">Hello css</div>
<p id="i3">Hello css</p>
<div id="i4">Hello css</div>
<p id="i5">Hello css</p>
<div id="i6">Hello css</div>
</body>ex>
Hello css
Hello css
Hello css
Hello css
Hello css
Hello css
복합 선택자
- 자손
- 후손
<head>
   <style type="text/css">
        div > p {color:red;}  --> 부모 > 자식 빨간색으로 (css2,4) 빨간색
        div p {color:red;} --> >풀면 후손까지 빨간색으로 된다. (css2,3,4)
        /* 아우 선택자 */
        div+p {color:gray;} --> 부모에 근접한 p가 회색으로 (css5가 회색)
         div~p {color:gray;} --> 아우 p 전체가 회색으로
    </style>
</head>
<body>
    <!-- DOM(Document Object Model) Tree (계층 구조) -->
    <p>Hello css1</p>
    <div>  --> 부모
        <p>Hello css2</p> -->자식
            <span> --> 자식
                <p>Hello css3</p> -->후손
            </span>
            <p>Hello css4</p> --> 자식
    </div>
    <p>Hello css5</p>   --> 아우
    <p>Hello css6</p>   --> 아우
</body>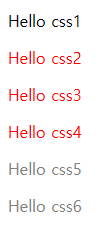
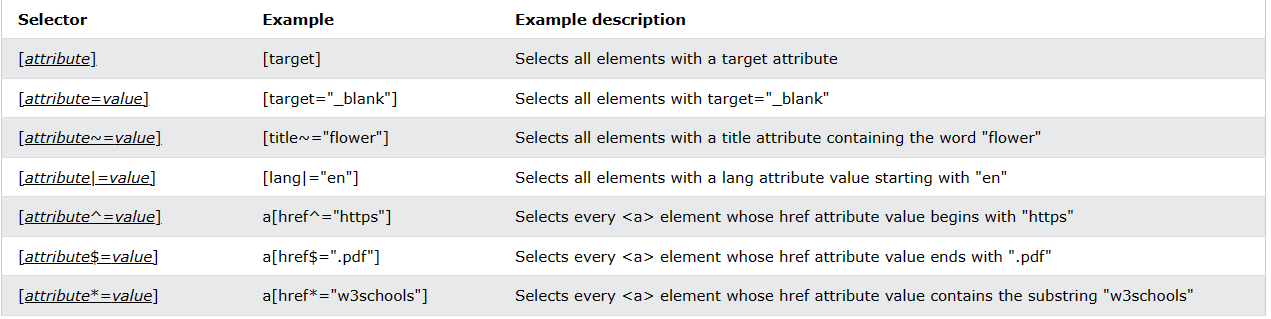
Attribue Selector
<head>
    <style type="text/css">
        a[target] {background-color:green;}  --> target 붙은 것들 색 바꾸기
        a[target=_blank] {background-color: greenyellow;} -> target=_blank만 색 바꾸기
    </style>
</head>
<body>
    <a href="https://m.naver.com">모바일 네이버</a><br>
    <a href="https://m.naver.com" target="_blank">모바일 네이버</a><br>
    <a href="https://m.naver.com" target="_top">모바일 네이버</a><br>
</body>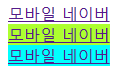
background(배경)
- background-color(배경색)
- background-image
			/* background-color:blue; */   -->배경색
            /* background-color:rgb(50, 50, 160); */  -->배경색
            /* 이미지 배경 */
            background-image: url( '../images/daum.png');
            /* 반복 x (repeat-x(y) ->x,y축 반복 x) */
            background-repeat: no-repeat;
            /* 위치 조정 */
            background-position: right top;
            /* 위치 고정 */
            background-attachment: fixed;

/* 색, 이미지, 반복, 스크롤 고정, 위치 한 줄로 쓸 수 있다. */
            background: #ffff00 url( '../images/daum.png') no-repeat
fixed right top;<head>
<style type="text/css">
/* 표 영역에 이미지 넣기 */
div, td {
background-image: url('../images/img_flwr.gif'), url('../images/paper.gif'); <br>
->이미지 중첩 가능
background-repeat:no-repeat, repeat;
background-position: right bottom, left top;
}
->이것을 한번에 표현하면
background: url('../images/img_flwr.gif') no-repeat right bottom,
url('../images/paper.gif') repeat left top ;
</style>
</head>
<body>
<table border="1" width="600" height="200">
<tr>
<td>1열</td>
<td>2열</td>
</tr>
</table>
<br> <br>
<div>Hello Image<br>
Hello Image<br>
Hello Image<br>
Hello Image<br>
</div><br>
</body>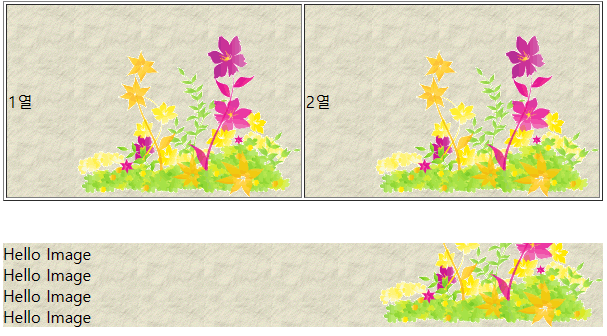
font
family : 브라우저에서 지원하는 폰트 중심
size : 폰트의 크기
style : 폰트 스타일
<style type="text/css">
       #i1 {
           /* 폰트의 기본 사이즈는 16px, 배율(em)이나 퍼센트(%)로도 줄 수 있음 */
           font-family: "궁서체"; --> 폰트 변경
           font-size:12px;
           font-style:normal; -> 폰트 스타일 변경
           font-weight:bold;  -> 폰트 굵기 변경
   }
       #i2 {font-family: "굴림체";}
       /* #i3 {font-size:20px;} */
       #i3 {font-size: 2.5em;}
       #i3 {font-size: 400%;}

       한번에 쓴다면 #i3 {font: bold 20px "궁서체";} 이런식으로 가능

   </style>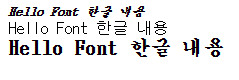
브라우저 외의 폰트를 가져오는 방법(구글 등)
<link rel="stylesheet"
        href="https://fonts.googleapis.com/css?family=Sofia">
        <style type="text/css">
            /* 폰트 두개 쓰는 이유는 sofia가 안되면 굴림체를 쓴다는 뜻 */
            #i1 {font-family:"sofia", "굴림체";}
            #i2 {font: 30px, "sofia";}
        </style>

        <body>
    <div id="i1">Hello Font 한글 내용</div>
    <div id="i2">Hello Font 한글 내용</div>
    <div id="i3">Hello Font 한글 내용</div>
	</body>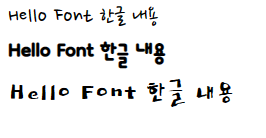
web font(ttf/otf/woff/eot or svg기능으로 만들기 가능)
-> 다운받아서 사용하는 폰트 가져오는 방법(순간적으로 느려질 수 있는 단점있음)<style type="text/css">
/* 폰트 등록 */
@font-face {
font-family: myFont1;
src: url( './fonts/sansation_light.woff');
}
@font-face {
font-family: myFont2;
src: url( './fonts/gabia_bombaram.ttf');
}
#i1 {font-family:myFont1;}
#i2 {font-family: myFont2;}
</style> 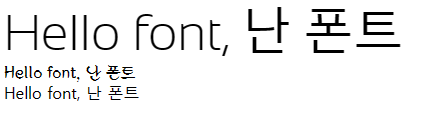
아이콘
<head>
    <script src="https://kit.fontawesome.com/a076d05399.js"
    crossorigin="anonymous"></script> ->해당 링크에 존재하는 아이콘만 가능
</head>
<body>
    <i class="fas fa-cloud"></i> --> 아이콘은 클래스 형식으로 있음
    <i class="fas fa-car"></i>
    <i class="fas fa-heart"></i>
    <i class="fas fa-bars"></i>
커서
<head>
    <style type="text/css">
        #i1 {cursor:default;}
        #i2 {cursor:auto;}
        #i3 {cursor:crosshair;}
    </style>

</head>
<body>
    <div id="i1">default</div>
    <div id="i2">auto</div>
    <div id="i3">crosshair</div>
</body>
-> 커서 모양이 바뀐다.
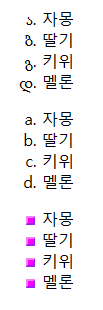
순서 모양 아이콘 바꾸기(1장의 type써서 한 거랑 같음)
<head>
    <style type="text/css">
        /* 순서 모양 아이콘 바꾸기(type과 동일함) */
        ul.a {list-style-type:georgian}
        ol.a {list-style-type: lower-alpha;}
        ol.b {list-style-image: url('../images/~~');}  ->이미지 아이콘으로 바뀜>
        <li>자몽</li>
        <li>딸기</li>
        <li>키위</li>
        <li>멜론</li>
    </ul>
    <ol class="a">
        <li>자몽</li>
        <li>딸기</li>
        <li>키위</li>
        <li>멜론</li>
    </ol>
     <ol class="b">
        <li>자몽</li>
        <li>딸기</li>
        <li>키위</li>
        <li>멜론</li>
    </ol>
ex>
Box Model(영역) -테이블 대신 테이블을 만드는 것
Width/Height (가장 중요)
Border -영역 구분선 width(굵기)/color(색깔)/style(종류)
Padding(Margin) - 여백

-> table or 블럭 태그(p, div, span(width,height 안먹음) ->영역을 나타내는 기본 태그 + css<head>
<style type="text/css">
/* #i1 {border-width: 2px; border-color: red; border-style: dotted;} */
/* 한번에 쓰기 (width style color) */
#i1 {border: 2px solid red;}
/* 전체 패딩하기(상하좌우), 마진도 동일 */
padding: 25px 50px 75px 100px;
margin: 10px;
}
/* #i2 {
border-bottom-width:2px;
border-bottom-color: aquamarine;
border-bottom-style: solid;
} */
/* 한번에 쓰기 (width style color) */
#i2 {border-bottom: 2px solid aquamarine;
border-top: 2px solid rgb(97, 17, 201);
}
</style>
</head>
<body>
<div id="i1">영역1</div>
<div id="i2">영역2</div>
</body>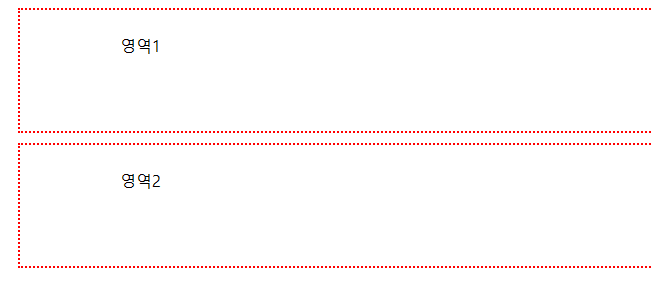
박스 만들기
<head>
    <style type="text/css">
        span {
            background-color: lightgray;
            width:200px;
            height:200px;
            border:1px solid red;
            border-radius:50px; -> 얼마나 휘는지
            padding: 10px;
        }
    </style>
</head>
<body>
    <br>
    <span>Hello Box Model</span>
    <span>Hello Box Model</span>
    <span>Hello Box Model</span>
    <br><br><br>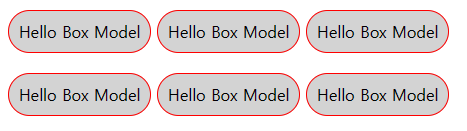
숨김 기능(없애기 기능)
<head>
    <style type="text/css">
        div {
            width:200px;
            height:50px;
            border: 1px solid red;
        }
        #i1 {display:none;}  --> 영역까지 다 없앰
        #i2 {visibility: hidden;} --> 영역은 남겨둠
    </style>
</head>
<body>
    <div id="i1">Hello Visiable1</div>
    <div id="i2">Hello Visiable2</div>
    <div id="i3">Hello Visiable3</div>
    <div id="i4">Hello Visiable4</div>
</body>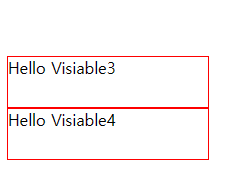
inline, block 차이점
inline = width/height/margin/padding -> 잘 안 먹는다.
inline-block -> 엔터키x but 위의 기능을 사용할 수 있는 혼합 기능
<head>
    <meta charset="UTF-8">
    <meta http-equiv="X-UA-Compatible" content="IE=edge">
    <meta name="viewport" content="width=device-width, initial-scale=1.0">
    <title>Document</title>
    <style type="text/css">
        span.a {display:inline;
                width:100px;
                height:100px;
                padding:5px;
                border: 1px solid red;
                background-color: yellow;}

        span.b {display:inline-block;
                width:100px;
                height:100px;
                padding:5px;
                border: 1px solid red;
                background-color: yellow;}

        span.c {display:block;
                width:100px;
                height:100px;
                padding:5px;
                border: 1px solid red;
                background-color: yellow;}
    </style>
</head>
<body>
    <span class="a">Inline</span>
    <span class="a">Inline</span>
    <br><br>
    <span class="b">Inline-block</span>
    <span class="b">Inline-block</span>
    <br><br>
    <span class="c">block</span>
    <span class="c">block</span>
</body>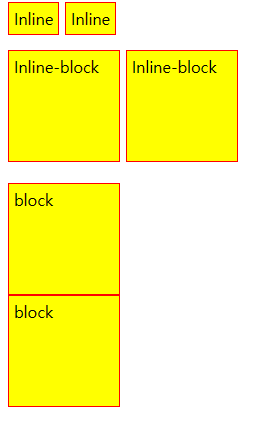
기능들의 특성 바꾸기
	 <style type="text/css">
        div, span {border: 1px solid red;}

        /* display로 속성 부여 가능 */
        div { display:inline}   --> inline 속성으로 바뀜
        span {display:block}    --> block 속성으로 바뀜
    </style>
	 -> display를 사용하여 태그의 기능들을 바꿔버릴 수 있다.


    <!-- block tag ->엔터키 있는 것 -->
    <div>Hello Block</div>
    <div>Hello Block</div>
    <br><br>
    <!-- Inline tag -> 엔터키가 없는 것 -->
    <span>Hello Inline</span>
<span>Hello Inline</span> 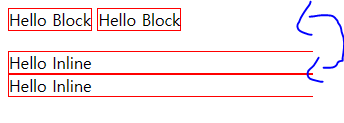
float(해당 위치로 채우기)
<head>
    <meta charset="UTF-8">
    <meta http-equiv="X-UA-Compatible" content="IE=edge">
    <meta name="viewport" content="width=device-width, initial-scale=1.0">
    <title>Document</title>
    <style type="text/css">
        img {
            width:170px;
            height:170px;
            /* 해당 위치로 채우기(이동) */
            float: left;
            margin-right:15px;
        }
    </style>
</head>
<body>
    <img src="../images/pineapple.jpg">
    The float property is used for positioning and formatting content.
</body>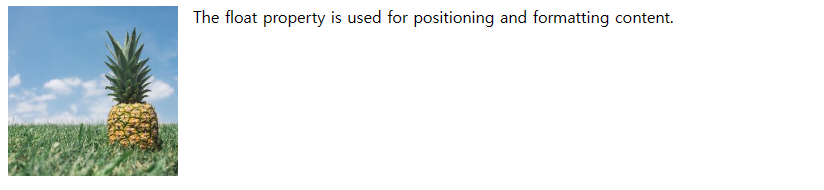

끄적끄적