** 해당 게시글은 인프런 김영한 님의 스프링부트 - 핵심 원리 활용 강의를 보고 작성된 게시글입니다.
스프링 컨테이너 등록
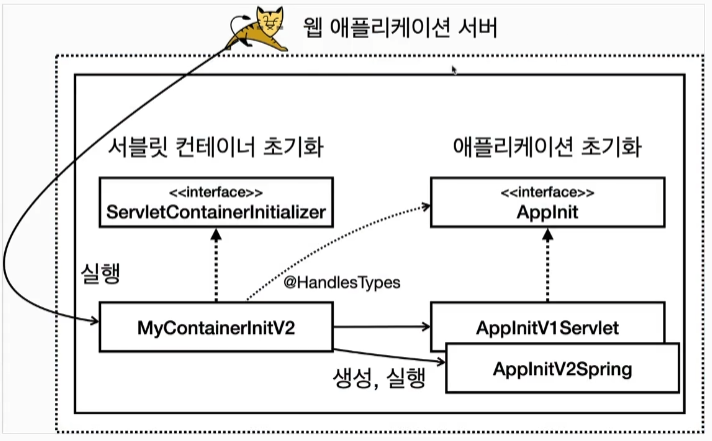
: 이번에는 WAS와 스프링을 통합해 보자.
앞서 배운 서블릿 컨테이너 초기화와 애플리케이션 초기화를 활용하면 된다.
- 다음과 같은 과정이 필요하다.
- 스프링 컨테이너 만들기
- 스프링 MVC 컨트롤러를 스프링 컨테이너에 빈으로 등록하기
- 스프링 MVC 컨트롤러를 사용하는데 필요한 디스패처 서블릿을 서블릿 컨테이너 등록하기
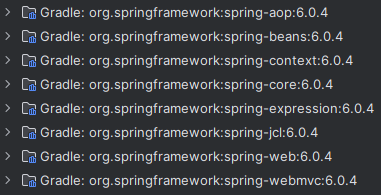
1. 현재 라이브러리에는 스프링 관련 라이브러리가 없다. 추가하도록 하자!
- build.gradle 에 dependencies 를 추가해 준 후, build 해 준다.
implementation 'org.springframework:spring-webmvc:6.0.4'- 그 뒤 라이브러리 부분을 확인해 보면 스프링 MVC 라이브러리들이 생긴 것을 확인할 수 있다.
2. 드디어! 이제 컨트롤러를 만들어 준다.
package hello.spring;

import org.springframework.web.bind.annotation.GetMapping;
import org.springframework.web.bind.annotation.RestController;

@RestController
public class HelloController {

    @GetMapping("/hello-spring")
    public String hello(){
        System.out.println("HelloController.hello");
        return "hello Spring!";
    }
}
3. 자바 Bean을 등록할 Config 파일을 만들어 준다.
package hello.spring;

import org.springframework.context.annotation.Bean;
import org.springframework.context.annotation.Configuration;

@Configuration
public class HelloConfig {

    //직접 빈으로 등록
    @Bean
    public HelloController helloController(){
        return new HelloController();
    }
}
4. 앞서 우리가 만들었던 AppInit을 이용하여 AppInitV2Spring 클래스를 만들어 준다.
package hello.container;

import hello.spring.HelloConfig;
import jakarta.servlet.ServletContext;
import jakarta.servlet.ServletRegistration;
import org.springframework.context.annotation.AnnotationConfigApplicationContext;
import org.springframework.web.context.support.AnnotationConfigWebApplicationContext;
import org.springframework.web.servlet.DispatcherServlet;

public class AppInitV2Spring implements AppInit{


    @Override
    public void onStartup(ServletContext servletContext) {
        System.out.println("AppInitV2Spring.onStartup");

        //스프링 컨테이너를 생성하자
        AnnotationConfigWebApplicationContext appContext =
                new AnnotationConfigWebApplicationContext();

        //config 설정을 해 주자.
        appContext.register(HelloConfig.class);

        //스프링 MVC 디스패처 서블릿 생성, 스프링 컨테이너 연결
        DispatcherServlet dispatcher = new DispatcherServlet(appContext);

        //디스패처 서블릿을 서블릿 컨테이너에 등록 (이름 주의!)
        ServletRegistration.Dynamic servlet = servletContext.addServlet("dispatcherV2", dispatcher);

        // /spring/* 요청이 다 디스패처 서블릿을 통하도록 요청한다.
        servlet.addMapping("/spring/*");
    }
}
정리해보면!
-
AppInitV2Spring은 AppInit을 구현했다. (imp) AppInit을 구현하면 애플리케이션 초기화 코드가 자동으로 실행된다. 앞서 'MyContainerInitV2'에 관련 작업을 미리 해 두었다.
-
스프링 컨테이너 생성
- AnnotationConfigWebApplicationContext 가 바로! 스프링 컨테이너이다.
- appContext.register(HelloConfig.class) 컨테이너에 스프링 설정을 추가하였다.
- 스프링 MVC 디스패처 서블릿 생성, 스프링 컨테이너 연결
- 'new DispatcherServlet(appContext)'
- 코드를 보면 스프링 MVC가 제공하는 디스패처 서블릿을 생성하고, 생성자에 앞서 만든 스프링 컨테이너를 전달했다. 이렇게 하면 디스패처 서블릿에 스프링 컨테이너가 연결되게 된다.
- 이 디스패처 서블릿에 HTTP 요청이 오면 디스패처 서블릿은 해당 스프링 컨테이너에 들어있는 컨트롤러 빈들을 호출한다.
근데 왜 /hello-spring 이 아니고 /spring/hello-spring 으로 맵핑이 될까?
자! 실행 순서를 정리해 보자.
실행을 /spring/* 패턴으로 호출했기 때문에 다음과 같이 동작한다.
1. dispatcherV2 디스패처 서블릿이 실행된다 (/spring)
2. dispatcherV2 디스패처 서블릿은 매칭되는 스프링 컨트롤러를 찾아서 실행한다 (/hello-spring)

유라라랜드에 오신 것을 환영합니다!