기존 내 프로젝트를 모듈화 하는 과정을 간단히 설명. 예시로 auth 라는 이름의 라우터를 재가공한다. 모듈화에 집중한 포스트이다보니, 각 파일별로 노출되는 함수가 다를 수 있음에 유의한다.
app.js 수정
const routers = require("./routers");

//기존에 router가 많던 코드를 치환
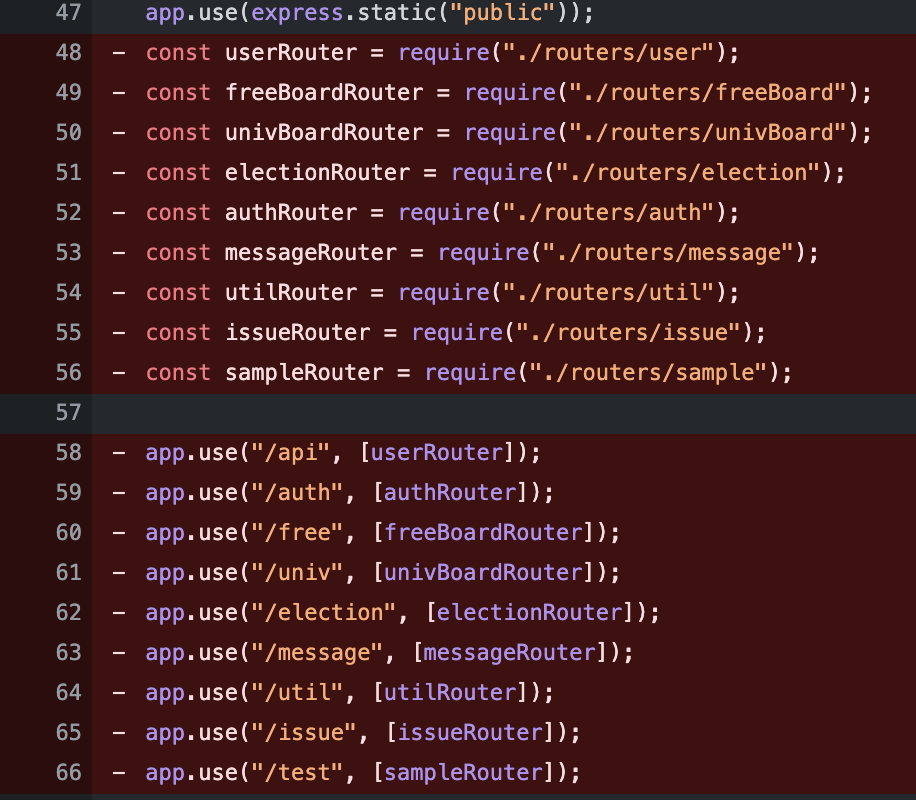
app.use(routers);- 기존 우리 코드는 다음과 같은 형태로 되어있었다.

app.js에서 라우팅 코드가 너무 많다보니 가독성이 떨어지는 단점이 있었다.
routers/index.js 생성
const express = require("express");
const router = express.Router();

const authRouter = require("./auth");

router.use("/auth", [authRouter]);

module.exports = router;- router index 파일을 생성해 모든 라우팅을 이곳에서 함으로써 목적에 맞는 인덱싱이 가능하다.
router/auth.js 파일 수정
const express = require("express");
const router = express.Router(); // 라우터라고 선언한다.
const passport = require("passport");
const { authController } = require("../controllers");

router.get("/fail", async (req, res, next) => {
  res.status(400).send({ message: "login failed" });
});

router.post("/email", authController.email);
router.post("/email/check", authController.emailCheck);
router.post("/find-id", authController.findId);
router.post("/find-pw", authController.findPw);
router.post("/update-pw", authController.updatePw);

module.exports = router;- router 파일에서 모두 실행해버리던 소스코드를, auth controller로 넘겨서 실행한다. 라우팅에 집중할 수 있는 소스코드가 되었다.
controllers/index.js 파일 생성
const authController = require("./authController");

module.exports = {
  authController,
};- 마찬가지로 controller에서 인덱싱을 해준다.
controllers/authController.js 파일 생성
const jwt = require("jsonwebtoken");
const { authService } = require("../services");

const logIn = async (req, res, next) => {
  try {
    const user = req.user;
    //로그인 부분 생략
    res.status(200).send({ message: "success", token: token });
  } catch (err) {
    res.status(400).send({ message: err + " : login failed" });
  }
};

const findId = async (req, res) => {
  const { school_email } = req.body;
  const result = await authService.findUser({ school_email });
  if (result) {
    res.status(200).send({ result, ok: true });
    return;
  }
  res.status(403).send({ result: "no user", ok: false });
};

const findPw = async (req, res) => {
  try {
    const { email } = req.body;
    const isExist = await authService.findUser({ email });
    if (isExist) {
      //인증코드 발급 부분 생략
      res.status(200).send({ authCode });
    } else {
      res.status(403).send({ result: "no user", ok: false });
    }
  } catch (error) {
    res.status(400).send({
      ok: false,
      message: error + "email 전송 실패!",
    });
  }
};

const updatePw = async (req, res) => {
  const { email, password } = req.body;
  const result = await authService.findUser({ email });
  // 유저 데이터 재가공 부분 생략
};

module.exports = {
  logIn,
  findId,
  findPw,
  updatePw,
};- 데이터베이스 가공과 같은 부분은 모두 service단으로 넘기고, controller에서는 control의 역할만 수행할 수 있도록 한다.
services/index.js 파일 생성
const authService = require("./authService");

module.exports = {
  authService,
};- 마찬가지로 service 인덱싱을 해준다.
services/authService.js 파일 생성
const { university, user } = require("../models");
const Sequelize = require("sequelize");
const Op = Sequelize.Op;

const findUnivByEmail = async (school_domain) => {
  return await university.findOne({
    where: {
      email_domain: {
        [Op.like]: "%" + school_domain,
      },
    },
  });
};

const findUser = async (field) => {
  return await user.findOne({
    where: field,
  });
};

const updateUserByUserId = async (fields, user_id) => {
  await user.update(fields, {
    where: { user_id },
  });
  return true;
};

module.exports = {
  findUnivByEmail,
  findUser,
  updateUserByUserId,
};- 데이터베이스 접근은 위와 같은 방식으로 진행한다. 함수의 parameter를 특성에 맞게 잘 설정해주어야한다.
