1) 학습한 내용
에어비앤비 디자인 시스템 따라하기
-
스토리북(Storyboook) : UI컴포넌트 개발 도구
-
데모용 코드를 작성하는 데 도움을 주고 공통적으로 사용될 컴포넌트를 팀원들과 편리하게 공유한느 도구로 활용
-
구성단위는 스토리(Story)
-
하나의 UI컴포넌트는 보통 하나 이상의 Story를 가짐
story북 설치법
리액트 프로젝트 안에서 터미널을 동작시킨 다음에 npx –p storybook sb init를 작성한다.
그리고, 설치가 완료되면 터미널에다 npm run storybook 을 작성해서 실행시킨다.
story북 폴더구조
main.js : stories를 위한 config 설정
preview.js : 모든 story들에 글로벌하게 적용될 포맷 세팅
스토리 기본구조
Export default{
	Title : 스토리북에 올릴 component 폴더 계층 구조,
    Component : 스토리를 만들 컴포넌트 이름
}
Export const 스토리 이름 = () => 해당스토리에서 테슽할 인자가 담긴 컴포넌트
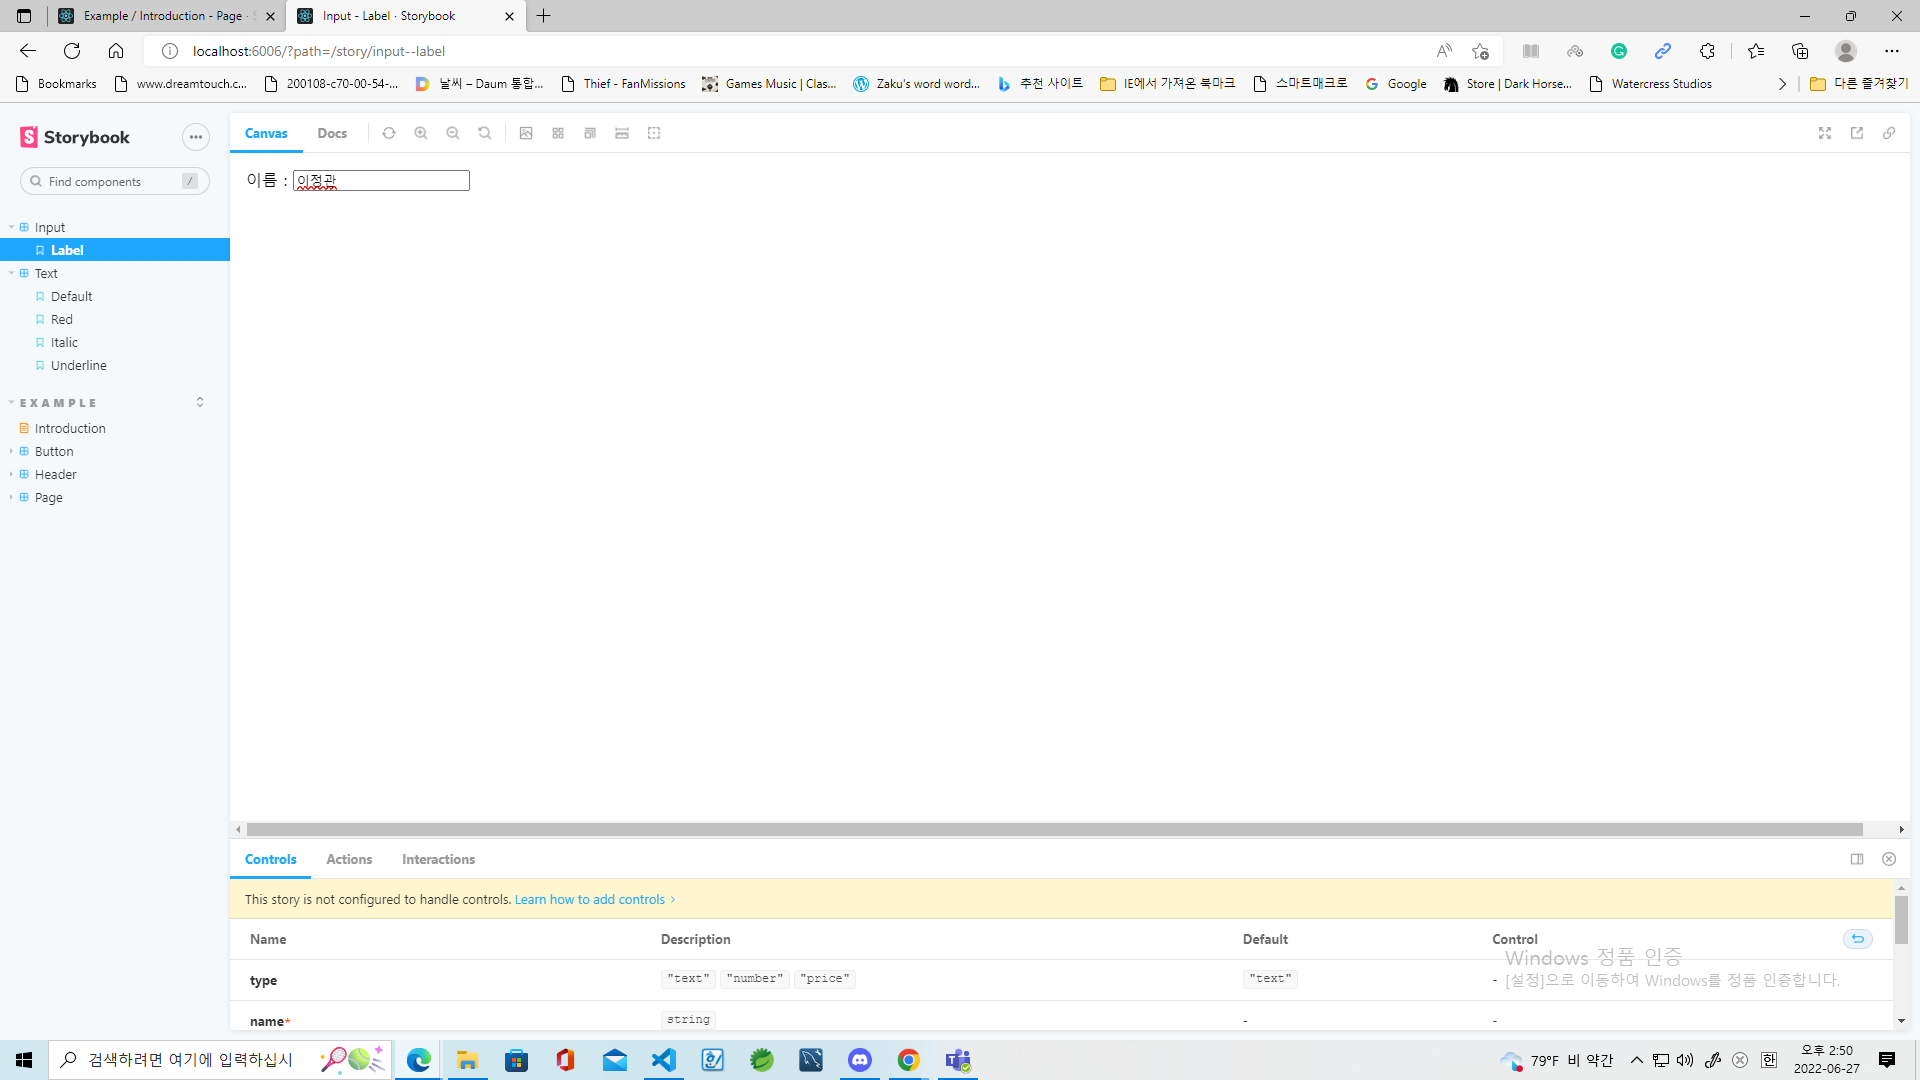
스토리북 실행화면과 코드
import React, { Component } from "react";
import PropTypes from "prop-types";

class Input extends Component {
  constructor(props) {
    super(props);
    this.setRef = this.setRef.bind(this);
    this.handleChange = this.handleChange.bind(this);
  }

  handleChange(e) {
    const { name, onChange } = this.props;
    if (onChange) {
      onChange(name, e.target.value);
    }
  }

  componentDidMount() {
    if (this.props.autoFocus) {
      this.ref.focus();
    }
  }

  componentDidUpdate() {
    if (this.props.autoFocus) {
      this.ref.focus();
    }
  }

  setRef(ref) {
    this.ref = ref;
  }

  render() {
    const { errorMessage, label, name, value, type, onFocus } = this.props;
    return (
      <label>
        {label}
        <input
          id={"input_${name}"}
          ref={this.setRef}
          onChange={this.handleChange}
          onFocus={onFocus}
          value={value}
          type={type}
        />
        {errorMessage && <span className="error">{errorMessage}</span>}
      </label>
    );
  }
}

Input.propTypes = {
  type: PropTypes.oneOf(["text", "number", "price"]),
  name: PropTypes.string.isRequired,
  value: PropTypes.oneOfType([PropTypes.number, PropTypes.string]),
  errorMessage: PropTypes.string,
  label: PropTypes.string,
  onChange: PropTypes.func,
  autoFocus: PropTypes.bool,
};

Input.defaultProps = {
  onChange: () => {},
  onFocus: () => {},
  autoFocus: false,
  type: "text",
};

export default Input;
'Input.jsx'
import React, { Component } from 'react';
import Input from "./Input";

export default{
    title : "Input",
    component : Input,
};

export const label = () => <Input name="name" label="이름 : "/>;
'Input.stories.js'
import React, { Component } from "react";
import PropTypes from "prop-types";

export function Text({ children, color, italic, underline }) {
  const style = {
    color: color,
    fontStyle: italic ? "italic" : "normal",
    textDecoration: underline ? "underline" : "none",
  };
  return <span style={style}>{children}</span>;
}

Text.propTypes = {
  children: PropTypes.string.isRequired,
  color: PropTypes.string,
  italic: PropTypes.bool,
  underline: PropTypes.bool,
};

Text.defaultProps = {
  color: "black",
  italic: false,
  underline: false,
};
'Text.jsx'
import React, { Component } from "react";
import {Text} from "./Text";

export default{
    title : "Text",
    component : Text,
};

const TEST_TEXT = "Story Text Test";
export const Default = () =><Text>{TEST_TEXT}</Text>;
export const Red = () =><Text color="red">{TEST_TEXT}</Text>;
export const Italic = () =><Text italic>{TEST_TEXT}</Text>;
export const Underline = () =><Text underline>{TEST_TEXT}</Text>;
Text.stories.js
2) 학습내용 중 어려웠던 점
이번에 리액트 중에서 스토리북 부분이 어려웠었다. 왜냐하면, 리액트라면 보통 독학으로 배웠던 앞부분을 많이 생각했었지, 거기에 있는 또 다른 건 전혀 배우질 않았기 때문이다. 거기에, 강사의 컴퓨터 성능이라고 뭐하지만 디버깅 속도가 내 컴퓨터 보다 상대적으로 느렸기 때문에 시간이 오래 걸리기도 했다. 리액트 자체가 첫 동작시의 느리다는 단점이 있다는 걸 감안해야 할 필요가 있지만 말이다.
3) 해결방법
강사가 준 코드와 새 프로젝트를 만들어서 거기에다 덧씌웠다. 뭔가, 없어보이는 짓이었지만 만약 프로젝트가 초기에 꼬여있다면 한 번 해볼 법한 방법이다.
4) 학습소감
리액트 2번째 시간 때 나는 스토리북을 학습했다. 스토리북은 처음인지라 리액트 초기 때와는 달리 제법 난이도가 높았고 나는 거기에서 막히기도 했었다. 그나마, 다행인 것은 프로젝트가 초기에 문제가 생기자, 새로운 프로젝트를 만들어서 거기에다 작업한 것을 덧씌우는 것으로 해결했었다.