Application Context
스프링 애플리케이션에서는 오브젝트의 생성과 관계설정, 사용, 제거 등의 작업을 애플리케이션 코드 대신 독립된 컨테이너가 담당한다. 이를 컨테이너가 코드 대신 오브젝트에 대한 제어권을 갖고 있다고 해서 IoC라고 부른다. 그래서 스프링 컨테이너를 IoC 컨테이너라고도한다.
스프링 컨테이너는 단순한 DI 작업 보다 더 많은 일을 하는데, DI를 위한 빈 팩토리를 구현하며 애플리케이션을 개발하는 데 필요한 여러 가지 컨테이너 기능을 추가한 것을 Application Context라고 부른다.
애플리케이션 컨텍스트 생명주기
- 애플리케이션 실행
- 스프링 컨테이너 생성되고 설정파일을 읽는다
- 설정으로부터 컨테이너에 생성될 빈들의 설정 정보가 생성된다
- 빈팩토리 후처리기
BeanFactoryPostProcessors가 호출되고 빈의 설정정보에 대한 후처리가 진행된다 - 스프링 빈 인스턴스가 생성되고 빈 설정정보에 따라 프로퍼티가 설정되고 종속성을 주입한다
- 빈 후처리기
BeanPostProcessor가 호출되고 빈 객체에 대한 후처리를 진행 - 애플리케이션 실행
- 애플리케이션 종료
- 애플리케이션 컨텍스트 종료
- Destruction 콜백 실행
애플리케이션 컨텍스트 종류
애플리케이션 컨텍스트를 상속하는 구현체
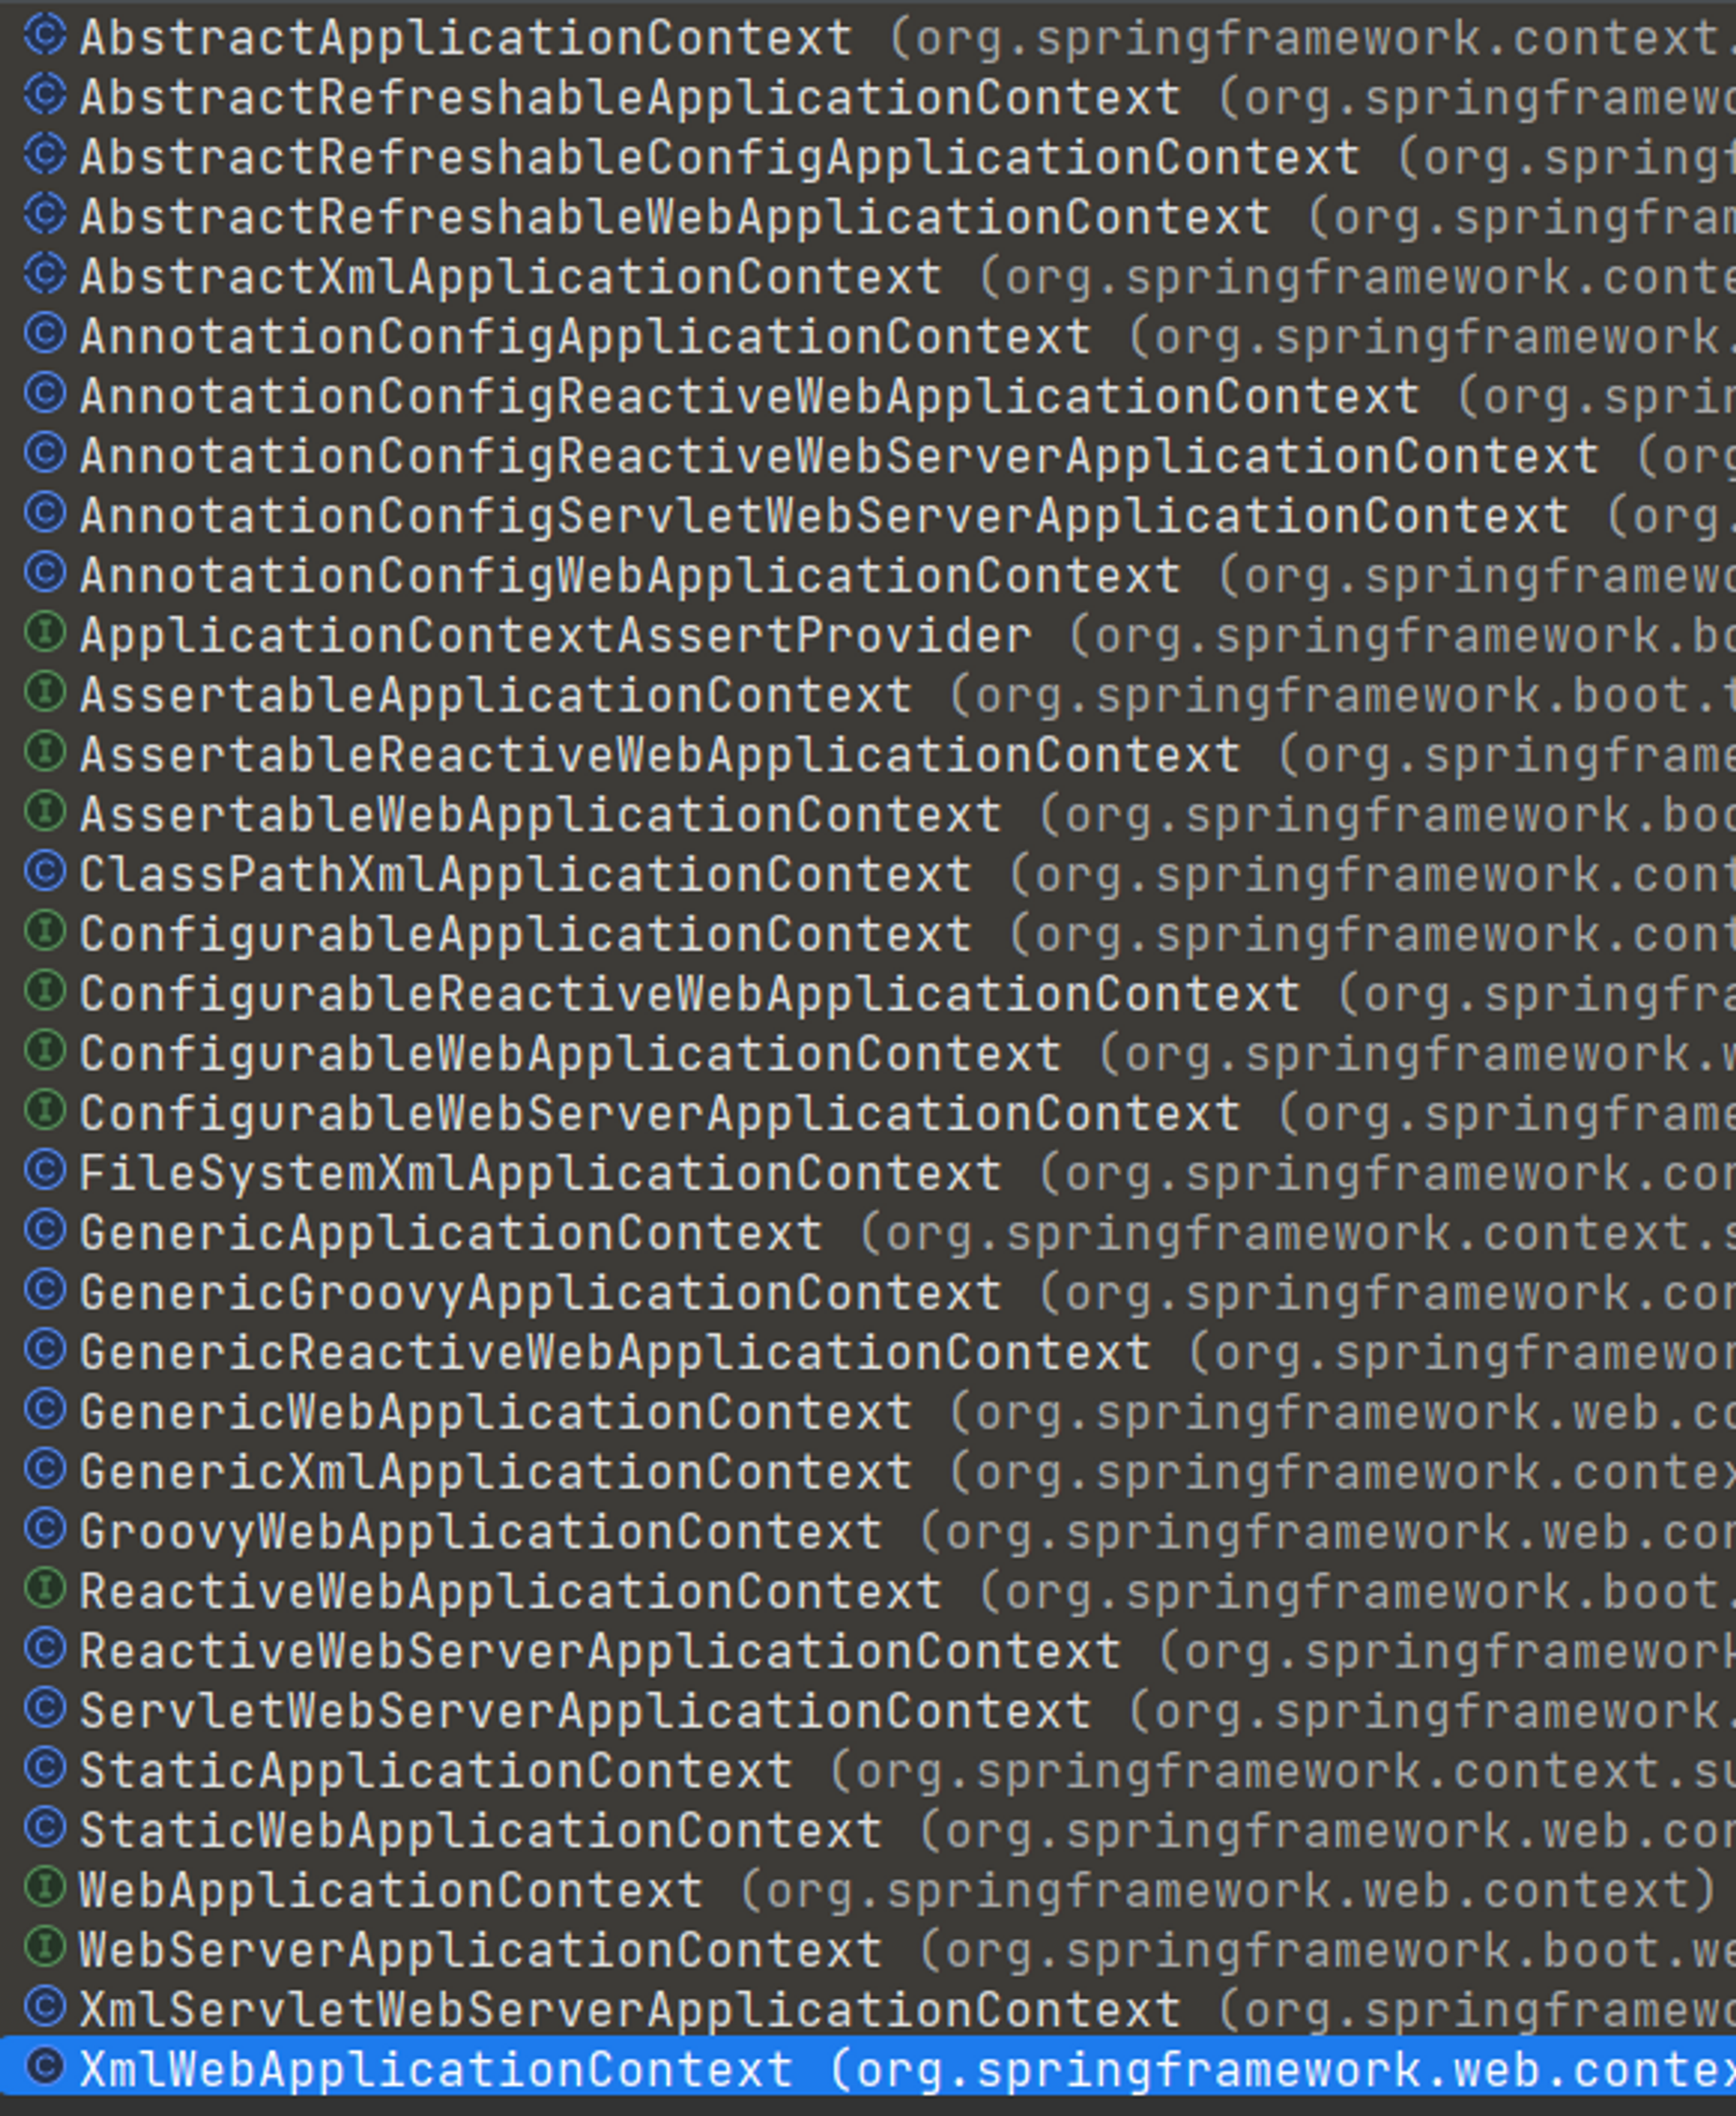
Non-Web Applications
- AnnotationConfigApplicationContext ⇒ 컴포넌트 스캔을 실행하는 Configuration을 읽어 빈 등록
- ClassPathXmlApplicationContext ⇒ 클래스 패스로부터 상대 경로에 있는 파일을 로드하여 빈 등록
- FileSystemXmlApplicationContext ⇒ 소스가 실행되어지는 워킹 디렉토리로부터 상대 경로에 있는 파일을 로드하여 빈등록
Web Applications
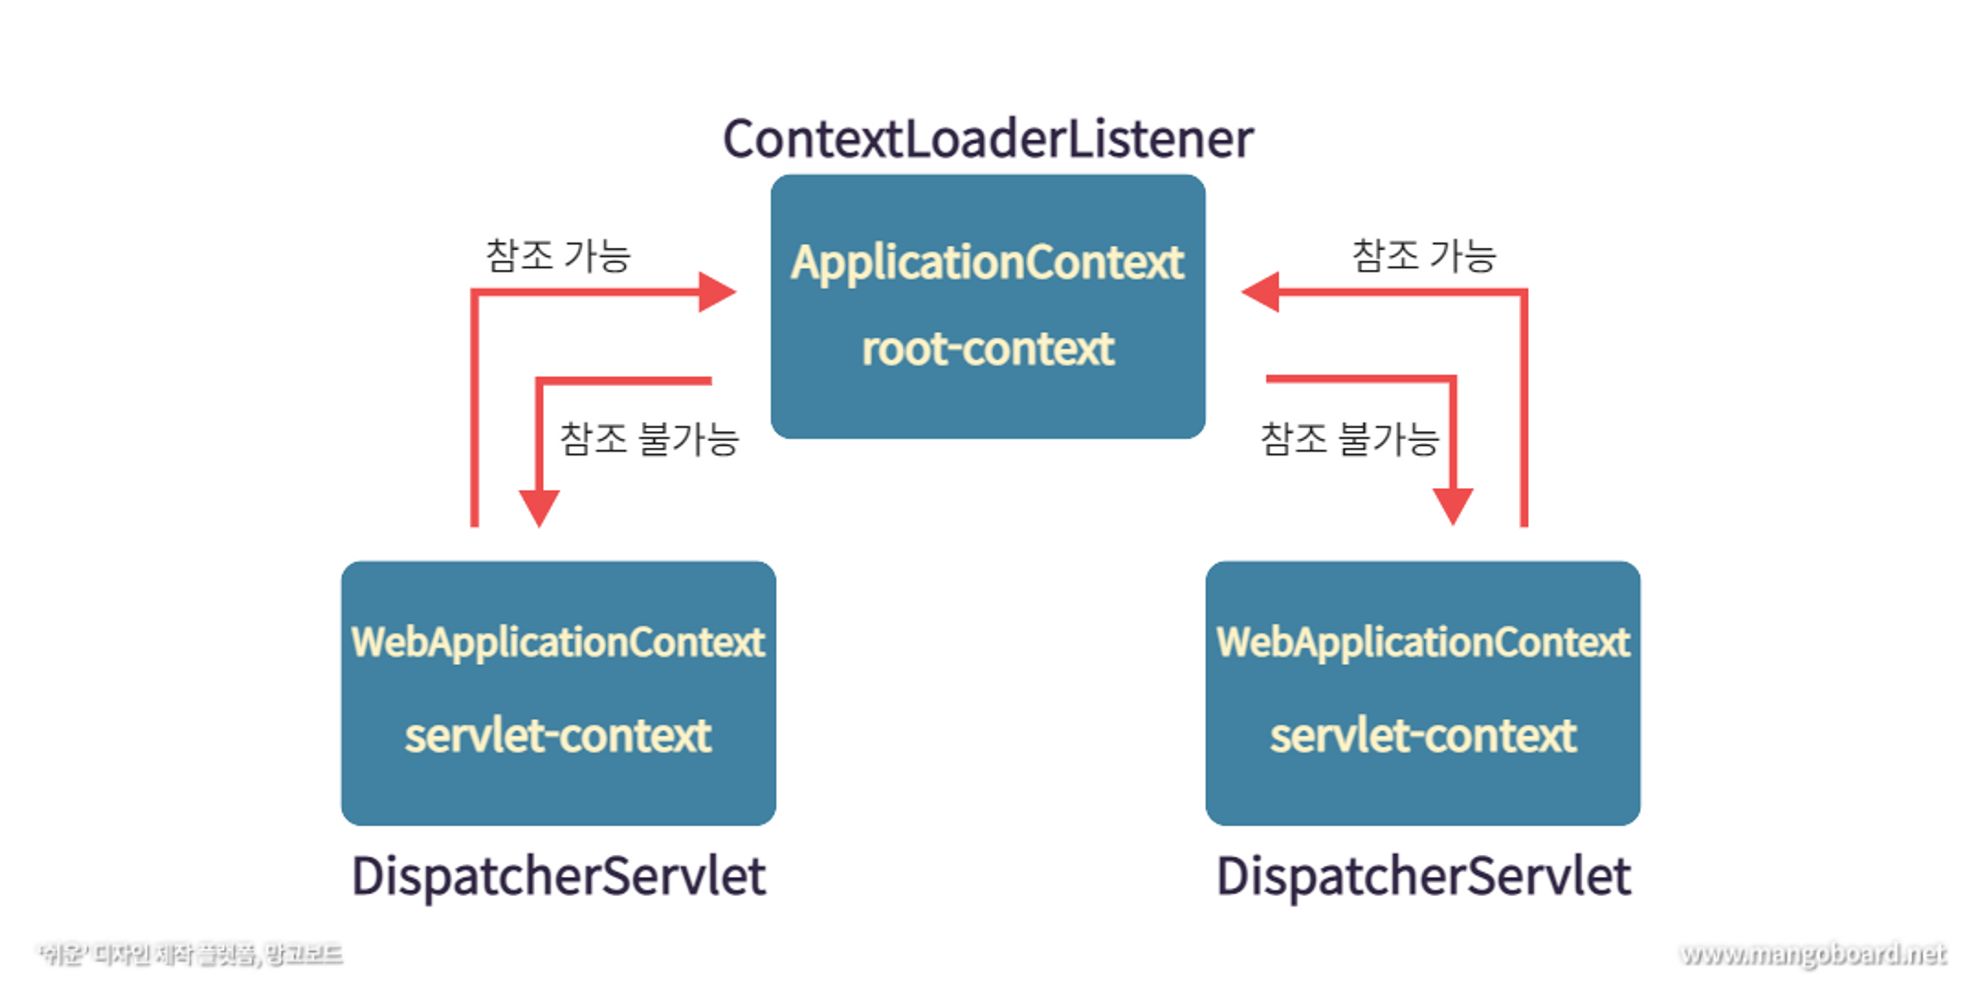
RootApplicationContext
- root-context에 등록되는 빈들은 모든 컨텍스트에서 사용할 수 있다 ⇒ 서로 다른 servlet-context에서 공유해야 하는 빈들을 등록해놓고 사용
- 웹 환경에 독립적인 빈들을 담아둔다((@Service, @Repository, @Configuration, @Component))
- Application Context에 정의된 Bean은 Servlet Context에 정의 된 Bean을 사용할 수 없다.
Servlet Context(servlet-context.xml)
- Servlet 단위로 생성되는 context
- Spring에서 servlet-context.xml 파일은 DispatcherServlet 생성 시에 필요한 설정 정보를 담은 파일(Interceptor, Bean생성, ViewResolver등..)
- URL설정이 있는 Bean을 생성 (@Controller, Interceptor)
- Application Context를 자신의 부모 Context로 사용한다.
- Application Context와 Servlet Context에 같은 id로 된 Bean이 등록 되는 경우,Servlet Context에 선언된 Bean을 사용한다.
- Bean 찾는 순서
- Servlet Context에서 먼저 찾는다.
- 만약 Servlet Context에서 bean을 못찾는 경우 Application Context에 정의된 bean을 찾는다.
- Servlet Context에 정의된 Bean은 Application Context의 Bean을 사용할 수 있다.
-
web.xml 을 통한 구성
- Spring 3.1 까지 DispatcherServlet 을 구성하는 유일한 방법
<web-app xmlns="http://java.sun.com/xml/ns/javaee" version="2.5"> <!-- Creates the Spring Container shared by all Servlets and Filters --> <listener> <listener-class>org.springframework.web.context.ContextLoaderListener</listener-class> </listener> <!-- The definition of the Root Spring Container shared by all Servlets and Filters --> <context-param> <param-name>contextConfigLocation</param-name> <param-value>WEB-INF/beans.xml</param-value> </context-param> ... </web-app>ContextLoaderListener: RootApplicationContext를 생성하는 클래스<context-param>태그 내부 contextConfigLocation 설정파일을 읽어 RootApplicationContext를 생성한다.
<web-app xmlns="http://java.sun.com/xml/ns/javaee" version="2.5"> ... <!-- Processes application requests --> <servlet> <servlet-name>spring-web-app</servlet-name> <servlet-class>org.springframework.web.servlet.DispatcherServlet</servlet-class> <init-param> <param-name>contextConfigLocation</param-name> <param-value>/WEB-INF/spring/appServlet/servlet-context.xml</param-value> </init-param> <load-on-startup>1</load-on-startup> </servlet> <servlet-mapping> <servlet-name>spring-web-app</servlet-name> <url-pattern>/*</url-pattern> </servlet-mapping> </web-app><servlet>태그 내부 contextConfigLocation 설정파일(sertvlet-context.xml)을 읽어 servlet-context를 생성
-
하이브리드 구성 ⇒
XmlWebApplicationContext- Servlet API 3.0 버전이 채택됨에 따라 web.xml 파일이 선택 사항이되었으며 Java를 사용하여 DispatcherServlet 을 구성 할 수 있게 되었음
public class XmlWebApplicationInitializer implements WebApplicationInitializer { @Override public void onStartup(ServletContext container) throws ServletException { XmlWebApplicationContext context = new XmlWebApplicationContext(); context.setConfigLocation("/WEB-INF/beans.xml"); ServletRegistration.Dynamic dispatcher = container .addServlet("dispatcher", new DispatcherServlet(context)); dispatcher.setLoadOnStartup(1); dispatcher.addMapping("/"); } }WebApplicationInitializer인터페이스 구현onStartup메서드를 재정의 (Configuration 파일 등록)- 인스턴스화 한 컨텍스트로 DispatcherServlet의 인스턴스 생성
- URL 매핑하여 서블릿 등록
-
자바를 통한 구성 ⇒
AnnotationConfiWebgApplicationInitializerpublic class AnnotationConfigWebApplicationInitializer implements WebApplicationInitializer { @Override public void onStartup(ServletContext container) throws ServletException { AnnotationConfigWebApplicationContext context = new AnnotationConfigWebApplicationContext(); context.setServletContext(container); context.register(ConfigurationComponentScan.class); context.refresh(); ServletRegistration.Dynamic dispatcher = container .addServlet("dispatcher", new DispatcherServlet(context)); dispatcher.setLoadOnStartup(1); dispatcher.addMapping("/"); } }- 어노테이션을 통한 디스패처서블릿 구성 설정(컴포넌트 스캔)
- 위의 설정을 컨텍스트에 등록
Spring Boot
- SpringBootConsoleApplication → CommandLineRunner
- SpringBootWebApplication → Embedded Tomcat