Links
원문
- https://raytracing.github.io/books/RayTracingInOneWeekend.html
- https://github.com/RayTracing/InOneWeekend
유튜브
- https://www.youtube.com/watch?v=8RhYo0S6cus
- https://github.com/jarreed0/raytracer
- 강의에 나온 예제를 사용하려면 sdl2 설치 필요 https://www.libsdl.org/download-2.0.php
- SDL latest 버전 다운 받고 압축 해제 한 다음 폴더에서
$ ./config
$ make
$ make install- build.sh 로 컴파일 할 때
./sdltemplate.h:24:13: error: expected ';' at end of declaration
 SDL_Color c{r,g,b,a};
오류나면 SDL_Color c = {r,g,b,a}; 로 변경
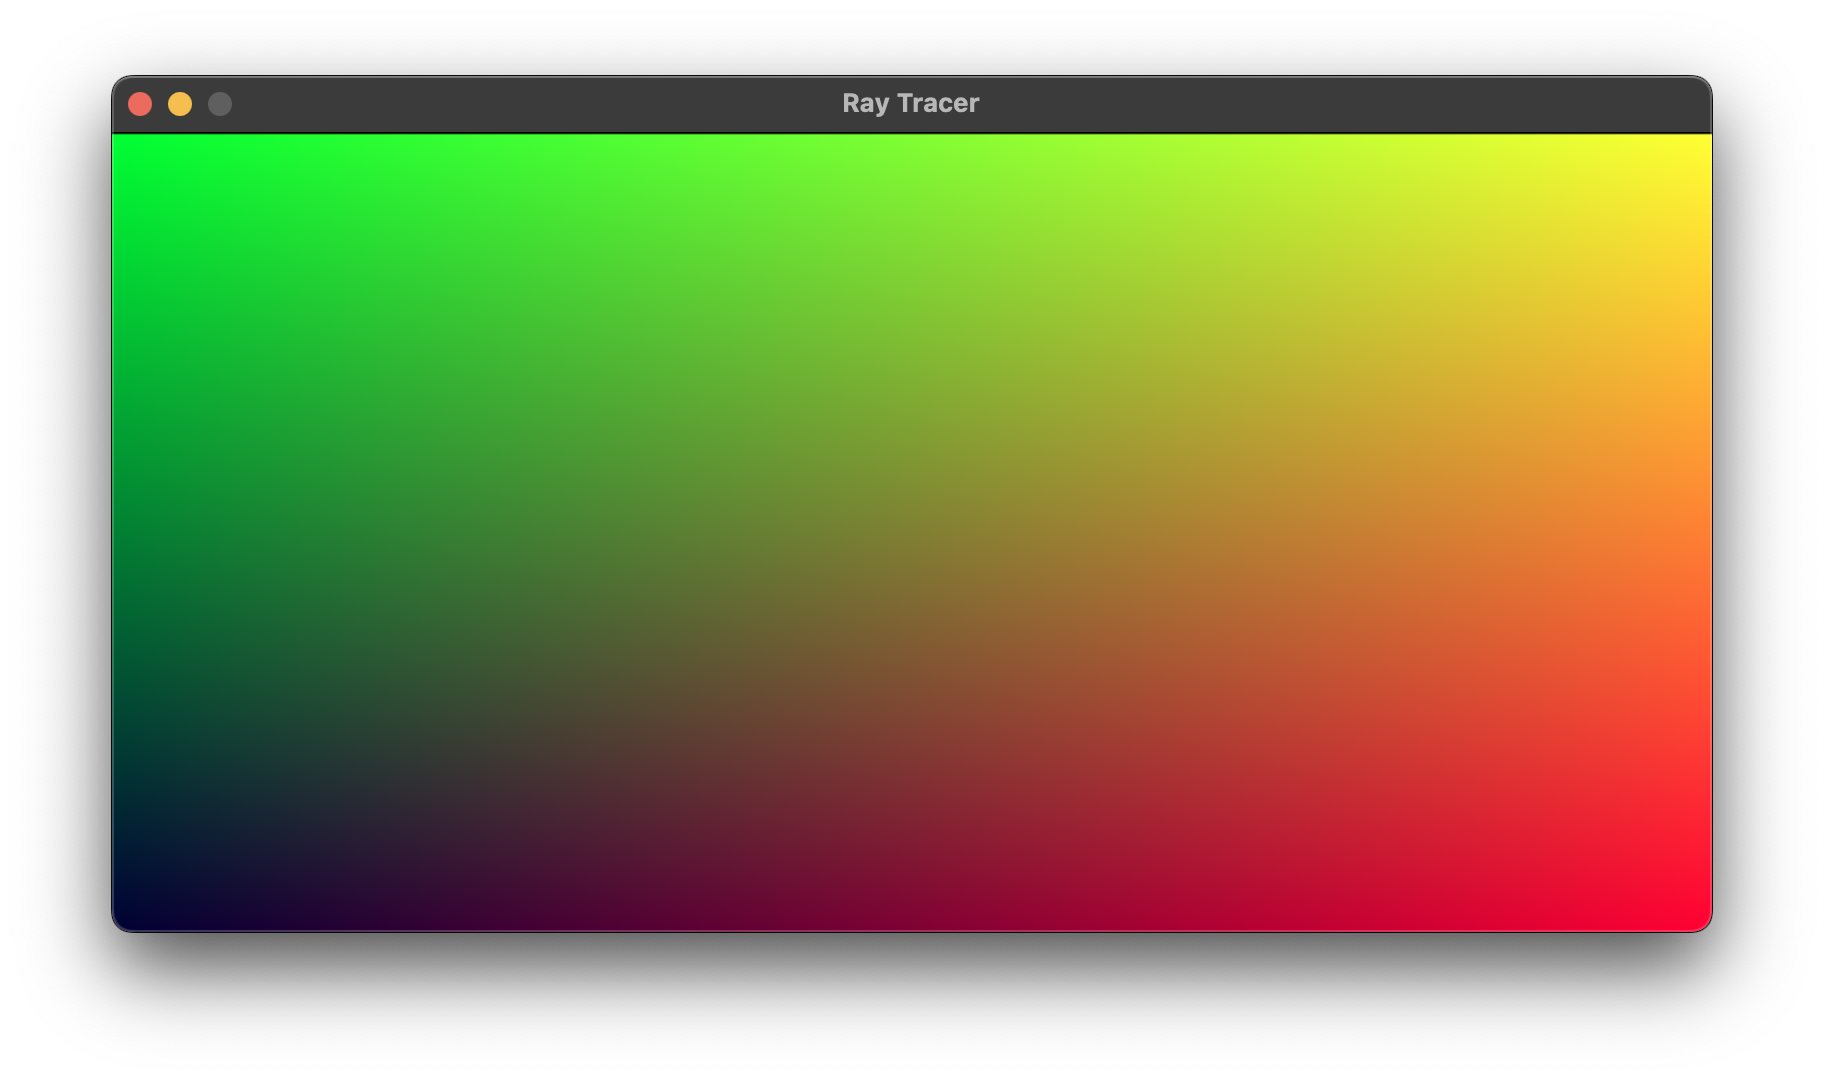
2. Output an Image
- ray 없이 그냥 rgb값 넣어서 출력 연습
The PPM Image Format
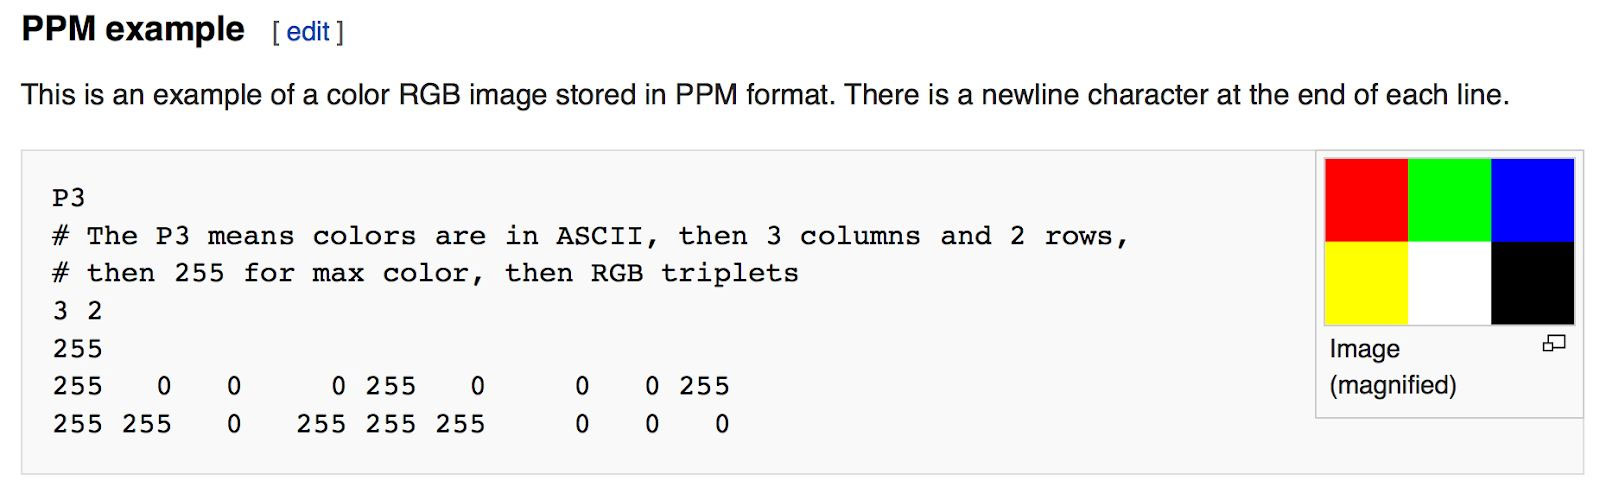
- P3: ascii 로 쓰겠다.
- coloumn, row 써 줌
- 한 coloumn 당 r,g,b 값 입력
3. The vec3 Class
- 멤버변수로 double형 3개를 담을 수 있는 클래스이다.
- rgb 값을 담거나 x,y,z point를 담을 수 있는 역할을 하는듯
- 그래서 alias로 point3, color를 제공하고 있음
- 함수로는 기본적인
덧셈 뺄셈 곱셈 나눗셈연산을 지원. 더하여dot product,cross product,unit vector를 지원.
dot product(내적, 스칼라곱)
- 두 벡터의 내적이 가지는 기하학적 의미는
한 벡터를 다른 벡터위로 정사영시킨 길이와 그다른 벡터의 길이의곱셈이다.
cross product(외적)
- 두 벡터의
수직인 벡터를 구하는 방법이다.
unit vector(단위 벡터)
- 길이가 1인 벡터
- 벡터의 정규화: v와 같은 방향을 가지는 단위벡터 u를 생성하는 것.
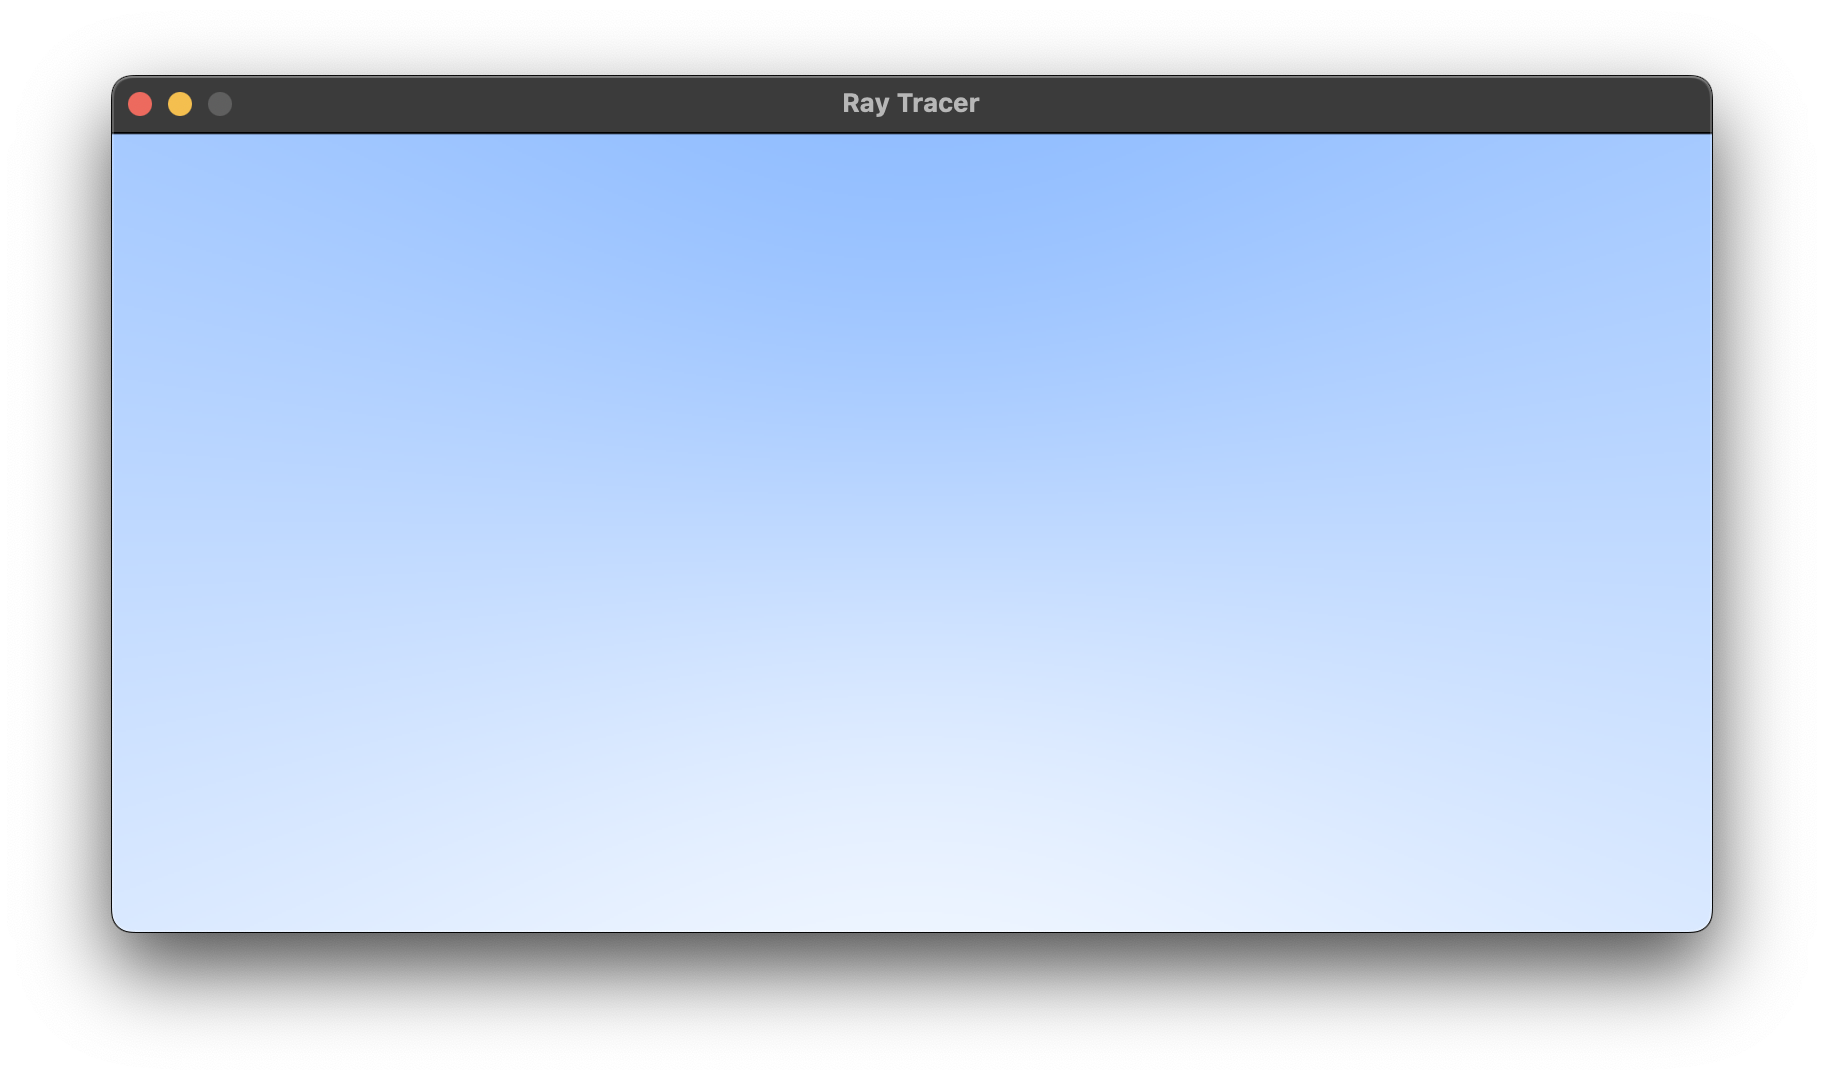
4. Rays, a Simple Camera, and Background
The ray Class
-
origin과direction으로 생성 -
direction: (v1 - v0) / length (도착점 - 시작점) / 거리
https://gpgstudy.com/forum/viewtopic.php?t=15441ray r(origin, lower_left_corner + u*horizontal + v*vertical - origin); -
P(t) = A + tb -
origin ray
A, directionb, real numbert
Sending Rays Into the Scene
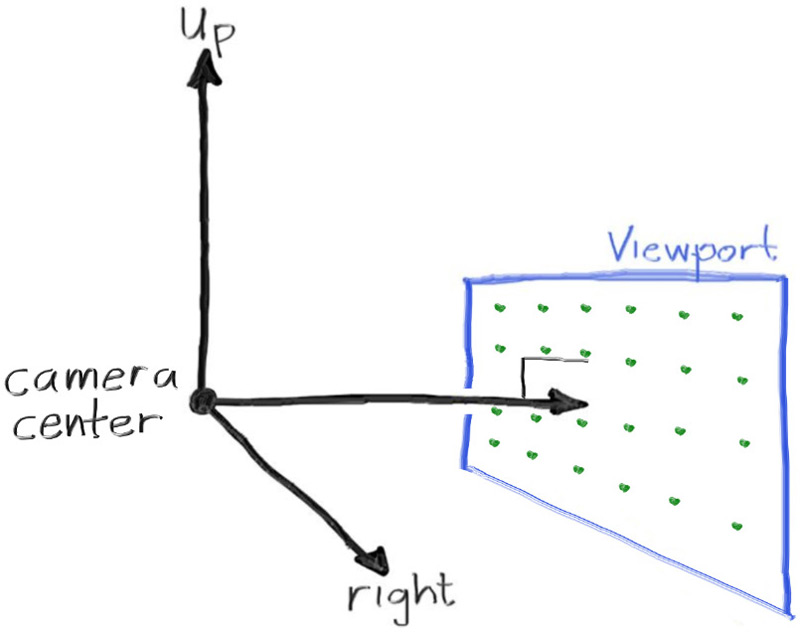
- 눈(가상 카메라)을
(0,0,0)으로 잡고 오른손 좌표계 사용(z축 방향이 반대)
https://raytracing.github.io/images/fig-1.03-cam-geom.jpg
카메라에서 픽셀까지의 광선계산- 광선이
교차하는객체를 정하기 - 해당
교차점의 색상정하기
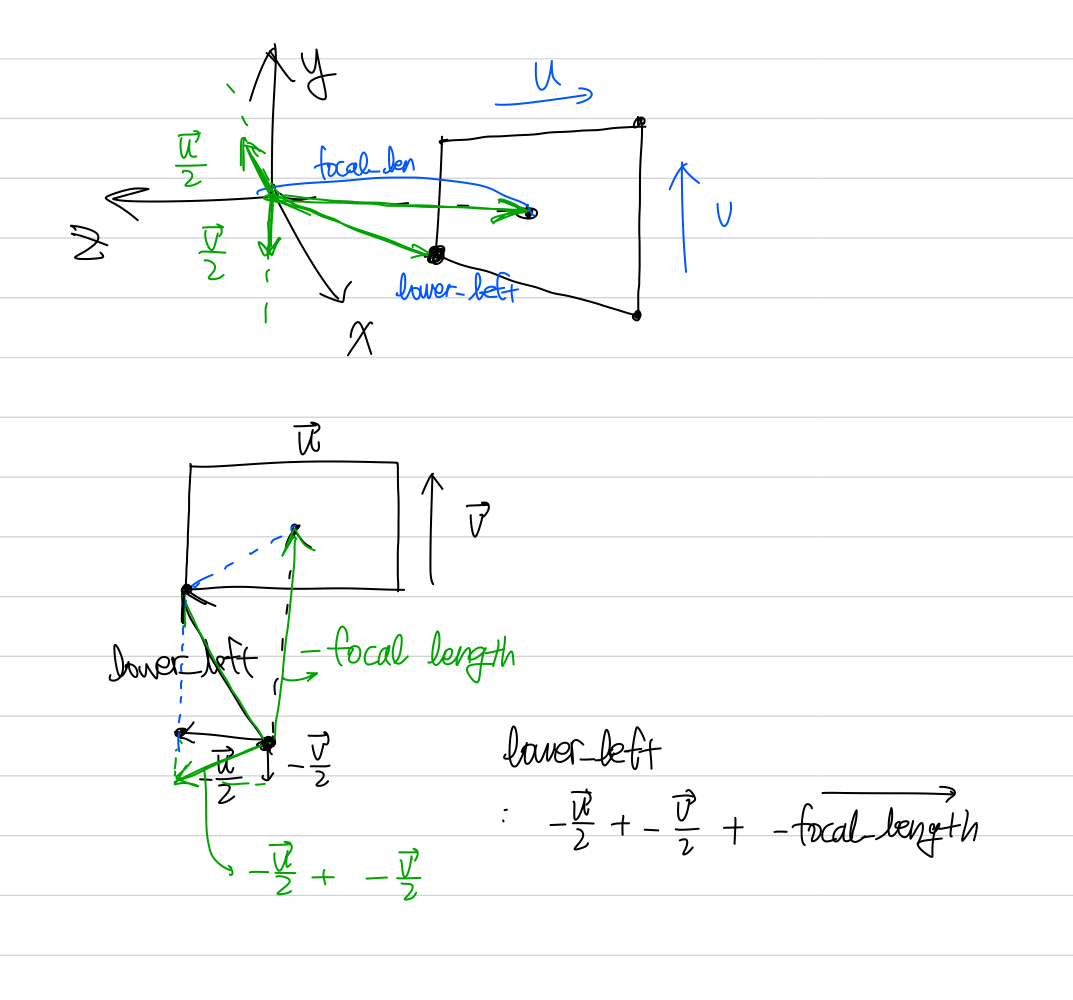
auto origin = point3(0, 0, 0);
auto horizontal = vec3(viewport_width, 0, 0);
auto vertical = vec3(0, viewport_height, 0);
auto lower_left_corner = origin - horizontal/2 - vertical/2 - vec3(0, 0, focal_length);- origin: 카메라 좌표
- horizontal, vertical: 오프셋 벡터인듯. viewport_width, viewport_height로 세팅.
- "그리고 스크린을 교차하는 광선의 끝점을 움직이기 위해 두 오프셋 벡터를 사용합니다. ray direction을 단위 길이 벡터로 만들지 않는다는 점에 유의하십시오. 그렇게 하지 않으면 코드가 더 간단하고 약간 더 빨라질 것이라고 생각하기 때문입니다" --> 이게 뭔말일까
- focal length:
카메라에서투영평면까지의거리 - focal length 알아보기
https://computergraphics.stackexchange.com/questions/10593/is-focal-length-equal-to-the-distance-from-the-optical-center-to-the-near-clippi - 암튼 lower_left_corner부터 u, v 가지고 적절히 벡터 더해가면서 lower_left_corner +u, +v범위 == right_top_corner까지 ray구하는 것
5. Adding a Sphere
Ray-Sphere Intersection
- ray가 구와 만나는지 알고 싶으면 의 해가 존재하는지 알면 된다. 위 식을 다시 풀어 쓰면
(C는 sphere) - t에 대한 이차방정식 으로 나타냈을 때
a:
b:
c: - 판별식 사용 가능
- 서로 다른 실근: 두 점 교차, 중근: 한 점 교차, 허근: 안 지나감
Creating Our First Raytraced Image
bool hit_sphere(const point3& center, double radius, const ray& r) {
vec3 oc = r.origin() - center; // (𝐀−𝐂)
auto a = dot(r.direction(), r.direction()); // 𝐛⋅𝐛
auto b = 2.0 * dot(oc, r.direction()); // 2𝐛⋅(𝐀−𝐂)
auto c = dot(oc, oc) - radius*radius; // (𝐀−𝐂)⋅(𝐀−𝐂)−𝑟^2
auto discriminant = b*b - 4*a*c;
return (discriminant > 0);
}
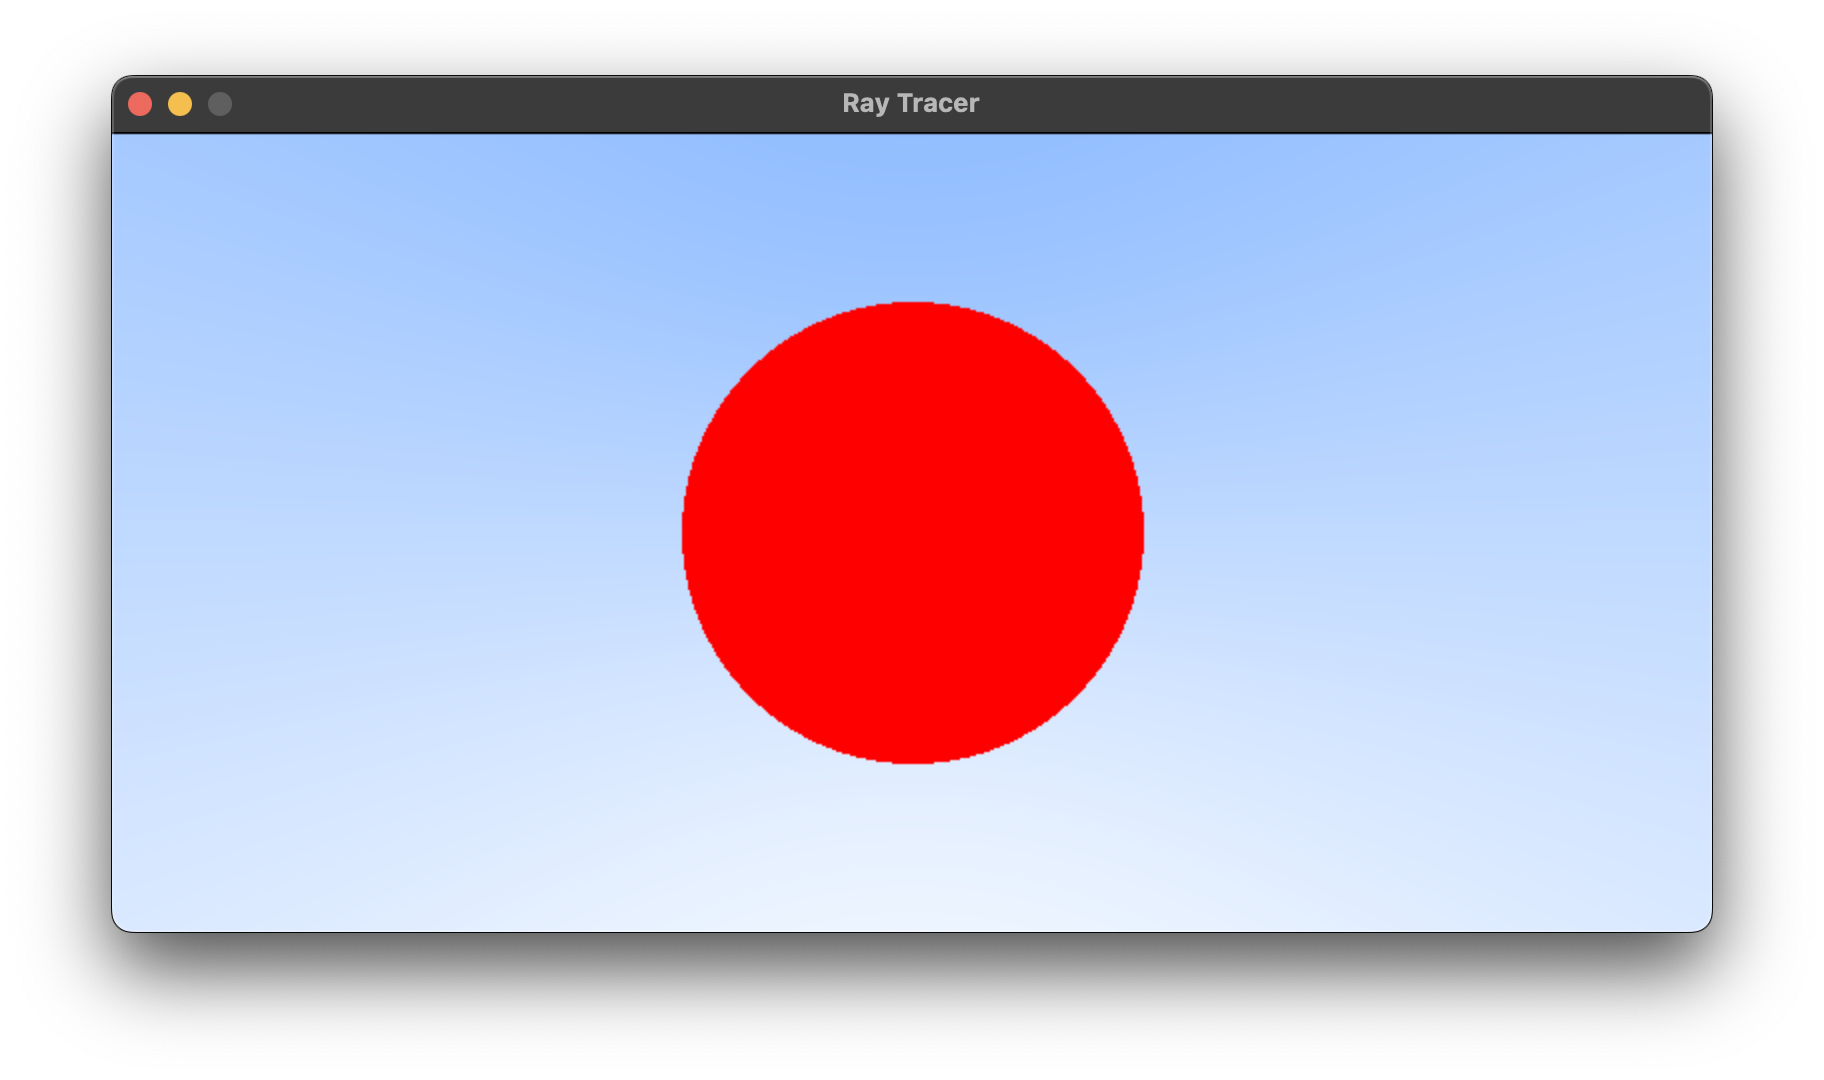
color ray_color(const ray& r) {
if (hit_sphere(point3(0,0,-1), 0.5, r)) // ray와 sphere이 교차하는 부분이라면
return color(1, 0, 0); // red 리턴
vec3 unit_direction = unit_vector(r.direction());
auto t = 0.5*(unit_direction.y() + 1.0);
return (1.0-t)*color(1.0, 1.0, 1.0) + t*color(0.5, 0.7, 1.0);
}- dot product로 벡터를 스칼라로 바꿔줌
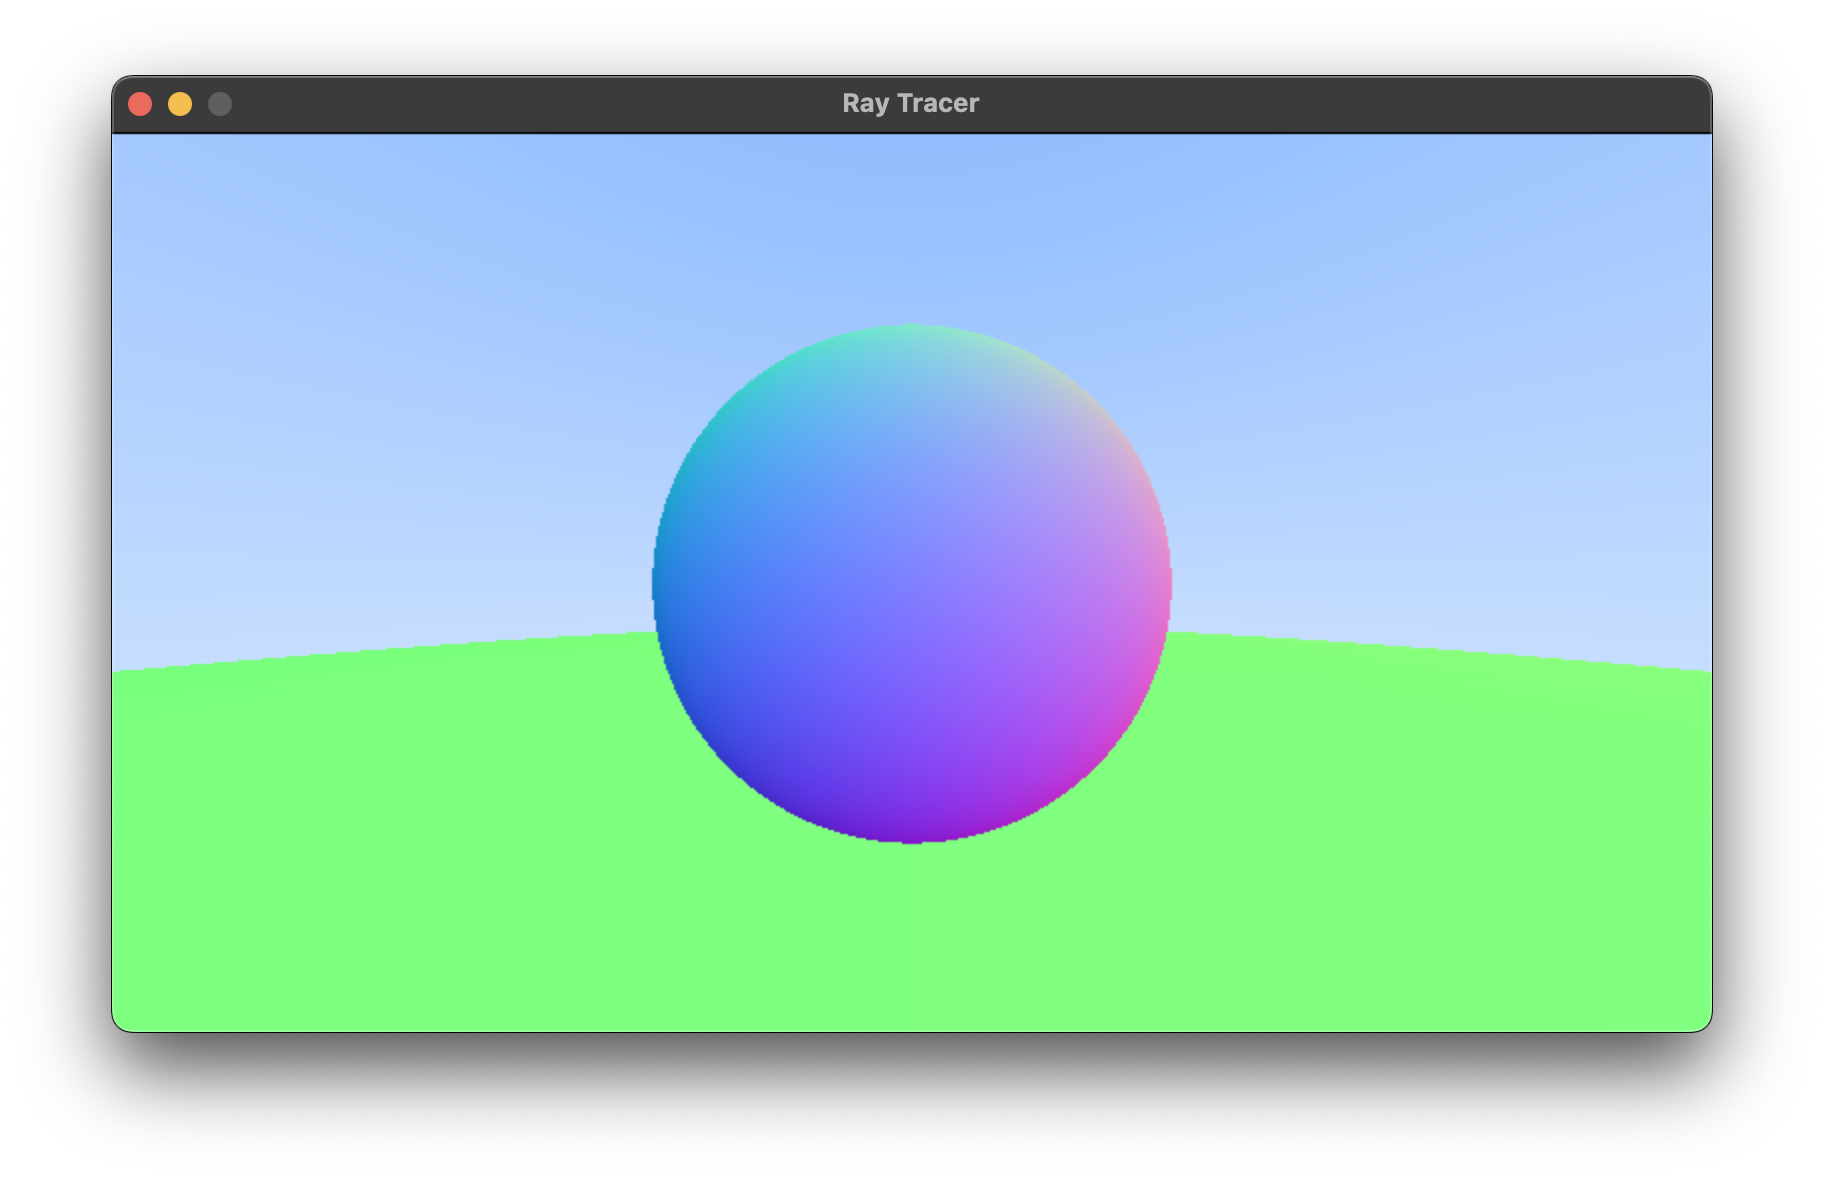
6. Surface Normals and Multiple Objects
Shading with Surface Normals
- 음영 넣는 단계
Surface Normals: 표면법선- 법선: 기하학에서 법선은 주어진
객체에수직인 선, 광선 또는 벡터와 같은 객체 - 표면의 점
P에서의outward normal은P - C(center)direction에 놓여있다.
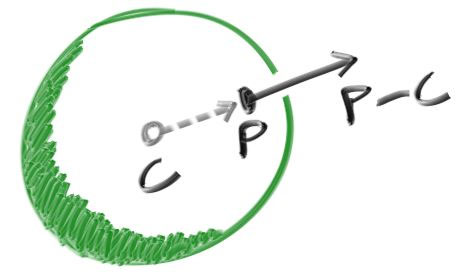
- 법선을 위해선 hit 하는지 안 하는지 뿐만 아니라 hit point도 알아야 함
double hit_sphere(const point3& center, double radius, const ray& r) {
vec3 oc = r.origin() - center;
auto a = dot(r.direction(), r.direction());
auto b = 2.0 * dot(oc, r.direction());
auto c = dot(oc, oc) - radius*radius;
auto discriminant = b*b - 4*a*c;
if (discriminant < 0) {
return -1.0;
} else {
return (-b - sqrt(discriminant) ) / (2.0*a); // 실제 근을 리턴 함
}
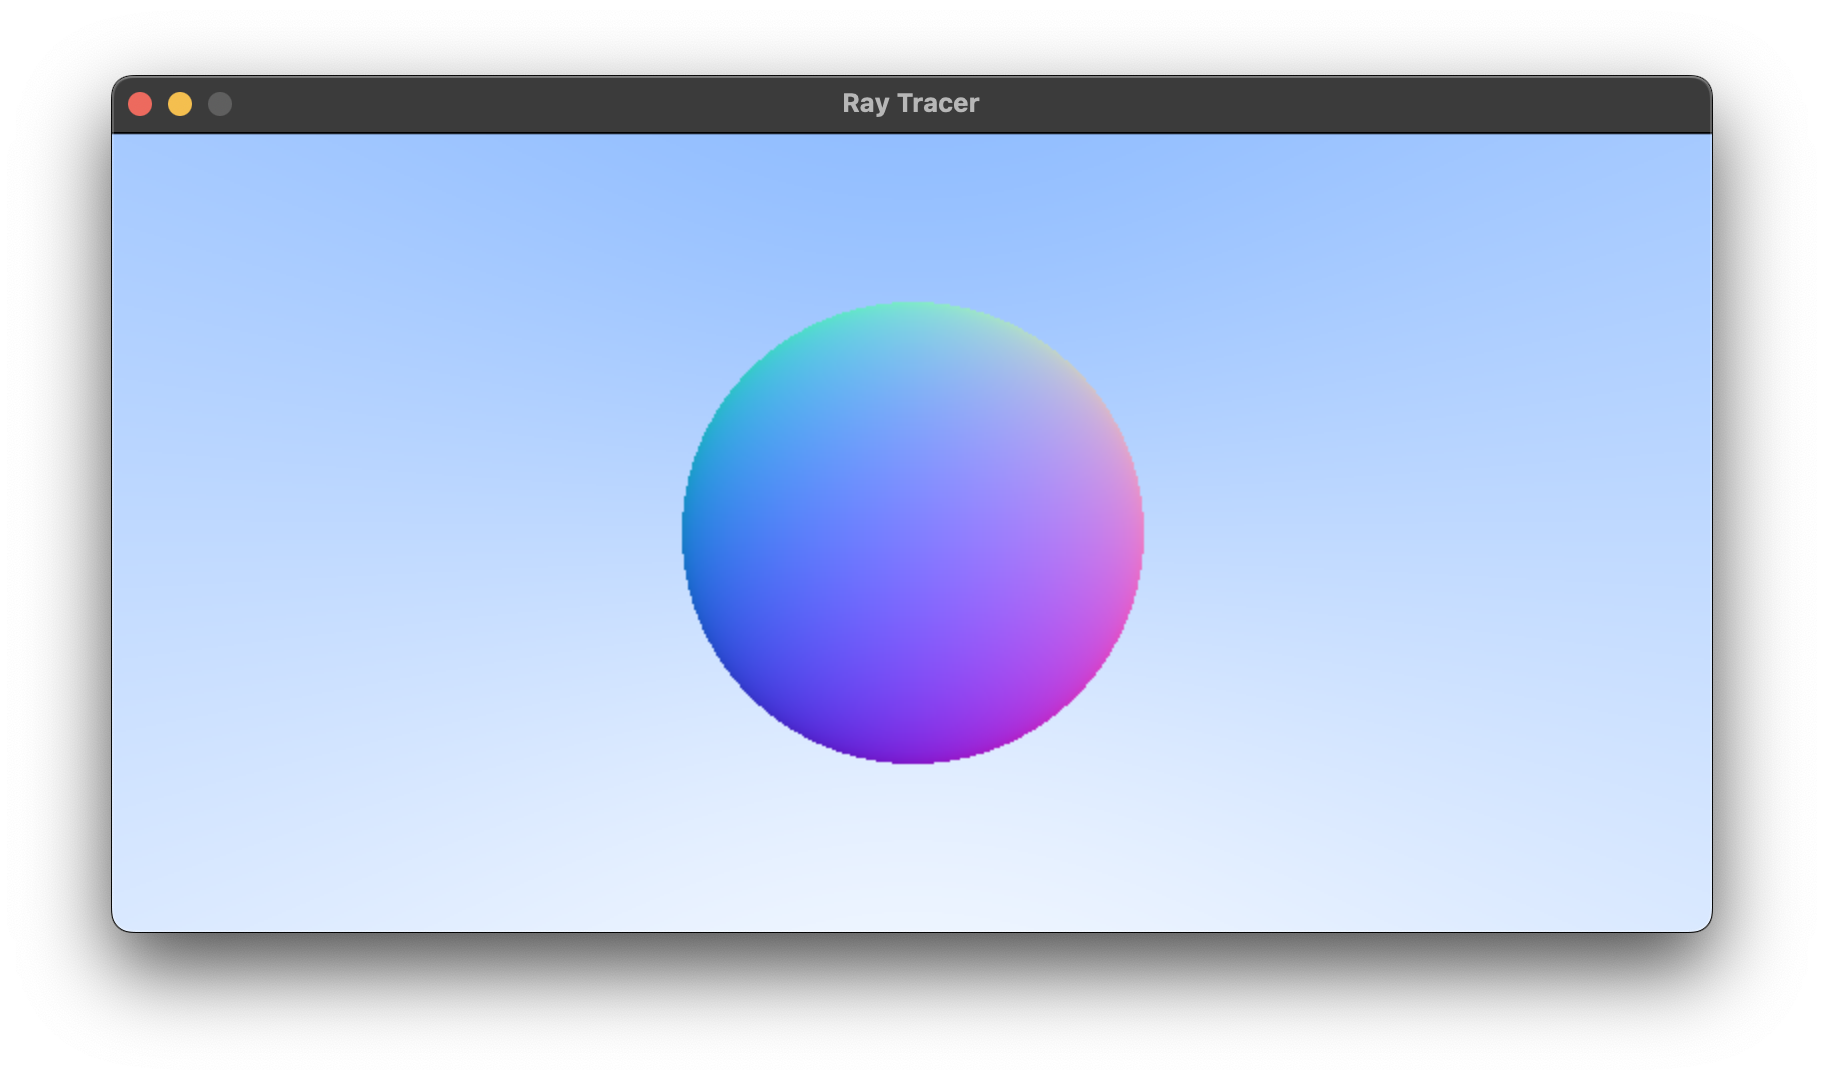
}color ray_color(const ray& r) {
auto t = hit_sphere(point3(0,0,-1), 0.5, r);
if (t > 0.0) {
vec3 N = unit_vector(r.at(t) - vec3(0,0,-1)); // P - C direction
return 0.5*color(N.x()+1, N.y()+1, N.z()+1);
}
vec3 unit_direction = unit_vector(r.direction());
t = 0.5*(unit_direction.y() + 1.0);
return (1.0-t)*color(1.0, 1.0, 1.0) + t*color(0.5, 0.7, 1.0);
}Simplifying the Ray-Sphere Intersection Code
- 에서
- 가 이기 때문에 half_를 로 다시 계산하면
- 말고 로 판별식 변경 가능

double hit_sphere(const point3& center, double radius, const ray& r) {
    vec3 oc = r.origin() - center;
    auto a = r.direction().length_squared(); // dot 함수 말고 vec3 class의 length_squared 함수 사용
    auto half_b = dot(oc, r.direction()); // 𝐛⋅(𝐀−𝐂)
    auto c = oc.length_squared() - radius*radius; // dot 함수 말고 length_squared 사용
    auto discriminant = half_b*half_b - a*c; // h^2 - ac

    if (discriminant < 0) {
        return -1.0;
    } else {
        return (-half_b - sqrt(discriminant) ) / a;
    }
}
An Abstraction for Hittable Objects
- 이해를 못 하겠다..
- 여러 개의 구를 다루고 싶을 때, array of spheres를 사용하는 것이 아니라 "abstract class" for anything a ray might hit을 만들라는 내용
- 흠 그니까 hit 함수를 순수가상함수로 두는 게 포인트인듯
- hit 함수를 순수 가상함수로 둬서 상속 받은 객체에서 각 방정식에 맞게 구현하게끔
#ifndef HITTABLE_H
#define HITTABLE_H

#include "ray.h"

struct hit_record {
    point3 p; // 표면 위 한 점 p
    vec3 normal; // p에서의 법선
    double t; // ray가 p에 닿을 때의 t?
};

class hittable {
    public:
        virtual bool hit(const ray& r, double t_min, double t_max, hit_record& rec) const = 0;
        // hit 함수를 순수 가상함수로 둬서 상속 받은 객체에서 각 방정식에 맞게 구현하게끔
};

#endif
Front Faces Versus Back Faces
- ray가 나오는 방향도 중요함
- ray direction과 outward_normal의 스칼라곱으로 front_face인지 결정 후 normal을 front face는 outward_normal 그대로,back face는 -outward_normal로 설정해 준다.
struct hit_record {
    point3 p;
    vec3 normal;
    double t;
    bool front_face;

    inline void set_face_normal(const ray& r, const vec3& outward_normal) {
        front_face = dot(r.direction(), outward_normal) < 0;
        normal = front_face ? outward_normal :-outward_normal;
    }
};
bool sphere::hit(const ray& r, double t_min, double t_max, hit_record& rec) const {
...
rec.t = root;
rec.p = r.at(rec.t);
vec3 outward_normal = (rec.p - center) / radius;
rec.set_face_normal(r, outward_normal);
return true;
}A List of Hittable Objects
bool hittable_list::hit(const ray& r, double t_min, double t_max, hit_record& rec) const {
    hit_record temp_rec;
    bool hit_anything = false;
    auto closest_so_far = t_max;

    for (const auto& object : objects) {
        if (object->hit(r, t_min, closest_so_far, temp_rec)) {
            hit_anything = true;
            closest_so_far = temp_rec.t;
            rec = temp_rec;
        }
    }

    return hit_anything;
}
- 해석 나중에 다시 해보기
7. Antialiasing
- jaggies(계단화)를 없애는 단계
Some Random Number Utilities
- 범위의 난수 발생 함수 필요
- The “less than” before the 1 is important as we will sometimes take advantage of that.
Generating Pixels with Multiple Samples
- For a given pixel we have several samples within that pixel and send rays through each of the samples. The colors of these rays are then averaged
- 샘플에 레이를 쏘고 이 ray의 색상값을 평균낸다 ?
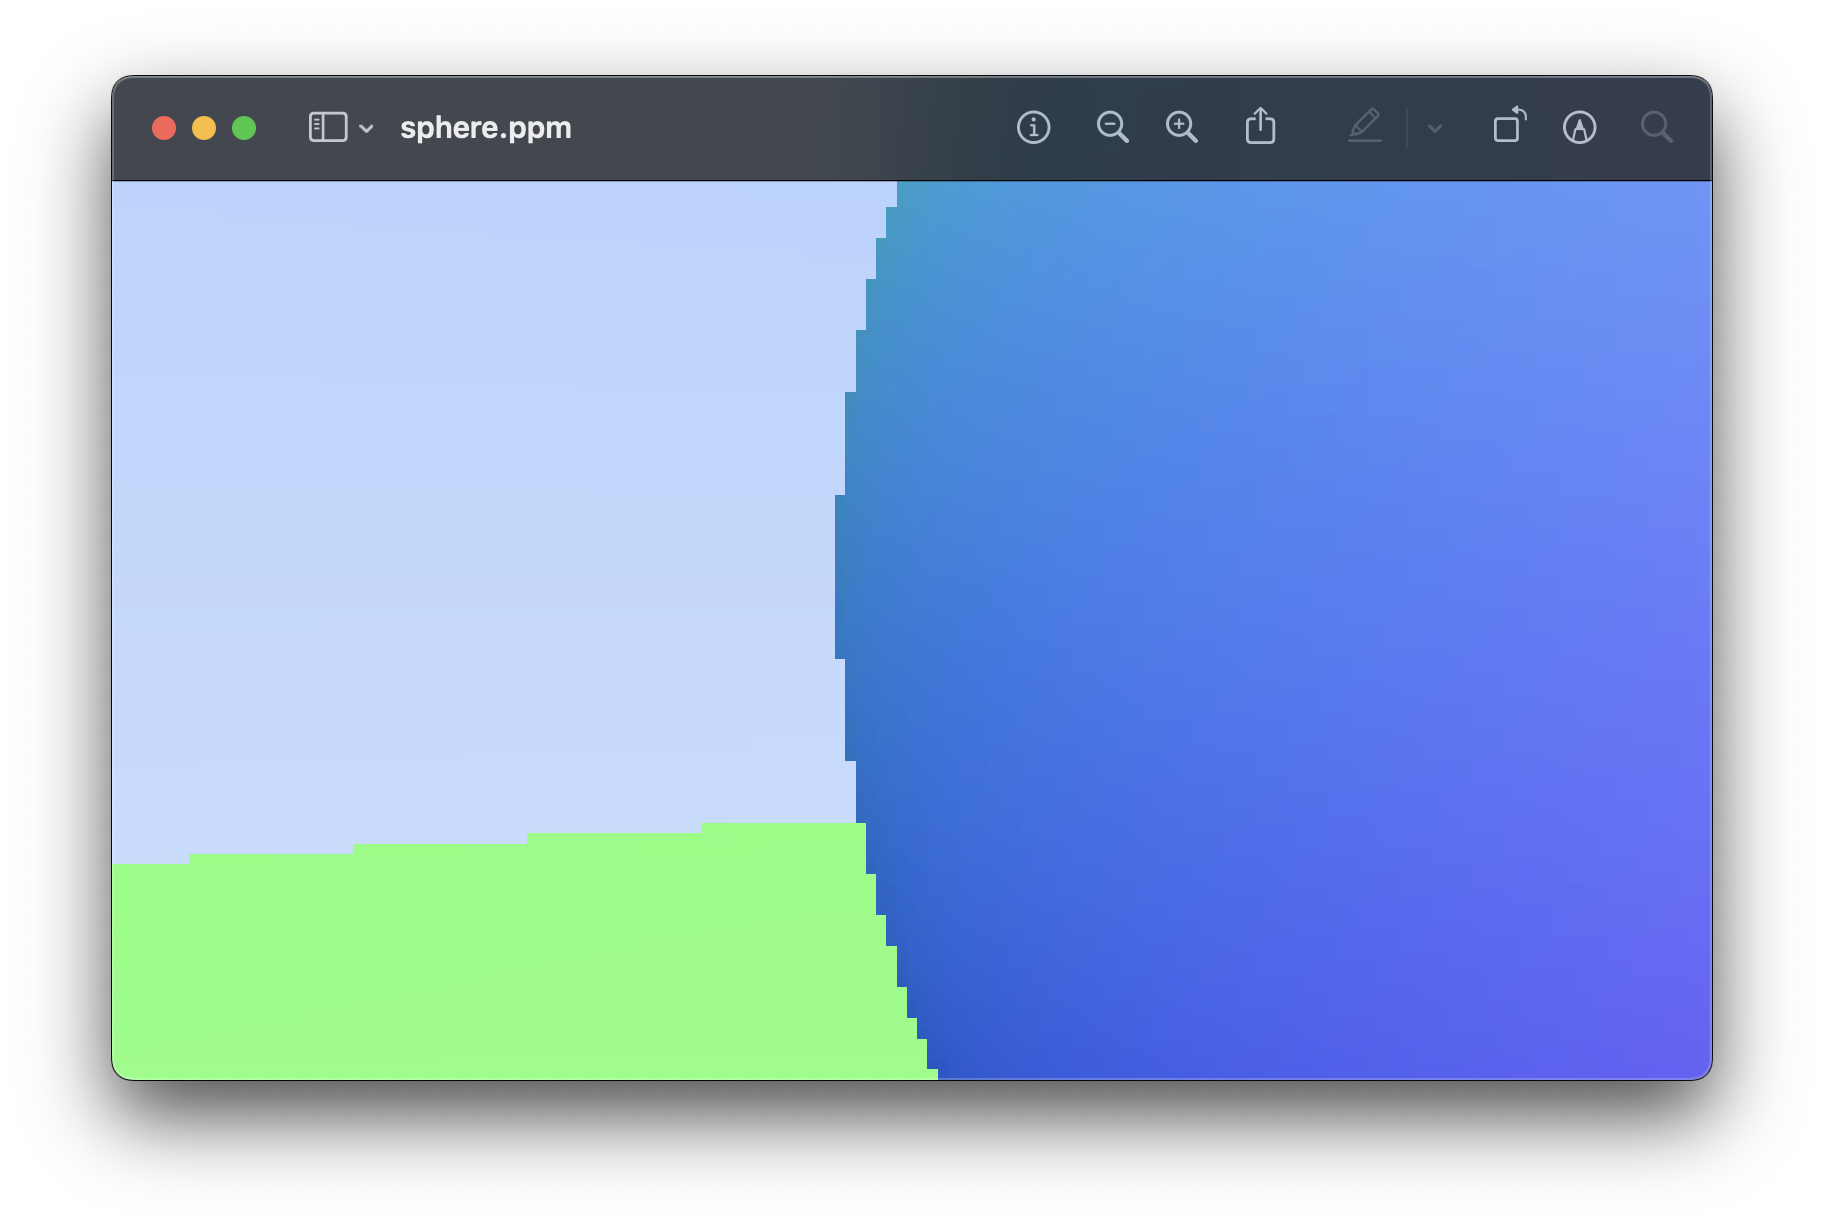 | 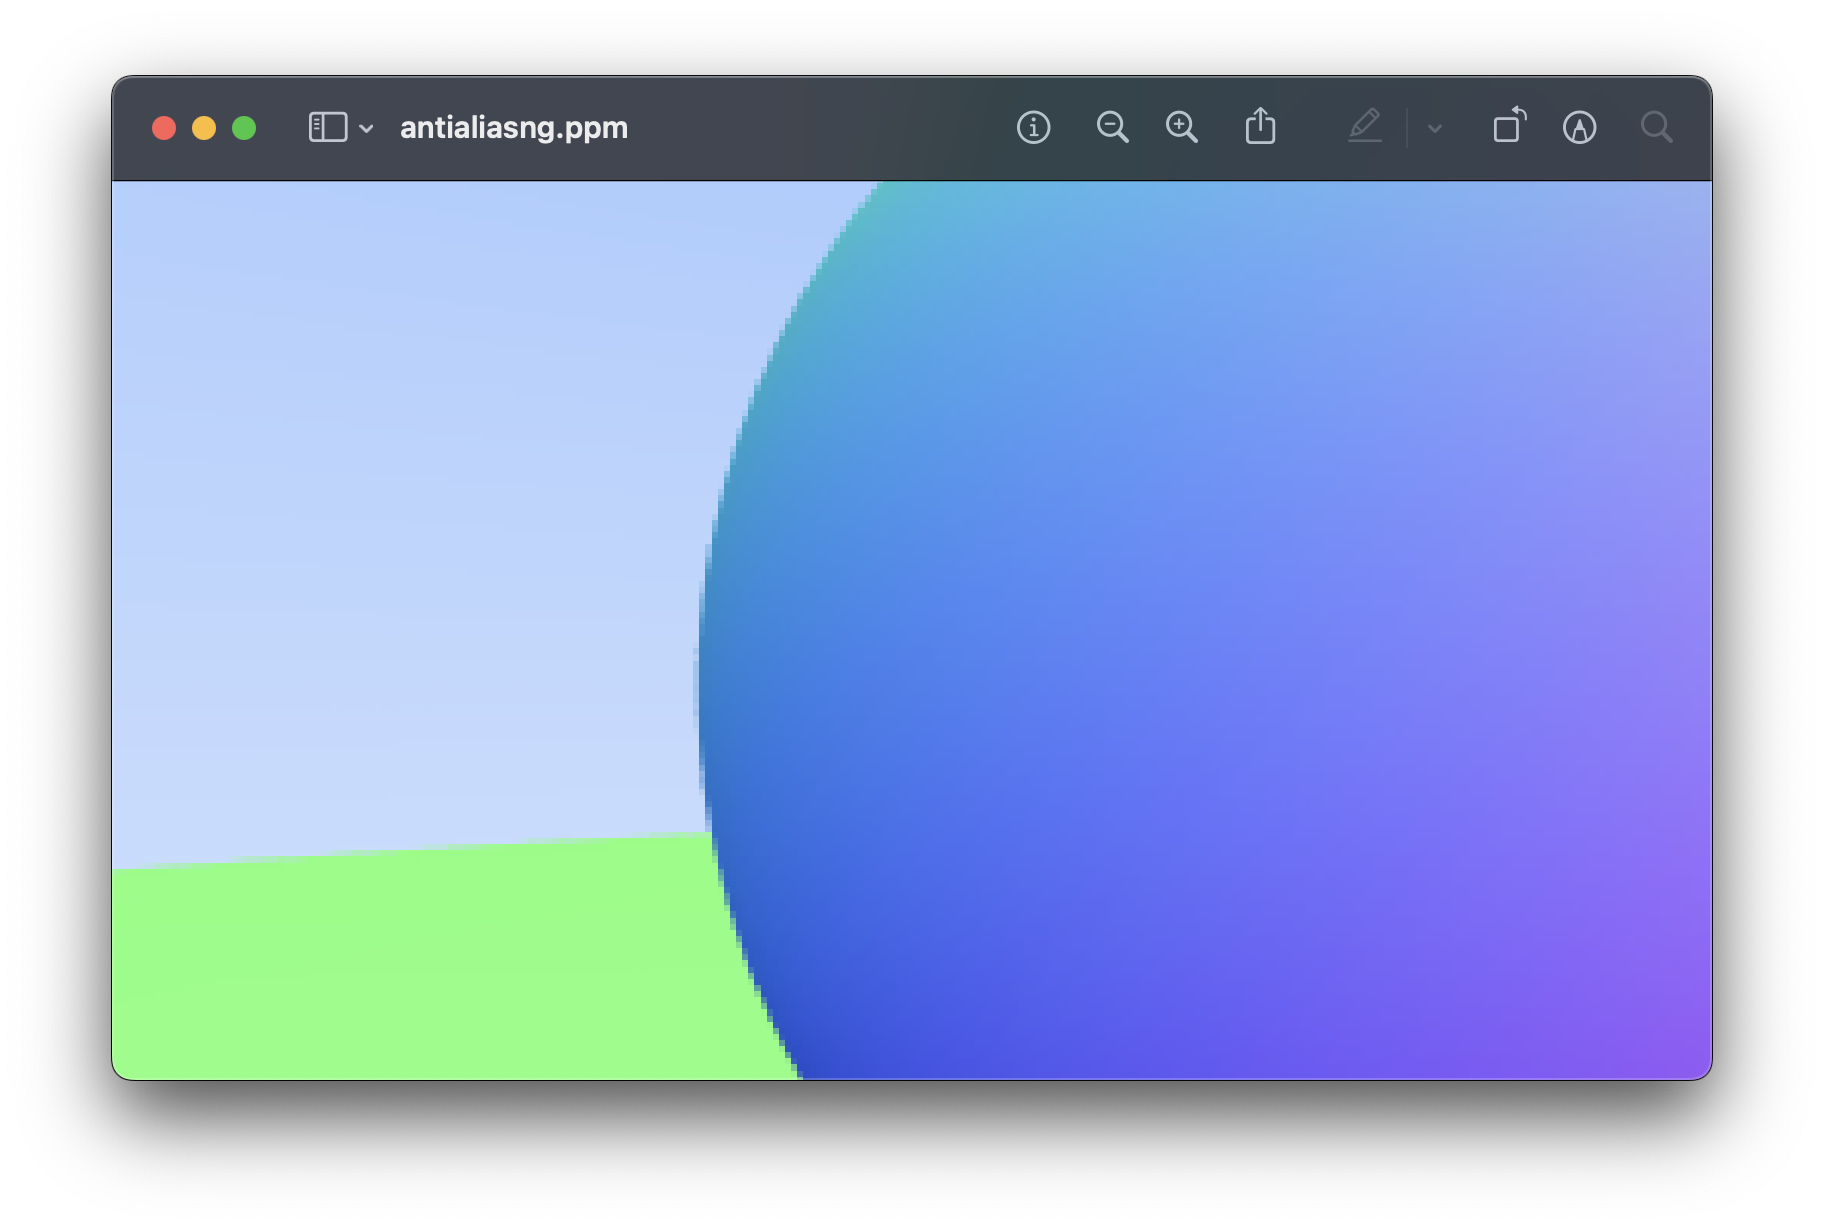 |
|---|
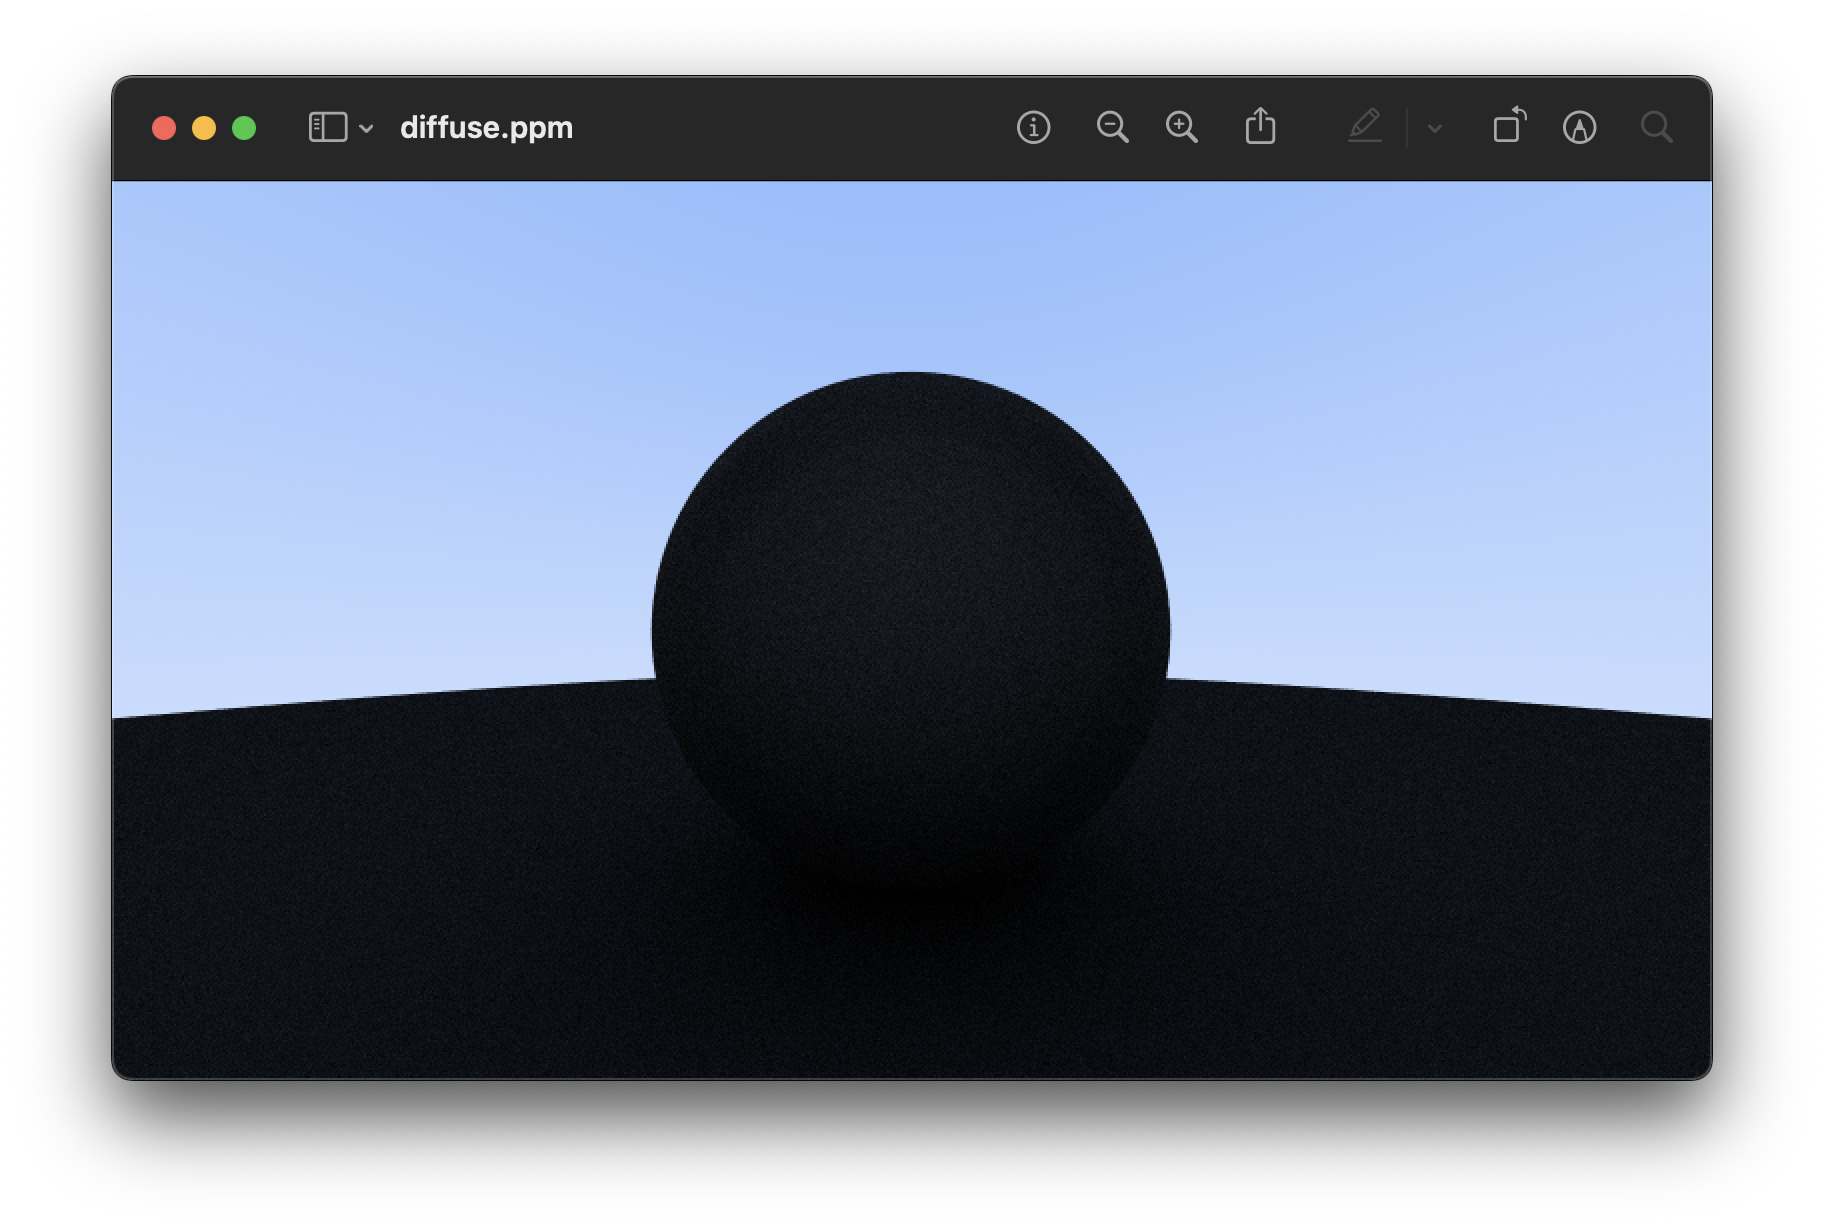
8. Diffuse Materials
A Simple Diffuse Material
-
We’ll start with diffuse (matte) materials.
-
흠 matte material 표현하는 방법을 설명하고 있는 것 같은데.. 뭐라는지 모르겠다
-
Really any algorithm that randomizes direction will produce surfaces that look matte.
-
🫠방향을 무작위로 하는 것이 왜 매트하게 보이게 할까..?

Figure 9: Generating a random diffuse bounce ray -
sphere의 표면 위 한 점 P에 접한 unit radius sphere 두 개가 있음
-
P+n, P-n (n은 P에서의 normal) 을 중심으로 함.
-
P+n이 outside surface, P-n은 inside surface.
-
P에서 outside surface에 접한 구 안에 있는 random point S로 ray 쏜다면 이는 S-P (도착점 - 시작점)
-
We need a way to pick a random point in a unit radius sphere.
-
흠 랜덤 포인트 구하는 방법으로 rejection method 사용할 건데 x, y, z -1~1범위 중 하나 고르고 구 outside에 있는 거면 reject하고 try again 한다
color ray_color(const ray& r, const hittable& world) {
    hit_record rec;

    if (world.hit(r, 0, infinity, rec)) {
        point3 target = rec.p + rec.normal + random_in_unit_sphere();
        return 0.5 * ray_color(ray(rec.p, target - rec.p), world);
    }

    vec3 unit_direction = unit_vector(r.direction());
    auto t = 0.5*(unit_direction.y() + 1.0);
    return (1.0-t)*color(1.0, 1.0, 1.0) + t*color(0.5, 0.7, 1.0);
}
--> 다시 이해해보기
Limiting the Number of Child Rays
- ray_color를 recursive function이 되었음
- When will it stop recursing? When it fails to hit anything.
- 시간 너무 많이 드는 거 막기 위해 limit을 둘 거임
- let's limit the maximum recursion depth, returning no light contribution at the maximum depth:
color ray_color(const ray& r, const hittable& world, int depth) {
    hit_record rec;

    // If we've exceeded the ray bounce limit, no more light is gathered.
    if (depth <= 0)
        return color(0,0,0);

    if (world.hit(r, 0, infinity, rec)) {
        point3 target = rec.p + rec.normal + random_in_unit_sphere();
        return 0.5 * ray_color(ray(rec.p, target - rec.p), world, depth-1); // depth 줄이면서 진행
    }

    vec3 unit_direction = unit_vector(r.direction());
    auto t = 0.5*(unit_direction.y() + 1.0);
    return (1.0-t)*color(1.0, 1.0, 1.0) + t*color(0.5, 0.7, 1.0);
}- 흠 너무 느리다 이게 맞나...? 아 화면 크기 800으로 해놔서
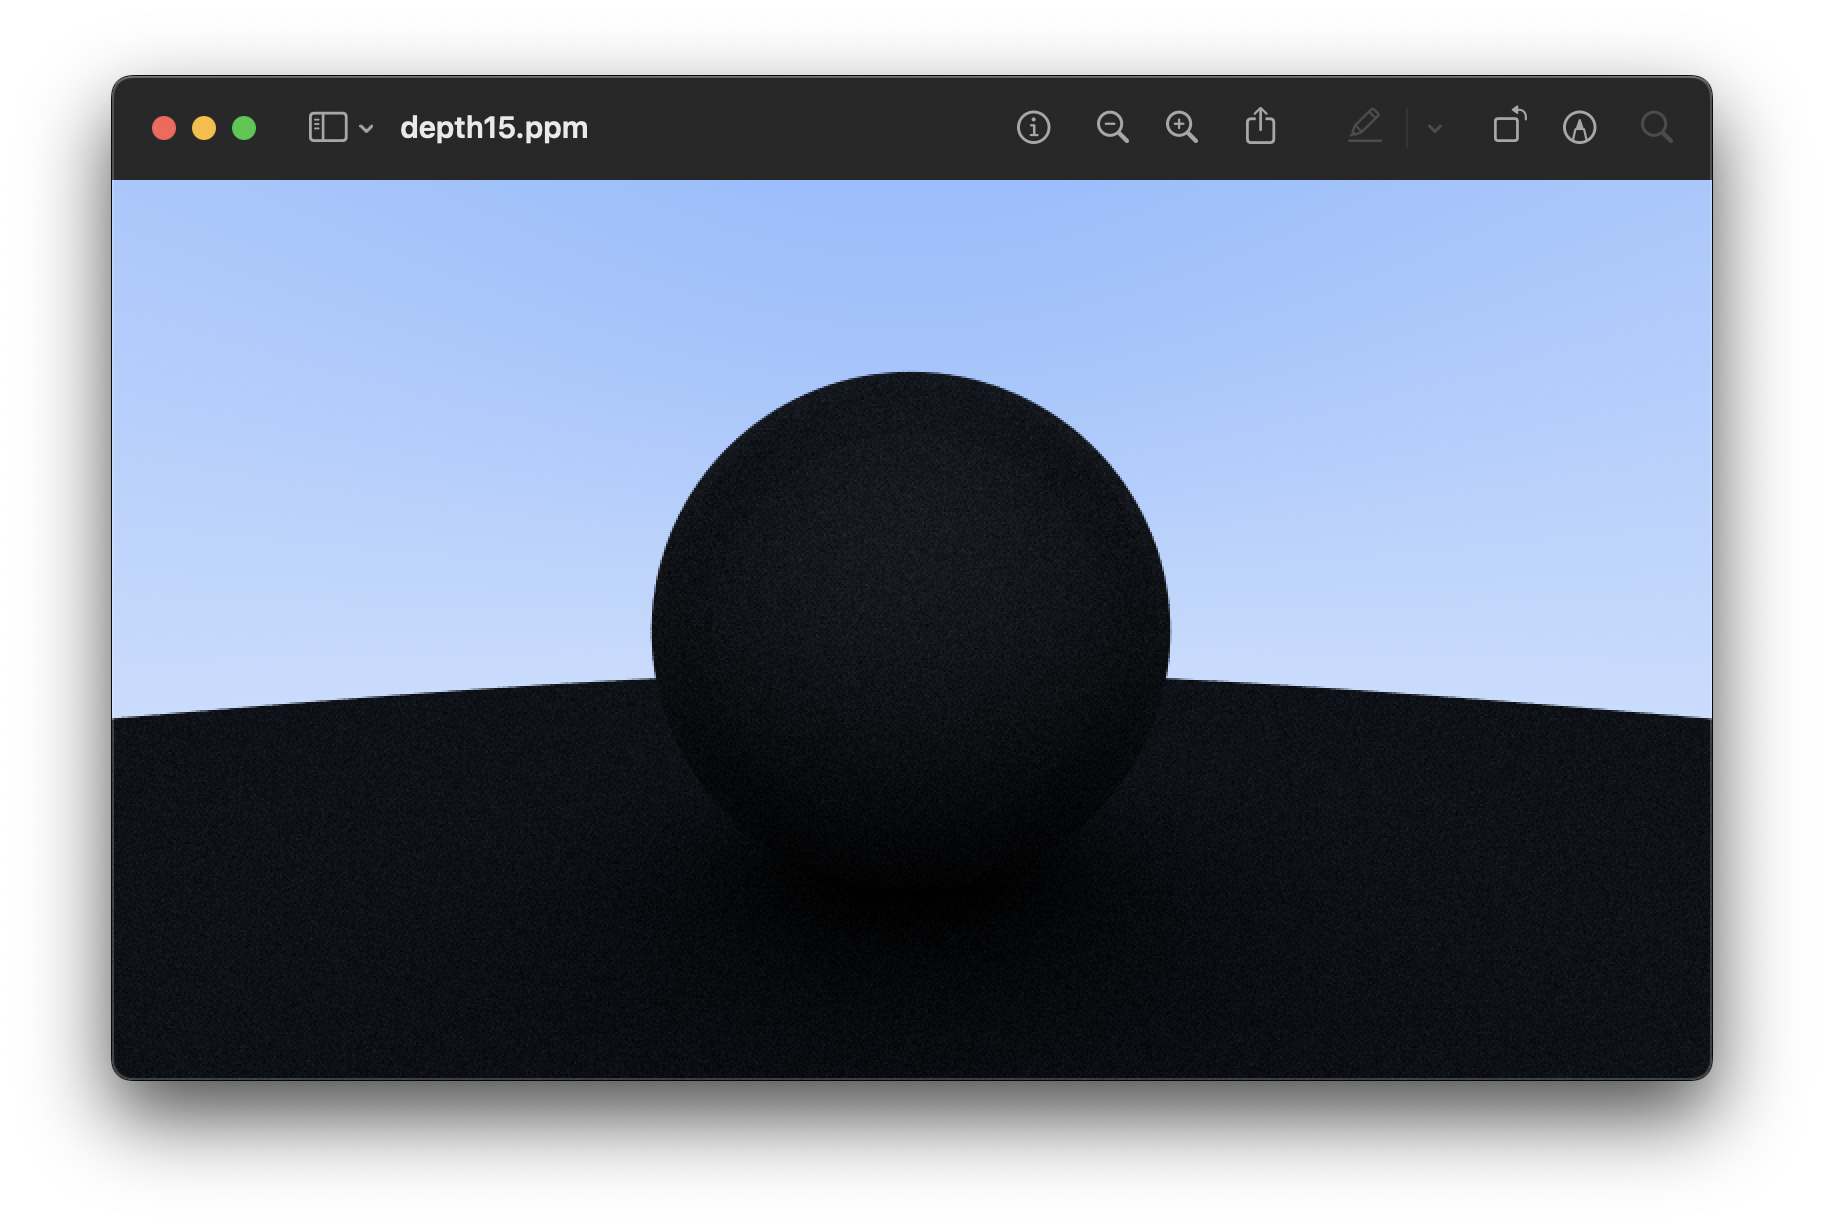
- depth 역할이 정확히 뭐지 그래서..? 50이랑 15랑 겉보기에 큰 차이는 안 난다. 속도는 많이 차이남
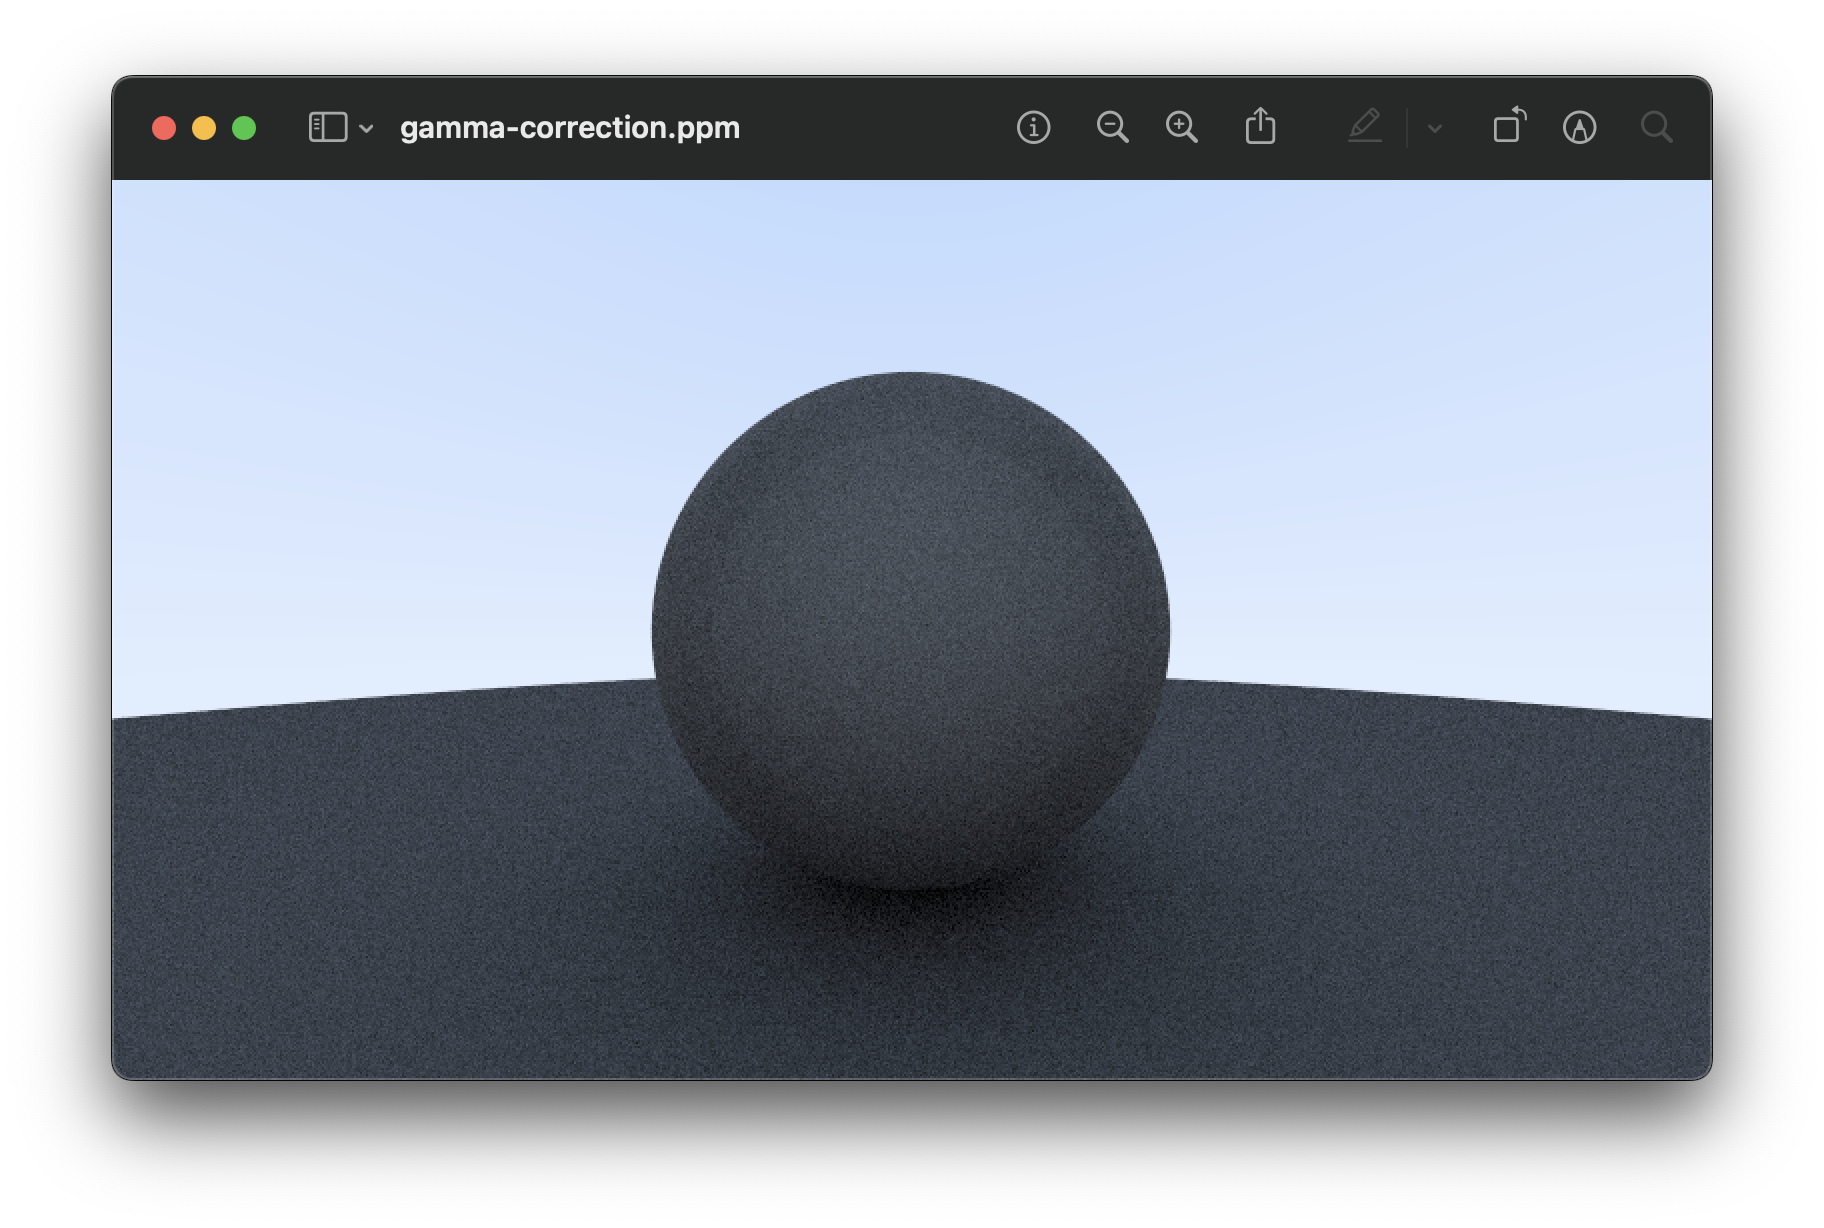
Using Gamma Correction for Accurate Color Intensity
gamma corrected감마보정: 빛의 강도 신호를 비선형적으로 변환하는 것.- 인간의 시각이 비선형적으로 대응하기 때문에 감마보정으로 인간의 시각과 비슷하게 만들어주는 것.
- 감마승을 이용해 비선형적으로 변환 가능.

