PhotoGallery
핵심적인 내용은 레이아웃을 통한 사진 배치와 권한 설정 내용이었다.
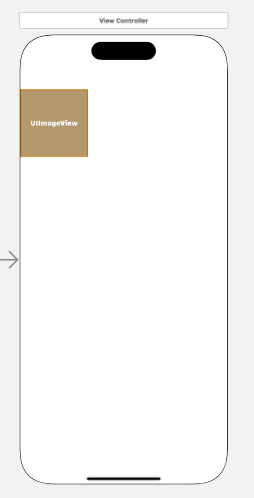
이런 배치로 한칸만 포토 컬렉션과, 이미지 셀을 이용하여 배치한 후,
 @IBOutlet weak var PhotoCollectionview: UICollectionView!
    override func viewDidLoad() {
        super.viewDidLoad()

        self.title = "Photo Gallery App"
        makenavigationItem()

        let layout = UICollectionViewFlowLayout()

        layout.itemSize = CGSize(width: UIScreen.main.bounds.width / 2 - 0.5, height: 200)
        layout.minimumLineSpacing = 1
        layout.minimumInteritemSpacing = 1
        PhotoCollectionview.collectionViewLayout = layout

        PhotoCollectionview.dataSource = self

    }
viewdidload에서 전반적인 레이아웃 설정을 마친다.
그 과정에서 깔끔하게 정리하기 위해 함수를 사용했다.
func makenavigationItem() {
        let photoItem = UIBarButtonItem(image: UIImage(systemName: "photo.on.rectangle"), style: .done, target: self, action: #selector(checkpermission))
        photoItem.tintColor = .black.withAlphaComponent(0.7)

        self.navigationItem.rightBarButtonItem = photoItem

        let refreshItem = UIBarButtonItem(image: UIImage(systemName: "arrow.clockwise"), style: .done, target: self, action: #selector(refresh))
        self.navigationItem.leftBarButtonItem = refreshItem
    }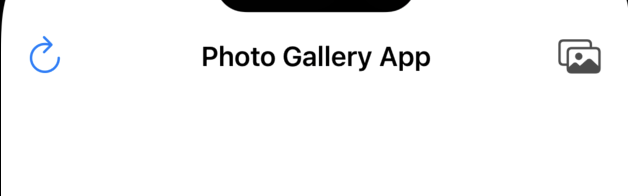
위에 버튼 들을 설정한다.
특히 오른쪽 버튼에는 갤러리를 활성화해야하기 때문에 접근 허용이 필요하다. 그렇기 때문에 그것에 관한 설정을 해준다.
@objc func checkpermission(){    //권합접근허용
        if PHPhotoLibrary.authorizationStatus() == .authorized || PHPhotoLibrary.authorizationStatus() == .limited{
            DispatchQueue.main.async {
                self.showGallery()
            }
        }else if PHPhotoLibrary.authorizationStatus() == .denied{
            DispatchQueue.main.async {
                self.showAuthorizationdeinedAlert()
            }
        }else if PHPhotoLibrary.authorizationStatus() == .notDetermined{
            PHPhotoLibrary.requestAuthorization { status in
                self.checkpermission()
            }
        }
    }
이건 우선 접근허용 수준에 따른 if문으로 설정한 모습이고 세부 함수는
func showAuthorizationdeinedAlert() {
            let alert = UIAlertController(title: "포토라이브러리 접근 권한을 활성화 해주세요", message: nil, preferredStyle: .alert)
            alert.addAction(UIAlertAction(title: "닫기", style: .cancel,handler: nil))
            alert.addAction(UIAlertAction(title: "설정으로 가기", style: .default, handler: {
                action in

                guard let url = URL(string: UIApplication.openSettingsURLString) else{
                    return
                }
                if UIApplication.shared.canOpenURL(url) { //url로 이동하는 기능 can으로 가능한지 확인
                    UIApplication.shared.open(url, options: [:], completionHandler: nil)
                } //내 설정으로 가기

        }))
            self.present(alert, animated: true)
    }
이렇게 url을 사용한 설정창으로의 이동, 설정창으로 이동할 것인지 묻는 버튼등을 실행하는 요소가 포함되어있다.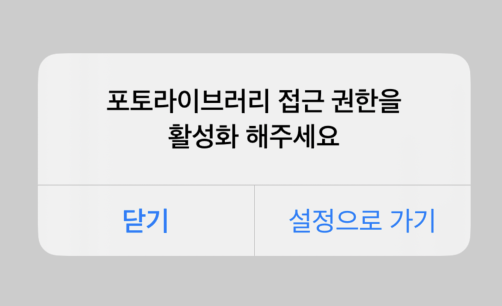
그리고 설정이 허용됐다면 갤러리로 이동하는데
func showGallery() {
        let library = PHPhotoLibrary.shared() //라이브러리 개념

        var configuration = PHPickerConfiguration(photoLibrary: library) //환경설정에 관함
        configuration.selectionLimit = 10 //사진선택 갯수 제한

        let picker = PHPickerViewController(configuration: configuration)
        picker.delegate = self
        present(picker, animated:  true)
    }
갤러리 사진을 지정하는 갯수 제한이라던가 라이브러리를 펴는 개념을 정하고
익스텐션을 통해
extension ViewController: UICollectionViewDataSource{
    func collectionView(_ collectionView: UICollectionView, numberOfItemsInSection section: Int) -> Int {
        return 0
    }

    func collectionView(_ collectionView: UICollectionView, cellForItemAt indexPath: IndexPath) -> UICollectionViewCell {
        let cell = collectionView.dequeueReusableCell(withReuseIdentifier: "PhotoCell", for: indexPath)

        return cell
    }


}

extension ViewController: PHPickerViewControllerDelegate{
    func picker(_ picker: PHPickerViewController, didFinishPicking results: [PHPickerResult]) {

        self.dismiss(animated: true)
    }


}
정한 사진들을 몇개까지 나열할 것인지 고른 후에 행동을 정한다.
이 다음강의에서 사진을 추가하고, 행동하는 것을 할 예정이다.
이번 강의에서 가장 중요했던 것은 권한접근이었던것 같다. 권한에 따른 설정과 허용하지 않을경우 안내창을 띄우고 설정하게끔 하는 그 메커니즘은 어디서든 사용할터이니 잘 익혀둬야겠다.