stlyed-components 를 이용한 과제 리팩토링
기존 index.css 에 작성했던 css 코드를 stlyed-components 를 사용해서 리팩토링 해봤다.
// index.css

  input {
    font-size: 16px;
    height: 2.1rem;
    width: 15rem;
    margin-right: 1rem;
    border-radius: 10px;
    border: 1px solid #999
  }
// TodoStyle.jsx
export const TodoInput = styled.input`
font-size: 16px;
height: 2.1rem;
width: ${(props) => props.inputWidth};
margin-right: 1rem;
border-radius: 10px;
border: 1px solid #999;<TodoInput type="text" placeholder=" 제목" name="title" />
<TodoInput inputWidth="30rem" type="text" placeholder=" 내용" name="content"/>
<TodoInput inputWidth="7rem" type="date" name="deadline" />기존 css 에 있던 input 스타일을 컴포넌트화 시켰다. export 를 해서 다른 컴포넌트에 적용 가능하게 하고 className 처럼 변수 이름을 할당해줬고, stlyed-components 사용해서 width를 동적으로 설정해주게 만들어봤다.
기존 input 태그 대신 "TodoInput" 을 넣고 컴포넌트에 전달된 inputWidth 속성을 통해 동적으로 지정되는 너비 값을 줬다.

보이는 것처럼 같은 TodoInput 를 사용했음에도 "제목" 과 "내용" 의 width 값이 다르게 적용된 걸 볼 수 있다.
export const TodoCardItem = styled.div`
  padding: 1rem;
  text-decoration: ${({ isDone }) => (isDone ? "line-through" : "none")};
  display: flex;
  flex-direction: column;
  justify-content: center;
  align-items: center;
  height: 70%;
`;
추가로 완료된 todo 는 line-through 를 통해서 완료된 상태라는 표시를 해줬다. 마찬가지로 isDone 속성을 통해 동적으로 line-through 가 적용되도록 만들었다.
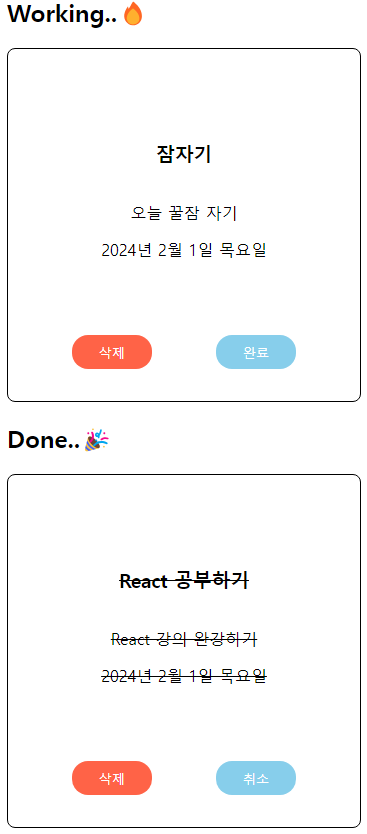
정상적으로 완료된 상태면 텍스트에 line-through 가 적용되고 아직 하는중이면 미적용되고있다.

:)