ahncheer/vscode-다운로드-salesforce-연결
위 링크를 참고해 VSCode를 다운받은 후, 오그에 연결한 뒤 시작합니다.
001 컴포넌트 생성
1. Ctrl+shift+P 단축키를 사용, Create Ligtning Web Component를 검색해 실행합니다. 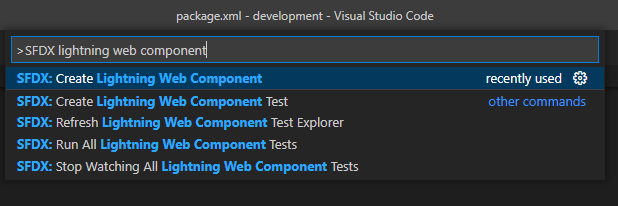
2. 케밥 대소문자 명명 규칙을 따르기 때문에, 이를 참고하여 컴포넌트명을 짓습니다. 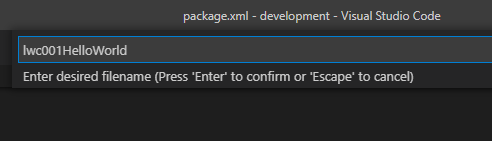
출처 : https://www.apexhours.com/20-tips-for-lightning-web-components/
네이밍 규칙 : https://lnsideout.tistory.com/entry/%EB%84%A4%EC%9D%B4%EB%B0%8D-%EC%B4%9D%EC%A0%95%EB%A6%ACcamel-case-kebab-case-pascal-case-snake-case
3. 컴포넌트 생성 완료! 
- tests_ 폴더는 일단 무시해도 괜찮음
(+ tests_는 팀의 생산성에 영향을 주지 않고 전체 프론트 엔드를 테스트할 수 있으며 LWC 테스트 결과는 이해하기 쉽고 유익한 방식으로 해석됩니다. / 출처 : https://www.salesforceben.com/how-to-use-jest-for-lightning-web-component-testing/)
002 컴포넌트 코드 작성
-- lwc001HelloWorld.html
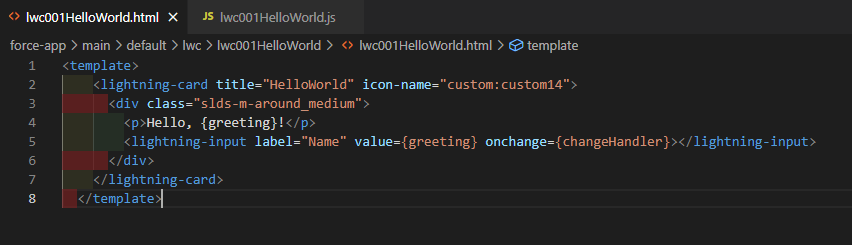
<template>
    <lightning-card title="HelloWorld" icon-name="custom:custom14">
      <div class="slds-m-around_medium">
        <p>Hello, {greeting}!</p>
        <lightning-input label="Name" value={greeting} onchange={changeHandler}></lightning-input>
      </div>
    </lightning-card>
  </template>
5번째 줄의 lightning input의 value값이 'greeting'이라는 이름의 변수이고, input안의 내용이 바뀌면 js의 'changeHandler'로 이동함.
-- lwc001HelloWorld.js

import { LightningElement } from 'lwc';
export default class HelloWorld extends LightningElement {
  greeting = 'World';
  changeHandler(event) {
    this.greeting = event.target.value;
  }
}
003 컴포넌트 오그에 업로드
1) 수정한 컴포넌트 우클릭 → SFDX: Deploy Source to org 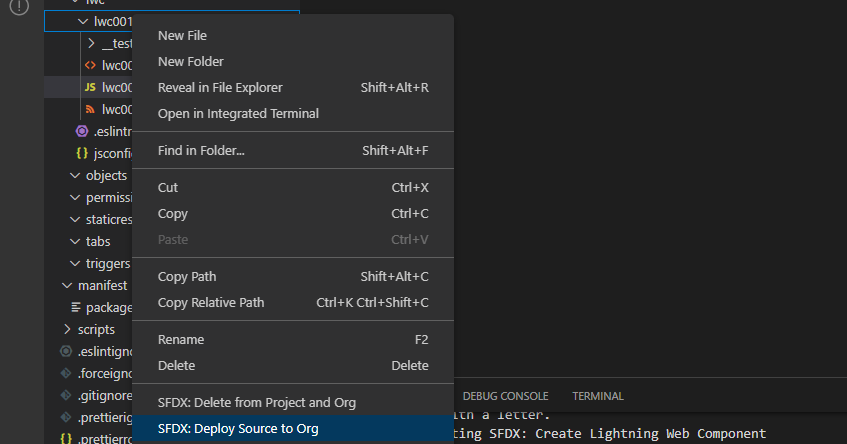
2) 통합 터미널의 출력 탭에서 배포 결과를 확인합니다. 명령이 성공적으로 실행되면 Deployed Source 메시지에 조직에 업로드된 3개의 파일이 나열됩니다. 
3) Ctrl+shift+P 단축키를 사용 → SFDX: Open Default Org. (기존 오그가 열려있다면 단축키를 사용해서 열지 않고 페이지를 열어도 괜찮습니다.)
4) 오그 페이지의 오른쪽 상단의 톱니바퀴 아이콘 선택 → 페이지 편집(Edit Page) 선택 (페이지 편집이 없다면 왼쪽 상단의 회색 점 9개 아이콘을 클릭해 다른 앱 페이지를 열어보세요.)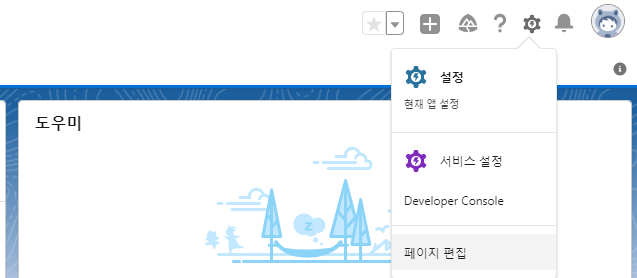
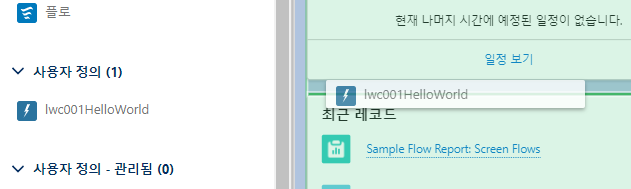
5) 오른쪽의 구성요소 → 사용자 정의에서 +
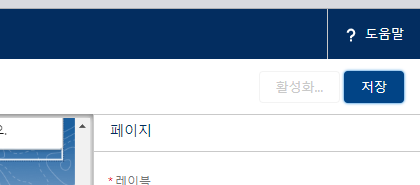
6) 오른쪽 버튼 → 저장
7) 왼쪽에 있는 ←모양 버튼을 눌러서 추가한 컴포넌트 확인