Today's Lesson: Character Selection Screen
Summary
1. We take a look at how we can setup a character selection screen that will allow the player to choose to use either the magic or sword based character.
2. We cover all the blueprints required to set this screen up.
Virtus Learning Hub
✅ 캐릭터 선택창
◼️ 월드 세팅
- World Settings - Game Mode
Default Pawn Class: None
선택을 통해 기본 캐릭터를 정하기 위함
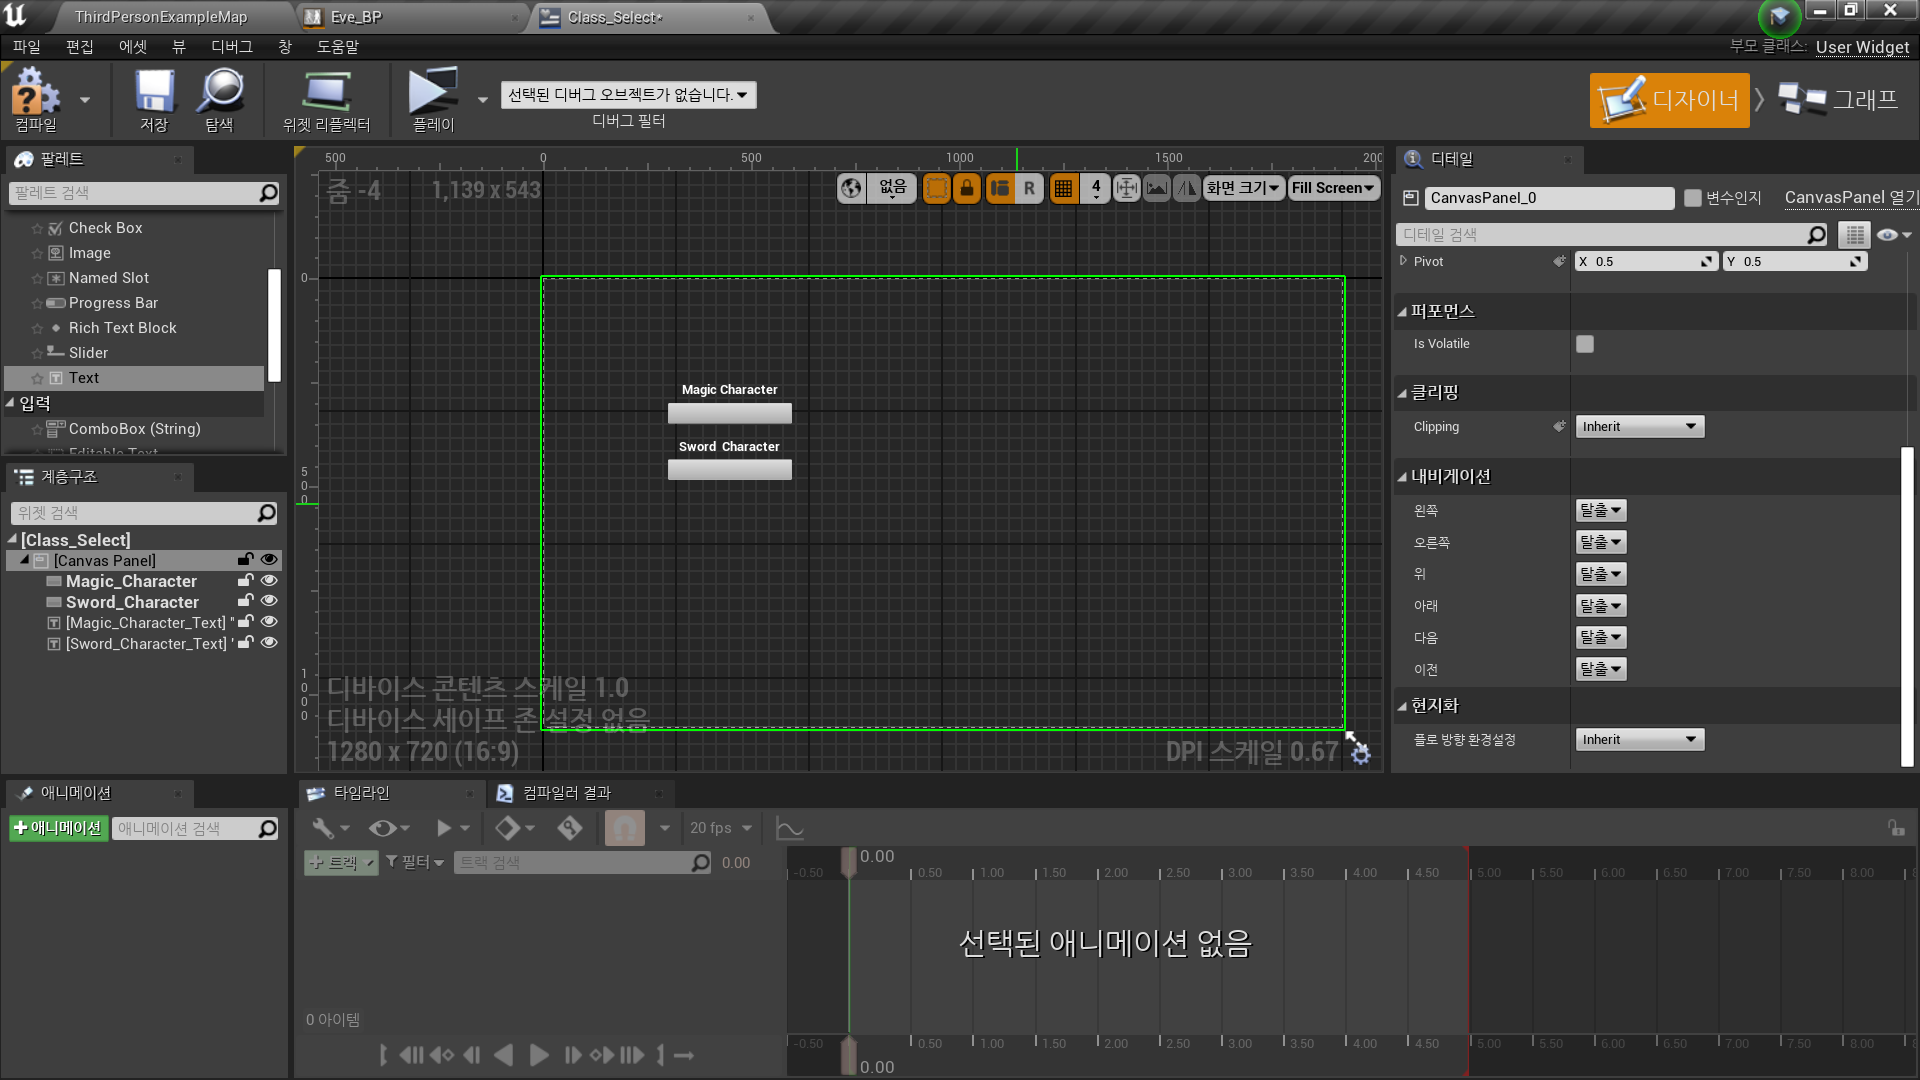
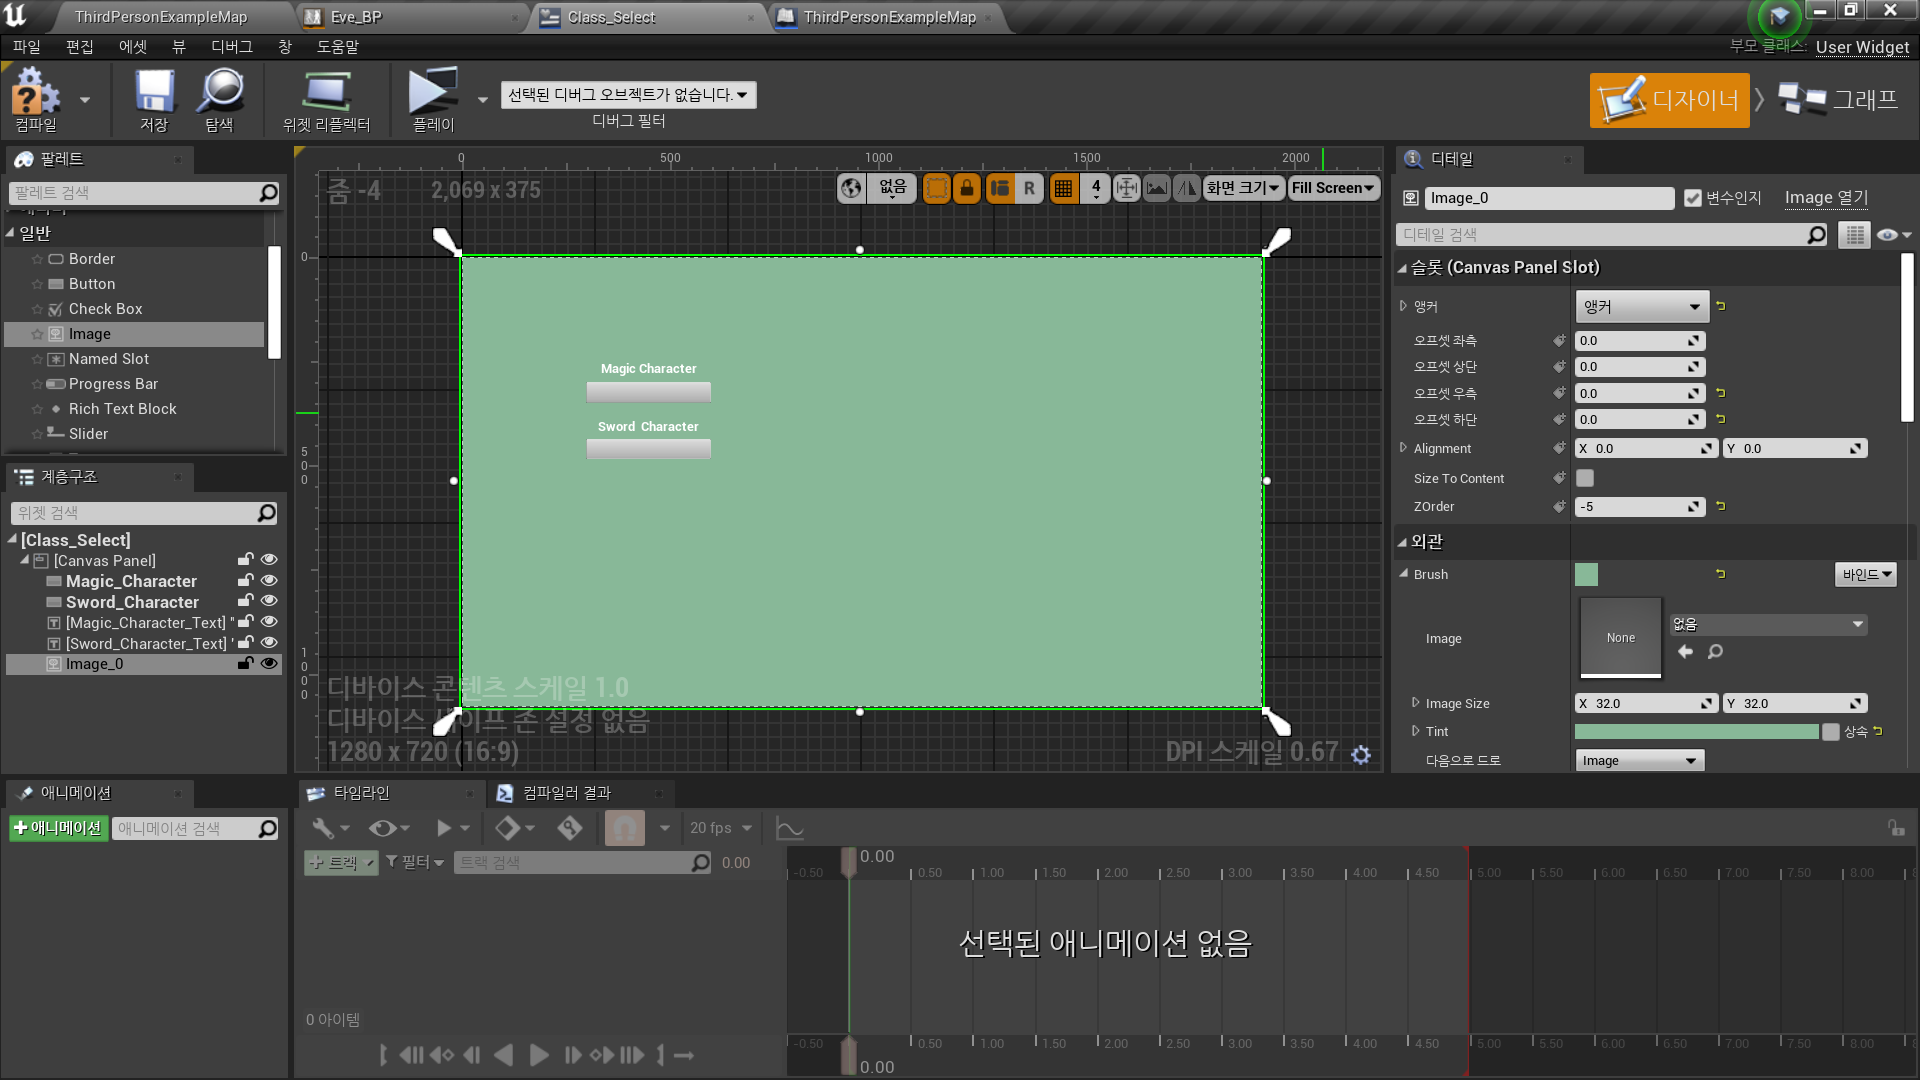
◼️ 위젯 블루프린트
- Create Widget Blueprint <Class_Select>
- 버튼/텍스트 2개 추가
캐릭터 선택용 버튼
✅ 레벨에 캐릭터 소환
◼️ 버튼 클릭 함수 추가
- Magic_Character 버튼 - On Clicked
- Spawn Actor from Class
- Class: MagicCharacter
- Transform: Make Transform
- Collision Handling Override: Always Spawn, Ignore Collisions - Is Valid
- Input Object: Return Value - Get Player Controller → Possess
- In Pawn: Return Value
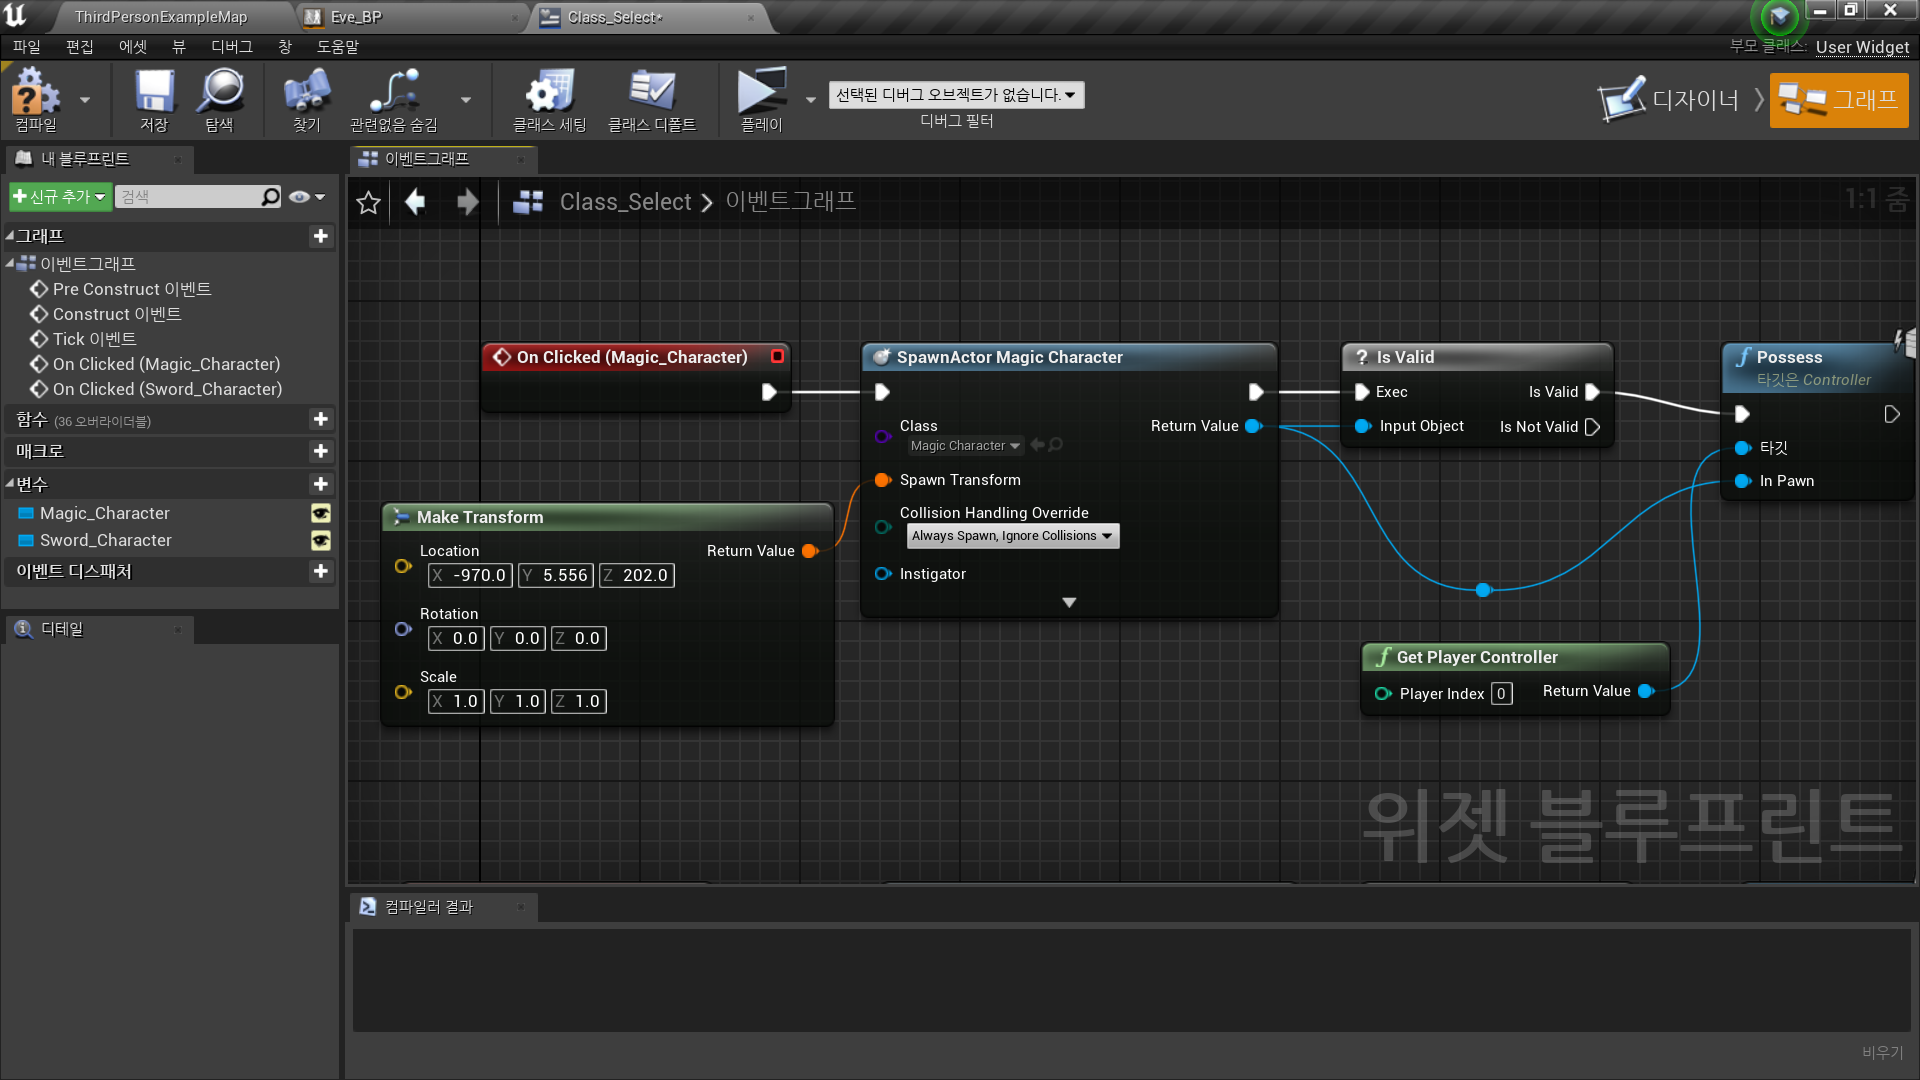
- Sword_Character 버튼 - On Clicked
//위와 동일하게 구현
◼️ 레벨 블루프린트 로직
- Event BeiginPlay
- Construct from Class
- Class: Class_Select - Add to Viewport
✅ 세부 로직
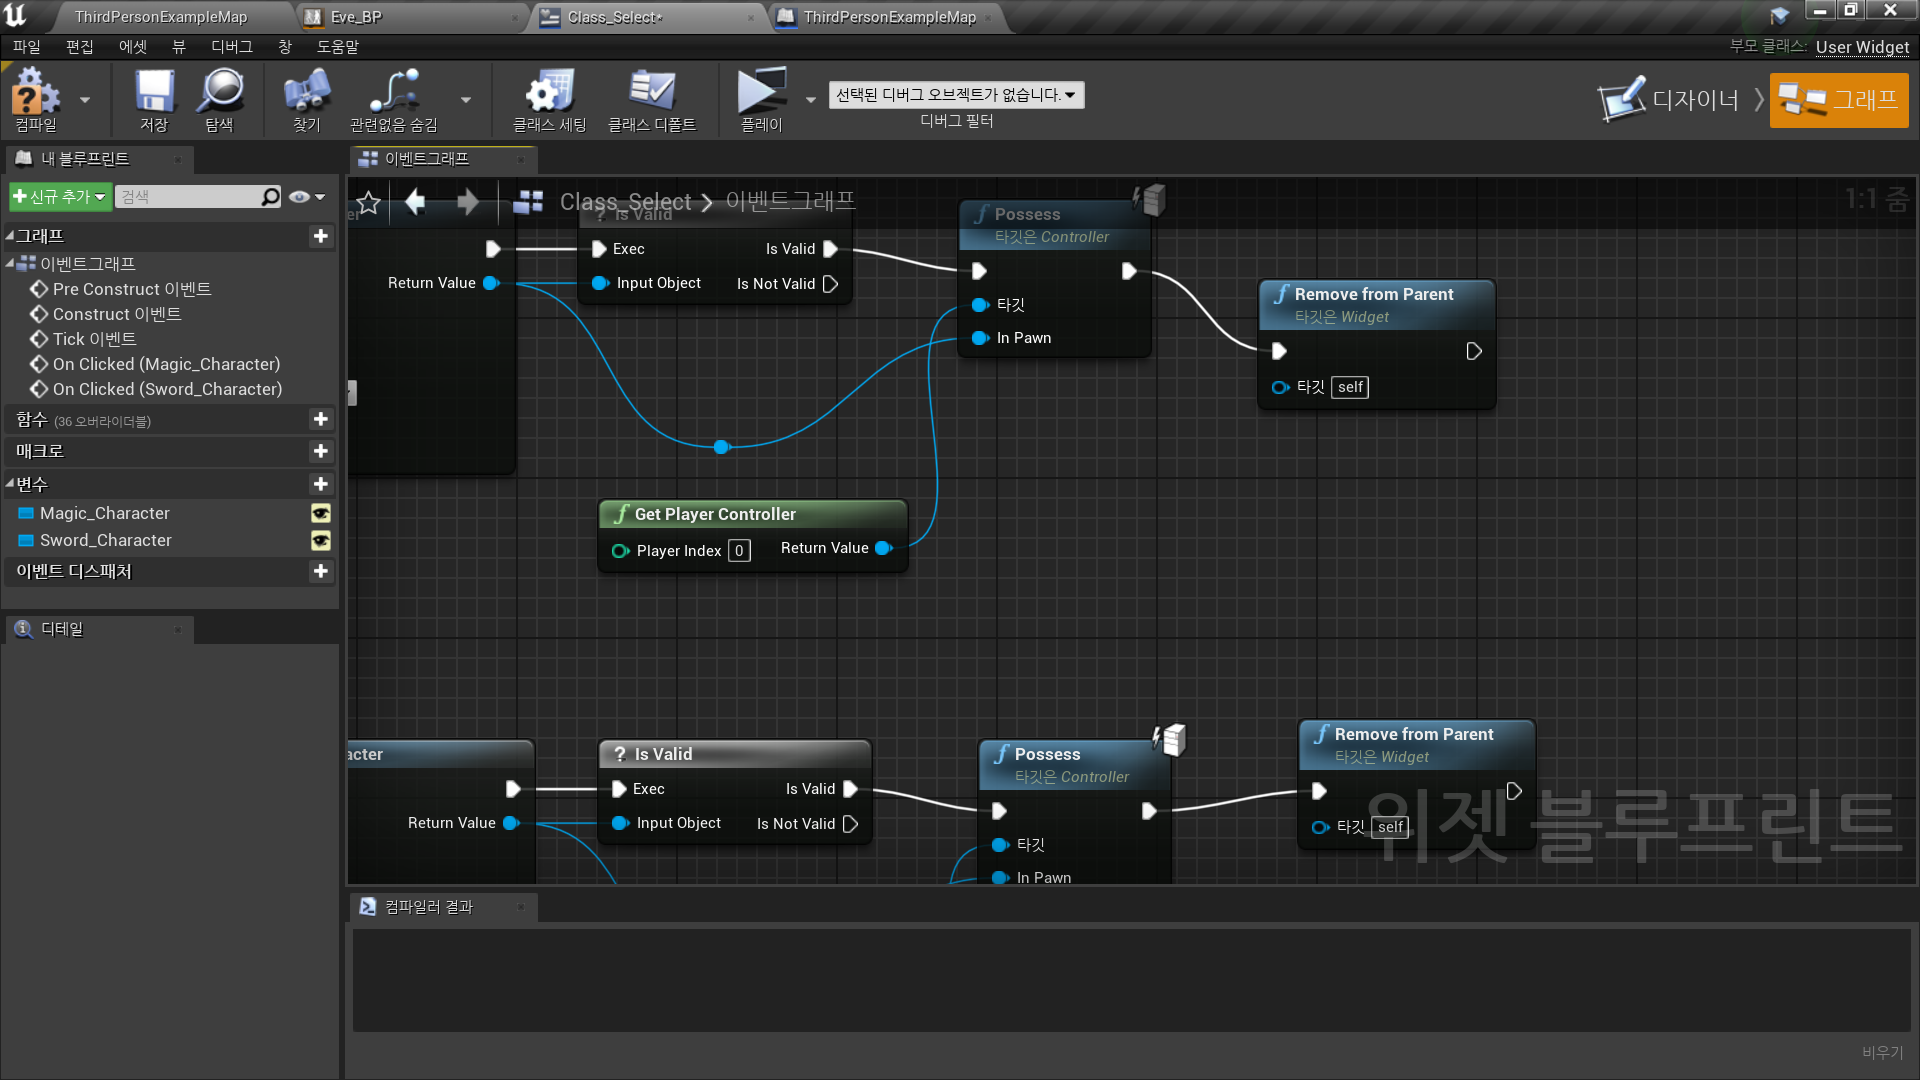
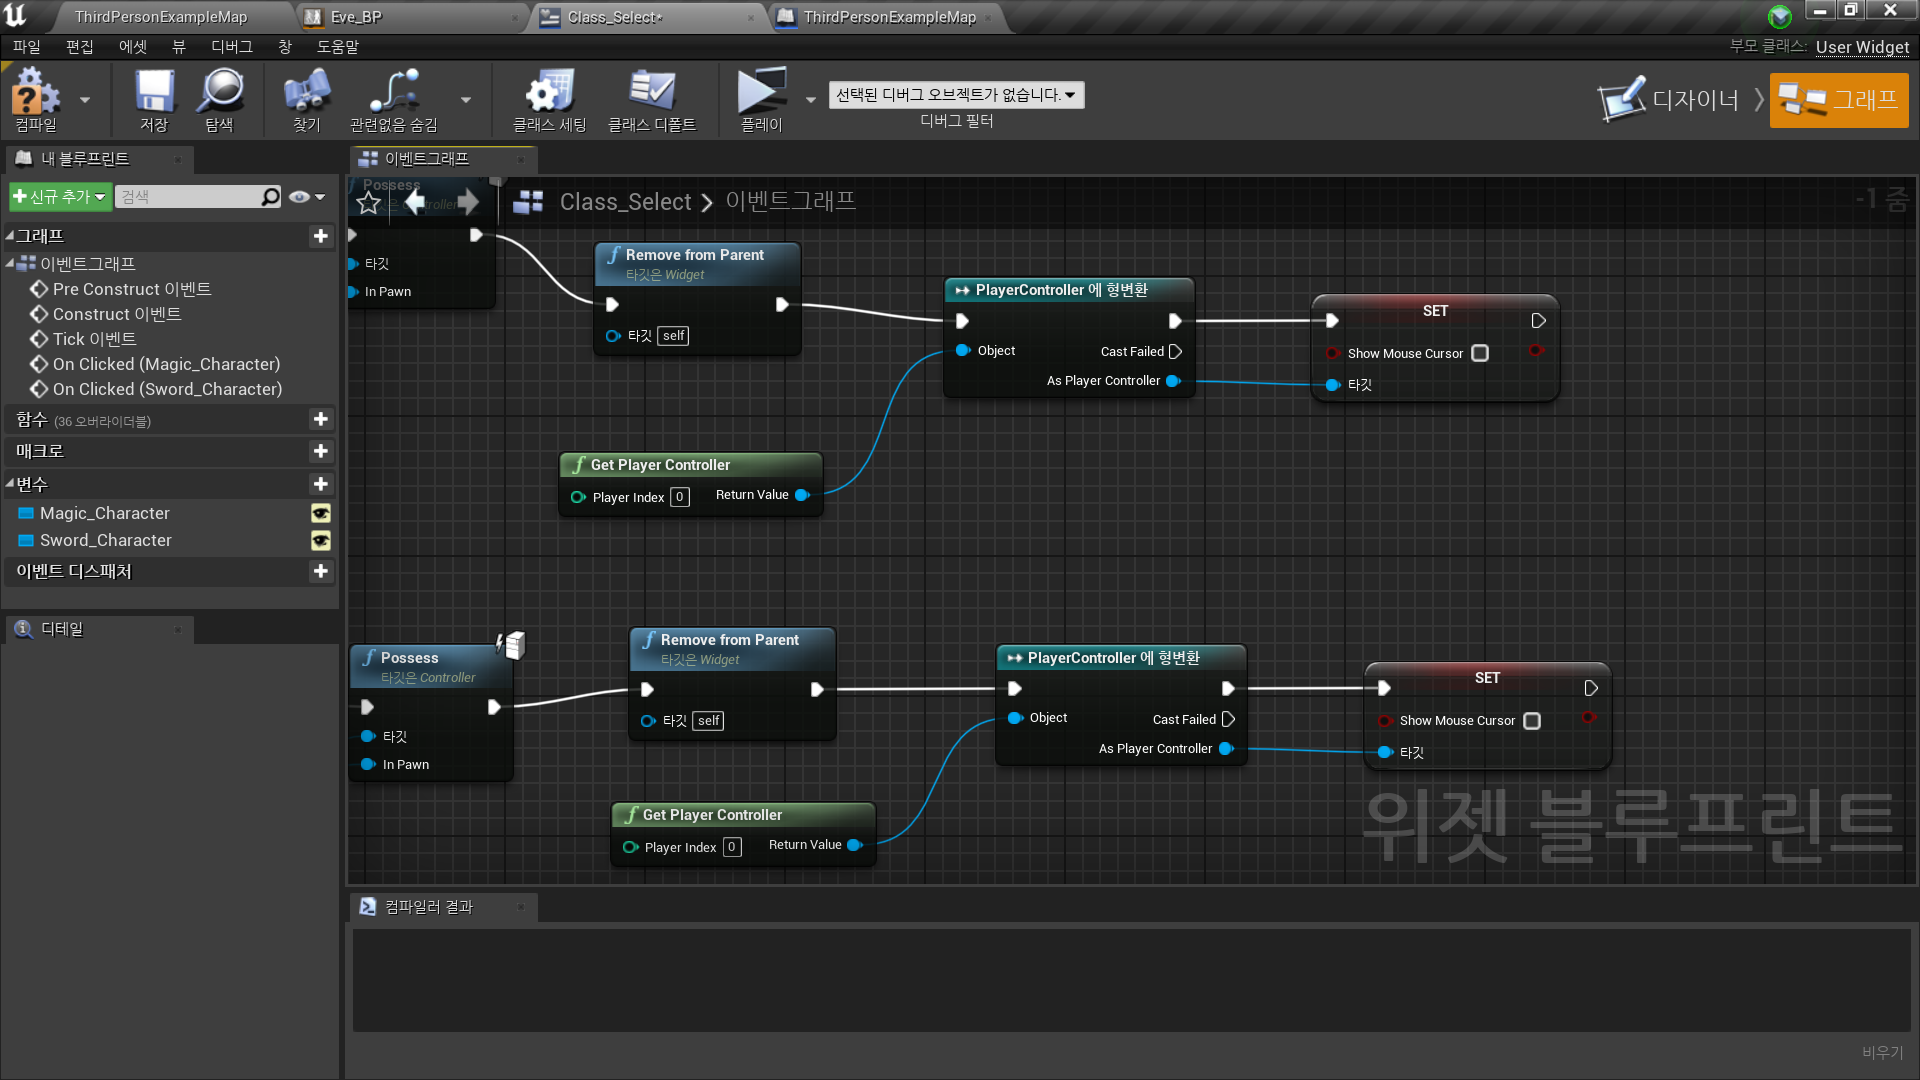
◼️ 캐릭터 선택 후 UI 제거
In Widget Blueprint <Class_Select>
Possess를 통한 컨트롤러를 지정된 폰으로 어태치 이후
- Remove from Parent
◼️ 마우스 커서
- Contruect Event를 통한 마우스 보임 처리
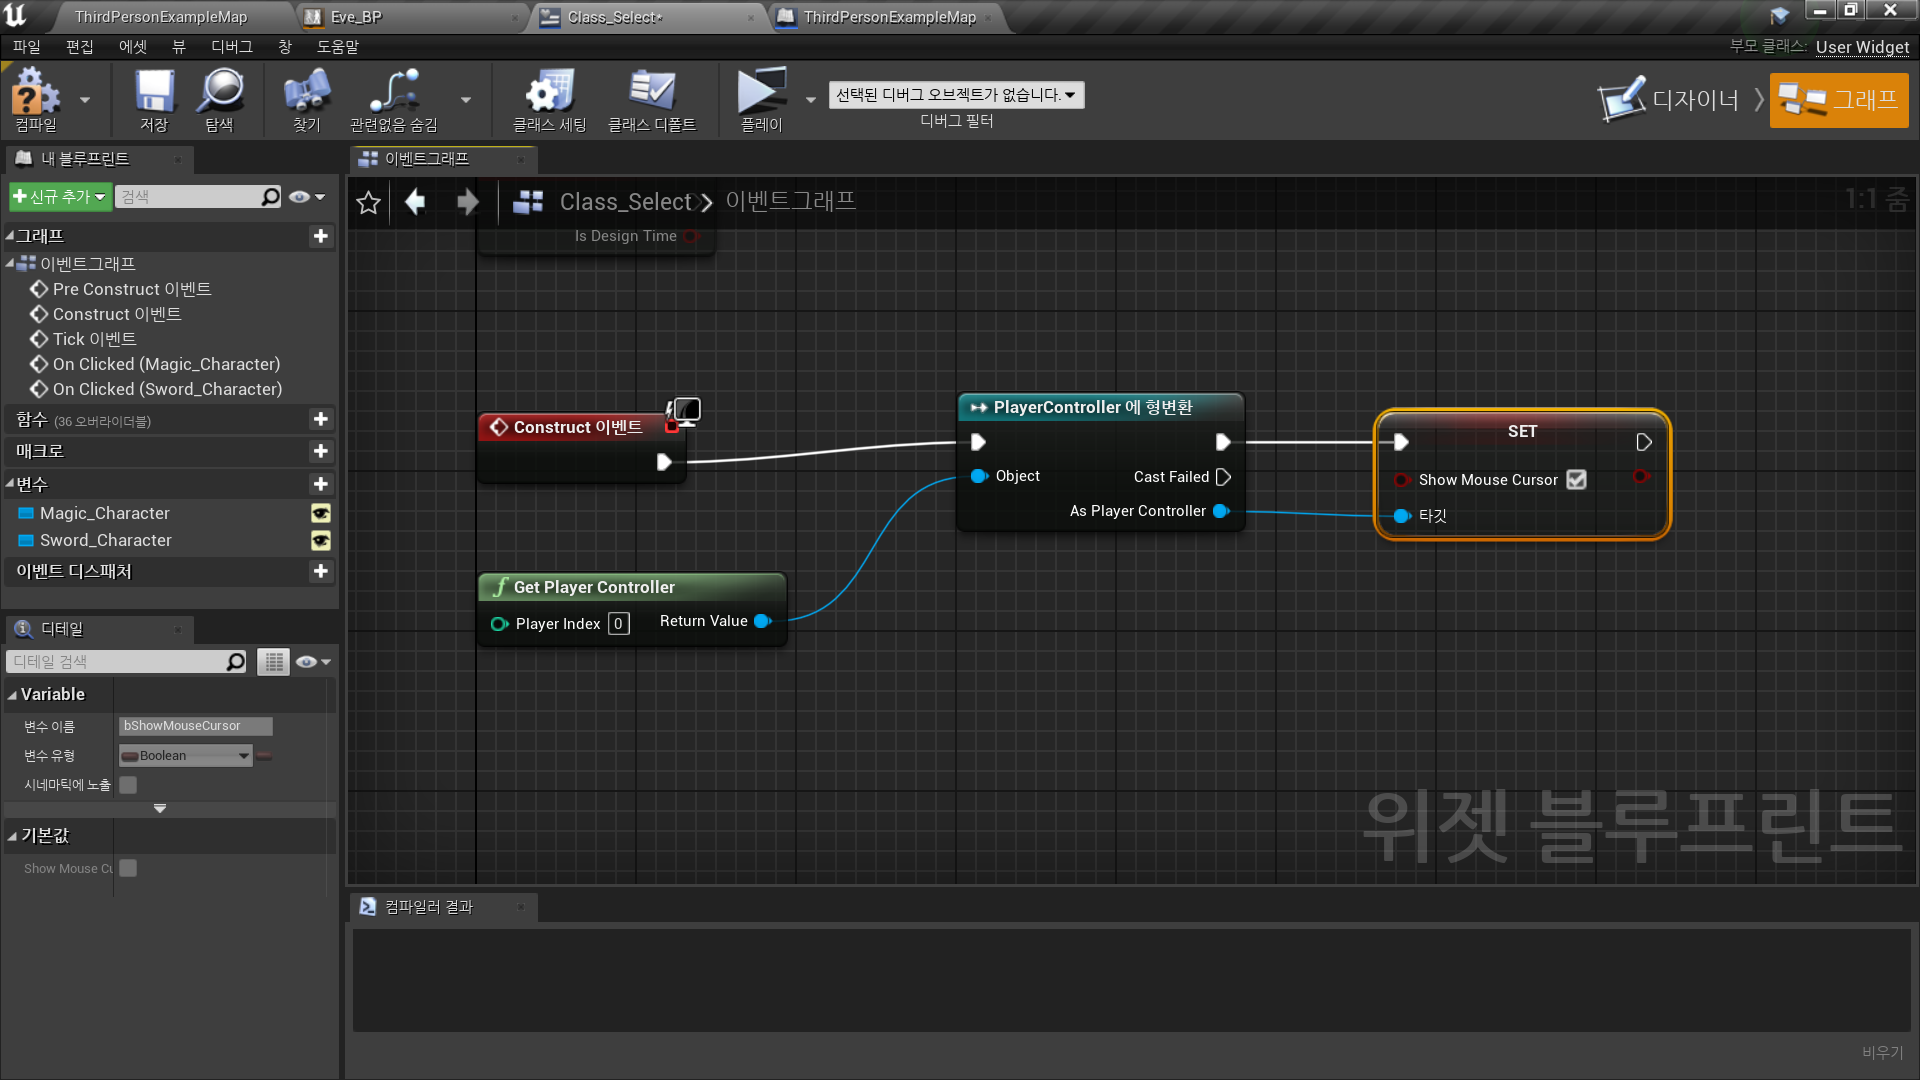
- Remove Parent 이후 마우스 보이지 않음 처리
◼️ UI 배경
- 이미지
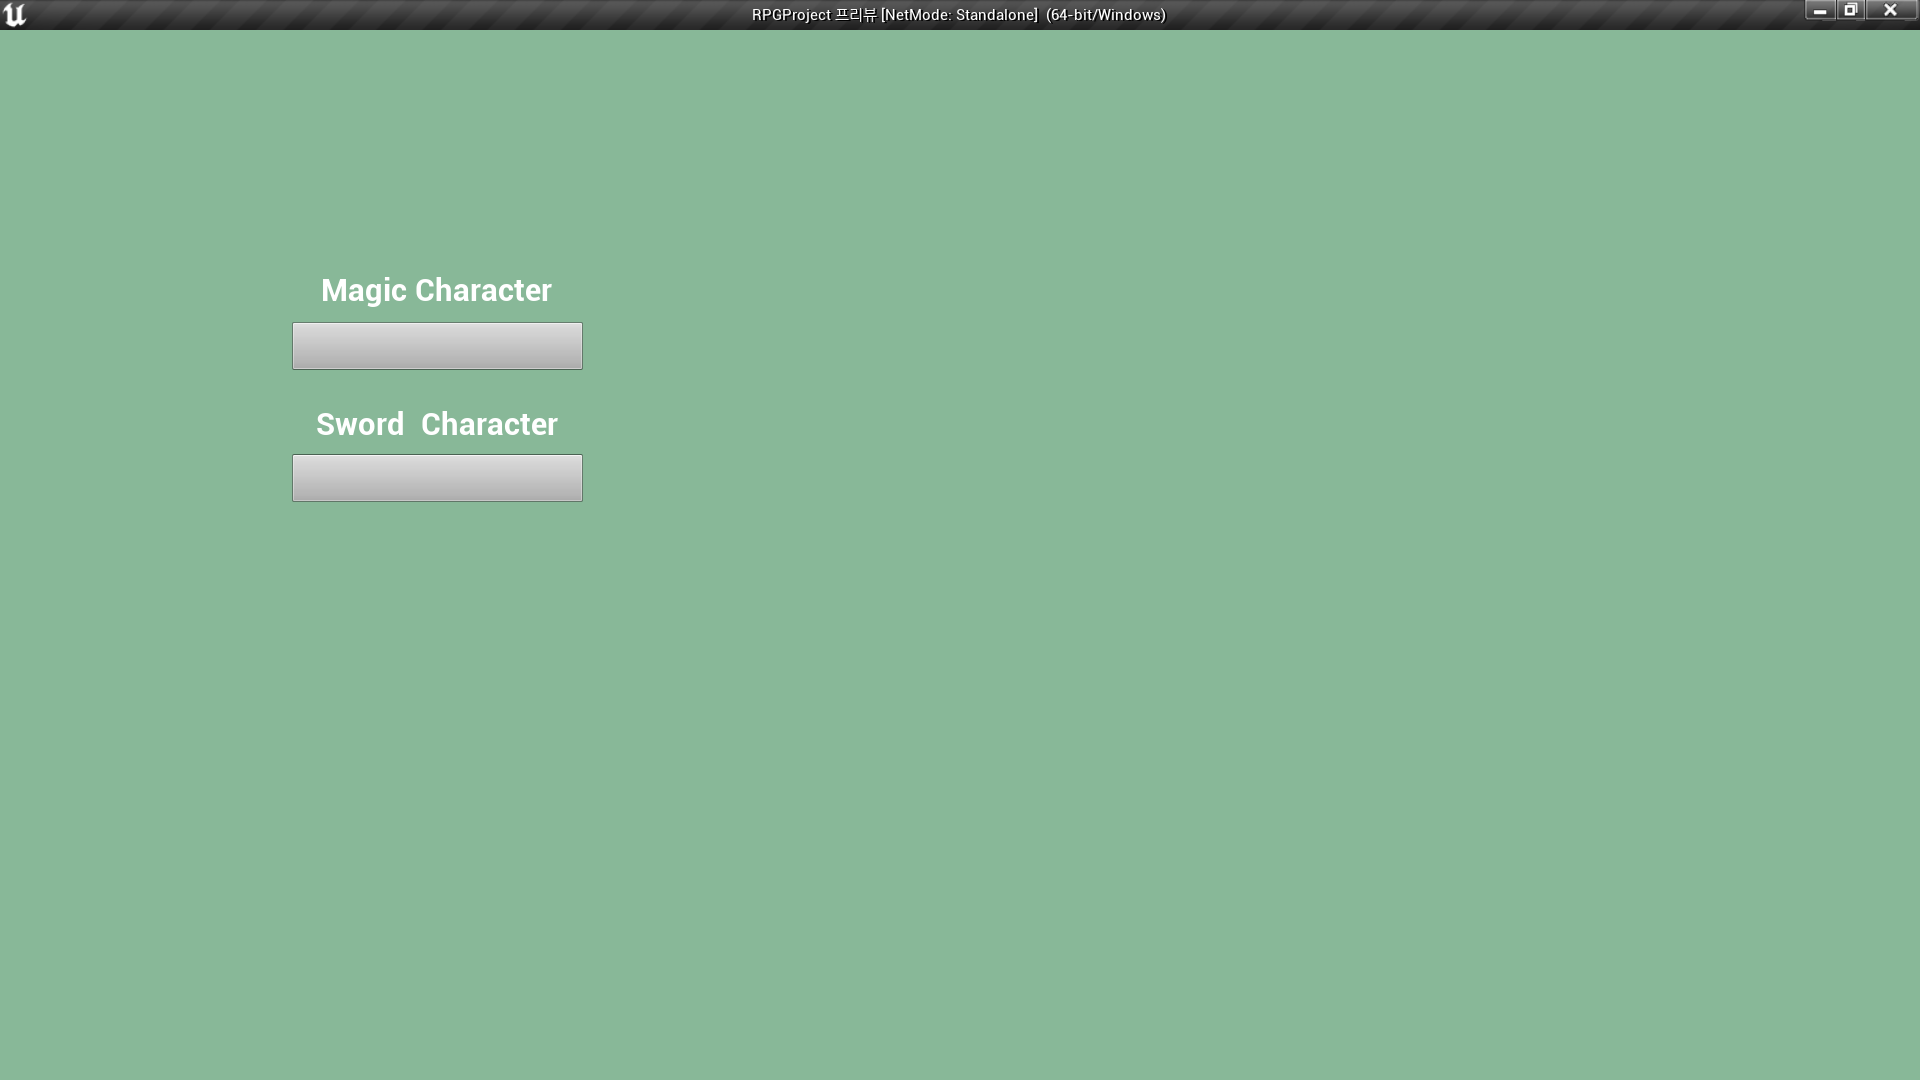
✅ Result
- 캐릭터 선택 창
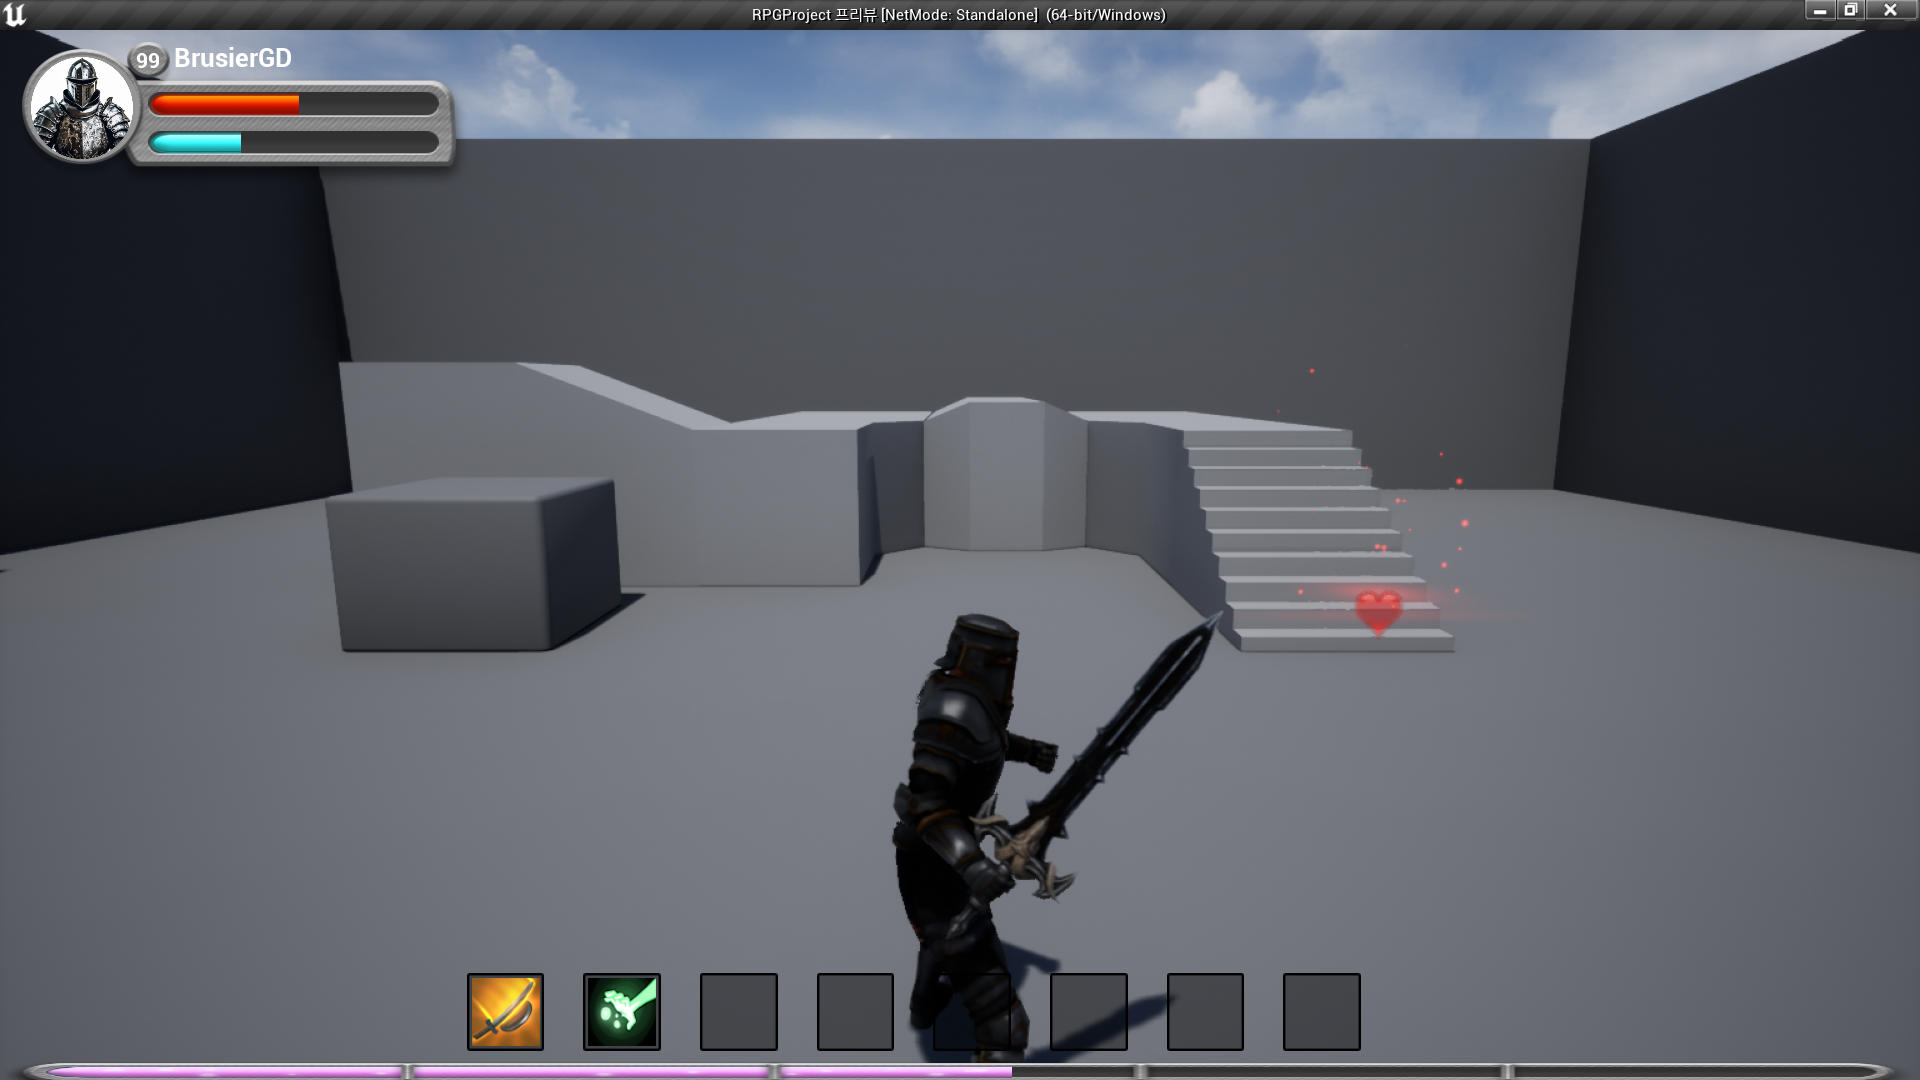
- 선택 캐릭터로 시작

RPG 기획자 지망생