이미지 증강을 할 때 주의해야 할 사항이 있다면?
- 노이즈를 확대하거나 크롭하면 문제가 된다.
- 6을 180도 돌리면 완전히 다른 의미인 9가 되기 때문에 이런 숫자 이미지는 돌리지 않는다.
- 색상이 중요한 역할을 하는 이미지일 경우에 색상 반전 혹은 변경을 하면 안된다.
- 신호등, 옐로카드 레드카드
- 증강할 때 train 에만 해준다. test에는 해주지 않는다. 왜냐하면 현실세계 문제를 푼다고 가정했을 때 현실세계 이미지가 들어왔을 때 증강해주지는 않고 들어온 이미지로 판단하기 때문에 train에만 사용한다.
-> 증강할때는 현실세계의 문제와 함꼐 고민을 해봐야 한다.
CNN 모델을 학습시키는데 내 컴퓨터로 돌렸더니 메모리 오류가 났을때! 어떻게 해야할까?
정확도가 낮게 나와도 오류 없이 돌리고 싶을 때 :
- 이미지 사이즈를 줄인다.
- 레이어를 줄인다. 필터수를 줄인다.
- 배치(한번에 다 불러오지 않고 나눠서 불러오게) 사이즈를 줄인다.
- 1003 실습 : 전이학습해보기!!
전이학습이란?
전이학습(Transfer Learning)이란? 참고링크
전이학습 : 한 분야의 문제를 해결하기 위해서 얻은 지식과 정보를 다른 문제를 푸는데 사용하는 방식
딥러닝의 분야에서는 '이미지 분류' 문제를 해결하는데 사용했던 네트워크(DNN;Deep Neural Network)를 다른 데이터셋 혹은 다른 문제(task)에 적용시켜 푸는 것을 의미한다.
전이학습을 위해서는 ImageNet과 같은 대량의 데이터셋으로 이미 학습이 되어있는 모델을 사용한다. 이를 '사전에 학습된 모델' 혹은 'pretrained model'이라고 부른다.
- ImageNet과 비슷하지만 소량의 데이터셋을 가지고 있다면 ImageNet으로 학습시킨 CNN을 구조를 그대로 두고 뒷단에 분류를 위해 새로운 완전연결레이어(FC;Fully Connected Layer)를 붙여서 학습시킬 수 있다.
Module: tf.keras.applications
Keras Applications are premade architectures with pre-trained weights.
= 미리 유명한 모델 아키텍처로 학습을 해서 찾아놓은 가중치를 사용한다.
- 간단하게 보면 유명한 모델 아키텍처를 가져다 사용하는 것이다.
- 논문을 보면 코드가 많고 복잡한데 간단하게 API를 만들어서 코드 1~2줄로 사용하게 만들어 놓은 것!
include_top 의 의미는?
whether to include the 3 fully-connected layers at the top of the network.
상단에 완전연결 레이어를 추가할 것인지 여부로 True 나 False 로 설정
# TF Keras 예제 코드
# 이미지넷 데이터셋 기준 => 1000 개의 분류를 하는 예제
# classes=1000 예측할 이미지의 종류가 1000개다.
# classifier_activation='softmax' 출력층의 output
# 1000 개 종류의 확률값을 반환
# 이미지넷의 가중치만 사용할 것이지 그대로 분류할게 아니기 때문에 해당 옵션이 필요 없습니다.
# 이 미리 구현된 pre-trained model 을 사용해서 혈액도말이미지로 말라리아 감염여부를 예측할 것이기 때문에
# 클래스 수도 다르고, 출력층 activation 도 따로 구현해 줄 것이기 때문에
# include_top=False 로 나머지도 별도의 레이어로 구성해 주었습니다.

tf.keras.applications.vgg16.VGG16(
    include_top=True,
    weights='imagenet',
    input_tensor=None,
    input_shape=None,
    pooling=None,
    classes=1000,
    classifier_activation='softmax'
)- 1004 실습
- 실습 1004 의 목적
- tf.kreas의 전처리 기능을 사용하지 않고 이미지 파일을 array 로 직접 만들어 보기.
- 데이터셋(train, valid, test)도 직접 나누어 보기.
- CNN 네트워크 구성 응용, 학습과 예측해 보기.
실습순서
1) 1004 파일을 열고 사본을 생성해 주세요!
2) 런타임 > 런타임 유형 변경 > GPU 나 TPU 로 하드웨어 가속기 설정
3) 캐글에서 파일 다운로드 받기 : Weather dataset Kaggle 캐글 데이터셋
4) 다운로드 파일 압축을 풀어서 구글 드라이브에 data 폴더에 업로드 하기
5) 구글 드라이브에 업로드한 파일 마운트 하기
6) 파일 경로 읽어오기, 해당 경로의 폴더 별 파일 시각화 하기
7) 파일 사이즈를 변경하는 함수를 만들고 적용하기
8) train, valid, test 변수에 이미지 여러장을 array 만들어서 넣어주는 방법 알아보기
이미지 폴더 읽어오기
import os
root_dir = "/gdrive/My Drive/data/dataset"
image_label = os.listdir(root_dir)
image_label.remove("test.csv")
image_label
>>> ['rainy', 'cloudy', 'alien_test', 'sunrise', 'foggy', 'shine']
# 폴더 이름을 알 수 있다.
폴더별로 이미지 확인해보기
import glob

fig, axes = plt.subplots(nrows=1, ncols=len(image_label), figsize=(20, 5))

for i, img_label in enumerate(image_label):
    wfiles = glob.glob(f"{root_dir}/{img_label}/*")
    wfiles = sorted(wfiles)
    # print(wfiles[0])
    img = plt.imread(wfiles[0]) # 첫번째 이미지
    axes[i].imshow(img)
    axes[i].set_title(img_label)
이미지 사이즈 변환
# 이미지 사이즈 변환 함수
def img_read_resize(img_path):
    img = cv2.imread(img_path)
    img = cv2.cvtColor(img, cv2.COLOR_BGR2RGB)
    img = cv2.resize(img, (120, 120))
    return img

# img_read_resize 함수 동작 확인
img_path = f"{root_dir}/cloudy/cloudy111.jpg"
img_read_resize(img_path).shape

plt.imshow(img_read_resize(img_path))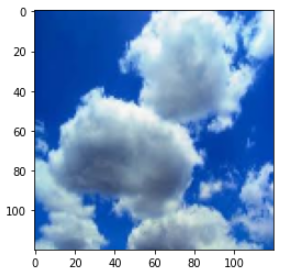
# 이미지를 읽어온것은 숫자의 배열 형태이다.
img_read_resize(img_path).shape
>>> (120, 120, 3)

img_read_resize(img_path)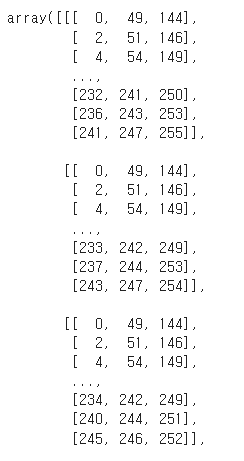
이미지들을 array 로 반환하는 함수
from logging import exception

# 폴더별로 이미지 파일을 읽어서 list 에 담고 반환하는 함수
def img_folder_read(img_label):
    img_files = []
    labels = []

    # 특정 날씨 폴더의 전체 이미지를 읽어온다다.
    wfiles = glob.glob(f"{root_dir}/{img_label}/*")
    wfiles = sorted(wfiles)

    # 반복문을 통해서 폴더의 이미지를 하나씩 순회.
    # 일단 5개만
    for w_img in wfiles[:5]:
        try:
    		# img_read_resize 함수로 이미지를 array 로 읽어오고 넣어준다.
    		img_files.append(img_read_resize(w_img))
            labels.append(img_label)
        except: #유형이 안맞는게있어서 예외처리한다.
            continue
    return img_files, labels


# shine 폴더를 넣어주면 어떻게 되는지 확인해보기
img_label="shine"
img_files, labels = img_folder_read(img_label)
len(img_files), len(labels), labels[0], img_files[0].shape
>>> (5, 5, 'shine', (120, 120, 3))
train 과 test 데이터 나누기
(test 데이터는 alien_test 폴더에 있는 데이터이다.)
x_train_img = []
x_test_img = []
y_train_img = []
y_test_img = []

# tqdm 을 통해 이미지를 읽어오는 상태를 표시합니다.
for img_label in tqdm.tqdm(image_label):
    x_temp, y_temp = img_folder_read(img_label)
    if img_label == "alien_test":
        x_test_img.extend(x_temp)
        y_test_img.extend(y_temp)
    else:
        x_train_img.extend(x_temp)
        y_train_img.extend(y_temp)

len(x_train_img), len(y_train_img), len(x_test_img), len(y_test_img)

>>>
100%|██████████| 6/6 [00:13<00:00,  2.23s/it]
(1498, 1498, 30, 30)
list 에 append 가 아니라 extend 를 해줘야 한다.
append 는 통째로 넣고 extend 는 풀어서 넣기 때문이다.
이미지 확인해보기
plt.imshow(x_test_img[0])
plt.title(y_test_img[0])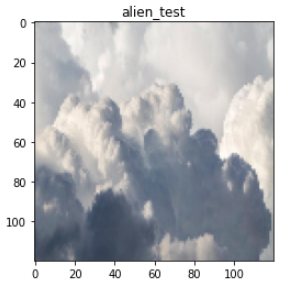
plt.imshow(x_train_img[-2])
plt.title(y_train_img[-2])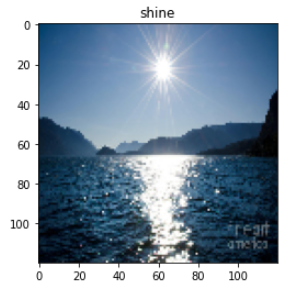
np.array 형식으로 만들기
type(x_train_img)
>>> list

x_train_arr = np.array(x_train_img)
y_train_arr = np.array(y_train_img)
x_test_arr = np.array(x_test_img)
y_test_arr = np.array(y_test_img)

x_train_arr.shape, y_train_arr.shape, x_test_arr.shape, y_test_arr.shape
>>> ((1498, 120, 120, 3), (1498,), (30, 120, 120, 3), (30,))
정답값 수치화해주기 : One-hot-encoding
y_train_arr
>>> array(['rainy', 'rainy', 'rainy', ..., 'shine', 'shine', 'shine'],
      dtype='<U7')


# LabelBinarizer 를 사용하여 'cloudy', 'shine', 'sunrise', 'rainy', 'foggy' 형태의 분류를 숫자로 변경
# y_test 는 정답값 비교를 할 예정이고 학습에 사용하지 않기 때문에 인코딩 하지 않아도 된다.

from sklearn.preprocessing import LabelBinarizer

lb = LabelBinarizer()
lb.fit(y_train_arr)
y_train = lb.transform(y_train_arr)
y_valid = lb.transform(y_valid_raw)

y_train.shape, y_valid.shape
>>> ((1498, 5), (300, 5))