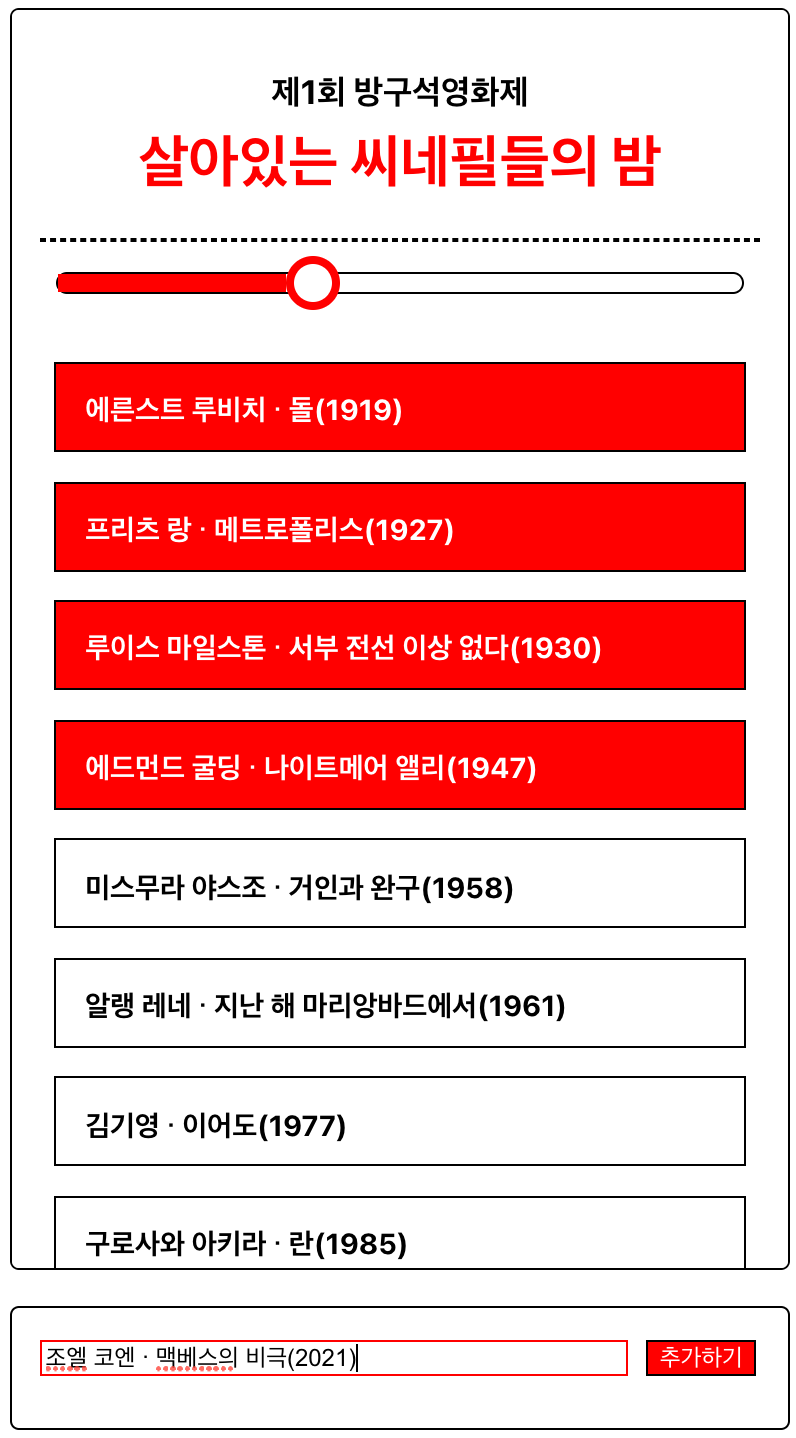
1️⃣ 버킷리스트 영역에 스크롤바 달기
→ BucketList.js의 ListStyle에max-height지정
2️⃣ 감상 버튼 누르면 메인 화면에서 글자색 변경하기
→ ItemStyle의background-color응용
3️⃣ 프로그래스바에 원 달기
→<ProgressBar>에<Circle>추가 후 스타일에display: flex;와align-items: center;적용
→ Circle 스타일에margin-left: -3px;적용
4️⃣ 인풋박스 클릭시 border 색상 변경하기
5️⃣ 인풋박스 클릭시 border 색상 변경하기
인풋 요소 변경하기
App.js
     <Input>
        <input type="text" ref={text} />
        <button onClick={addBucketList}
          style={{ marginLeft: "5px" }}>추가하기</button>
      </Input>


const Input = styled.div`
.
.
.
& input{
  border: 1px solid black;
  width: 321px;
  margin-right: 5px;
}
& input:focus {
  outline: none;
  border: 1px solid red;
}
& button {
  border: 1px solid black;
  background: white;
}
& button:hover {
  color: white;
  background: red;
}
`;
인풋박스와 추가하기 버튼은 의 자식요소이므로 4️⃣와 5️⃣는 가상 클래스 선택자 &로 해결할 수 있다.
가상 클래스 선택자
특정 이벤트마다 스타일을 다르게 적용하는 것으로
&(부모 자신)와 함께 사용한다.
:link방문한 적이 없는 링크:visited방문한 적이 있는 링크:hover마우스 오버:active마우스 클릭:focus인풋 박스등이 포커스 되었을 때:first첫번째 요소:last마지막 요소:first-child첫번째 자식:last-child마지막 자식:nth-child(2n+1)홀수 번째 자식
단, input은 웹상에서 outline을 디폴트로 갖기 때문에 border를 변경하려면 outline: none;을 적용해야 한다.
