이번에도 code lab에서 MotionLayout부분을 따라해본다.
Animating based on drag events
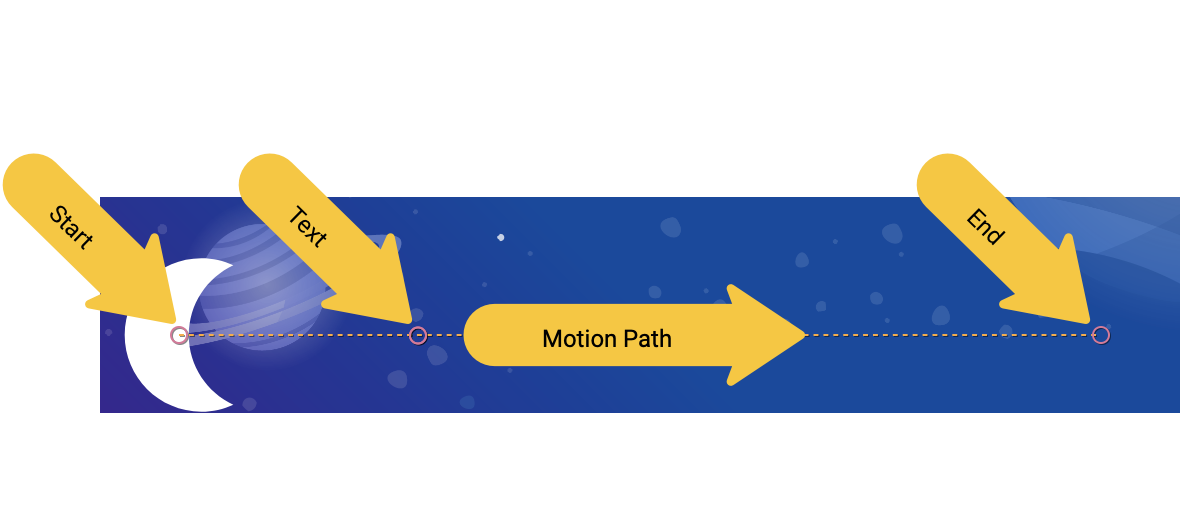
Transition에 onSwipe를 추가해 swipe action으로 애니메이션을 시작하는 예제
- start : 흰 별 두개의 alpha를 0.0으로 설정한다.
- end : 위치에 맞게 적당히 constraint를 주고, 흰 별 두개는 alpha를 1.0으로 한다.
- onSwipe : touchAnchorId 등의 attr을 설정해 자연스러운 swipe를 만든다.
쉬운 편이고 xml을 다 적자면 너무 길게 되므로 transition부분과 left_star만 보자.
<Transition
    motion:constraintSetEnd="@+id/end"
    motion:constraintSetStart="@+id/start">
    <OnSwipe motion:touchAnchorId="@+id/red_star" />
</Transition>
<ConstraintSet android:id="@+id/start">
    <Constraint
        android:id="@+id/left_star"
        android:layout_width="wrap_content"
        android:layout_height="wrap_content"
        android:alpha="0.0"
        motion:layout_constraintBottom_toBottomOf="parent"
        motion:layout_constraintEnd_toEndOf="parent"
        motion:layout_constraintStart_toStartOf="parent" />
</ConstraintSet>
<ConstraintSet android:id="@+id/end">
    <Constraint
        android:id="@+id/left_star"
        android:layout_width="wrap_content"
        android:layout_height="wrap_content"
        android:alpha="1.0"
        motion:layout_constraintEnd_toStartOf="@id/red_star"
        motion:layout_constraintHorizontal_chainStyle="packed"
        motion:layout_constraintStart_toStartOf="parent"
        motion:layout_constraintTop_toBottomOf="@id/credits" />
</ConstraintSet>
이번 예제에서 소개한 OnSwipe의 attr 몇개만 살펴보고 가자.
- touchAnchorId : 손가락과의 거리가 유지될 뷰의 id
- touchAnchorSide : 뷰의 어느 쪽이 tracked 될 것인지. resize, complex path가 있을 때 중요하다. (touchAnchorId와 같이 생각해보라.)
- dragDirection : swipe(동작) 방향. onSwipe가 지정된 방향 swipe에만 적용된다.
마지막으로 drag event Listener는 지정한 View(예제에선 red_star)가 아니라 MotionLayout에 등록된다.
Modifying a path
KeyPosition을 이용해서 start와 end사이의 경로를 좀더 재밌게 만들어보자.
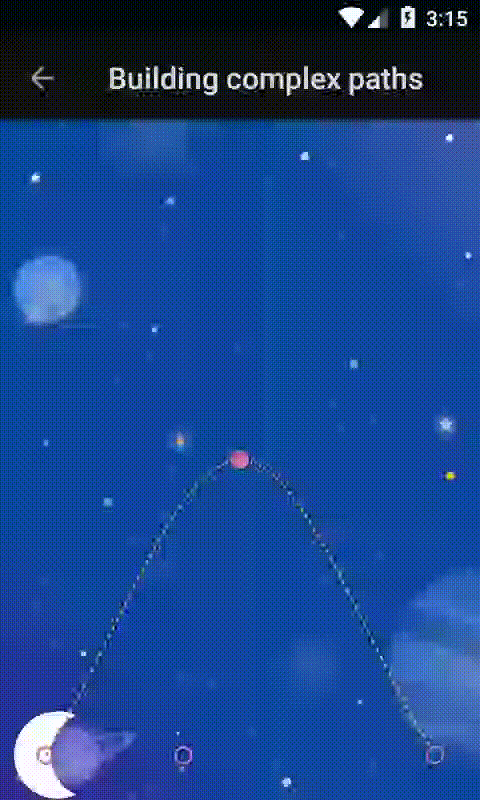
Enable path debugging
MotionLayout의 attribute로 app:motionDebug="SHOW_PATH"를 추가한다.
이상태로 앱을 실행해보면 path가 화면에 보인다.
그림을 보면 원이 있는데, 이는 ConstraintSet에 있는 뷰의 start와 end지점들이다.
여기는 없지만 다이아몬드도 있는데, 이는 경로가 변경되는 지점인 KeyPosition이다.
Modify a path
MotionLayout은 기본적으로 start와 end사이의 Linear Path의 애니메이션을 만들어준다.
여기서 KeyPosition을 사용하면 start와 end 사이의 새로운 지점을 지나게 하거나 속도를 늦추거나 빠르게 할 수 있다.
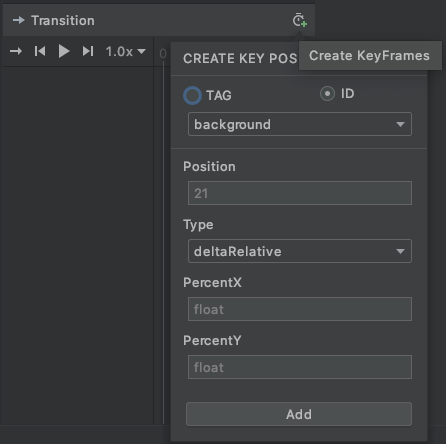
아래와 같이 KeyPosition을 Transition아래에 추가한다.
<KeyFrameSet>
   <KeyPosition
           motion:framePosition="50"
           motion:motionTarget="@id/moon"
           motion:keyPositionType="parentRelative"
           motion:percentY="0.5" />
</KeyFrameSet>
또는 MotionEditor - Transition에서 우측 상단의 시계모양(create KeyFrames)를 클릭한다.
이제 xml에서 설정한 KeyPosition의 attr에 대해 알아보자.
- framePosition : start를 0, end를 1이라고 했을 때 KeyPosition의 시점
- motionTarget : KeyPosition으로 path를 바꿀 View의 id
- keyPositionType : X/Y값을 계산하는 방법을 지정 (추후 다시 나옴)
- percentX/Y : framePosition에서 얼마나 경로를 수정할지 (keyPositionType에 따름)
추가적으로, KeyPosition으로 인해 변경된 path는 기본적으로 curveFit이다.
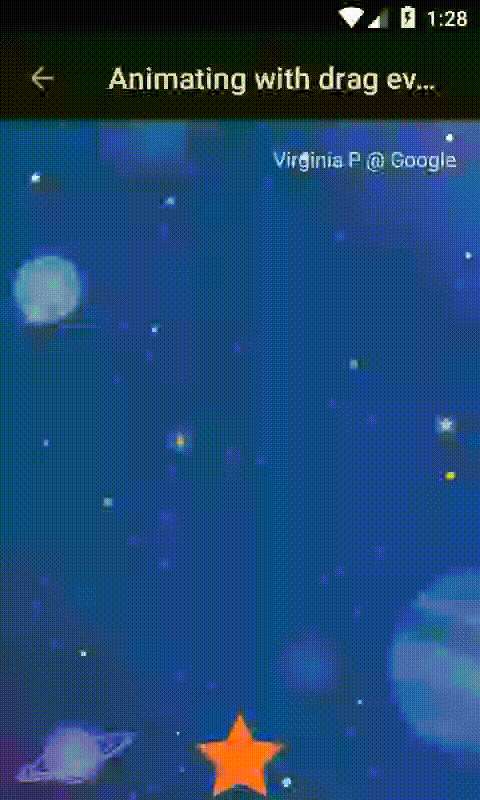
Try it out
codelab의 예제를 실행하면 아래와 같다.
예제 xml에서 alpha가 바뀌는 TextView(Virginia P @ Google)의 layout_constraint는 아래와 같다.
motion:layout_constraintBottom_toBottomOf="@id/moon"
motion:layout_constraintStart_toStartOf="parent"
motion:layout_constraintTop_toTopOf="@id/moon"
그냥 보면 moon은 수직 이동을 하기에 constraint에 따라 TextView는 수직이동을 해야할 것 같다.
그럼에도 불구하고 이 TextView는 y가 바뀌는 moon과 함께 y축 이동을 하지 않는다.
이유를 찾아보자면 아래와 같다.
TextView의 start와 end는 똑같이 양쪽 아랫쪽 가장자리고, 이 정보로 TextView의 path가 결정된다.
그런데 TextView는 KeyPosition으로 path변경을 하지 않았다.
그러므로, 기본 path에서 linear 이동을하고, 이 경우 수평 / 수직 이동은 없게 되는 것이다.