이번에는 주로 AJAX를 활용하는 게시글 내 댓글 작성을 구현하고자 한다.
게시글에 댓글을 함께 다는데, 댓글을 작성할 때 VIEW 상에 영향받지 않고 DB에 댓글을 등록하고 게시글 상세화면으로 유지되면 된다.
// 댓글 작성을 위한 javascript //
$("#btn-comment-write").click(function() {

        var header = $("meta[name='_csrf_header']").attr("content");
        var token = $("meta[name='_csrf']").attr("content");

        var nowUser = $("#nowUser").val();
        var comment = $("#comment").val();

        if (confirm("댓글을 작성하시겠습니까?")) {
            $.ajax({
                type : "post",
                url : "/comment/write",
                // post mapping이므로 CSRF 토큰을 설정한다.
                beforeSend : function(xhr) {xhr.setRequestHeader(header, token);},
                // 댓글 정보를 data로 전달함
                data : JSON.stringify({
                    "boardId" : $("#boardId").val(),
                    "commentWriter" : $("#nowUser").val(),
                    "comment" : $("#comment").val()
                }),
                contentType : "application/json; charset=UTF-8",
                success : function() {
                    alert("댓글이 작성되었습니다.");
                  	// 작성 후에 해당 게시글의 상세 보기로 다시 넘어가도록 하여
                    // 작성된 댓글을 업데이트 할 수 있도록 하게 한다.
                    window.location.href="/board/" + $("#boardId").val();
                }
            })
        }
    })
// CommentController // // AJAX 통신이므로 ResponseBody 어노테이션으로 데이터를 받게끔 하면 된다. // @ResponseBody @PostMapping("/comment/write") // 받는 데이터를 Map<String, Object>로 받으면 된다. // public void commentWrite(@RequestBody Map<String, Object> map) { // DTO로 데이터를 받는다. // CommentDTO commentDTO = new CommentDTO(); commentDTO.setBid(Long.valueOf((String) map.get("boardId"))); commentDTO.setCommentWriter((String) map.get("commentWriter")); commentDTO.setComment((String) map.get("comment")); commentDTO.setCommRegTime(String.valueOf(LocalDate.now())); commentDTO.setCommModTime(String.valueOf(LocalDate.now())); // DTO를 서비스단으로 보낸다. // commentService.commentWrite(commentDTO); }// CommentService // public void commentWrite(CommentDTO commentDTO) { // DTO를 Entity로 변환 // CommentEntity commentEntity = new CommentEntity(); commentEntity.setBid(commentDTO.getBid()); commentEntity.setCommentWriter(commentDTO.getCommentWriter()); commentEntity.setComment(commentDTO.getComment()); commentEntity.setCommRegTime(commentDTO.getCommRegTime()); commentEntity.setCommModTime(commentDTO.getCommModTime()); // Repository로 Entity를 전달하여 DB에 저장 // commentRepository.save(commentEntity); }
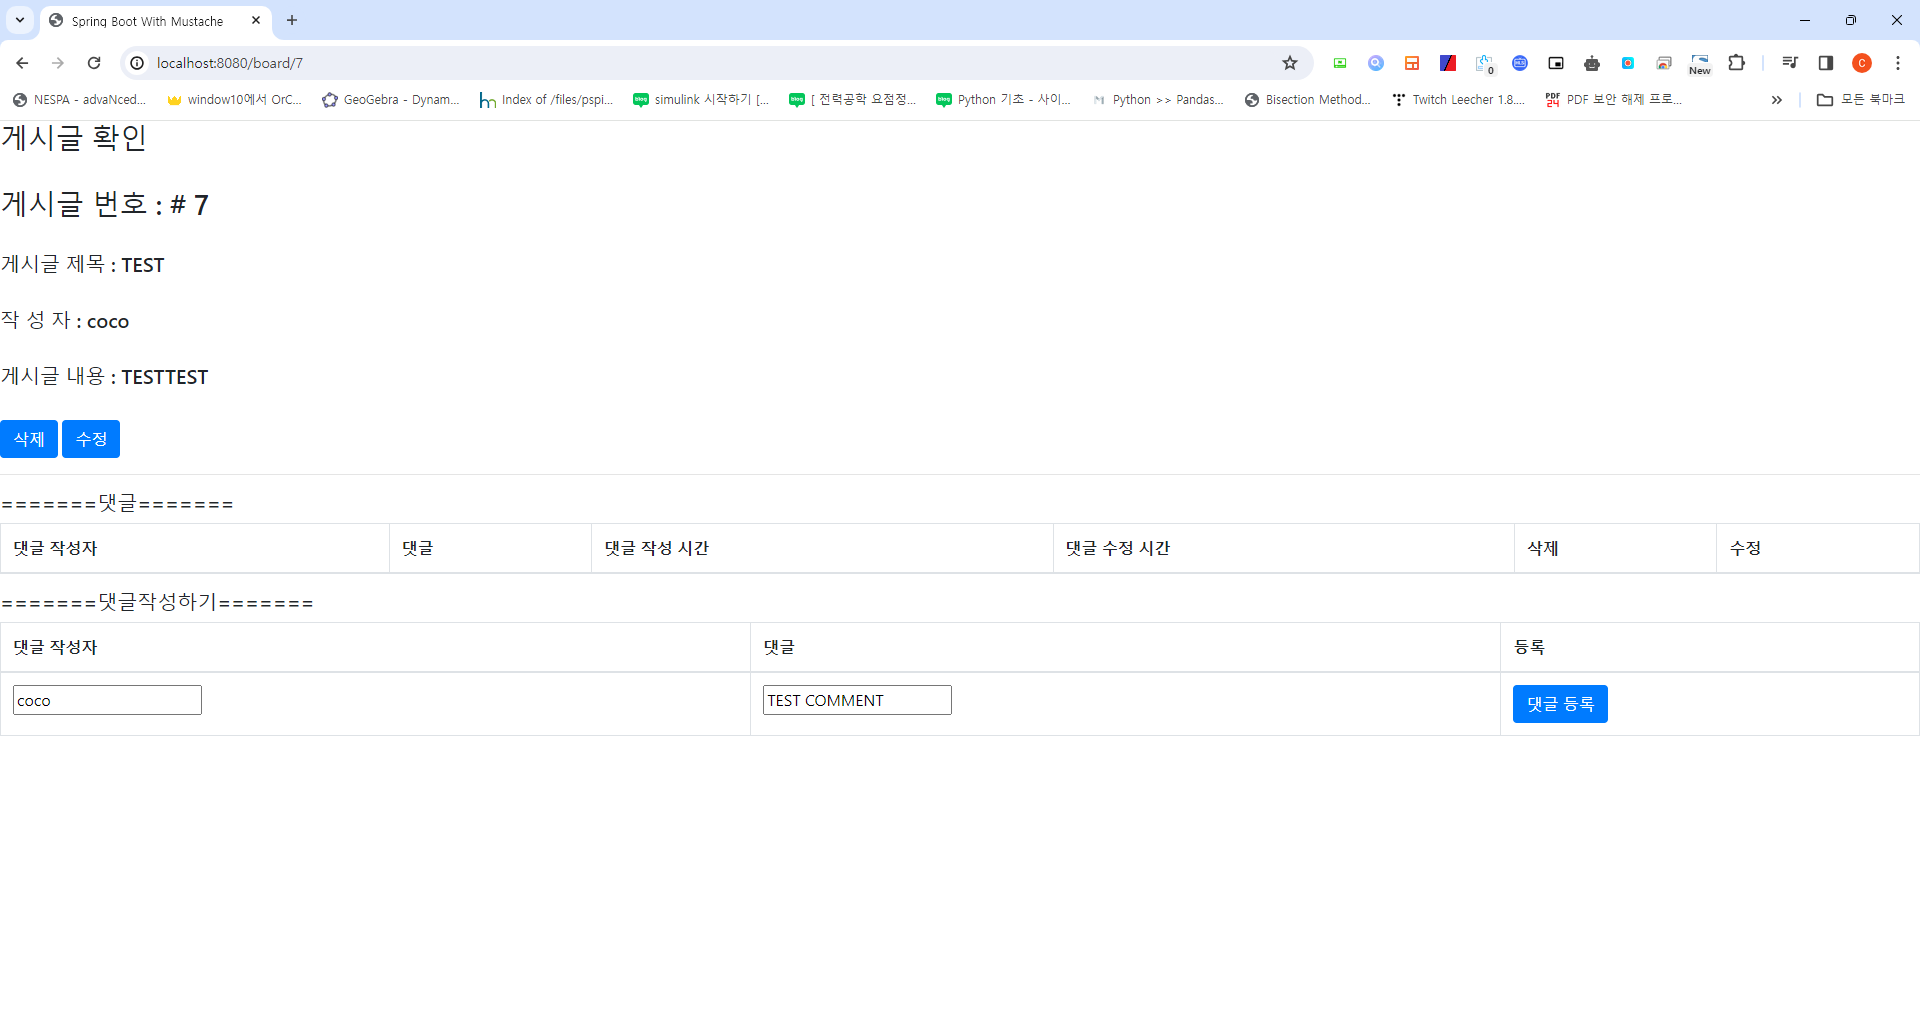
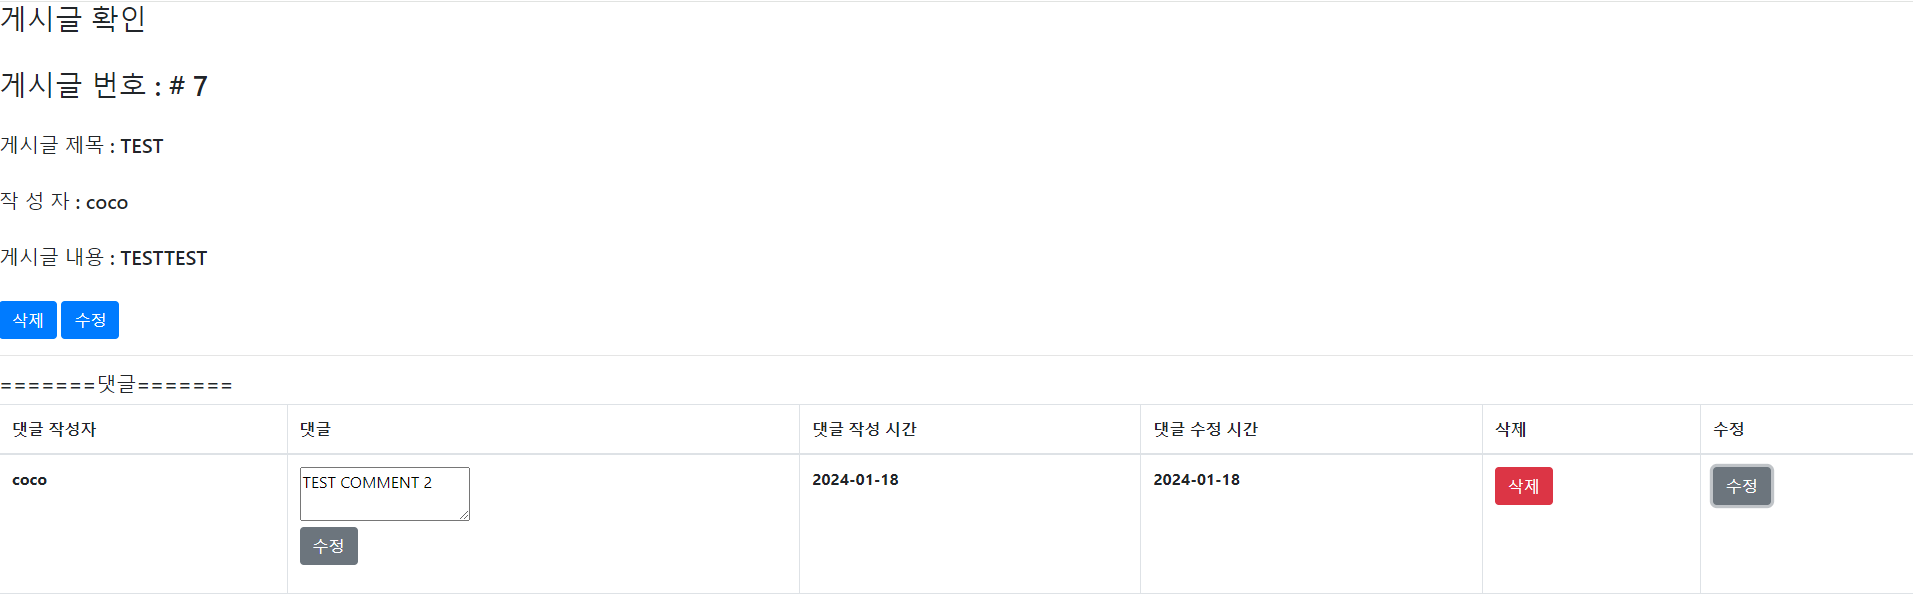
게시글 상세 VIEW에서 댓글을 닮
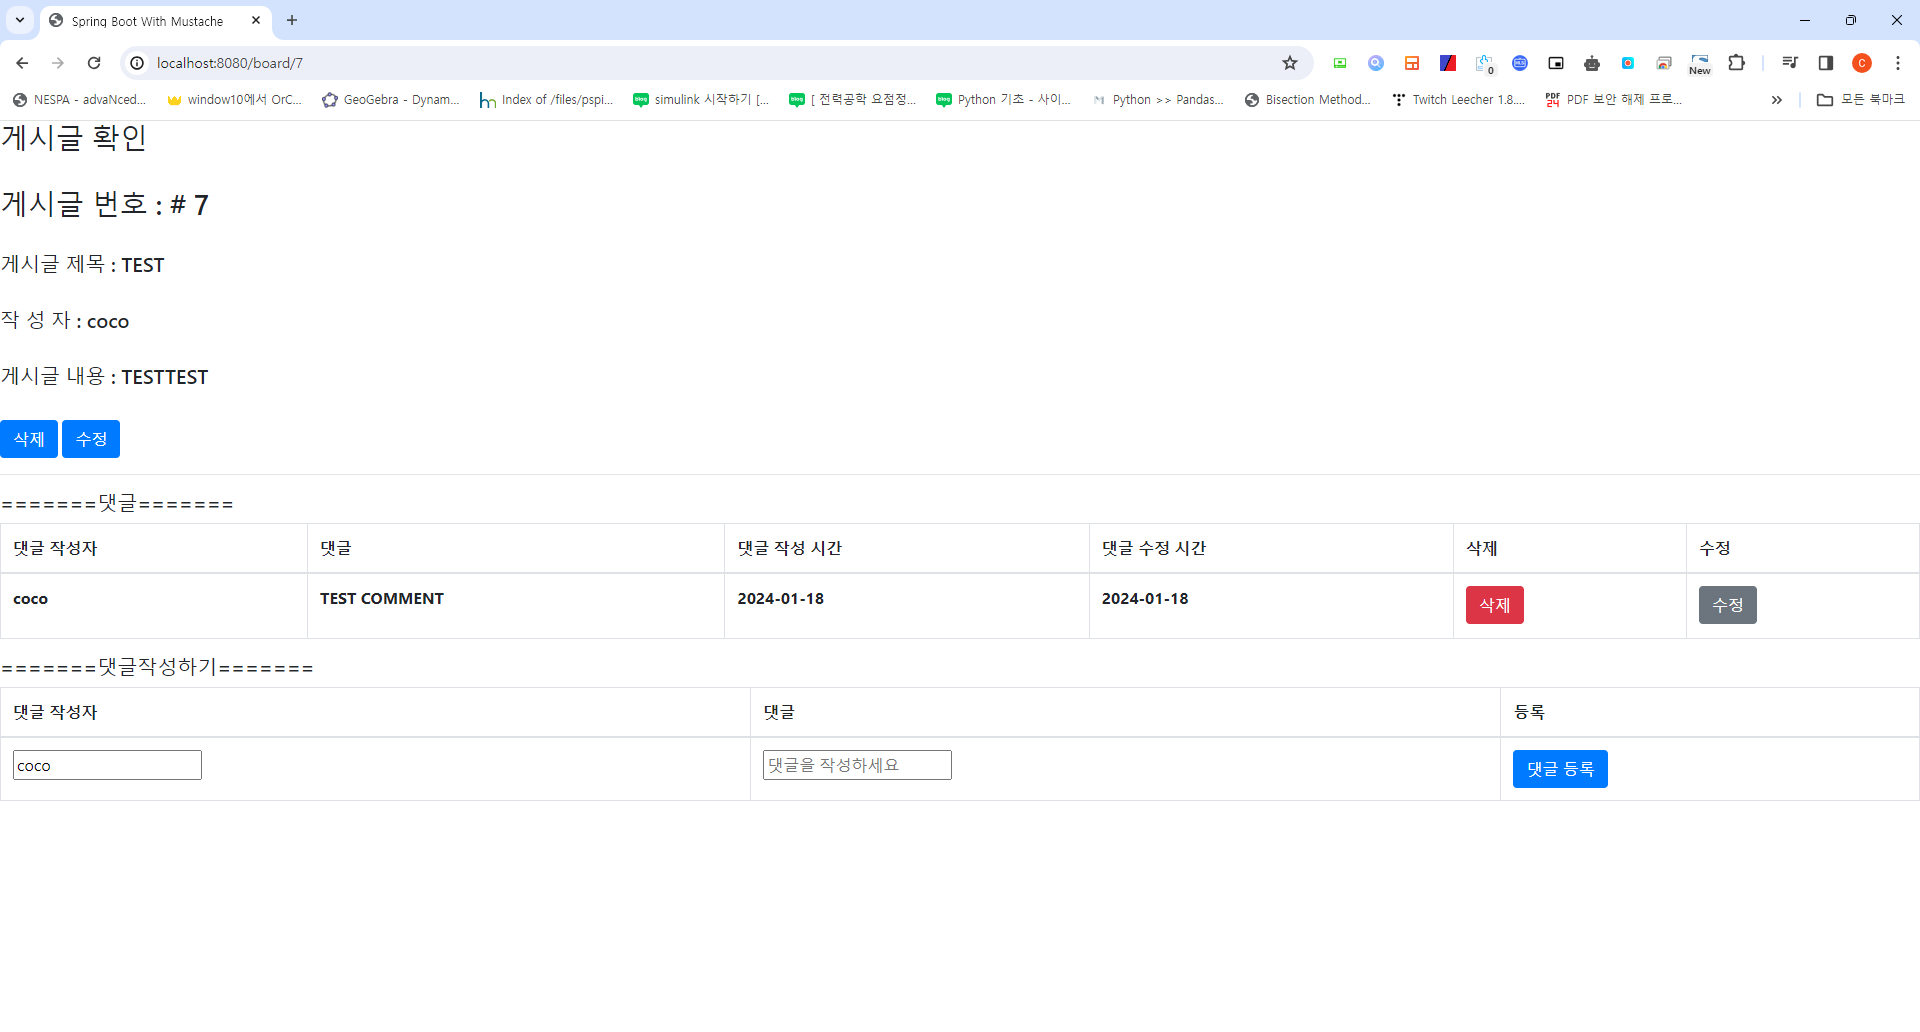
댓글 작성 후 게시글 상세 VIEW
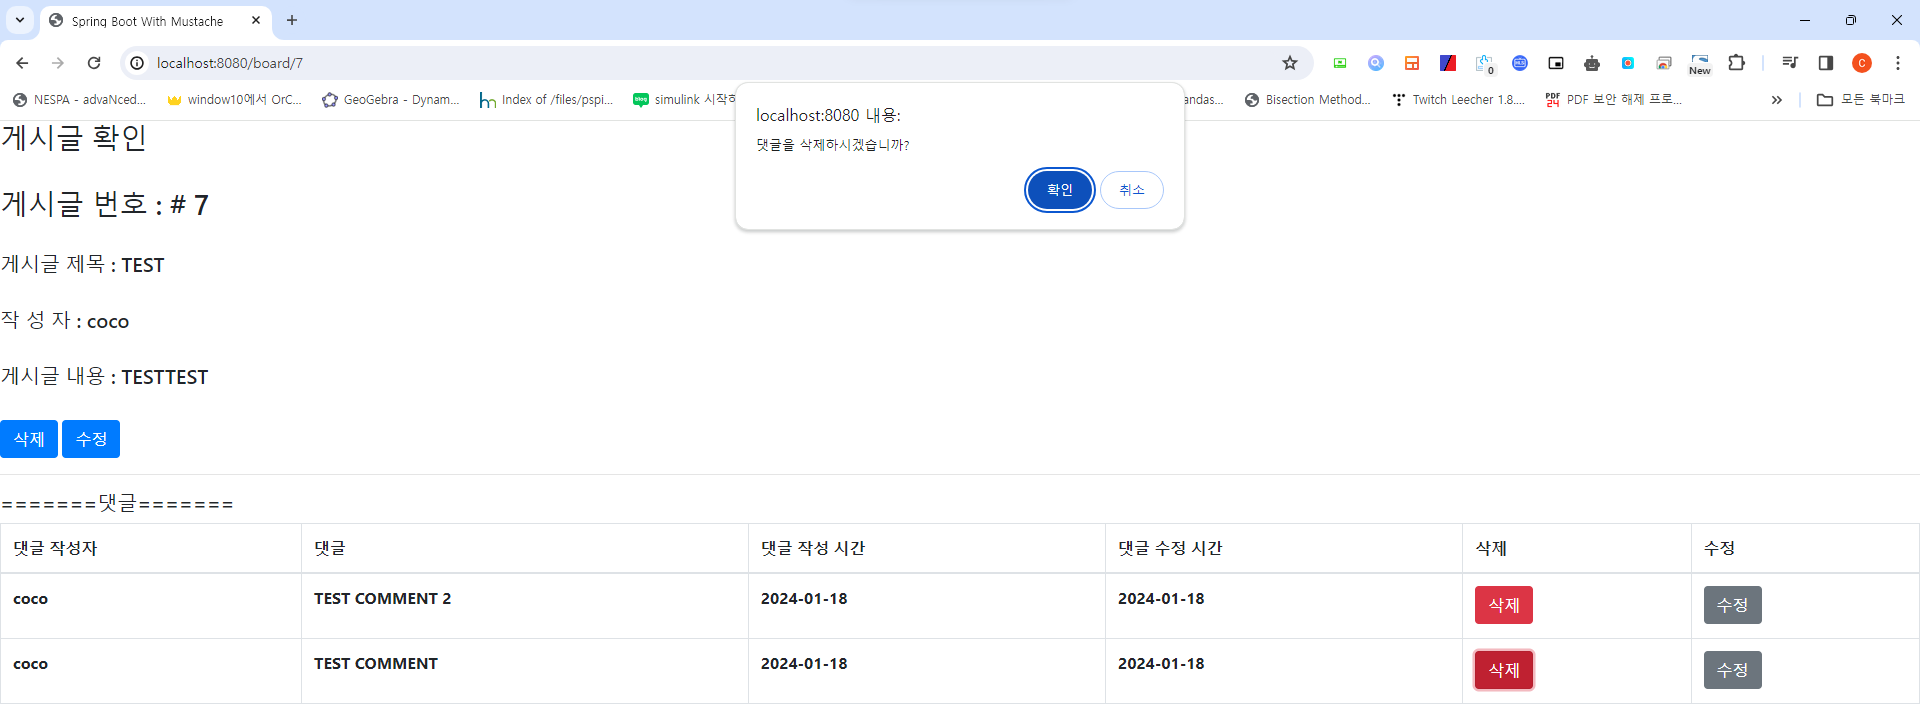
댓글 삭제
댓글을 삭제하는 로직은 댓글 작성자와 현재 로그인한 유저의 아이디가 같을 때 삭제할 지 여부를 물어보게 하도록 하면 된다.
    var commentDeleteButtons = document.querySelectorAll(".btn-comment-delete");
    var commentIds = document.querySelectorAll(".commentId");
    var commentWriters = document.querySelectorAll(".commentWriter");
    var nowUser = $("#nowUser").val();
	// 댓글은 반복문을 통해서 view에 나타내지므로 해당 버튼에 대해서 삭제 기능을 구현하면 된다 //
    for(let i = 0; i < commentDeleteButtons.length; i++) {
        commentDeleteButtons[i].addEventListener("click", function() {
            var commentWriter = commentWriters[i].value;
            var commentId = commentIds[i].value;
            if (nowUser === commentWriter) {
                // 댓글 작성자가 현재 유저와 같은지 비교하게끔 한다. //
                if (confirm("댓글을 삭제하시겠습니까?")) {
                    // URL에서 댓글 ID를 GET으로 보내 해당 댓글을 삭제하게 한다. //
                    $.ajax({
                        type : "get",
                        url : "/comment/delete?cid=" + commentId,
                        contentType : "json",
                        success : function() {
                            alert("삭제했습니다!!");
                            window.location.href = "/board/" + $("#boardId").val();
                        }
                    });
                }
            } else {alert("댓글 작성자가 아닙니다.");}
        });
    }
// CommentController // // ResponseBody로 통신 // @ResponseBody @GetMapping("/comment/delete") // Get 방식이므로 RequestParam으로 받으면 된다. // public void commentDelete(@RequestParam Long cid) { // Service 단으로 delete 호출 // commentService.commentDelete(cid); }// CommentService // public void commentDelete(Long cid) { // Respository 호출 // commentRepository.deleteById(cid); }
댓글 삭제 VIEW
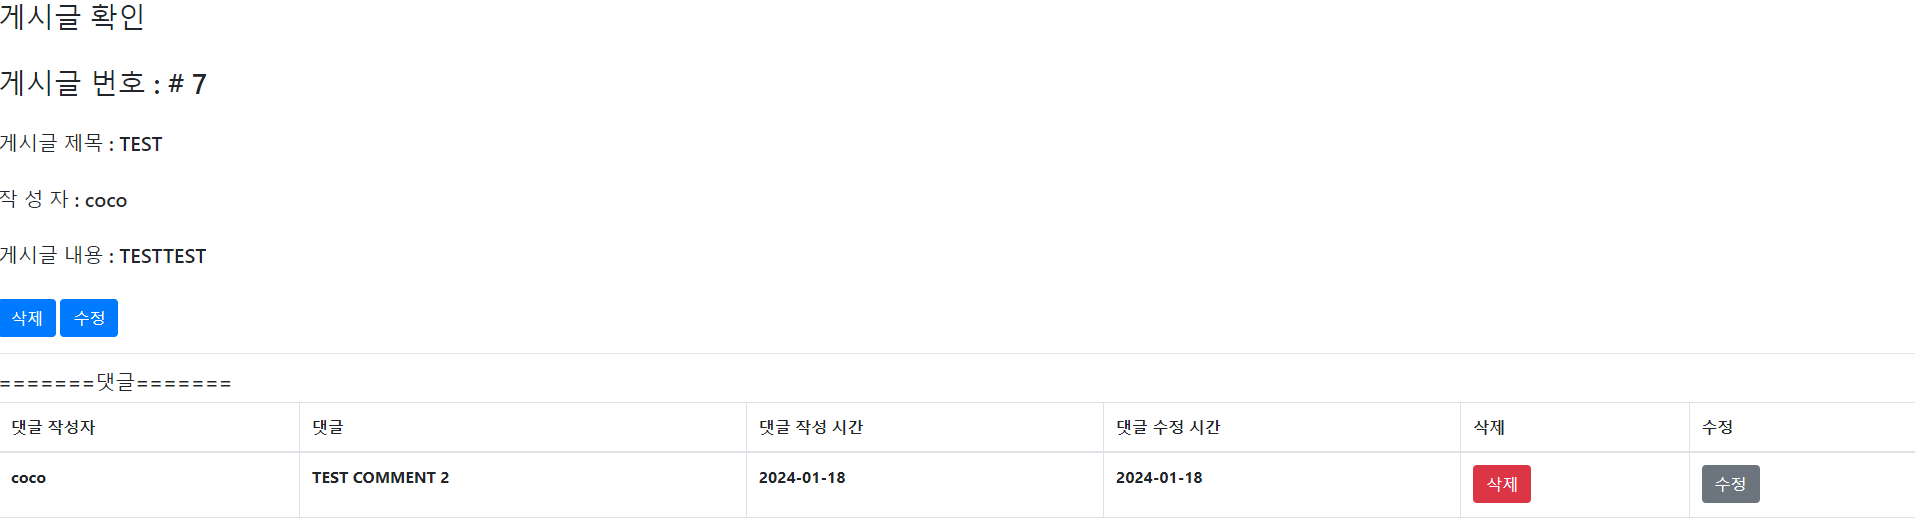
댓글 삭제 후 VIEW
댓글 수정
댓글을 수정하는 방법은 댓글의 내용을 보여주는 태그를 textarea와 같은 데이터를 입력받을 수 있는 태그로 바꾸고 해당 태그에 입력된 내용으로 댓글을 변경하면 된다.
var commentIds = document.querySelectorAll(".commentId");
var commentWriters = document.querySelectorAll(".commentWriter");
var nowUser = $("#nowUser").val();
var commentModifyButtons = document.querySelectorAll(".btn-comment-modify");

for (let j = 0; j < commentModifyButtons.length; j++) {
    commentModifyButtons[j].addEventListener("click", (e) => {
        e.preventDefault();
		// post 방식이므로 CSRF 토큰을 전달함 //
        var header = $("meta[name='_csrf_header']").attr("content");
        var token = $("meta[name='_csrf']").attr("content");
        var commentWriter = commentWriters[j].value;
        var commentId = commentIds[j].value;
		// 현재 유저와 댓글 작성자를 비교함 //
        if (nowUser === commentWriter) {
            if (confirm("댓글을 수정하시겠습니까?")) {
                var nowElement = document.getElementById("comm_" + commentId);
                var beforeValue = nowElement.textContent;
                console.log(beforeValue);
                nowElement.value = "";
                // 현재 태그의 값을 빈 값으로 초기화하고 //
                // 현재 태그의 HTML의 textarea로 바꾼 후에 변경하고자 하는 값을 입력받는다. //
                nowElement.innerHTML = "<textarea id='comm_modi_" + commentId + "'>" + beforeValue + "</textarea><br><button type='button' id='modi_btn_" + commentId + "' class='btn btn-secondary'>수정</button>"
                document.getElementById("modi_btn_" + commentId).addEventListener("click", function() {
                    $.ajax({
                        type : "post",
                        url : "/comment/update",
                        beforeSend : function(xhr) {xhr.setRequestHeader(header, token);},
                        data : JSON.stringify({
                            "commentID" : commentId,
                            "commentUpdate" : document.getElementById("comm_modi_" + commentId).value
                            }),
                        contentType : "application/json; charset=UTF-8",
                        success : function() {
                            window.location.href = "/board/" + $("#boardId").val();
                        }
                        })
                    });
                }
            } else {alert("댓글 작성자가 아닙니다.");}
        })
    }
// CommentController // // AJAX 통신을 하기 위해 ResponseBody 어노테이션을 명시한다. // @ResponseBody @PostMapping("/comment/update") public void commentUpdate(@RequestBody Map<String, Object> map) { // id에 맞는 CommentDTO를 서비스단으로부터 받아온다. // // AJAX가 보낸 데이터를 받아서 Comment를 업데이트한다. // Long cid = Long.valueOf((String) map.get("commentID")); CommentDTO commentDTO = commentService.getComment(cid); commentDTO.setComment((String) map.get("commentUpdate")); commentDTO.setCommModTime(String.valueOf(LocalDate.now())); 서비스단을 호출하여 변경된 댓글을 DB에 저장한다. // commentService.commentUpdate(commentDTO);}// CommentService // public void commentUpdate(CommentDTO commentDTO) { // DTO의 값을 Entity로 변환한다. // CommentEntity commentEntity = new CommentEntity(); commentEntity.setId(commentDTO.getId()); commentEntity.setBid(commentDTO.getBid()); commentEntity.setCommentWriter(commentDTO.getCommentWriter()); commentEntity.setComment(commentDTO.getComment()); commentEntity.setCommRegTime(commentDTO.getCommRegTime()); commentEntity.setCommModTime(commentDTO.getCommModTime()); // Repository를 호출하여 업데이트 된 Entity의 값으로 save한다. // // JPA에서는 DB에 동일한 ID가 있는 경우 업데이트되므로 동일하게 save를 호출하면 된다. // commentRepository.save(commentEntity);}
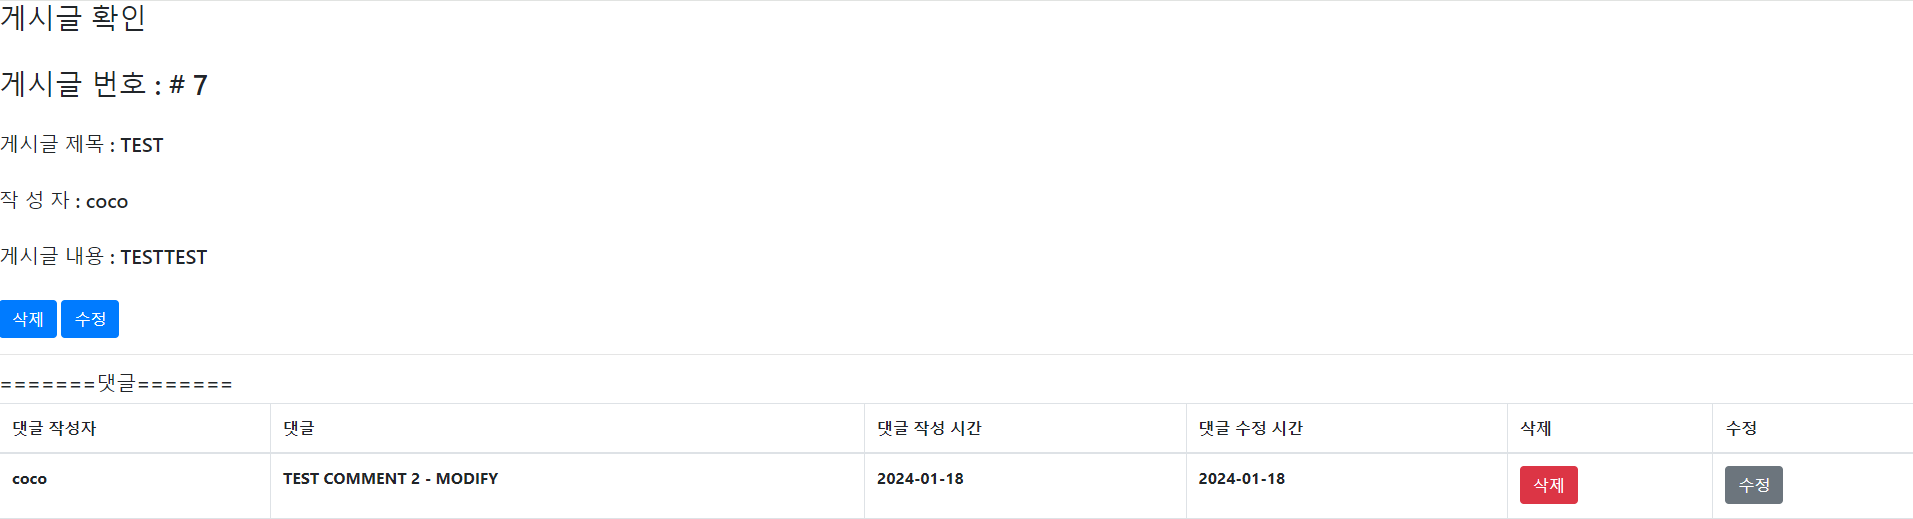
댓글 수정창 호출
댓글 수정
댓글 수정 후 VIEW

구현 후 필요한 개선사항
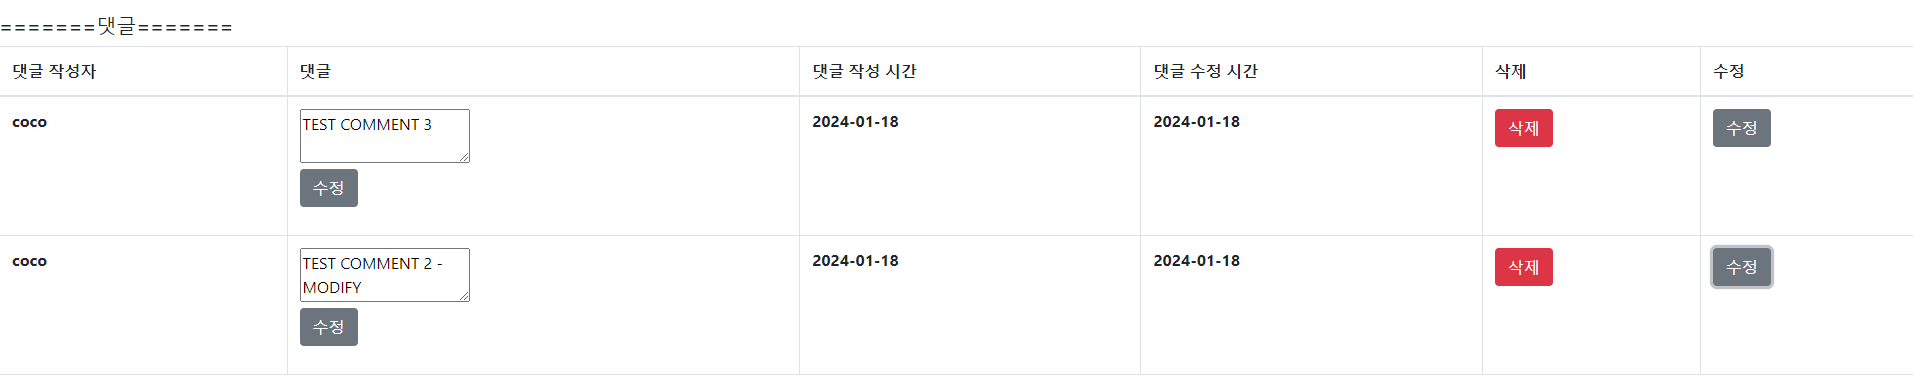
댓글이 여러 개인 경우, 수정 버튼을 모두 누르면 모든 댓글에 대해 수정창이 나타나게 되므로, 이러한 점이 수정이 필요한데 이는 자바스크립트 상에서 수정 하나를 누를 때 모든 태그들을 원상복구 시킨 후에 해당 댓글에 대해서만 textarea로 바꾸도록 하면 될 것이다.
다음으로 구현해볼 사항
게시글을 등록할 때 사진을 등록하는 것 그리고 RestfulAPI를 활용할 때 PutMapping이나 DeleteMapping을 활용하는 것을 구현할 것이다.

ヽ(≧□≦)ノ