토이 프로젝트를 위해 지난번 React(TypeScript) APP을 만들었으나, 상태(state) 관리 라이브러리를 사용하기 위해 Redux를 구축하려고 한다.
Redux
Redux가 무엇인가?
- 상태 관리 라이브러리 중 하나이다.
- redux, mobx, recoil 등이 존재한다.
- 프론트엔드 APP을 만들다보면, 항상 서버로 데이터를 주고받는 것이 아니라 클라이언트에서만 필요한 경우도 있다.
- 예를 들면 서버에 저장 안 되는 체크박스를 눌렀다거나? 도움말 창 열었거나?
Redux 필요성
- Prop drilling 문제 해결
- 규모가 커져 복잡해지다보면, 상태가 점점 상위 component로 올라간다. component가 계층화되거나 여러 component와 관련된 상태라면 말이다. 그래서 결국 상태를 글로벌하게 모아서 관리하자는 취지에서 상태 관리 라이브러리가 생겼다고 할 수 있다.
- 사이드이펙트, 메모이제이션, 데이터 직렬화 등 다양한 기술을 사용하려 한다.
- 물론, React Context API랑 hook을 이용해 상태 관리를 할 수 있다. 그러나, 토이 프로젝트 규모가 좀 커서 Redux 기능을 적극 활용해보려 한다.
설치
크게 특별할 것이 없다. 참고로 @types/react-redux는 아래 패키지에 dependency로 포함된다고 한다. 그리고 참고로 CRA를 이용하면 초기 APP을 만들 때 redux도 함께 설치할 수 있다. 저자는 모르고 넘어와 따로 구축하고 있다. (...하하)
npm install react-redux @reduxjs/toolkit@reduxjs/toolkit 패키지는 redux에서 사용하기 쉽게 배포하는 toolkit이라고 한다. 사용하지 않으면 다른 라이브러리를 많이 추가하거나, 코드가 길어지고 러닝커브가 높다고 한다.
- store 생성은 tutorial을 보고 적용하였다.
- 먼저 store 생성 코드를 입력하였다.
// src/redux/store.ts
import { configureStore } from '@reduxjs/toolkit'

export const store = configureStore({
  reducer: {
    // 여기에 reducer를 추가하는 방식이다.
  },
});

// Infer the `RootState` and `AppDispatch` types from the store itself
export type RootState = ReturnType<typeof store.getState>;
// Inferred type: {posts: PostsState, comments: CommentsState, users: UsersState}
export type AppDispatch = typeof store.dispatch;- useSelector, useDispatch 를 hook으로 만들어 type을 component마다 import하는 행위를 줄인다고 한다.
// src/redux/hooks.ts
import { TypedUseSelectorHook, useDispatch, useSelector } from 'react-redux'
import type { RootState, AppDispatch } from './store'

// Use throughout your app instead of plain `useDispatch` and `useSelector`
export const useAppDispatch = () => useDispatch<AppDispatch>();
export const useAppSelector: TypedUseSelectorHook<RootState> = useSelector;- APP에 redux store를 제공하자!
// src/index.js
import React from "react";
import ReactDOM from "react-dom";
import App from "./pages/App";

import { Provider } from "react-redux";
import { store } from './redux/store'

ReactDOM.render(
  <Provider store={store}> // 이게 추가된 것이다!
    <App />
  </Provider>,
  document.getElementById("root")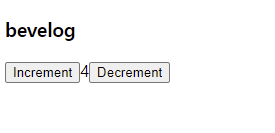
);- 예시로 사용할 counter라는 예제이다. 숫자 올리고 내리고를 나타내는 component라고 볼 수 있다.
// src/components/molecules/Counter.tsx
import React, { useState } from 'react'
import { useAppSelector, useAppDispatch } from '../../redux/hooks'
import { decrement, increment } from '../../redux/reducers/counterSlice'

export function Counter() {
  // The `state` arg is correctly typed as `RootState` already
  // hook을 정의 안하면 이렇게 state에 RootState type을 줘야하고 import를 해야만 한다.
  //  const count = useSelector((state: RootState) => state.counter.value)
  const count = useAppSelector((state) => state.counter.value);
  const dispatch = useAppDispatch();

  return (
    <div>
      <div>
        <button
          aria-label="Increment value"
          onClick={() => dispatch(increment())}
        >
          Increment
        </button>
        <span>{count}</span>
        <button
          aria-label="Decrement value"
          onClick={() => dispatch(decrement())}
        >
          Decrement
        </button>
      </div>
    </div>
  );
}

// src/redux/reducers/counterSlice.ts
import { createSlice, PayloadAction } from '@reduxjs/toolkit'
import type { RootState } from '../store'

// Define a type for the slice state
interface CounterState {
  value: number
}

// Define the initial state using that type
const initialState: CounterState = {
  value: 0,
}

export const counterSlice = createSlice({
  name: 'counter',
  // `createSlice` will infer the state type from the `initialState` argument
  initialState,
  reducers: {
    increment: (state) => {
      state.value += 1
    },
    decrement: (state) => {
      state.value -= 1
    },
    // Use the PayloadAction type to declare the contents of `action.payload`
    incrementByAmount: (state, action: PayloadAction<number>) => {
      state.value += action.payload
    },
  },
});

export const { increment, decrement, incrementByAmount } = counterSlice.actions;

// Other code such as selectors can use the imported `RootState` type
export const selectCount = (state: RootState) => state.counter.value;

export default counterSlice.reducer;
- 물론 root store에 reducer를 추가하고 app에도 렌더링 해야 한다.
// src/redux/store.ts
import { configureStore } from '@reduxjs/toolkit'
import counterReducer from './reducers/counterSlice'

export const store = configureStore({
  reducer: {
    counter: counterReducer, // 이렇게 추가해준다!
  },
});

// Infer the `RootState` and `AppDispatch` types from the store itself
export type RootState = ReturnType<typeof store.getState>;
// Inferred type: {posts: PostsState, comments: CommentsState, users: UsersState}
export type AppDispatch = typeof store.dispatch;

// src/pages/App.tsx
import React from "react";
import { Counter } from "../components/molecules/Counter";

const App = () => {
  return (
    <>
      <h3>bevelog</h3>
      <Counter />
    </>
  );
};

export default App;- 실행하면 이렇게 나온다!

- 버튼을 누르면 숫자가 증가하고 줄어든다.
폴더 구조
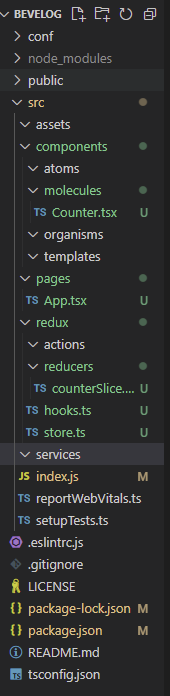
- atomic design을 적용하기 위해 다음과 같이 구성했다.
- 최대한 분할하여 코드 재사용이 높은 프로젝트를 해보고 싶었다. 가능한지.. 정말 효율인지..? 그런것을 검증해보고 싶었다.
- component를 최대한 나눠서 생각한다.
- atoms - molecules - organisms - templates - pages
- atoms: div 같이 최소한 HTML tag로 구성하는 단위 (label, button, input 등)
- molecules: atom을 합친 기본 단위, 디자인 레벨에서 기본 component 단위라고 할 수 있다 (검색바 등)
- organisms: 아래 단위를 합친 단위, UI의 기본 단위처럼 느껴진다 (login form 등)
- templates: 아래 컴포넌트의 위치 같은 배치를 정하는 역할로, 스타일 칼라는 들어가지 않는다고 한다. (header, footer 등)
- pages: 말그대로 페이지이다. 서비스 별 나눠질 수 있을 거 같다.

최종 결과 폴더 구조는 다음과 같다.

Front-end developer