개발 이유
유료 Music-Bot 존재하지만, 월간 이용 요금이 있었고, 현재 운영 중 Discord Channel에서 유저의 요청이 있었기 때문에 개발.
폴더 구조
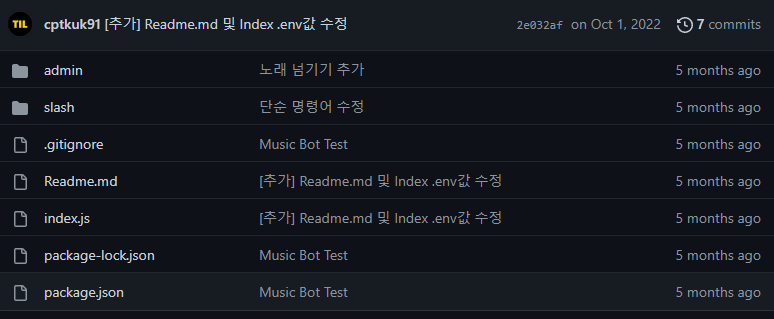
폴더 구조는 개인의 자유지만, 초보 개발자로서 항상 어떤 느낌으로 폴더 구조를 설계해야하는지 고민을 많이 했습니다. 따라서 폴더 구조를 위 사진과 같이 첨부합니다. admin의 경우 일반 사용자 접근이 불가능하게 막아놨습니다. 24시간 채널을 관리할 수 없지만, 채널에 접속해 있는 시간, 이상하거나? 잘못된 영상 및 Music을 추가하는 경우 차단 시켜버리기 위한 목적으로 제작했습니다. (.env의 경우 gitignore로 인해 업로드 X)
index.js
const { GatewayIntentBits, Client, Collection } = require("discord.js");
const dotenv = require("dotenv");
const { REST } = require("@discordjs/rest");
const { Routes } = require("discord-api-types/v9");
const fs = require("fs");
const { Player } = require("discord-player");

dotenv.config();
const TOKEN = process.env.TOKEN;

const LOAD_SLASH = process.argv[2] == "load";

const CLIENT_ID = "CLIENT_ID";
const GUILD_ID = "GUILD_ID";

const client = new Client({
  intents: [GatewayIntentBits.Guilds, GatewayIntentBits.GuildVoiceStates],
});

client.slashcommands = new Collection();
client.player = new Player(client, {
  ytdlOptions: {
    quality: "highestaudio",
    highWaterMark: 1 << 25,
  },
});

let commands = [];

const slashFiles = fs
  .readdirSync("./slash")
  .filter((file) => file.endsWith(".js"));
for (const file of slashFiles) {
  const slashcmd = require(`./slash/${file}`);
  client.slashcommands.set(slashcmd.data.name, slashcmd);
  if (LOAD_SLASH) commands.push(slashcmd.data.toJSON());
}

if (LOAD_SLASH) {
  const rest = new REST({ version: "9" }).setToken(TOKEN);
  console.log("작동 시작~");
  rest
    .put(Routes.applicationGuildCommands(CLIENT_ID, GUILD_ID), {
      body: commands,
    })
    .then(() => {
      console.log("성공적으로 작동");
      process.exit(0);
    })
    .catch((err) => {
      if (err) {
        console.log(err);
        process.exit(1);
      }
    });
} else {
  client.on("ready", () => {
    console.log(`인증 된 사용자를 위해 대기`);
  });
  client.on("interactionCreate", (interaction) => {
    async function handleCommand() {
      if (!interaction.isCommand()) return;

      const slashcmd = client.slashcommands.get(interaction.commandName);
      if (!slashcmd) interaction.reply("불가능한 명령어 입력");

      await interaction.deferReply();
      await slashcmd.run({ client, interaction });
    }
    handleCommand();
  });
  client.login(TOKEN);
}
- 최상단의 import의 경우, 제작에 필요한 Discord.js의 function을 사용하기 위해 추가하였습니다.
- dotenv의 경우 공유가 불가능한 자료를 모아놓기 위해 사용하였습니다.
- TOKEN, CLIENT_ID, GUILD_ID의 경우 Discord Developer Portal에서 발급받을 수 있습니다.
TOKEN = BOT 개발에 직접적으로 필요한 TOKEN
CLIENT_ID = 인증 된 개발자에게 필요한 ID 값
GUILD_ID = 어떤 채널에서 작동시킬지에 대한 채널 ID 값https://discord.com/developers/docs/intro
- 기능 작동을 위해서 아래 공식 문서를 참고해서 BOT을 만들었습니다.
https://discordjs.guide/creating-your-bot/main-file.html#running-your-application// Require the necessary discord.js classes const { Client, Events, GatewayIntentBits } = require('discord.js'); const { token } = require('./config.json'); // Create a new client instance const client = new Client({ intents: [GatewayIntentBits.Guilds] }); // When the client is ready, run this code (only once) // We use 'c' for the event parameter to keep it separate from the already defined 'client' client.once(Events.ClientReady, c => { console.log(`Ready! Logged in as ${c.user.tag}`); }); // Log in to Discord with your client's token client.login(token);
제가 만든 코드를 보시면, 아래 코드가 추가됐다는 걸 확인 할 수 있습니다. 해당 코드의 경우 slashcommands를 통해 Bot을 작동시킨다는 뜻이고(Discord.js 기능), Discord.js에서 제공하는 Audio Player인 Player Function을 추가하였습니다. ytdlOptions는 YouTube downloading module로 Youtube에서 노래를 끌어오기 위해서 추가하였습니다. Twitch, Spotify등 다양하 Options가 존재하기 때문에 반드시 ytdlOptions를 사용할 필요는 없습니다.
client.slashcommands = new Collection();
client.player = new Player(client, {
  ytdlOptions: {
    quality: "highestaudio",
    highWaterMark: 1 << 25,
  },
});
- let commands = [];
배열을 선언하여 명령어가 입력될 때 commands에 push할 수 있도록 빈 배열을 만들어줍니다.
ex) 노래 재생을 입력했을 때 commands 노래 재생이 들어갔을 것이고, 노래 중지를 했을 때 commands 배열에서 노래 재생이 제거됩니다.
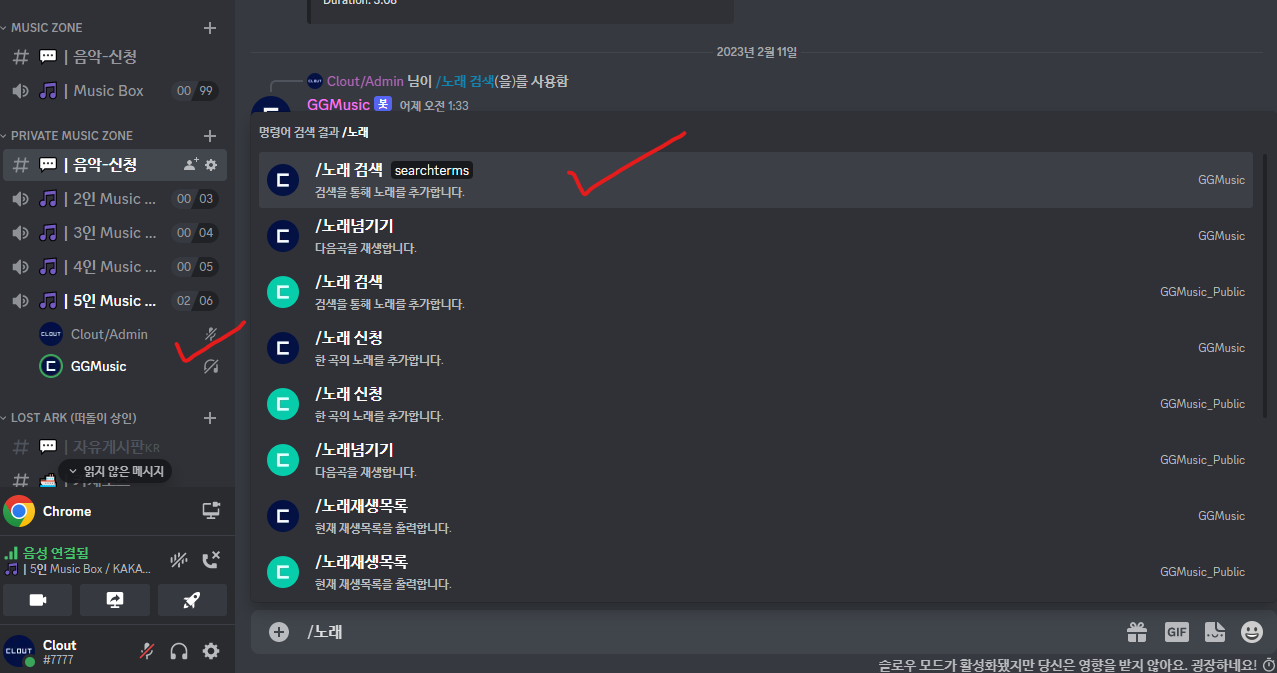
- 입력받는 값을 commands에 넣을 수 있도록 아래 코드를 작성합니다. 처음 폴더구조 사진을 보시면 slash라는 폴더가 존재한다는 걸 알 수 있습니다. slash 폴더로 이동 후 .js (명령어)를 찾아 기능을 commands에 추가합니다. (사용자는 js까지 입력할 필요가 없도록 명령어를 한글로 변환해 제공합니다. -> slash 폴더 파일에서 설정이 가능합니다.)
const slashFiles = fs
  .readdirSync("./slash")
  .filter((file) => file.endsWith(".js"));
for (const file of slashFiles) {
  const slashcmd = require(`./slash/${file}`);
  client.slashcommands.set(slashcmd.data.name, slashcmd);
  if (LOAD_SLASH) commands.push(slashcmd.data.toJSON());
}
- 만약 commands에 사용자가 원하고, slash 폴더에 들어 있는 기능을 정상적으로 실행한다면 성공적으로 commands에 명령어가 들어가 기능이 작동하게 됩니다.
반대로 잘못된 명령어를 사용하면 else문을 통해 사용자에게 "불가능한 명령어 입력"을 반환합니다.if (LOAD_SLASH) { const rest = new REST({ version: "9" }).setToken(TOKEN); console.log("작동 시작~"); rest .put(Routes.applicationGuildCommands(CLIENT_ID, GUILD_ID), { body: commands, }) .then(() => { console.log("성공적으로 작동"); process.exit(0); }) .catch((err) => { if (err) { console.log(err); process.exit(1); } }); } else { client.on("ready", () => { console.log(`인증 된 사용자를 위해 대기`); }); client.on("interactionCreate", (interaction) => { async function handleCommand() { if (!interaction.isCommand()) return; const slashcmd = client.slashcommands.get(interaction.commandName); if (!slashcmd) interaction.reply("불가능한 명령어 입력"); await interaction.deferReply(); await slashcmd.run({ client, interaction }); } handleCommand(); }); client.login(TOKEN); }

메일은 매일 확인하고 있습니다. 궁금하신 부분이나 틀린 부분에 대한 지적사항이 있으시다면 언제든 편하게 연락 부탁드려요 :)