
👀0.개요
world를 생성할때 population tag를 사용하면 오브젝트를 하나씩 배치하지 않고 일정한 규칙을 지정하여 생성하거나 랜덤으로 배치 할 수 있는 기능을 가진다. 실습을 통해 population의 사용법을 알아보자.
🚙1.실습 진행
population tag를 이용하여 world 파일을 작성 한 뒤 gazebo에서 어떤 식으로 나타나는지 확인하고 각각의 코드가 어떤식으로 동작하는지 알아보겠다.
🗒1.1 코드
🌍population.world
<?xml version="1.0" ?>
<sdf version="1.5">
    <world name="default">

        <!-- A global light source -->
        <include>
            <uri>model://sun</uri>
        </include>

        <!-- A ground plane -->
        <include>
            <uri>model://ground_plane</uri>
        </include>

        <!-- +X barriers -->
        <population name="barriers_population">
            <model name="jersey_barrier_1">
                <include>
                    <static>true</static>
                    <uri>model://jersey_barrier</uri>
                </include>
            </model>
            <pose>0 19 0.3 0 0 0</pose>
            <box>
                <size>40 40 0.01</size>
            </box>
            <model_count>10</model_count>
            <distribution>
                <type>linear-x</type>
            </distribution>
        </population>

        <!-- -X barriers -->
        <population name="barriers_population">
            <model name="jersey_barrier_2">
                <include>
                    <static>true</static>
                    <uri>model://jersey_barrier</uri>
                </include>
            </model>
            <pose>0 -21.5 0.3 0 0 0</pose>
            <box>
                <size>40 40 0.01</size>
            </box>
            <model_count>10</model_count>
            <distribution>
                <type>linear-x</type>
            </distribution>
        </population>

        <!-- +Y barriers -->
        <population name="barriers_population">
            <model name="jersey_barrier_3">
                <include>
                    <static>true</static>
                    <uri>model://jersey_barrier</uri>
                    <pose>0 0 0 0 0 1.57</pose>
                </include>
            </model>
            <pose>19 0 0.3 0 0 0</pose>
            <box>
                <size>40 40 0.01</size>
            </box>
            <model_count>10</model_count>
            <distribution>
                <type>linear-y</type>
            </distribution>
        </population>

        <!-- -Y barriers -->
        <population name="barriers_population">
            <model name="jersey_barrier_4">
                <include>
                    <static>true</static>
                    <uri>model://jersey_barrier</uri>
                    <pose>0 0 0 0 0 1.57</pose>
                </include>
            </model>
            <pose>-21.5 0 0.3 0 0 0</pose>
            <box>
                <size>40 40 0.01</size>
            </box>
            <model_count>10</model_count>
            <distribution>
                <type>linear-y</type>
            </distribution>
        </population>


        <!-- random models population -->
        <population name="construction_barrel_population">
            <model name="construction_barrel">
                <include>
                <static>false</static>
                <uri>model://construction_barrel</uri>
                </include>
            </model>
            <pose>0 0 0.2 0 0 0</pose>
            <box>
                <size>30 30 0.01</size>
            </box>
            <model_count>100</model_count>
            <distribution>
                <type>random</type>
            </distribution>
        </population>

    </world>
</sdf>
💻1.2 Gazebo 화면
1️⃣1.2.1 첫번째 실행
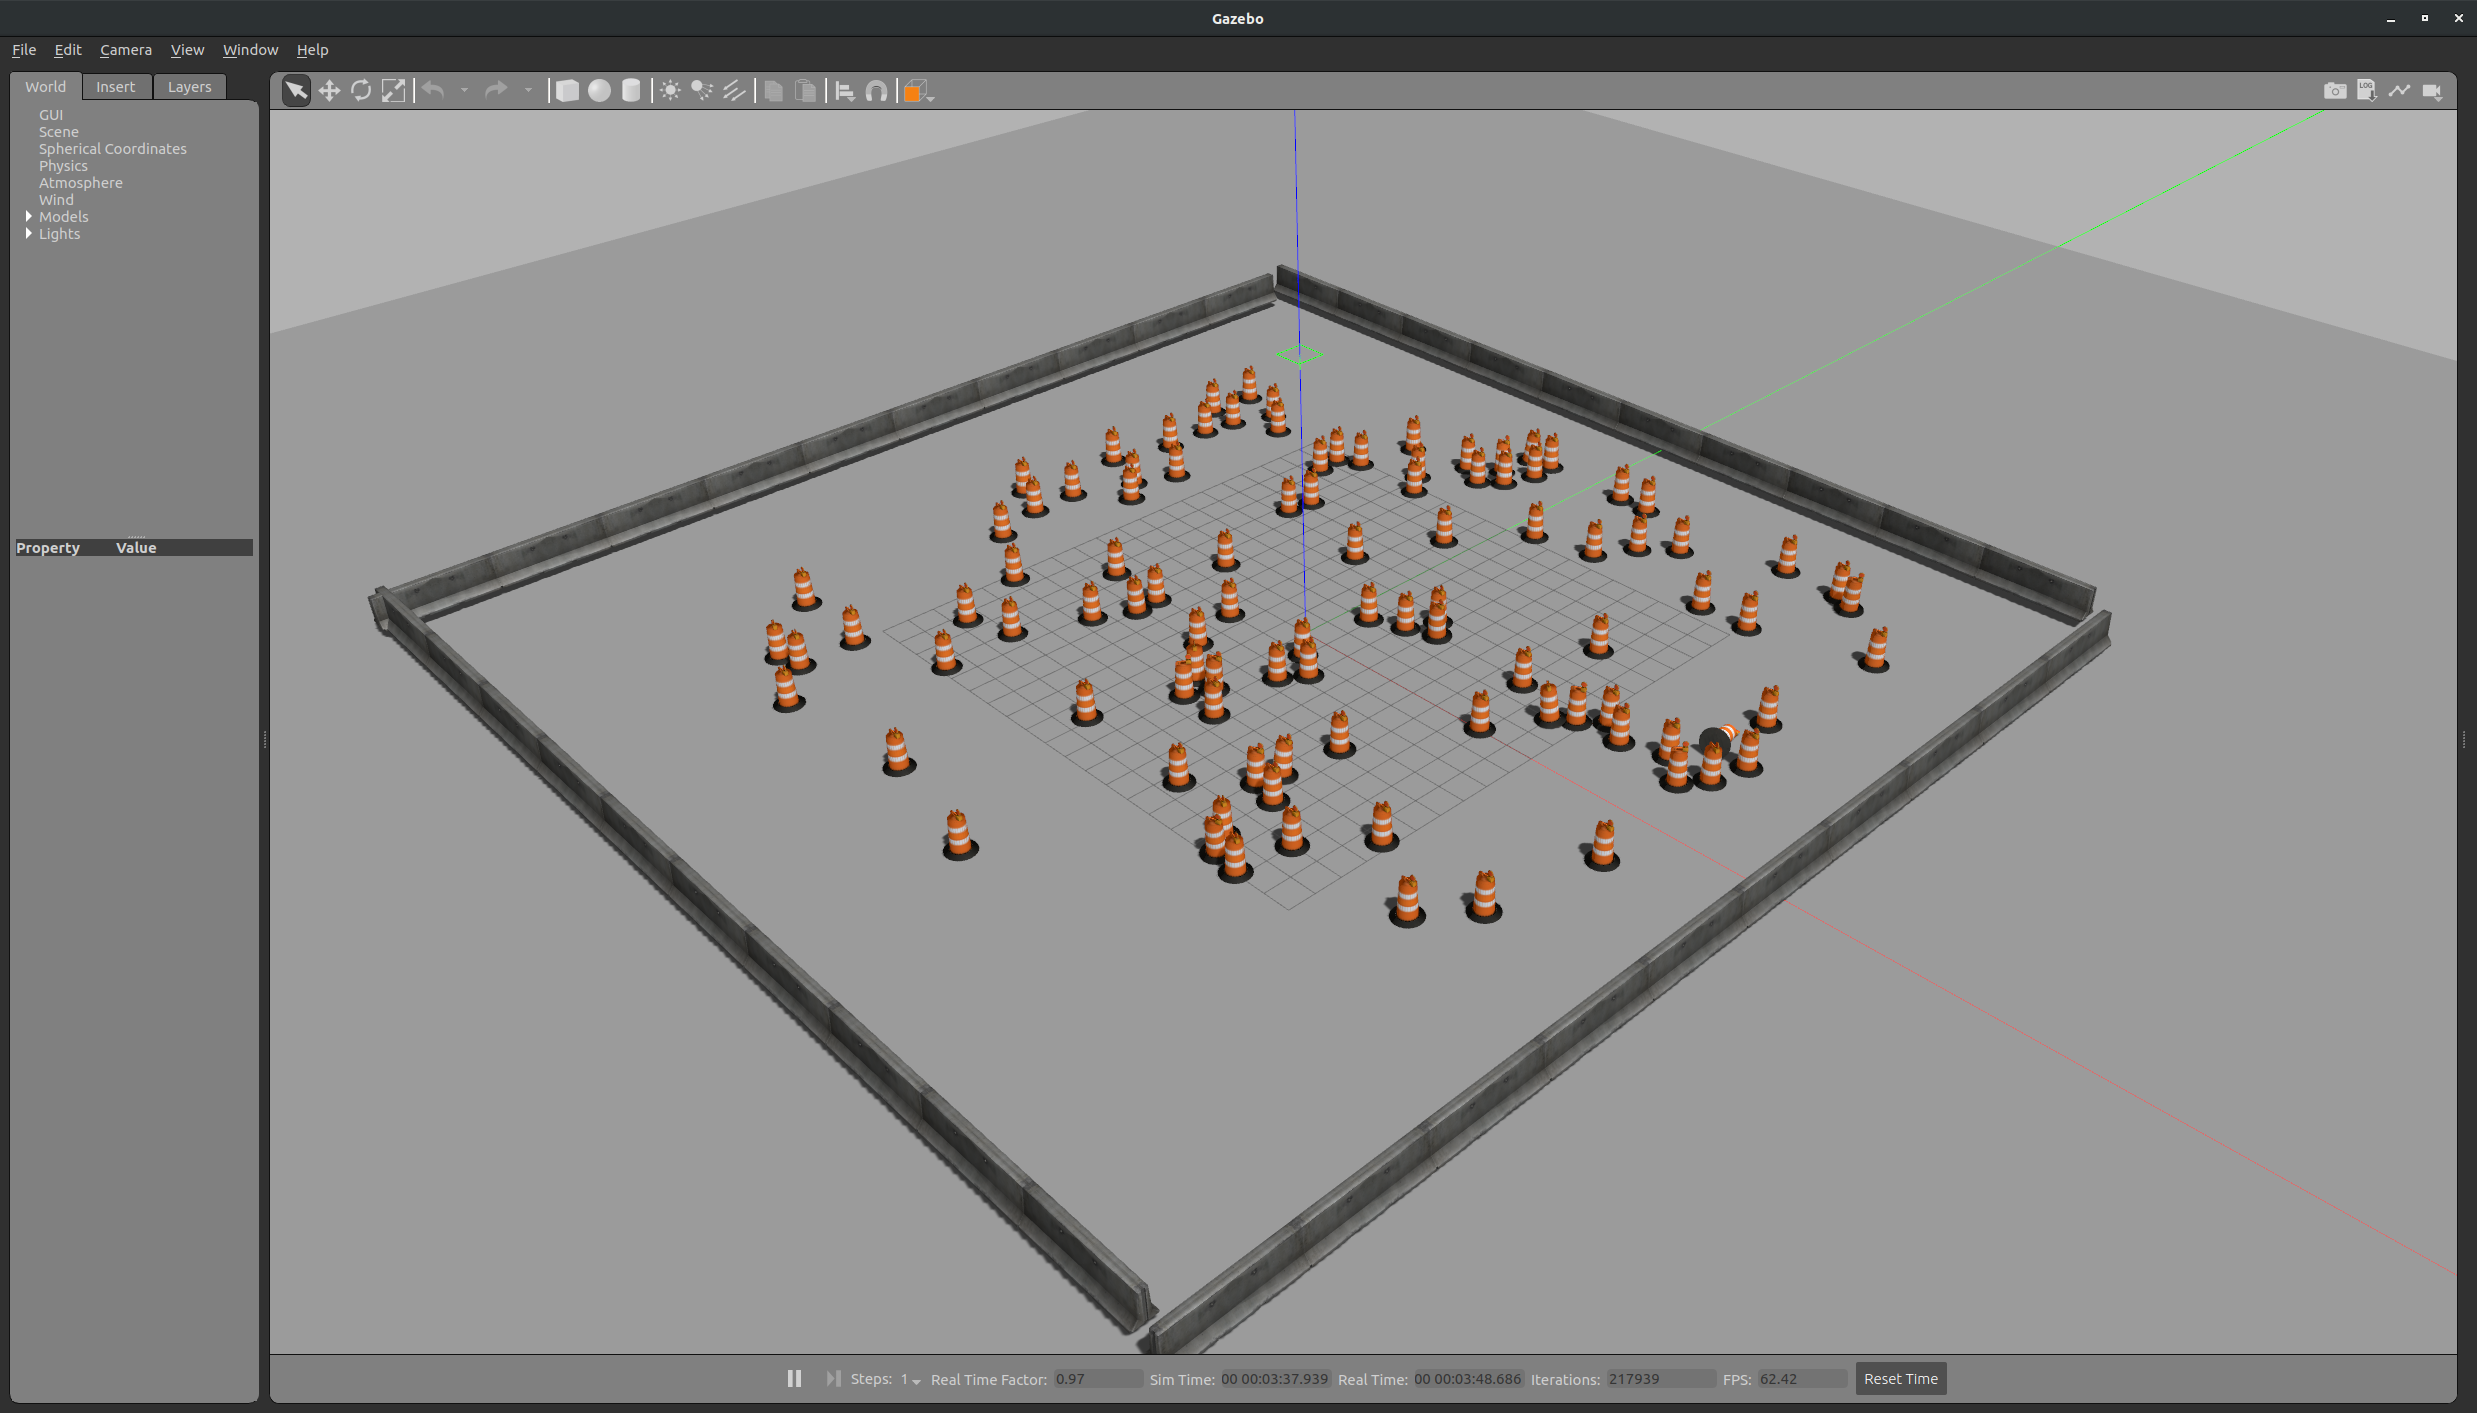
2️⃣1.2.2 두번재 실행

🤔2. 코드 분석
실행화면을 보면 사각형 형태로 둘러싼 바리케이드와 내부에 꼬깔이 여러개 배치되어 있는 것을 확인 할 수 있다.
아래에 population에서 사용가능한 tag를 설명하였고, 바리케이트 및 꼬깔이 어떤식으로 배치되었는지 살펴보자.
🗒테그 목록
1.
population-population객체의 이름을 지정할 수 있다.
2.model- 객체의 모델을 정의하는데 사용된다.
3.include- 모델에 필요한 소스를 불러오거나 ,속성을 정의 하는데 사용된다.
4.pose- 시뮬레이션에서 오브젝트의 초기위치 또는 방향을 설정한다.
5.box- 시뮬레이션에서 객체가 위치할 영역을 설정한다.
6.model_count- 시뮬레이션에서 만들 모델의 수를 정의한다.
7.distribution- 개체를 배포할 방법을 지정한다 (ex : random , uniform, grid, linear-x,linear-y,linear-z)
🚧바리케이스 생성코드
        <population name="barriers_population">
            <model name="jersey_barrier_1">
                <include>
                    <static>true</static>
                    <uri>model://jersey_barrier</uri>
                </include>
            </model>
            <pose>0 19 0.3 0 0 0</pose>
            <box>
                <size>40 40 0.01</size>
            </box>
            <model_count>10</model_count>
            <distribution>
                <type>linear-x</type>
            </distribution>
        </population>
우선 population의 name은 barriers_population이고 ,
model name 은 jersey_barrier_1이다.
static 이 true이므로 고정된 성질을 가진다.
uri에 해당되는 모델 jersey_barrier을 불러온다.
pose모델의 초기 위치는 xyz = 0 19 0.3 pry = 0 0 0 으로 회전 값은 따로 부여하지 않았다.
box 테그는 객체가 위치할 영역으로 40*40 으로 설정하였다.
model_count 값이 10이므로 10개의 바리케이트가 설치될 것이다.
distribution == linear-x 이므로 x축으로 일렬로 배열한다.
해당 내용으로 x축 및 y축으로 총 4개의 population의 pose, distribution 값을 바꾸면서 구성할 수 있었고 , y축 바리케이트는 include 의 pose 중 pry = 0 0 1.57 을 부여해 모델이 Y축으로 향하게 배치할 수 있었다.
위 실행화면을 보면 첫번째 실행화면과 두번째 실행화면의 바리케이트 배치는 같으나 꼬깔의 배치가 다른 것을 확인 할 수 있다.
그이유는 아래의 코드를 보면서 확인해보자.
🚧꼬깔 생성코드
        <!-- random models population -->
        <population name="construction_barrel_population">
            <model name="construction_barrel">
                <include>
                <static>false</static>
                <uri>model://construction_barrel</uri>
                </include>
            </model>
            <pose>0 0 0.2 0 0 0</pose>
            <box>
                <size>30 30 0.01</size>
            </box>
            <model_count>100</model_count>
            <distribution>
                <type>random</type>
            </distribution>
        </population>
차이점은 distribution 이부분의 값이 random으로 설정되어있기 때문이다.
random 값을 부여하면 지정된 범위 내에 랜덤으로 해당 객체를 생성하게 된다.
