🐢0.개요
자율주행에서 mapping은 아주 중요한 요소이다.
로봇이 SLAM을 이용하여 Mapping을 어떻게 하여 Map 파일을 만드는지 아래의 과정을 통해 알아보자
목차
1. Rviz에서 Mapping 과정 시각화 하기
2. Map 파일 다루기
3. Transforms
4. SLAM 오픈소스 패키지
⛰️1.Rviz에서 Mapping 과정 시각화
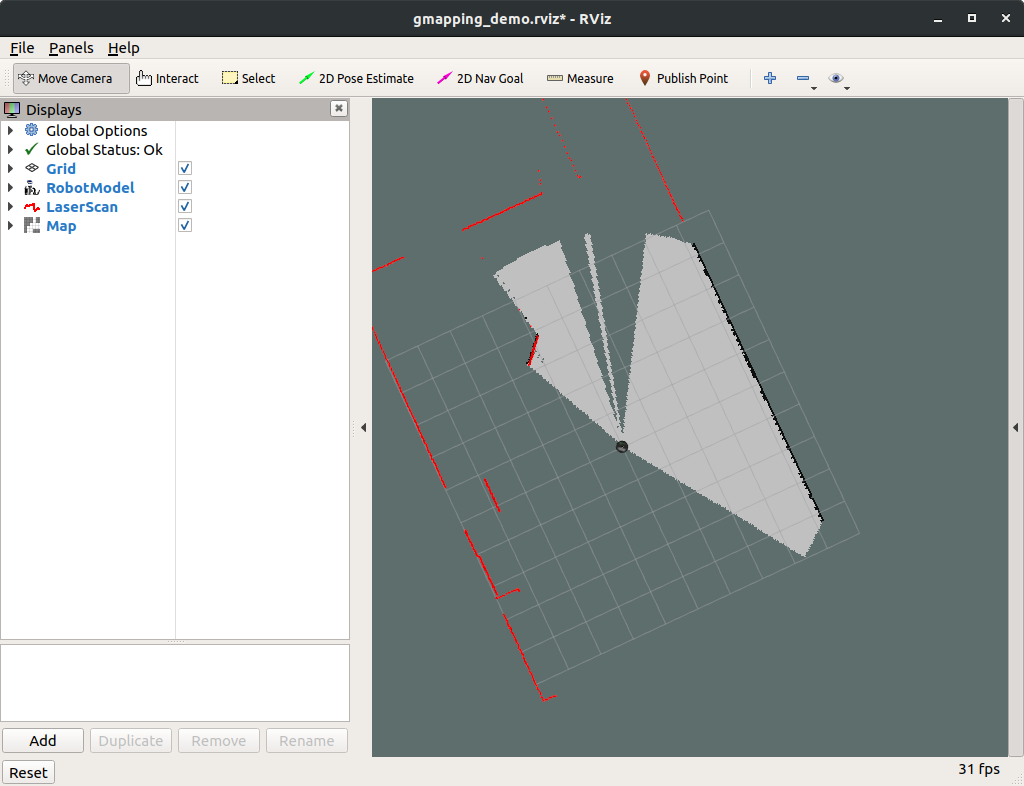
데모 gmapping 파일을 통해 mapping 과정을 시각적으로 알아보자.
카페 맵에 꼬부기 소환 및 gmapping_demo.launch 를 실행하였다.
1.1 터미널 명령어
roslaunch turtlebot_navigation_gazebo main.launch
roslaunch turtlebot_navigation_gazebo gmapping_demo.launch
각각 다른 터미널에서 실행새주고 Rviz를 따로 실행시켜주자
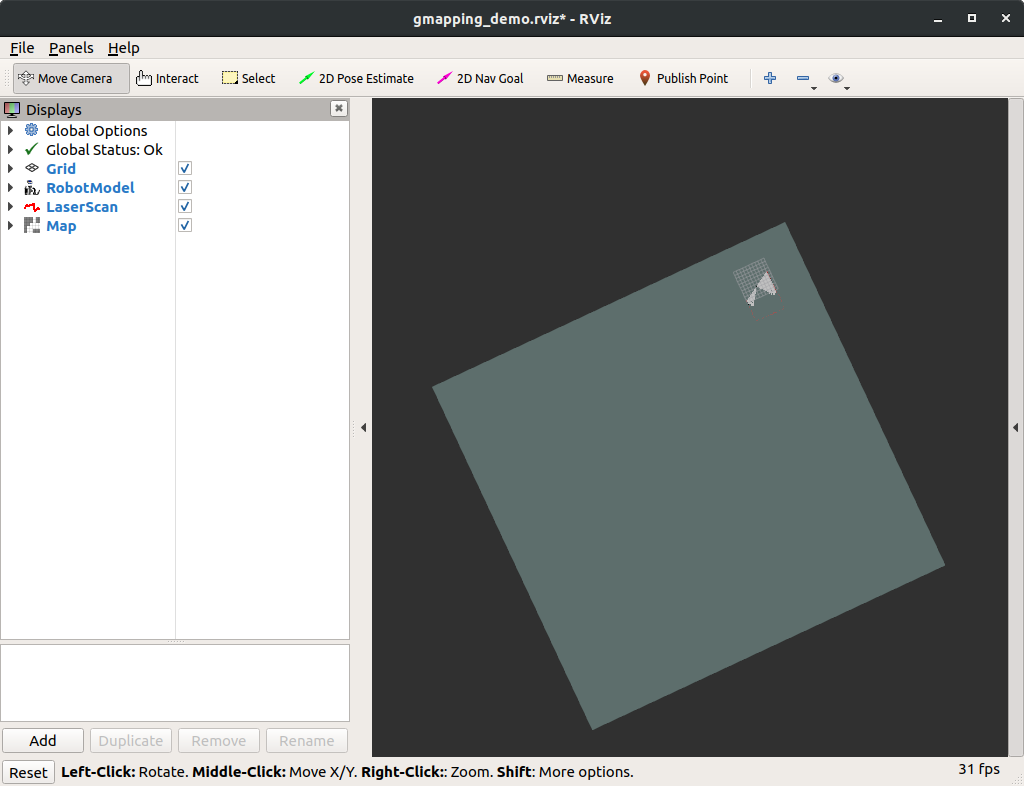
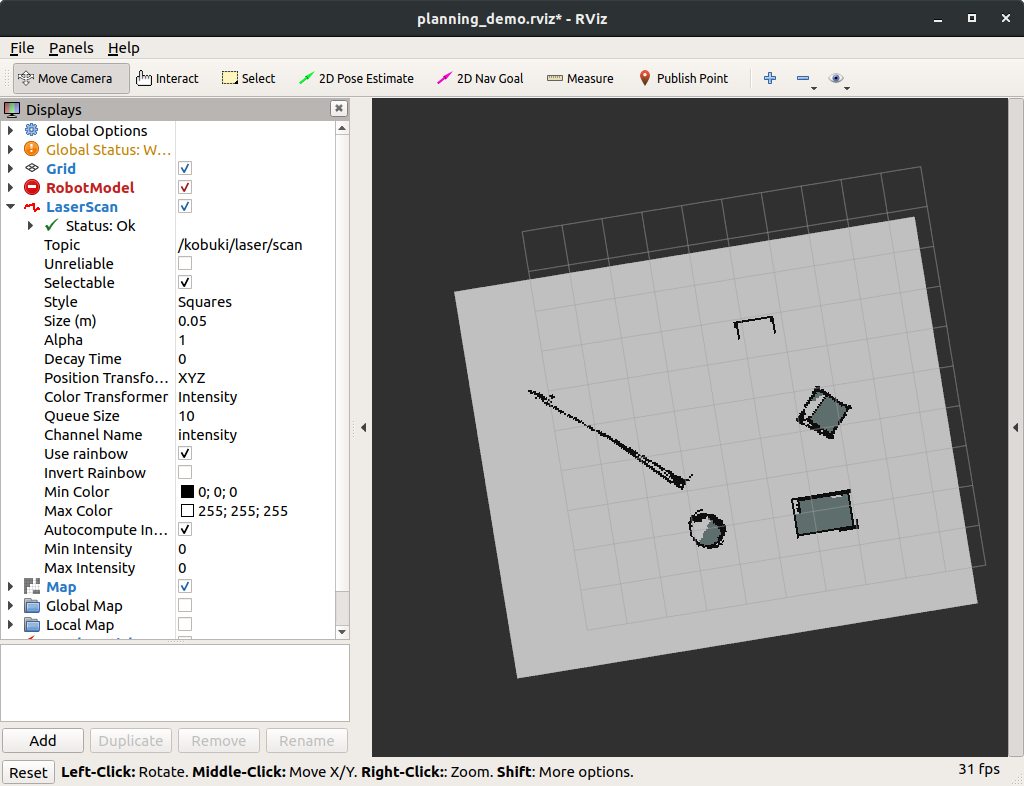
1.2 실행화면
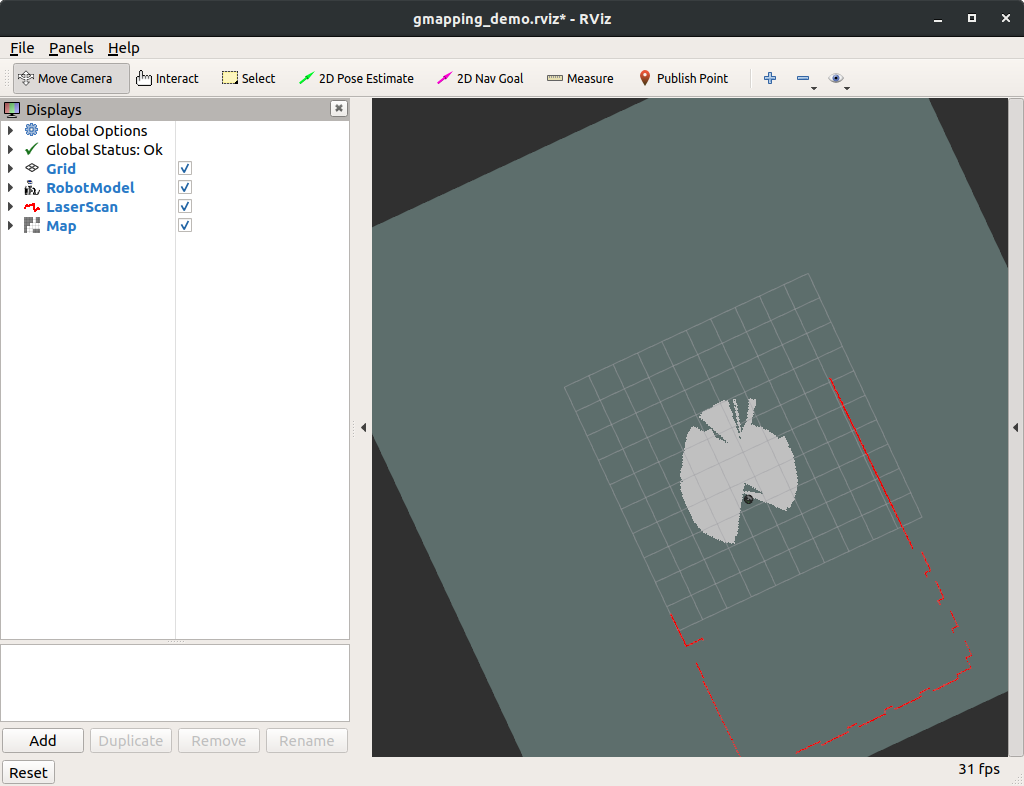
초기 mapping 화면은 위와 같다.
Add를 통해 로봇 및 레이저 스캔을 추가해주었다.
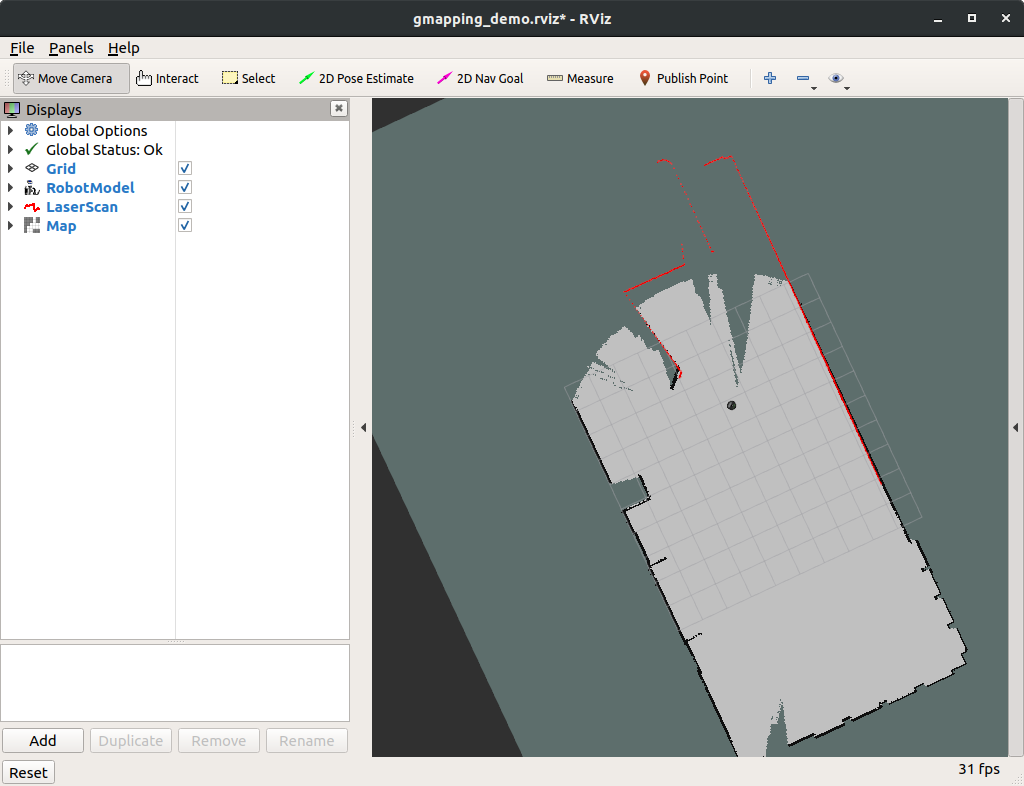
키보드를 통해 꼬부기 로봇을 이동시켜 mapping 범위를 늘릴 수 있었다.
🗺️2.Map 다루기
gmaping 을 통해 저장된 map 은 map.yaml 과 map.pgm으로 저장 할 수 있다.
저장 터미널 명령어는 아래와 같다.
roslaunch rosrun map_server map_saver -f "저장할 map이름"
위와 같이 저장된 모습 확인 할 수 있다.
rosrun map_server map_server ~경로/파일.yaml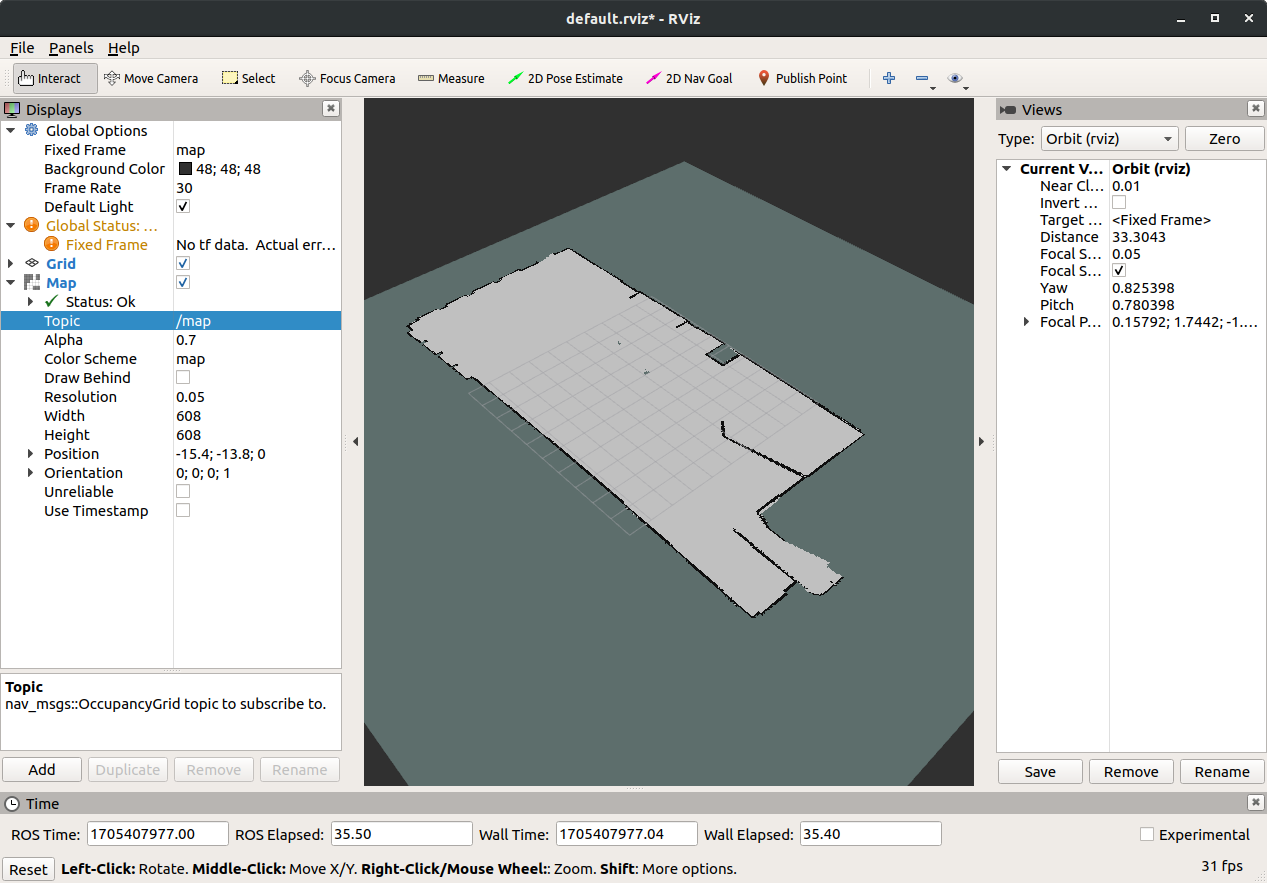
저장된 map은 rviz에서 로드 할 수 있다.
실습
2.1.1 launch 파일 작성하기
map_server 노드를 roslanch 를 통해 실행 할 수 있는 파일을 만들어 보자.
🚀map_server.launch
<launch>
    <arg name="map_file" default="/home/dazi/sim_ws/src/programmers_turtlebot/turtlebot_navigation_gazebo/maps/playground.yaml" />

    <node name="map_server" pkg="map_server" type="map_server" args="$(arg map_file)" />
</launch>
2.1.2 실행화면
2.2.1 /static_map 서비스를 처리 할 수 있는 서비스 클라이언트 노드 작성하기
🐍call_map_service.py
#! /usr/bin/env python

import rospy
from nav_msgs.srv import GetMap, GetMapRequest
import sys

rospy.init_node('service_client') # Initialise a ROS node with the name service_client
rospy.wait_for_service('static_map') # Wait for the service /static_map to be running
rospy.loginfo("init complete")

get_map_service = rospy.ServiceProxy('static_map', GetMap) # Create the connection to the service
get_map = GetMapRequest() # Create an object of type GetMapRequest

result = get_map_service(get_map) # Call the service
print(result) # Print the result given by the service called
2.1.2 실행화면
아래의 터미널과 같은 실행 결과를 확인 할 수 있었다.

🤖3.Transforms
mapping을 잘 하기 위해서는 제대로 된 map을 만들어야 한다.
그러기 위해서는 좋은 로봇을 사용해야한다.
로봇에서 인식하는 odom 과 laser 데이터의 퀄리티가 높아야 좋은 mapping을 할 수 있다.
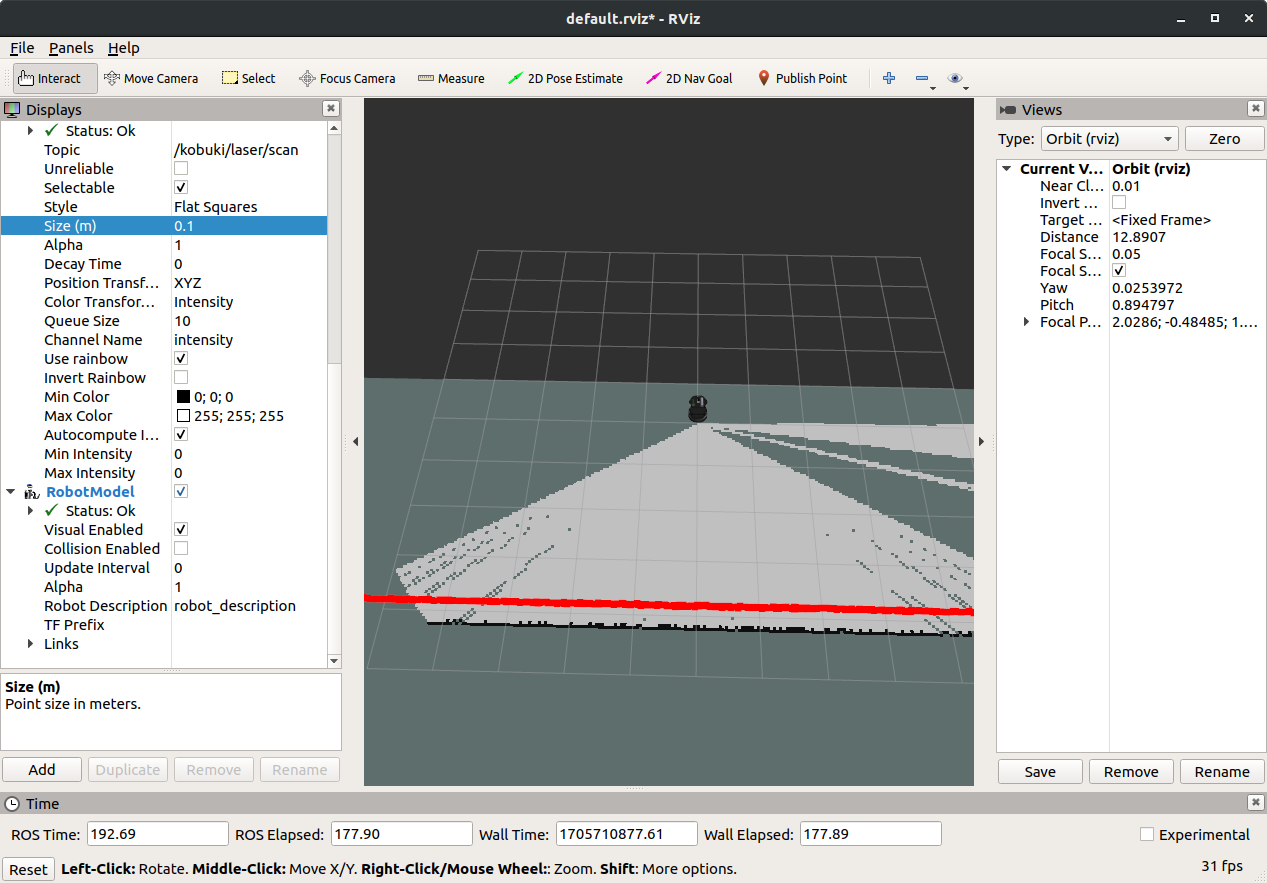
3.1 TF란?
한 프레임에 표현된 데이터를 다른 프레임으로 변환하는 방법으로 Position, Orientation 정보를 포함한다.
특히 로봇의 base_link 와 laser_link 관계는 mapping에 반드시 필요하다.
$rqt 를 통해 알아본 꼬부기봇의 관계를 확인 할 수 있다.

매우 많지만 실행화면의 일부만을 가져왔다.

rviz에서 시각적으로도 확인 할 수 있다.
3.2 TF publishing
만약 어떤 로봇에 다른 TF를 추가하고 싶으면 아래와 같은 launch파일을 작성 하면 된다.
🚀pub_static_tf.launch
<launch>
    <node pkg="tf" type="static_transform_publisher" name="static_tf_node"
          args="0 0 2 0 0 0 base_link button 30">
    </node>
</launch>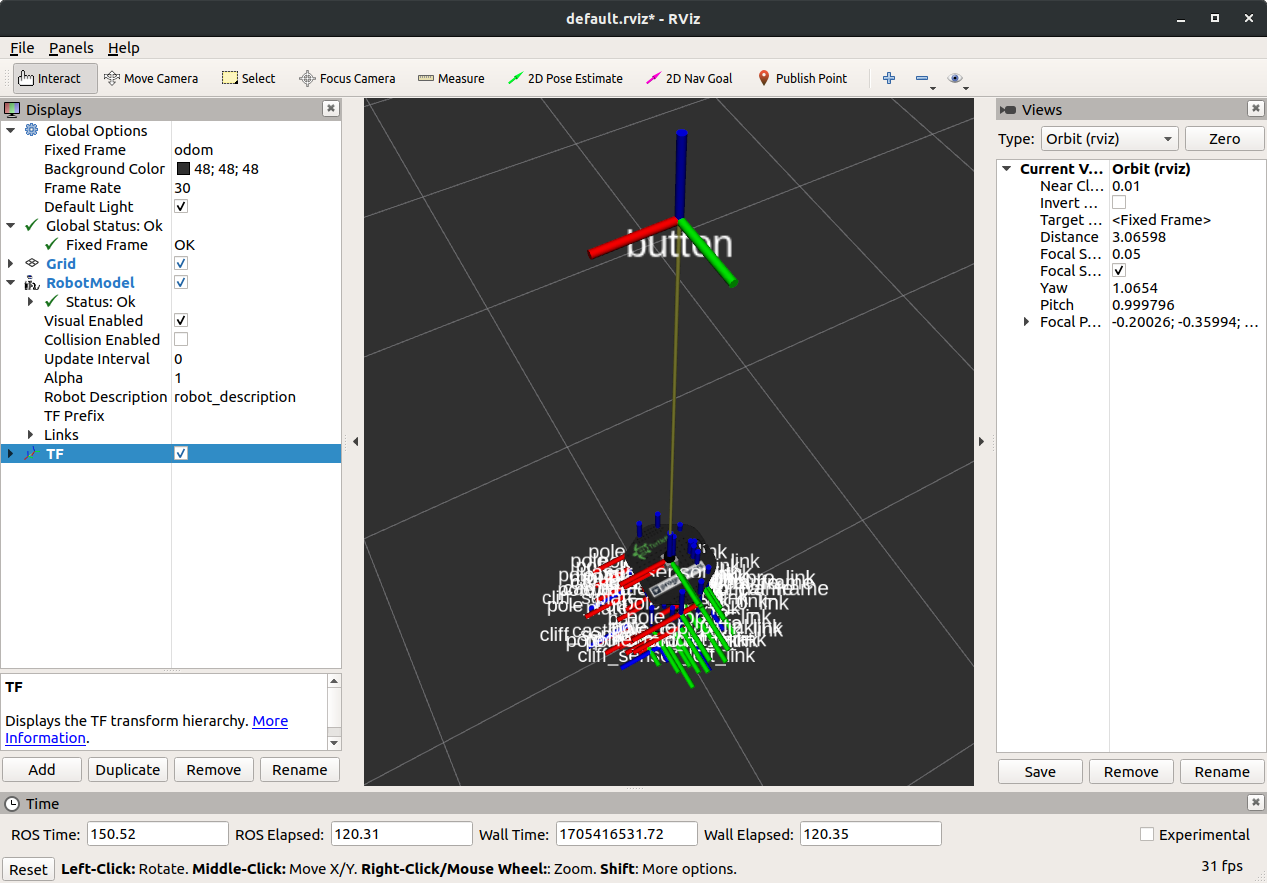
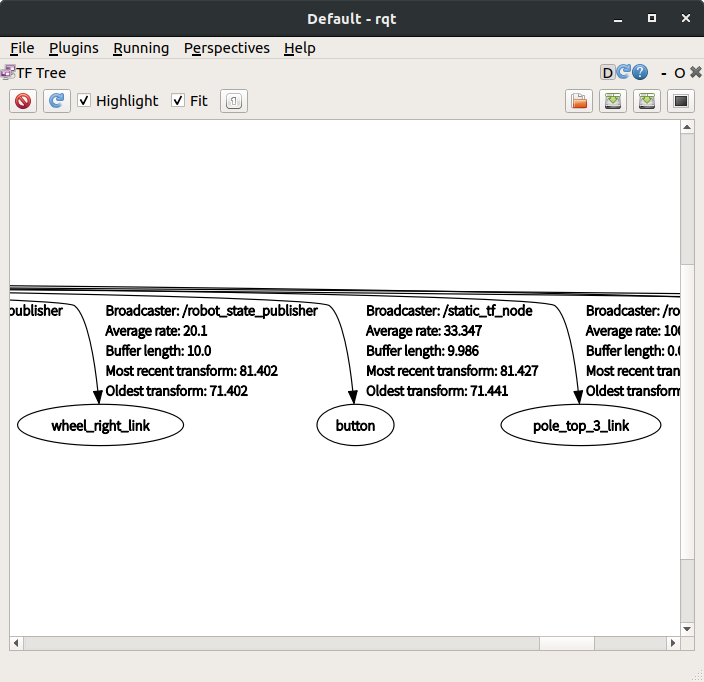
rviz 및 rqt 에서 button 이 추가 된 것을 확인 할 수 있다.
📦4.SLAM 오픈소스 패키지
SLAM 의 오픈소스인 gammping 에는 성능을 조절하기 위한 여러가지 파라미터가 존재한다.
아래의 ros 위키에서 파라미터를 확인 할 수 있다.
실습을 통해 어떤식으로 파라미터 값에 영향을 줄 수 있는지 ,
각 파라미터가 어떤역할을 하는지 알아보자.
4.1 실습코드
.yaml 코드에서 파라미터를 설정하고, launch 파일을 통해 해당 설정을 불러 올 수 있다.
🗒gmapping_params.yaml
base_frame: base_footprint
odom_frame: odom
map_update_interval: 5.0
maxUrange: 6.0
maxRange: 8.0

minimumScore: 200

linearUpdate: 0.5
angularUpdate: 0.436
temporalUpdate: -1.0
resampleThreshold: 0.5
particles: 80
xmin: -1.0
ymin: -1.0
xmax: 1.0
ymax: 1.0

delta: 0.05
llsamplerange: 0.01
llsamplestep: 0.01
lasamplerange: 0.005
lasamplestep: 0.005
🚀my_gmapping.launch
<launch>
    <arg name="scan_topic" default="kobuki/laser/scan" />

    <node pkg="gmapping" type="slam_gmapping" name="slam_gmapping" output="screen">
        <rosparam file="$(find turtlebot_navigation_gazebo)/param/gmapping_params.yaml" command="load" />

        <remap from="scan" to="$(arg scan_topic)" />
    </node>
</launch>
4.2 실행화면
위 코드와 같이 설정하였을 때 아래와 같이 평소에 보던 실행화면을 확인 할 수 있었다.
아래에서 설정을 바꾼 실행화면을 확인해보자.
4.2.1 maxUrange 2로 변경
로봇의 mapping 범위가 매우 좁아 진 것을 확인 할 수 있다.
4.2.2 xmin, ymin = -100 xmax, ymax = 100 으로 설정 후 화면 확인
map의 크기가 매우 커진 것을 확인 할 수 있다.