html 요소(태그) 가져오기
getElement-
<!DOCTYPE html>
<html lang="en">
  <head>
    <meta charset="UTF-8" />
    <meta name="viewport" content="width=device-width, initial-scale=1.0" />
    <title>Document</title>
  </head>
  <body>
    <!-- id 속성값은 페이지에서 유일해야 함 -->
    <h1 id="first"></h1>
    <ul>
      <!-- class 속성 값은 페이지에서 여러번 사용해도 됨 -->
      <li class="my-li"></li>
      <li class="my-li"></li>
      <li class="my-li"></li>
    </ul>

    <h1 class="second"></h1>

    <script>
      // window : 화면에 필요한 객체나 메소드들을 가지고 있는 최상위 객체
      // window라는 객체는 보통 생략이 가능
      // document : 화면의 html 전체 문서
      // 태그들도 모두 객체이다
      // getElementById : id 속성값을 기준으로 단일 태그 가져오기
      const firstTag = window.document.getElementById("first");
      firstTag.innerText = "첫번째입니다.";

      // getElementsByClassName : class 속성값을 기준으로 태그 리스트를 가져옴
      const myLiTagList = window.document.getElementsByClassName("my-li");
      for (let i = 0; i < myLiTagList.length; i++) {
        // 백틱은 문자열 포맷팅, 문자열 사이에 변수를 넣을 수 있다
        myLiTagList[i].innerText = `${i}. 상품${i}`;
      }

      // second class 가져와서 '두번째입니다 입력';
      const secondTagList = document.getElementsByClassName("second");
      // 값 넣을 때 둘 중 하나
      // 1. 반복문 이용
      //   for (let i = 0; i < secondTag.length; i++) {
      //     secondTagList[i].innerText = `두-번째`;
      //   }
      // 2. if문으로 요소 확인
      if (secondTagList.length > 0) {
        secondTagList[0].innerText = "두번-째";
      }
    </script>
  </body>
</html>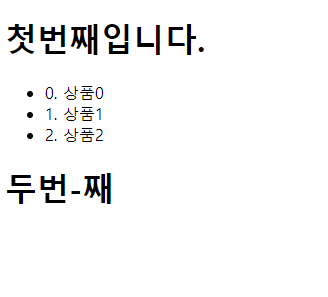
querySelector(추천)
<!DOCTYPE html>
<html lang="en">
  <head>
    <meta charset="UTF-8" />
    <meta name="viewport" content="width=device-width, initial-scale=1.0" />
    <title>Document</title>
  </head>
  <body>
    <h1 id="first"></h1>

    <ul>
      <li class="my-li"></li>
      <li class="my-li"></li>
      <li class="my-li"></li>
    </ul>

    <h1 class="second"></h1>
    <script>
      // querySelector : css 선택자 이용, 단일 태그 가져옴
      const firstTag = document.querySelector("#first");
      firstTag.innerHTML = "첫번째";

      // querySelectorAll : css 선택자 이용, 태그 리스트 가져옴
        const myLiTagList = document.querySelectorAll(".my-li");
        for (let i = 0; i < myLiTagList.length; i++) {
            myLiTagList[i].innerText = `${i}. 상품${i}`;
      }

      // querySelector가 단일 태그를 가져오는 점 이용
      // 클래스 선택자도 태그 하나만 가져와서 사용 가능
        const secondTag = document.querySelector(".second");
        secondTag.innerHTML = '두번째-';

    </script>
  </body>
</html>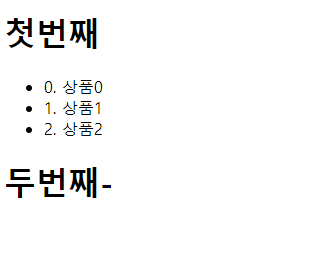
태그 조작(추가, 수정 등)
속성, 변수, 함수
<!DOCTYPE html>
<html lang="en">
<head>
<meta charset="UTF-8" />
<meta name="viewport" content="width=device-width, initial-scale=1.0" />
<title>Document</title>
<style>
.blue{
color: blue;
}
</style>
</head>
<body>
<!-- 태그도 객체다 -->
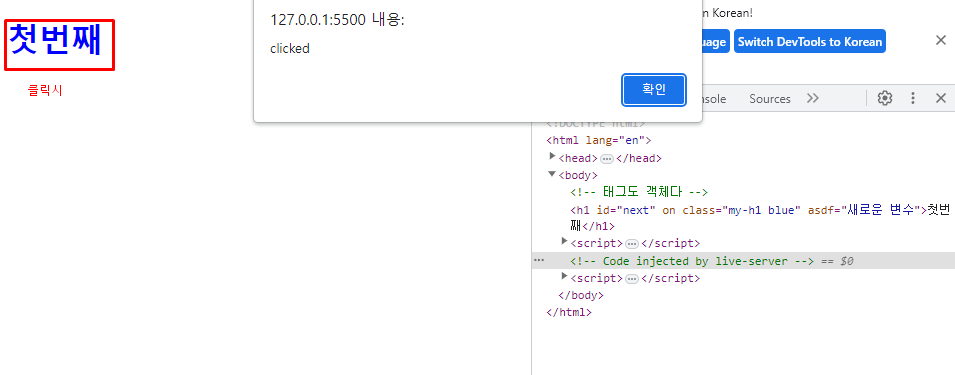
<h1 id="first" on>첫번째</h1>
<script>
const firstTag = document.querySelector("#first");
// 태그의 속성을 객체의 프로퍼티처럼 가져올 수 있다.
console.log(firstTag.id);
firstTag.id = "next";
// 태그에 없었던 속성도 만들어서 삽입 가능
// className은 class 내용 전체
// classList는 class 내용을 띄어쓰기 기준으로 스플릿
firstTag.className = "my-h1";
// firstTag.className = "my-h1 red";
firstTag.classList.add("blue");
// 태그가 가지고 있는 메소드 정의 가능
firstTag.onclick = function () {
alert("clicked");
};
// 기존에 태그에 없던 변수, 함수 선언 가능
// firstTag.asdf = "새로운 변수"; -
// firstTag.hello = () => alert("안녕하세요");
// 위의 두 형식은 작동이 안되는 브라우저가 있을 수 있다.
// 아래의 형식 추천 (변수만)
firstTag.setAttribute("asdf", "새로운 변수");
// setAttribute : (key문자열, value문자열) 형식으로 아래처럼 함수를 넣으면 작동하지 않음
// firstTag.setAttribute("hello", () => alert("안녕하세요"));
// firstTag.getAttribute("hello")(); // 오류
// console.log(firstTag.asdf);
// firstTag.hello();
</script>
</body>
</html>
클릭

html 태그, 코드
<!DOCTYPE html>
<html lang="en">
<head>
    <meta charset="UTF-8">
    <meta name="viewport" content="width=device-width, initial-scale=1.0">
    <title>Document</title>
</head>
<body>
    <!-- beforebegin -->
    <ul id="list">
        <!-- afterbegin -->

        <!-- beforeend -->
    </ul>
    <!-- afterend -->


    <script>
        // id가 list인 ul을 가져온다
        const ulList = document.querySelector("#list");

        // ul안에 li 삽입
        // 1. 문자열로 태그 안에 자식 태그 넣기
        // ulList.innerHTML = `<li id="item1" style="color:red;">바나나</li><li>사과</li>`;
        // 2. 자바스크립트에서 태그를 만들어서 넣는 방법
        const li1 = document.createElement("li");
        li1.innerText = "바나나";
        const li2 = document.createElement("li");
        li2.innerText = "사과";

        ulList.appendChild(li1);
        ulList.appendChild(li2);

        // 연습
        const fruitList = ["melon", "watermelon","strawberry"];
        // 반복문과 createElement, appendChild 이용해 li 추가
        for (const iterator of fruitList) {
            const t_li = document.createElement("li");
            t_li.innerText = iterator;
            ulList.appendChild(t_li);
        }
        // fruitList.forEach((element) => {
        //     const t = document.createElement("li");
        //     t.innerText = element;
        //     ulList.appendChild(t);
        // });

        // 3. insertAdjacentHTML
        // 문자열로 태그를 만들어서 추가 시킬 수 있다
        // 태그를 넣는 위치도 고를 수 있다
        ulList.insertAdjacentHTML(
            "beforeend",
            `<li>무화과</li>`
        );

        const fruitList1 = ["mango", "mandarin", "한라봉"];
        // insertAdjacentHTML, forEach 사용해서 추가
        fruitList1.forEach(element => {
            ulList.insertAdjacentHTML(
                "beforeend",
                `<li>${element}</li>`
            );
        });
    </script>
</body>
</html>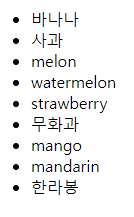
이벤트, 스타일 변경
기본
<!DOCTYPE html>
<html lang="en">
<head>
    <meta charset="UTF-8">
    <meta name="viewport" content="width=device-width, initial-scale=1.0">
    <title>Document</title>
    <style>
        .red {
            color: red;
        }

    </style>
</head>
<body>
    <h1 id="first">내용</h1>
    <script>
        // 스타일 변경
        const firstTag = document.querySelector("#first");
        // 비추천 (css를 id나 class 등으로 컨트롤 불가능 할 때만)
        // firstTag.style.color = "red";

        // 클래스를 추가 및 삭제하여 스타일 변경
        // firstTag.classList.add("red");

        // firstTag를 클릭할 때 반응
        firstTag.onclick = () => {
            // 클래스에 "red" 포함 시 삭제
            if(firstTag.classList.contains("red")){
                firstTag.classList.remove("red");
            // 클래스에 "red" 비포함 시 추가
            } else {
                firstTag.classList.add("red");
            }
        }
    </script>
</body>
</html>

마우스 이벤트 (3가지)
<!DOCTYPE html>
<html lang="en">
<head>
    <meta charset="UTF-8">
    <meta name="viewport" content="width=device-width, initial-scale=1.0">
    <title>Document</title>
</head>
<body>
    <!-- 1. 태그에 기능 바로 넣기 -->
    <h1 id="first" onclick="alert('첫번째 클릭')">첫번째</h1>
    <h1 id="second" ondblclick="alert('두번째 클릭')">두번째</h1>

    <h1 id="third">세번째</h1>
    <h1 id="fourth">네번째</h1>

    <script>

        // 이벤트 - 화면에 유저의 입력 등 움직임을 주는 것들
        // 마우스, 키보드, 음성, 카메라 등등
        // 마우스 이벤트
        const third = document.querySelector("#third");

        // 2.
        // js로 태그의 프로퍼티에 함수를 넣을 때에는
        // 실행결과 alert("...") 로 사용하면 안되고
        // 실행을 할 수 있는 함수 () => alert(...)를 대입해야한다.
        third.onclick = () => {
            alert("세번째 클릭");
        }
        // 프로퍼티를 null로 만들면 기능을 없앨 수 있다
        // third.onclick = null;

        const fourth = document.querySelector("#fourth");

        // 3. addEventListener
        // (on이 빠져있는 이벤트 이름, 실행할 수 있는 함수)
        fourth.addEventListener("click", () => {
            alert("네번째 클릭")
        });

        const clickEvent = () => {
            alert("네번째 클릭2")
        };

        // 이벤트 리스너는 여러개가 달릴 수 있다
        fourth.addEventListener("click", clickEvent);
        // 특정 이벤트 리스너를 삭제할 수 있다
        fourth.removeEventListener("click", clickEvent);;
    </script>
</body>
</html>
키보드 이벤트
<!DOCTYPE html>
<html lang="en">
<head>
    <meta charset="UTF-8">
    <meta name="viewport" content="width=device-width, initial-scale=1.0">
    <title>Document</title>
</head>
<body>
    <h1 id="first"></h1>
    <script>
        // 화면에 키보드 입력 시 h1에 key가 들어가도록
        // 1.
        document.body.addEventListener("keyup", (event) => {
            const first = document.querySelector("#first");
            first.innerHTML += event.key;
        });

        // 2. 단축키 만들기
        document.body.addEventListener("keyup", (event) => {
            // console.log(event);
            // ctrl + i 입력 시 alert창 출력
            if(event.code === "KeyI" && event.ctrlKey){
                alert("e");
            }
        })
    </script>
</body>
</html>
1.
2. Ctrl + i 입력

유승한