Spring에서 Bean등록은 주로 @Bean 또는 @Component를 이용한다
@Configuration
@ComponentScan
public class WebConfig {

    @Bean
    public ViewResolver viewResolver(){
        InternalResourceViewResolver IRVR = new InternalResourceViewResolver();
        IRVR.setSuffix(".jsp");

        return IRVR;
    }
}
주로 Spring Boot를 이용하여 웹개발을 진행하게되면 @Controller, @Service, @Repository와 같은 애노테이션을 이용하여 Bean을 등록하게 되는데 이 애노테이션들 역시 내부적으로 @Component를 사용하고 있다
그렇다면 @Bean과 @Component의 차이는 뭘까?
참고에 따르면 아래의 차이점이 있다고 한다
| Bean | Component |
|---|---|
| 메서드에 사용 | 클래스에 사용 |
| 개발자가 컨트롤이 불가능한 외부 라이브러리 사용시 사용 | 개발자가 직접 컨트롤이 가능한 내부 클래스에 사용 |
두 애노테이션의 사용목적이 다르며, 아래에는 @Bean 등록 시 사용되는 Configuration 작성에 참고할 수 있는 내용이다
@EnableWebMvc
DelegatingWebMvcConfiguration의 설정들을 사용할 수 있다
HandlerMapping이나 ViewResolver등의 설정을 직접하지 않고 DelegatingWebMvcConfiguration가 상속하는 WebMvcConfigurationSupport의 Bean 설정들을 이용하는 방법이다
@Configuration
@ComponentScan
@EnableWebMvc
public class WebConfig {

}
기본적인 Bean들은 설정되어있고 Interceptor와 같은 부분들은 커스터마이징할 수 있게 되어있다
<!-- applicationContext를 생성하기 위해서 필요한 xml파일 대신 Java 설정파일을 이용-->
<!-- Annotaion기반으로 Bean을 등록하기위해 AnnotataionConfigWebApplicationContext 사용-->
<context-param>
  <param-name>contextClass</param-name>
  <param-value>org.springframework.web.context.support.AnnotationConfigWebApplicationContext</param-value>
</context-param>
<context-param>
  <param-name>contextConfigLocation</param-name>
  <param-value>me.ddings.AppConfig</param-value>
</context-param>

<!--  ApplicationContext를 ServletContext들에게 배급해주기 위함-->
<listener>
  <listener-class>org.springframework.web.context.ContextLoaderListener</listener-class>
</listener>
Spring Framework 환경에서 @EnableWebMvc를 적용시키기 위해 ServletContext에 해당하는 부분의 주석을 해제하고 확인해보자
💡
@EnableWebMvc안의DelegatingWebMvcConfiguration에서 ServletContext가 사용되기 때문에 ServletContext가 반드시 있어야한다
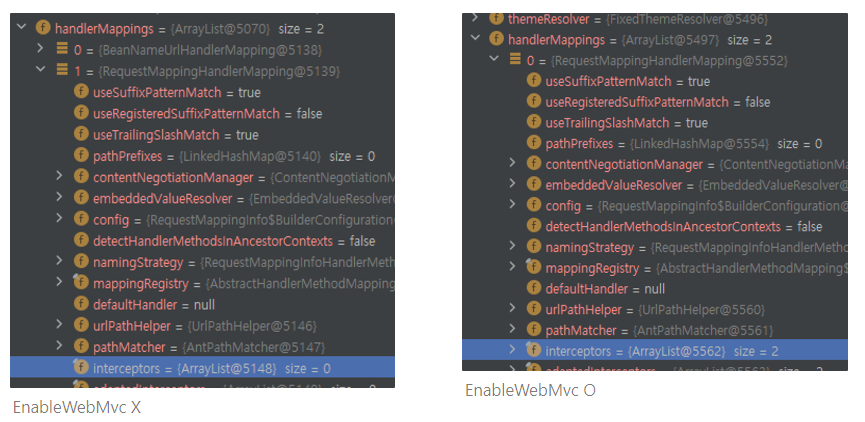
보이는바와 같이 interceptor가 등록되어있는 모습을 볼 수 있다
이렇게 @EnableWebMvc를 사용하면 기본적으로 제공되는 설정들을 이용할 수 있게된다
WebMvcConfigurer
@EnableWebMvc에서 addInterceptor와 같이 확장을 하는게 가능한 요소들이 있는데, 이때 사용되는 인터페이스다

다양한 메서드를 상속하여 확장하는게 가능하다
@Configuration
@ComponentScan
@EnableWebMvc
public class WebConfig implements WebMvcConfigurer {
    @Override
    public void addInterceptors(InterceptorRegistry registry) {
        registry.addInterceptor();
    }
}
가령 addInterceptors()를 재정의해서 인터셉터들을 등록 하는 식으로 확장할 수 있다
주의사항
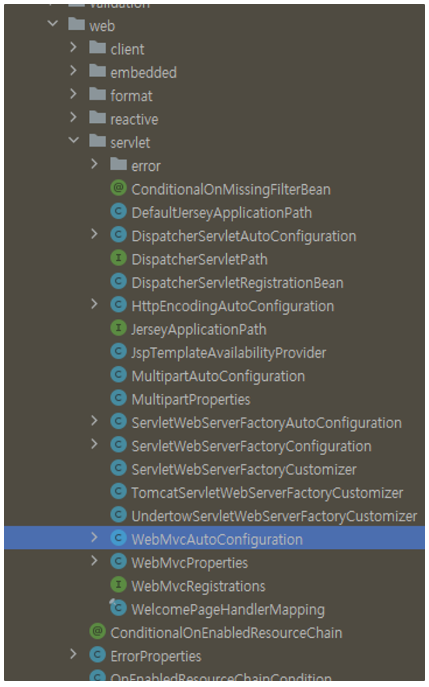
Spring Boot의 자동설정목록을 살펴보면 WebMvcAutoiConfiguration 가 있다

이 클래스를 살펴보면 @ConditionalOnMissingBean(WebMvcConfigurationSupport.class) 을 볼 수 있는데
WebMvcConfigurationSupport.class 가 Bean으로 등록되어 있지 않았을때 자동설정을 이용하겠다고 명시되어있다
따라서 @EnableWebMvc를 이용하면 해당 클래스의 빈이 생성되기 때문에 Boot에서 이 애노테이션을 사용하면
SpringBoot의 WebMvcAutoiConfiguration자동설정이 적용되지 않는다
- WebMvcConfigurer 사용 ⇒ Bean설정 확장 가능
- @EnableWebMvc 사용 ⇒ Boot에서 자동설정 사용 X
