이번 포스팅에서는 1. MySQL, 2. Sequelize에 대해 다루겠다. MySQL은 간단히만 보고, Sequelize에 대해 자세히 다루겠다.
내 PC에 이미 있는 개발환경
- MySQL
- WorkBench(워크벤치)
이미 내 PC에 설치되어 있으므로 이 포스팅에서는 위의 개발 환경 설치에 관한 내용은 생략함
책 Node.js 교과서(개정 2판) 책의 7장의 내용을 참고했다.
+모든 코드는 github주소에 있다.
1. MySQL
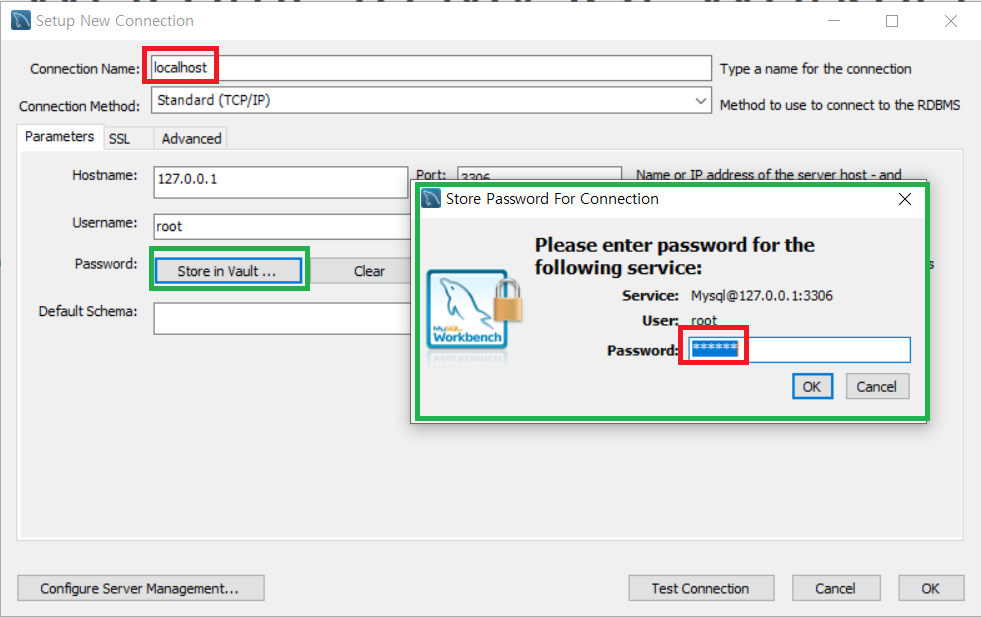
1. Workbench에서 Connection
- 빨간 네모:
localhost작성 - 초록 네모(+빨간 네모): 클릭 후, Password에 MySQL설치 시 설정했던
password입력
2. 윈도에서 MySQL 실행
-
cmd를 열고,
C:\Program Files\MySQL\MySQL Server 8.0\bin>로 이동 -
mysql -u root -p를 입력
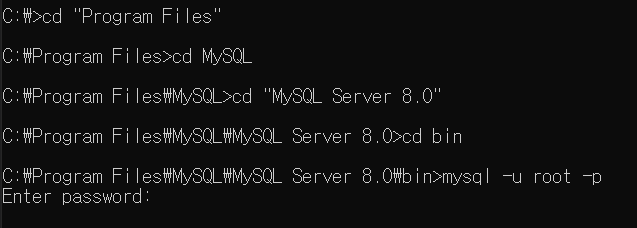
-
MySQL 설치 시 설정했던
password를 입력
**프롬프트가 mysql로 바뀌었다면 접속된 것
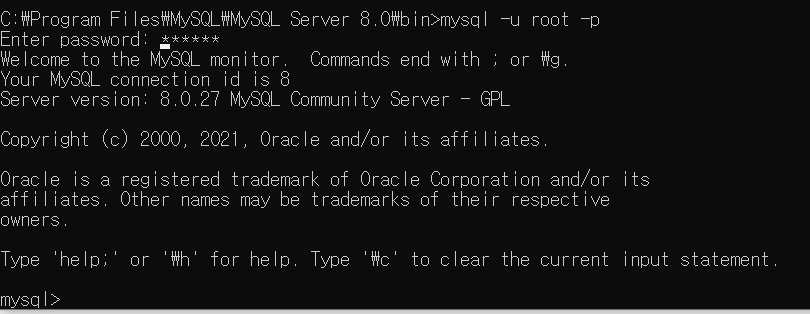
+exit 를 입력하면 Bye가 출력되며 mysql이 종료된다. 좀 귀엽네 Bye
3. DB 구축(feat. console)
** DB와 관련한 개념들은 나중에 시리즈로 다뤄보겠다! 여기서는 간단히 사용 방법만!
CREATE DB
CREATE SCHEMA [데이터베이스명]: 데이터베이스 생성
(=CREATE DATABASE [데이터베이스]: 데이터베이스 생성)
** MySQL에서는 두 문장이 동일하다!
nodejs 데이터베이스 생성 EXAMPLE )
**DEFAULT CHARACTER SET utf8: 한글 사용 가능케 함
입력(console)
CREATE SCHEMA `nodejs` DEFAULT CHARACTER SET utf8;실행화면

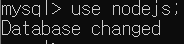
use [데이터베이스명]: 데이터베이스 사용을 알림
nodejs 데이터베이스 사용 선언 EXAMPLE )
입력(console)
use nodejs;실행화면
CREATE TABLE [데이터베이스명.테이블명]: 테이블 생성
users 테이블을 만드는 EXAMPLE )
입력(console)
CREATE TABLE nodejs.users (
    id INT NOT NULL AUTO_INCREMENT,
    name VARCHAR(20) NOT NULL,
    age INT UNSIGNED NOT NULL,
    married TINYINT NOT NULL,
    comment TEXT NULL,
    created_at DATETIME NOT NULL DEFAULT now(),
    PRIMARY KEY(id),
    UNIQUE INDEX name_UNIQUE (name ASC))
    COMMENT = '사용자 정보'
    DEFAULT CHARACTER SET = utf8
    ENGINE = InnoDB;
실행화면

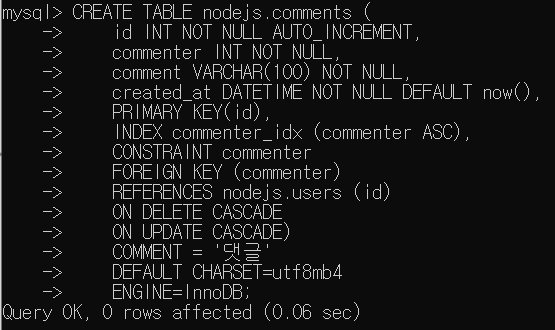
comments 테이블을 만드는 EXAMPLE )
입력(console)
CREATE TABLE nodejs.comments (
    id INT NOT NULL AUTO_INCREMENT,
    commenter INT NOT NULL,
    comment VARCHAR(100) NOT NULL,
    created_at DATETIME NOT NULL DEFAULT now(),
    PRIMARY KEY(id),
    INDEX commenter_idx (commenter ASC),
    CONSTRAINT commenter
    FOREIGN KEY (commenter)
    REFERENCES nodejs.users (id)
    ON DELETE CASCADE
    ON UPDATE CASCADE)
    COMMENT = '댓글'
    DEFAULT CHARSET=utf8mb4
    ENGINE=InnoDB;
실행화면
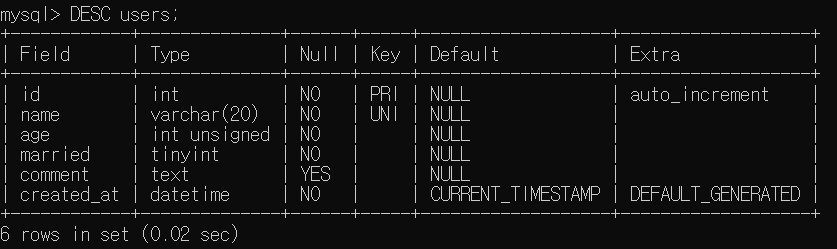
DESC [테이블 명]: 테이블 확인
입력(console)
DESC users;실행화면
DROP TABLE [테이블 명]: 테이블 제거
입력(console)
DROP TABLE users;실행화면

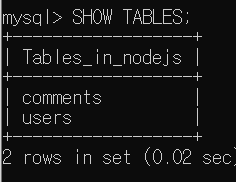
SHOW TABLES;: 테이블 (생성) 확인
입력(console)
SHOW TABLES;실행화면
--
CRUD DATA
CRUD
1. C: CREATE(생성)
2. R: READ(조회)
3. U: UPDATE(수정)
4. D: DELETE(삭제)
1. C: CREATE(생성)
데이터를 생성해서 데이터베이스에 넣는 작업
INSTERT INTO [테이블명] ([컬럼1], [컬럼2], ...) VALUES ([값1], [값2], ...): 데이터 생성
INSTERT INTO EXAMPLE )
입력(console)
INSERT INTO nodejs.users (name, age, married, comment) VALUES ('zero', 24, 0, '자기소개1');

INSERT INTO nodejs.users (name, age, married, comment) VALUES ('nero', 32, 1, '자기소개2');

INSERT INTO nodejs.comments (commenter, comment) VALUES (1, '안녕하세요. zero의 댓글입니다');
실행화면


2. R: READ(조회)
데이터베이스에 있는 데이터를 조회하는 작업
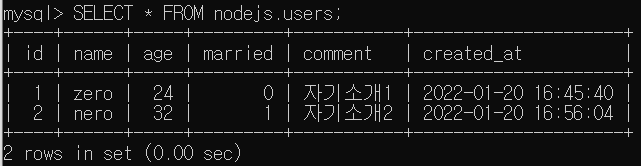
SELECT * FROM [테이블명]: 데이터 조회
SELECT EXAMPLE )
입력(console)
SELECT * FROM nodejs.users;실행화면
입력(console)
SELECT * FROM nodejs.comments;실행화면

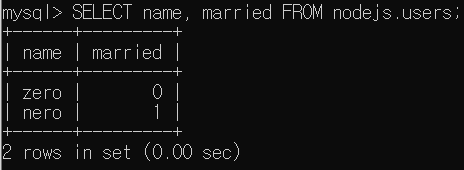
입력(console)
SELECT name, married FROM nodejs.users;실행화면
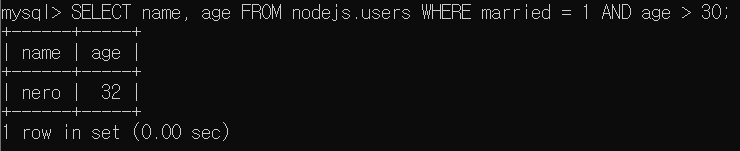
입력(console)
SELECT name, age FROM nodejs.users WHERE married = 1 AND age > 30;실행화면
입력(console)
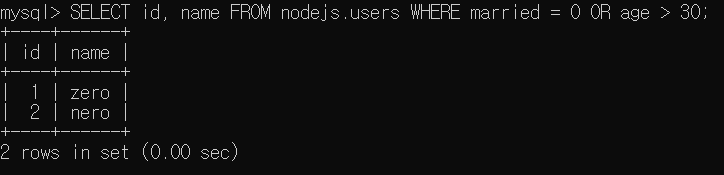
SELECT id, name FROM nodejs.users WHERE married = 0 OR age > 30;실행화면
입력(console)
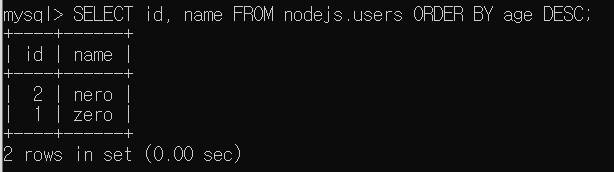
SELECT id, name FROM nodejs.users ORDER BY age DESC;실행화면
입력(console)
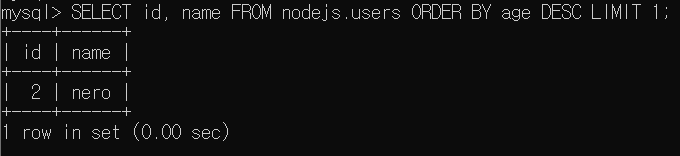
SELECT id, name FROM nodejs.users ORDER BY age DESC LIMIT 1;실행화면
입력(console)
SELECT id, name FROM nodejs.users ORDER BY age DESC LIMIT 1 OFFSET 1;실행화면

3. U: UPDATE(수정)
데이터베이스에 있는 데이터를 수정하는 작업
UPDATE [테이블명] SET [컬럼명=바꿀 값] WHERE [조건]: 데이터 수정
UPDATE EXAMPLE )
입력(console)
UPDATE nodejs.users SET comment = '바꿀 내용' WHERE id = 2;실행화면

4. D: DELETE(삭제)
데이터베이스에 있는 데이터를 삭제하는 작업
DELETE FROM [테이블명] WHERE [조건]: 데이터 삭제
DELETE EXAMPLE )
입력(console)
DELETE FROM nodejs.users WHERE id = 2;실행화면

2. Sequelize
위의 MySQL과 이어지므로 MySQL로 테이블, 데이터를 생성 후 읽으면 좋음
시퀄라이즈(Sequelize)
- MySQL 작업을 쉽게 할 수 있도록 도와주는 라이브러리
- Node와 MySQL을 연동해줄 뿐만 아니라 sql문을 작성하는 것을 도와주는 라이브러리
- 자바스크립트로 코드를 작성하면 SQL문을 만듦
- ORM(Object-relational Mapping)로 분류
**ORM: 자바스크립트 객체와 데이터베이스의 릴레이션을 매핑해주는 도구
Sequelize 환경 세팅
1. npm 설치
+ [설치할 모듈]
**
sequelize: 시퀄라이즈 패키지
sequelize-cli: 시퀄라이즈 명령어를 실행하기 위한 패키지
mysql2: MySQL과 시퀄라이즈를 이어주는 드라이버
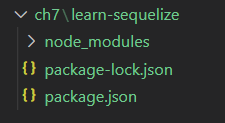
Git [learn-sequelize/package.json]
"main"의 index.js를 app.js로 변경
"scripts"에 ,"start": "nodemon app" 추가
{
  "name": "delay100_learn-sequelize",
  "version": "1.0.0",
  "description": "",
  "main": "app.js",
  "scripts": {
    "test": "echo \"Error: no test specified\" && exit 1",
    "start": "nodemon app"
  },
  "author": "delay100",
  "license": "ISC",
  "devDependencies": {
    "nodemon": "^2.0.15"
  },
  "dependencies": {
    "express": "^4.17.2",
    "morgan": "^1.10.0",
    "mysql2": "^2.3.3",
    "nunjucks": "^3.2.3",
    "sequelize": "^6.13.0",
    "sequelize-cli": "^6.4.1"
  }
}
2. sequelize init 명령어 호출
**npx: 전역 설치 없이 명령어로 사용
입력(console)
npx sequelize init실행화면

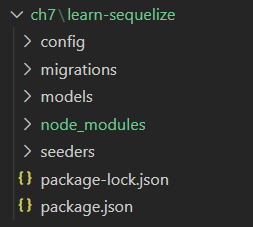
**config, migrations, models, seeders 폴더가 생성됨
3. models 폴더 안의 index.js를 아래와 같이 수정
**자동으로 생성해주는 코드는 그대로 사용할 때 에러가 발생, 필요 없는 부분도 많음
Git [learn-sequelize/models/index.js]
const Sequelize = require('sequelize'); // 시퀄라이즈 패키지이자 생성자

const env = process.env.NODE_ENV || 'development';
const config = require('../config/config')[env]; // config/config.json에서 데이터베이스 설정을 불러옴
const db = {};

const sequelize = new Sequelize(config.database, config.username, config.password, config); // new Sequelize를 통해 MySQL 연결 객체 생성

db.sequelize = sequelize; // 연결 객체를 나중에 재사용 하기 위해 db.Sequelize에 넣음

module.exports = db; 1. express - MySQL 연결
시퀄라이즈를 통해 익스프레스 앱과 MySQL을 연결
아래와 같이 app.js 생성
Git [learn-sequelize/app.js]
const express = require('express');
const path = require('path');
const morgan = require('morgan');
const nunjucks = require('nunjucks');

const { sequelize } = require('./models'); // require('./models/index.js')와 같음 - index.js는 require 시 이름 생략 가능

const app = express();
app.set('port', process.env.PORT || 3001);
app.set('view engine', 'html');
nunjucks.configure('views', {
    express: app,
    watch: true,
});
sequelize.sync({force: false}) // 서버 실행 시 MySQL과 연동되도록 함, force: true면 서버 실행 시 마다 테이블을 재생성, 테이블을 잘못 만든 경우에 true로 설정
    .then(() => {
        console.log('데이터베이스 연결 성공');
    })
    .catch((err) => {
        console.error(err);
    });

app.use(morgan('dev'));
app.use(express.static(path.join(__dirname, 'public')));
app.use(express.json());
app.use(express.urlencoded({extended: false}));

app.use((req,res,next) => {
    const error = new Error(`${req.method} ${req.url} 라우터가 없습니다.`);
    error.status = 404;
    next(error);
});

app.use((err,req,res,next)=>{
    res.locals.message = err.message;
    res.locals.error = process.env.NODE_ENV !== 'production' ? err : {};
    res.status(err.status || 500);
    res.render('error');
});

app.listen(app.get('port'), () =>{
    console.log(app.get('port'), '번 포트에서 대기 중');
});config.json파일의 일부를 아래와 같이 수정
Git [learn-sequelize/config/config.json]
{
  "development": {
    "username": "root",
    "password": "[MySQL 비밀번호]",
    "database": "nodejs",
    "host": "127.0.0.1",
    "dialect": "mysql"
  },
  ...
**
[설정 용도]
- development: 개발
- test: 테스트
- production: 배포
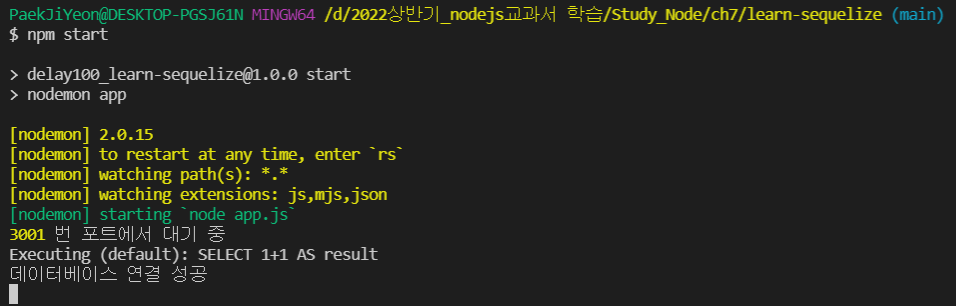
npm start로 서버 실행해보기
입력(console)
npm start실행결과(console)
2. 모델 생성 후 테이블에 연결(User-users, Comment-comments)
MySQL에서 정의한 테이블을 Sequelize에서도 정의해야 한다. MySQL의 테이블은 Sequelize 모델과 대응된다. Sequelize는 모델과 MySQL의 테이블을 연결해주는 역할을 한다.
User과 Comment 모델 생성
- User 모델 생성
Git [learn-sequelize/models/user.js]
const Sequelize = require('sequelize');

module.exports = class User extends Sequelize.Model { // User 모델을 만들고 모듈로 exports함(User 모델은 Sequelize.Model을 확장한 클래스)
    static init(sequelize){ // 테이블에 대한 설정 <-> static associate: 다른 모델과의 관계
        return super.init({ // super.init의 첫 번째 인수: 테이블에 대한 컬럼 설정
            name: {
                type: Sequelize.STRING(20), // STRING: MySQL의 VARCHAR
                allowNull: false, // allowNull: MySQL의 NOT NULL
                unique: true, // unique: MySQL의 UNIQUE
            },
            age: {
                type: Sequelize.INTEGER.UNSIGNED, // INTEGER: MySQL의 INT
                allowNull: false,
            },
            married: {
                type: Sequelize.BOOLEAN, // BOOLEAN: MySQL의 TINYINT
                allowNull: true,
            },
            comment: {
                type: Sequelize.TEXT,
                allowNull: true,
            },
            create_at: {
                type: Sequelize.DATE, // DATE: MySQL의 DATETIME
                allowNull: false,
                defaultValue: Sequelize.NOW, // defaultValue: MySQL의 default, Sequelize.NOW: MySQL의 now()
            },
        }, {  // super.init의 두 번째 인수: 테이블 자체에 대한 설정(테이블 옵션)
            sequelize, // static init 메서드의 매개변수와 연결되는 옵션, db.sequelize 객체를 넣어야 함 -> 추후에 models/index.js에서 연결
            timestamps: false, // true: Sequelize가 자동으로 createdAt과 updatedAt 컬럼을 추가
            underscored: false, // true: create_at같이(스네이크 케이스), false: createdAt같이(캐멀 케이스)
            modelName: 'User', // 모델 이름
            tableName: 'users', // 테이블 이름
            paranoid: false, // 컬럼을 지워도 완전히 지워지지 않고 deletedAt이라는 컬럼이 생김(지운 시각이 기록됨)
            charset: 'utf8', // 한글 입력, 이모티콘까지 입력: utf8mb4
            collate: 'utf8_general_ci', // 한글 입력, 이모티콘까지 입력: utf8mb4_general_ci
        });
    }
    static associate(db){}
}- Comment 모델 생성
Git [learn-sequelize/models/comment.js]
const Sequelize = require('sequelize');

module.exports = class Comment extends Sequelize.Model {
    static init(sequelize){
        return super.init({
            comment: {
                type: Sequelize.STRING(100),
                allowNull: false,
            },
            created_at: {
                type: Sequelize.DATE,
                allowNull: true,
                defaultVlue: Sequelize.NOW,
            },
        }, {
            sequelize,
            timestamps: false,
            modelName: 'Comment',
            tableName: 'comments',
            paranoid: false,
            charset: 'utf8mb4',
            collate: 'utf8mb4_general_ci',
        });
    }
    static associate(db){}
};
모델을 테이블에 연결(User - users, Comment - comments)
- 모델: 내가 정의해준 모델 ex)
user.js,comment.js - 테이블: MySQL의 테이블 ex) users, comments
Git [learn-sequelize/models/index.js] 中 일부
const User = require('./user');
const Comment = require('./comment');

...

// db 객체에 User, Comment 모델을 담음 -> 앞으로 db를 require해서 User, Comment에 접근 가능
db.User = User;
db.Comment = Comment;

// 각 모델의 static init을 호출, init이 실행되어야 테이블이 모델로 연결(테이블-모델 연결)
User.init(sequelize);
Comment.init(sequelize);

// 다른 테이블과 관계를 연결
User.associate(db);
Comment.associate(db);

...
3. Sequelize에게 관계 알림 (users - comments 테이블 간)
테이블 간 어떤 관계가 있는지 Sequelize에 알려야한다. 따라서 각각의 [모델명].js의 static associate(db){} 부분에 내용을 추가해야한다.
관계: 시퀄라이즈 메서드
- 일대일(1:1): hasOne 메서드
- 일대다(1:N): hasmany 메서드
- 다대다(N:M): belongsToMany 메서드
1:N EXAMPLE )
1 (User) : N (Comment)
User -hasMany> Comment
User <belongsTo- Comment
Git [learn-sequelize/models/user.js] 에 추가
static associate(db){ // 다른 모델과의 관계 <-> static init: 테이블에 대한 설정
        db.User.hasMany(db.Comment, { foreignKey: 'commenter', sourceKey: 'id'});
}
Git [learn-sequelize/models/comment.js] 에 추가
static associate(db){
db.Comment.belongsTo(db.User, { foreignKey: 'commenter', targetKey: 'id'});
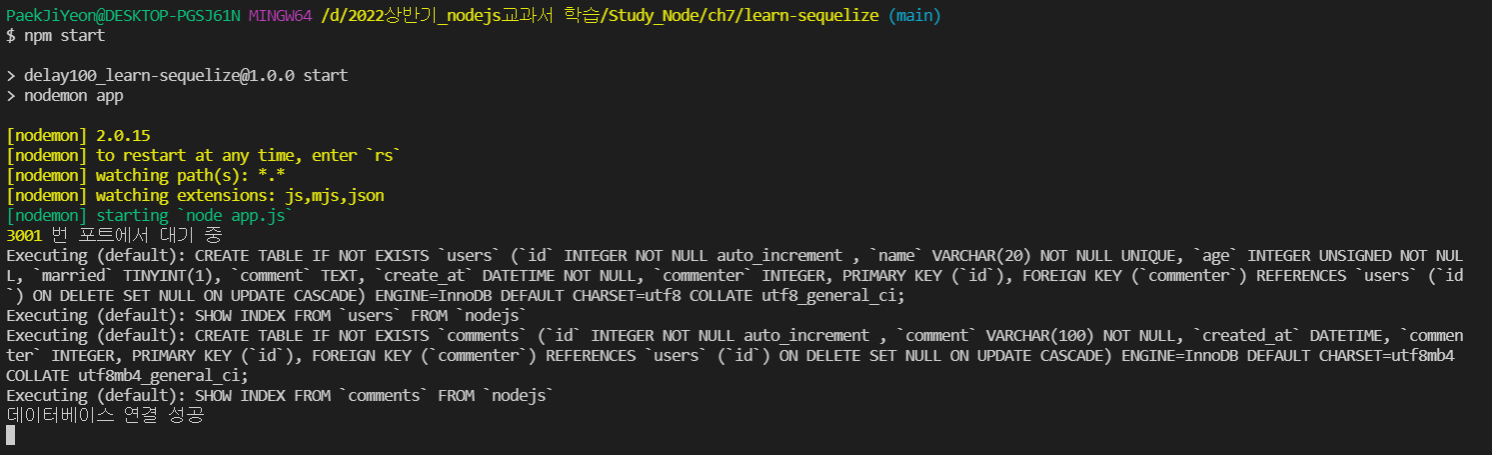
}입력(console)
npm start실행화면(console)
** Sequelize가 나 대신에 열심히 실행하고 있는 SQL문을 볼 수 있다.
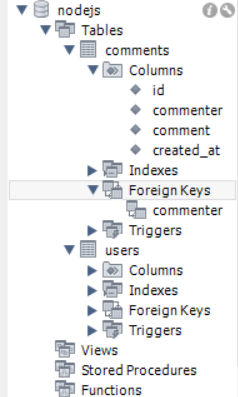
실행화면(Workbench)
** Sequelize가 실행한 쿼리문에 대한 것을 확인할 수 있다.
+ 1:1 EXAMPLE )
1 (User) : 1 (User)
User -hasOne> Info
User <belongsTo- Info
** Info 모델: 사용자 정보를 담고 있는 가상의 모델
[사용 방법]
user.js
db.User.hasOne(db.Info, { foreignKey: 'UserId', sourceKey: 'id' });info.js
db.Info.belongsTo(db.User, { foreignKey: 'UserId', targetKey: 'id' });+ N:M EXAMPLE )
N (게시글) : M (해시태그)
게시글 -belongsToMany> 해시태그
게시글 <belongsToMany- 해시태그
[사용 방법]
** through 안에 적어준 이름을 가진 새로운 모델이 생성됨
post.js
db.Post.belongsToMany(db.Hashtag, { through: 'PostHashtag' });hashtag.js
db.Hashtag.belongsToMany(db.Post, { through: 'PostHashtag' });여기서 만들어진 모델은 db.sequelize.models.PostHashtag로 가져올 수 있음
내용 정리
- MySQL: 테이블
users,comments생성- Sequelize: 모델
User,Comment생성- 테이블-모델 연결(users-User, comments-Comment)
- Sequelize에게 관계 알림 (users - comments)
이번 포스팅에서 Sequelize에 대해 끝까지 다루고 싶었는데 너무 길어질 것 같아 다음 포스팅을 통해 Sequelize를 마무리 지어보겠다!!
다음 포스팅에서는 4. Sequelize로 CRUD 하기, 5. Sequelize 관계 쿼리, 6. 쿼리 수행(전체 코드) 예를 다뤄보겠다.