분석하기 쉬운 모양으로 만들기
Come on, picture!
import cv2
import numpy as np
from matplotlib import pyplot as plt

img = cv2.imread('data/my_laptop_picture.png')

cv2.imshow('img', img)
cv2.waitKey()
cv2.destroyAllWindows()
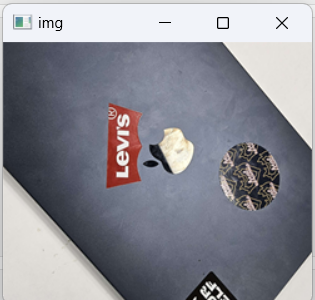
일단 사진 씨를 찍어서 들고 옵니다.
Come on, Canny!
import cv2
import numpy as np
from matplotlib import pyplot as plt

img = cv2.imread('data/my_laptop_picture.png')
canny = cv2.Canny(img, 100, 200)

cv2.imshow('canny', canny)
cv2.waitKey()
cv2.destroyAllWindows()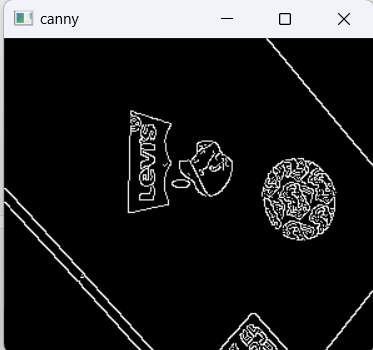
캐니 씨를 찾아갑니다.
이미지의 엣지만을 되돌려준다네요.
Come on, blur, dilation, eroded!
import cv2
import numpy as np
from matplotlib import pyplot as plt

kernal = np.ones((5,5), np.uint8)

img = cv2.imread('data/my_laptop_picture.png')
canny = cv2.Canny(img, 100, 200)
blured_canny = cv2.Canny(blur, 100, 200)
dilation = cv2.dilate(canny, kernal, iterations = 1)
eroded = cv2.erode(dilation, kernal, iterations = 1)

cv2.imshow('eroded', eroded)
cv2.waitKey()
cv2.destroyAllWindows()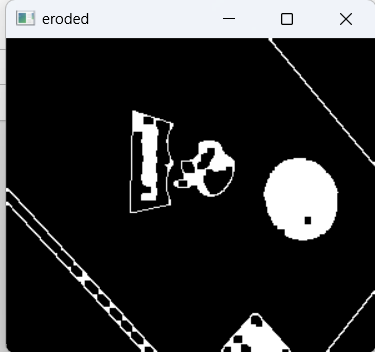
블러와 다일레이션, 에로디드를 불러옵니다.
흐릿, 팽창, 침식하는 거라 보시면 됩니다.
이런 건 다 분석하기 쉬우라 만든 겁니다. 그래서 제목이 저거고요.
그냥 쓰면 잘 안 돼요.
짠! 잡탕 완성~ 근데 대각선으로 찍혀 있네? 바꿔 줍시다.
import cv2
import numpy as np
from matplotlib import pyplot as plt

img = cv2.imread('data/my_laptop_picture.png')

M1 = np.float32([[1,0,100],[0,1,50]])
dst1 = cv2.warpAffine(img,M1,(cols,rows))

kernal = np.ones((5,5), np.uint8)
canny = cv2.Canny(dst1, 100, 200)
blured_canny = cv2.Canny(blur, 100, 200)
dilation = cv2.dilate(canny, kernal, iterations = 1)
eroded = cv2.erode(dilation, kernal, iterations = 1)

cv2.imshow('eroded', eroded)
cv2.waitKey()
cv2.destroyAllWindows()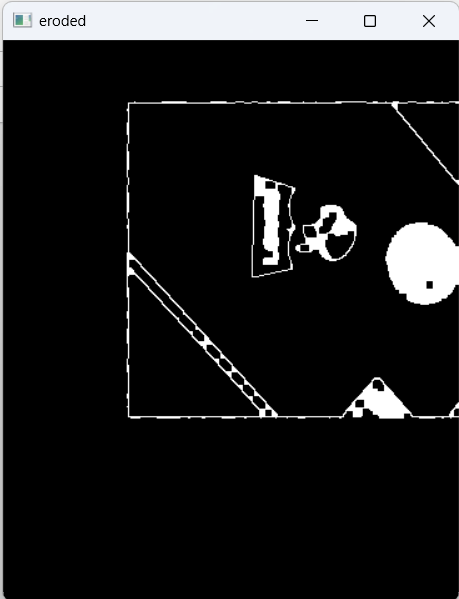
좀 낫네!
등고선
Come on, contour!
아까 그 사진 들고 온 다음에 이렇게 씁니다.
contour은 뭐 등고선이죠. 다 아시잖아요 초등학생 때 배웠는데.
import cv2
import numpy as np
from matplotlib import pyplot as plt

img = cv2.imread('data/my_laptop_picture.png')
imgray = cv2.cvtColor(img, cv2.COLOR_BGR2GRAY)
ret, thresh = cv2.threshold(imgray, 70, 255, 0)
contours, hierarchy = cv2.findContours(thresh, cv2.RETR_TREE, cv2.CHAIN_APPROX_NONE)

cv2.drawContours(img, contours, -1, (0, 255, 0), 3)
cv2.drawContours(imgray, contours, -1, (0, 255, 0), 3)

cv2.imshow('Image GRAY', imgray)

cv2.waitKey()
cv2.destroyAllWindows()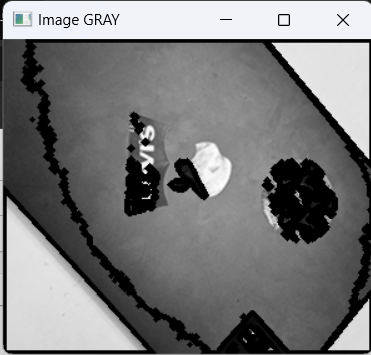
못생겼ㄷ...가 아니라 됐습니다!
What's your shape?
import cv2
import numpy as np
from matplotlib import pyplot as plt

img = cv2.imread('data/my_laptop_picture.png')
imgGrey = cv2.cvtColor(img, cv2.COLOR_BGR2GRAY)
_, thrash = cv2.threshold(imgGrey, 220, 255, cv2.THRESH_BINARY)
contours, _ = cv2.findContours(thrash, cv2.RETR_TREE, cv2.CHAIN_APPROX_NONE)
print(len(contours))
cv2.imshow("img", img)
for contour in contours:
    approx = cv2.approxPolyDP(contour, 0.01* cv2.arcLength(contour, True), True)
    cv2.drawContours(img, [approx], 0, (0, 0, 0), 5)
    x = approx.ravel()[0]
    y = approx.ravel()[1] - 5
    if len(approx) == 3:
        cv2.putText(img, "Triangle", (x, y), cv2.FONT_HERSHEY_COMPLEX, 0.5, (0, 0, 0))
    elif len(approx) == 4:
        x1 ,y1, w, h = cv2.boundingRect(approx)
        aspectRatio = float(w)/h
        print(aspectRatio)
        if aspectRatio >= 0.95 and aspectRatio <= 1.05:
            cv2.putText(img, "square", (x, y), cv2.FONT_HERSHEY_COMPLEX, 0.5, (0, 0, 0))
        else:
            cv2.putText(img, "rectangle", (x, y), cv2.FONT_HERSHEY_COMPLEX, 0.5, (0, 0, 0))
    elif len(approx) == 5:
        cv2.putText(img, "Pentagon", (x, y), cv2.FONT_HERSHEY_COMPLEX, 0.5, (0, 0, 0))
    elif len(approx) == 10:
        cv2.putText(img, "Star", (x, y), cv2.FONT_HERSHEY_COMPLEX, 0.5, (0, 0, 0))
    else:
        cv2.putText(img, "Circle", (x, y), cv2.FONT_HERSHEY_COMPLEX, 0.5, (0, 0, 0))


cv2.imshow("shapes", img)
cv2.waitKey(0)
cv2.destroyAllWindows()
이렇게 아무 설정도 없이 모든 도형을 찾는다 하면
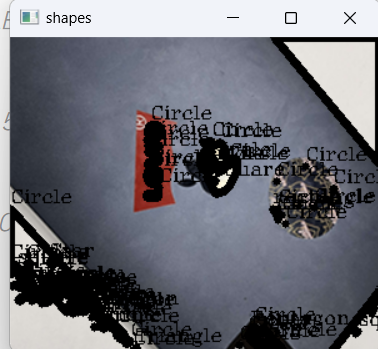
이렇게 됩니다.
adaptive threshold와 contour area를 사용해 봅시다.
import cv2
import matplotlib.pyplot as plt
import numpy as np


block_size = 9
C = 5
kernal = np.ones((5,5), np.uint8)
img = cv2.imread('data/wonbon.jpg', cv2.IMREAD_GRAYSCALE)
img = cv2.resize(img, (800, 500))
img = cv2.blur(img, (5, 5))
img = cv2.dilate(img, kernal, iterations = 1)
img = cv2.erode(img, kernal, iterations = 1)
img = cv2.adaptiveThreshold(img, 255, cv2.ADAPTIVE_THRESH_GAUSSIAN_C, cv2.THRESH_BINARY, block_size, C)

contours, _ = cv2.findContours(img, cv2.RETR_TREE, cv2.CHAIN_APPROX_NONE)

for contour in contours:
    approx = cv2.approxPolyDP(contour, 0.01* cv2.arcLength(contour, True), True)
    cnt = approx
    area = cv2.contourArea(cnt)
    if area < 115000:
        continue;
    cv2.drawContours(img, [approx], 0, (0, 0, 0), 5)
    x = approx.ravel()[0]
    y = approx.ravel()[1] - 5
    if len(approx) == 3:
        cv2.putText(img, "Triangle", (x, y), cv2.FONT_HERSHEY_COMPLEX, 0.5, (0, 0, 0))
    elif len(approx) == 4:
        x1 ,y1, w, h = cv2.boundingRect(approx)
        aspectRatio = float(w)/h
        print(aspectRatio)
        if aspectRatio >= 0.95 and aspectRatio <= 1.05:
            cv2.putText(img, "square", (x, y), cv2.FONT_HERSHEY_COMPLEX, 0.5, (0, 0, 0))
        else:
            cv2.putText(img, "rectangle", (x, y), cv2.FONT_HERSHEY_COMPLEX, 0.5, (0, 0, 0))
    elif len(approx) == 5:
        cv2.putText(img, "Pentagon", (x, y), cv2.FONT_HERSHEY_COMPLEX, 0.5, (0, 0, 0))
    elif len(approx) == 10:
        cv2.putText(img, "Star", (x, y), cv2.FONT_HERSHEY_COMPLEX, 0.5, (0, 0, 0))
    else:
        cv2.putText(img, "Circle", (x, y), cv2.FONT_HERSHEY_COMPLEX, 0.5, (0, 0, 0))

cv2.imshow("shapes", img)
cv2.waitKey(0)
cv2.destroyAllWindows()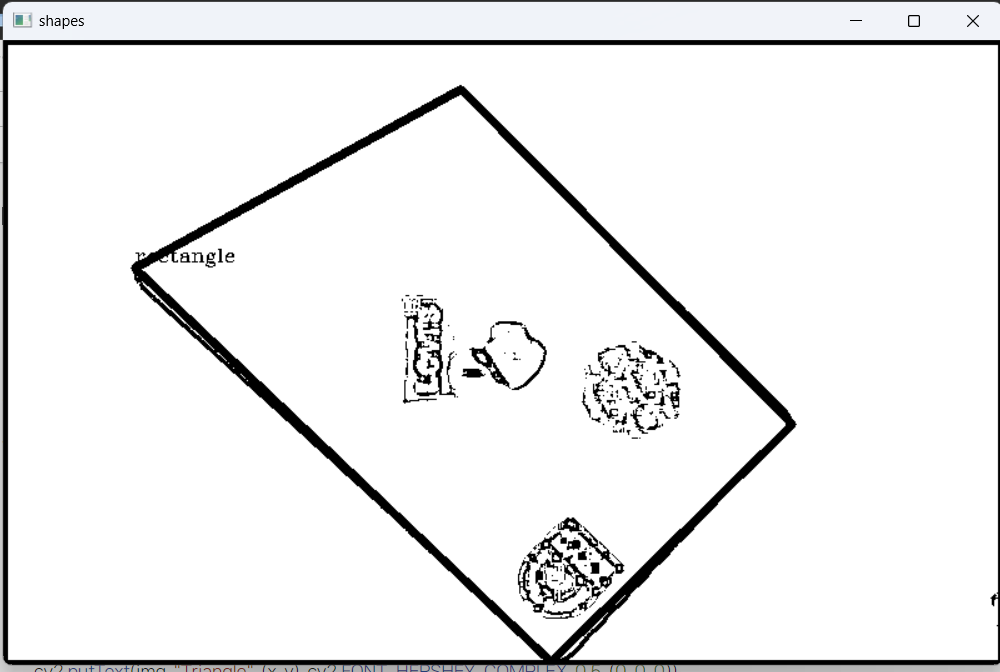
얼굴 인식
Haar Cascade는 객체 검출 알고리즘입니다.
네, 그걸로 얼굴 인식하면 되겠죠.
import cv2

faceCascade = cv2.CascadeClassifier("data/haarcascade_frontalface_default.xml")

cap = cv2.VideoCapture(0) # 인덱스번호로 연결된 소스를 객체로 선언 (웹캠 0번) (웹캠아니면 비디오 소스 넣기)
print(cap.isOpened()) # 소스가 열리는지 확인
while(cap.isOpened()): # 소스가 열리는 동안
    ret, frame = cap.read() # 소스로부터 이미지 객체 추출, ret: 성공여부 frame: 이미지 객체
    frame = cv2.cvtColor(frame, cv2.COLOR_BGR2GRAY)
    faces = faceCascade.detectMultiScale(frame,1.1,4)
    for (x,y,w,h) in faces:
        cv2.rectangle(frame,(x,y),(x+w,y+h),(255,0,0),2)
    # frame = cv2.cvtColor(frame, cv2.COLOR_BGR2GRAY)
    if ret : # 성공했다면
        cv2.imshow('frame',
        frame) # 이미지객체를 frame이라는 윈도우 출력

        if cv2.waitKey(1) & 0xFF == ord('q'): # Q키를 누르면 break
            break
    else: # 소스에서부터 이미지 불러오는 것이 실패했다면
        break # 탈출
cap.release() # 소스초기화
cv2.destroyAllWindows() # 윈도우창 종료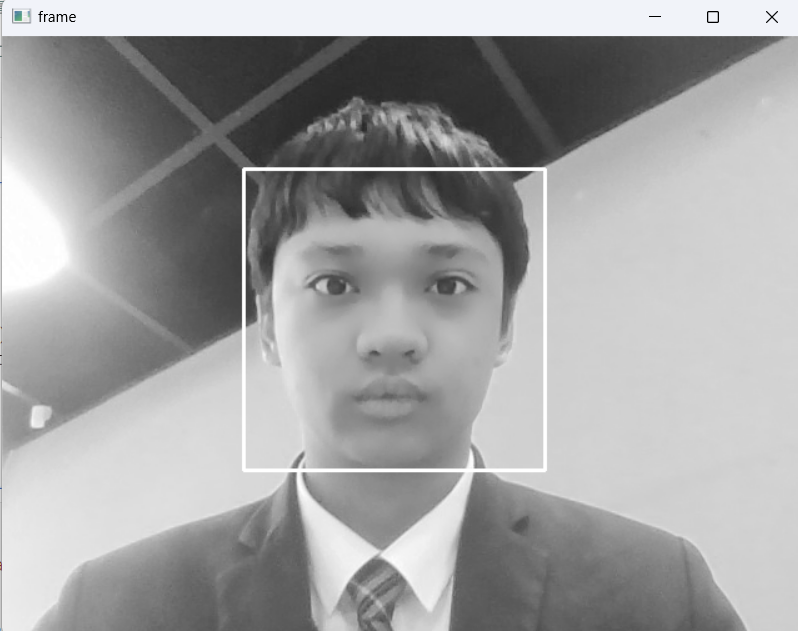
어차피 내 얼굴은 공공재니까 상관없겠지
얼굴 모자이크 처리
import cv2

faceCascade = cv2.CascadeClassifier("data/haarcascade_frontalface_default.xml")

cap = cv2.VideoCapture(0) # 인덱스번호로 연결된 소스를 객체로 선언 (웹캠 0번) (웹캠아니면 비디오 소스 넣기)
print(cap.isOpened()) # 소스가 열리는지 확인
while(cap.isOpened()): # 소스가 열리는 동안
    ret, frame = cap.read() # 소스로부터 이미지 객체 추출, ret: 성공여부 frame: 이미지 객체
    frame = cv2.cvtColor(frame, cv2.COLOR_BGR2GRAY)
    faces = faceCascade.detectMultiScale(frame,1.1,4)
    for (x,y,w,h) in faces:
        roi = frame[y:y+h, x:x+w]
        factor = 10
        small_roi = cv2.resize(roi, (w//factor, h//factor))
        mosaic_roi = cv2.resize(small_roi, (w,h), interpolation=cv2.INTER_NEAREST)
        frame[y:y+h, x:x+w] = mosaic_roi
        cv2.rectangle(frame,(x,y),(x+w,y+h),(255,0,0),2)
    # frame = cv2.cvtColor(frame, cv2.COLOR_BGR2GRAY)
    if ret : # 성공했다면
        cv2.imshow('frame', frame) # 이미지객체를 frame이라는 윈도우 출력

        if cv2.waitKey(1) & 0xFF == ord('q'): # Q키를 누르면 break
            break
    else: # 소스에서부터 이미지 불러오는 것이 실패했다면
        break # 탈출
cap.release() # 소스초기화
cv2.destroyAllWindows() # 윈도우창 종료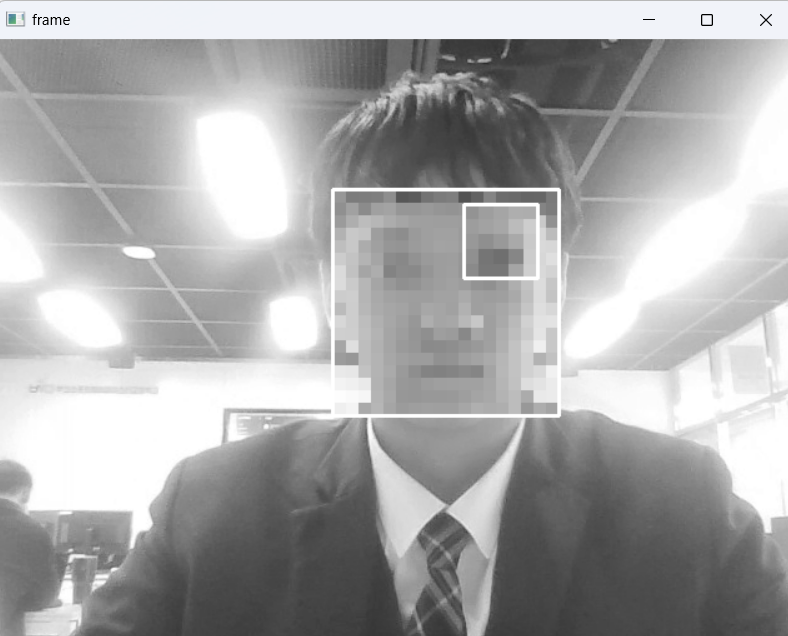
(그래서 눈은 왜 인식되는 건데)
프런트엔드 개발자 지망생