Selector
CSS는 HTML element의 스타일을 정의한다. 그렇게하려면 스타일을 적용하고자하는 HTML element를 특정할 필요가 있다.
이런 목적으로 사용되는 것인 selector다. 즉, 스타일을 적용하고자하는 HTML element를 selector로 특정하고, 선택된 element에 스타일을 정의하는 것이다.

<!DOCTYPE html>
<html>
<head>
  <style>
    h1 { color: red; }
    p  { color: blue; }
  </style>
</head>
<body>
  <h1>Hello World!</h1>
  <p>This paragraph is styled with CSS.</p>
</body>
</html>
같은 스타일을 다수의 selector에 지정할 수 있으며, 쉼표(,) 로 구분한다.
h1, p { color: red; }Universal selector
에스터리스크(*)를 사용해, HTML document 내의 모든 element를 선택할 수 있다. <html>, <head> 등 모든 element가 선택된다.
<!DOCTYPE html>
<html>
<head>
  <style>
    /* 모든 요소를 선택 */
    * { color: red; }
  </style>
</head>
<body>
  <h1>Heading</h1>
  <div>
    <p>paragraph 1</p>
    <p>paragraph 2</p>
  </div>
  <p>paragraph 3</p>
</body>
</html>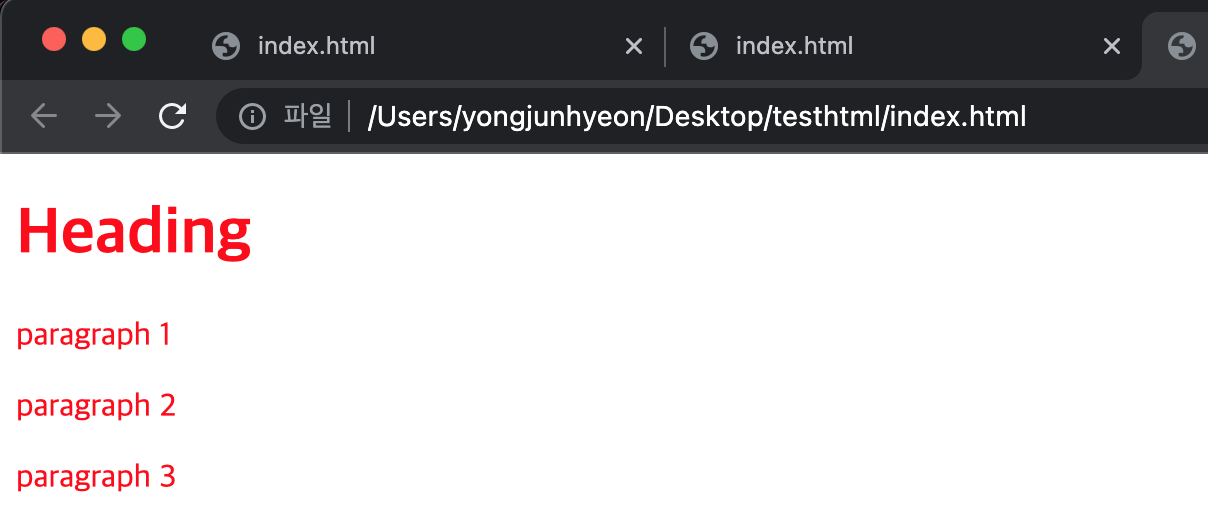
Tag selector
지정된 tag명을 가지는 모든 element를 선택한다.
<!DOCTYPE html>
<html>
<head>
  <style>
    /* 모든 p 태그 요소를 선택 */
    p { color: red; }
  </style>
</head>
<body>
  <h1>Heading</h1>
  <div>
    <p>paragraph 1</p>
    <p>paragraph 2</p>
  </div>
  <p>paragraph 3</p>
</body>
</html>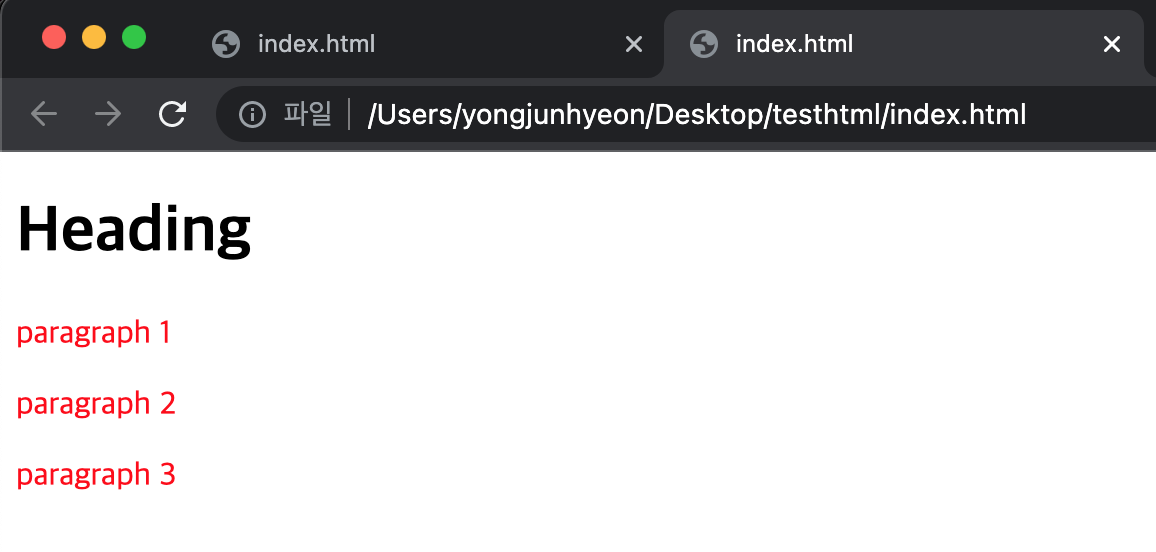
ID selector
해시태그(#)를 사용해 id attribute 값을 지정하여 일치하는 element를 선택한다. id attribute 값은 유일하며, 중복될 수 없다.
<!DOCTYPE html>
<html>
<head>
  <style>
    /* id 어트리뷰트 값이 p1인 요소를 선택 */
    #p1 { color: red; }
  </style>
</head>
<body>
  <h1>Heading</h1>
  <div class="container">
    <p id="p1">paragraph 1</p>
    <p id="p2">paragraph 2</p>
  </div>
  <p>paragraph 3</p>
</body>
</html>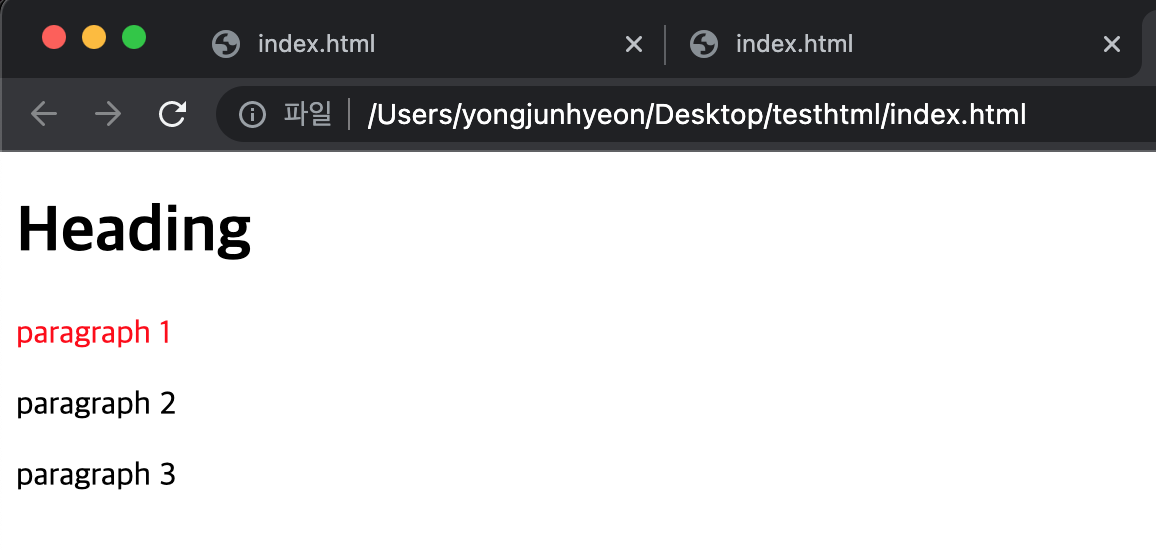
Class selector
온점(.)을 사용해 class attribute 값을 지정하여 일치하는 element를 선택한다. class attribute 값은 중복될 수 있다.
id selector는 class selector보다 우선 적용된다.
<!DOCTYPE html>
<html>
<head>
  <style>
    /* class 어트리뷰트 값이 container인 모든 요소를 선택 */
    /* color 어트리뷰트는 자식 요소에 상속된다. */
    .container { color: red; }
    /* not supported in IE */
    #p2 { color: initial; }
  </style>
</head>
<body>
  <h1>Heading</h1>
  <div class="container">
    <p id="p1">paragraph 1</p>
    <p id="p2">paragraph 2</p>
  </div>
  <p>paragraph 3</p>
</body>
</html>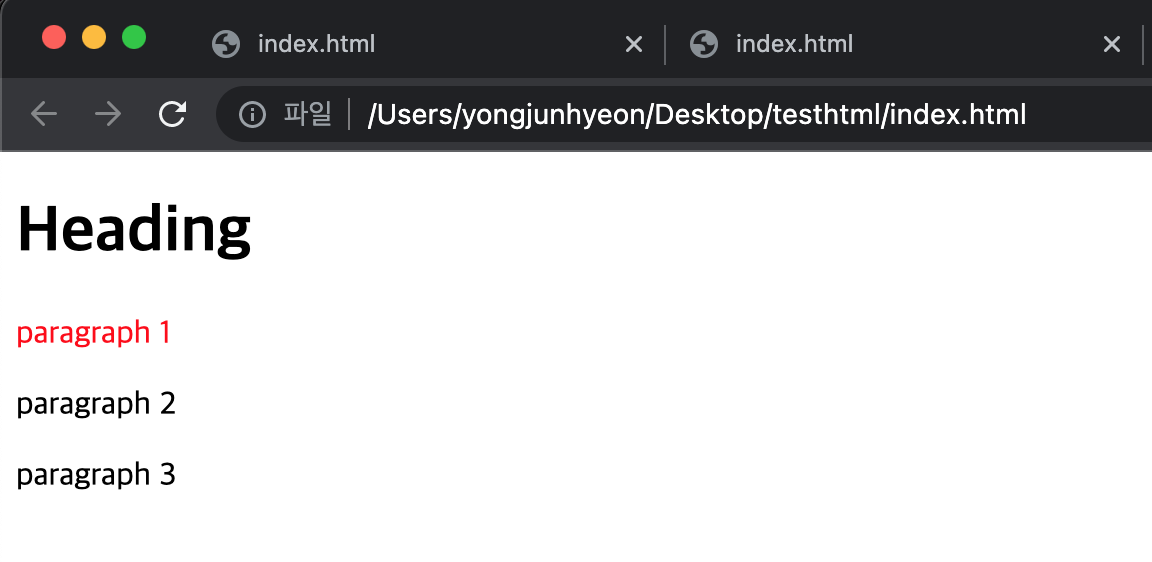
HTML element에 class attribute 값은 공백으로 구분하여 여러 개 지정할 수 있다.
아래와 같이 class selector를 사용하여 미리 스타일을 정의해 두고, HTML element는 이미 정의되어 있는 class를 지정하는 것으로 필요한 스타일을 지정할 수 있다. 이러한 방식은 재사용의 측면에서 유용하다.
<!DOCTYPE html>
<html>
<head>
  <style>
    /* class 어트리뷰트 값이 text-center인 모든 요소를 선택 */
    .text-center { text-align: center; }
    /* class 어트리뷰트 값이 text-large인 모든 요소를 선택 */
    .text-large  { font-size: 200%; }
    /* class 어트리뷰트 값이 text-red인 모든 요소를 선택 */
    .text-red    { color: red; }
    /* class 어트리뷰트 값이 text-blue인 모든 요소를 선택 */
    .text-blue   { color: blue; }
  </style>
</head>
<body>
  <p class="text-center">Center</p>
  <p class="text-large text-red">Large Red</p>
  <p class="text-center text-large text-blue">Center Large Blue</p>
</body>
</html>
Attribute selector
대괄호 []를 사용해서, 지정된 attribute를 갖는 모든 element를 선택한다.
<!DOCTYPE html>
<html>
<head>
  <style>
    /* a 요소 중에 href 어트리뷰트를 갖는 모든 요소 */
    a[href] { color: red; }
  </style>
</head>
<body>
  <a href="http://www.poiemaweb.com">poiemaweb.com</a><br>
  <a href="http://www.google.com" target="_blank">google.com</a><br>
  <a href="http://www.naver.com" target="_top">naver.com</a>
</body>
</html>
지정된 attribute와 값이 일치하는 element를 선택하는 방법도 있다.
<!DOCTYPE html>
<html>
<head>
  <style>
    /* a 요소 중에 target 어트리뷰트의 값이 "_blank"인 모든 요소 */
    a[target="_blank"] { color: red; }
  </style>
</head>
<body>
  <a href="http://www.poiemaweb.com">poiemaweb.com</a><br>
  <a href="http://www.google.com" target="_blank">google.com</a><br>
  <a href="http://www.naver.com" target="_top">naver.com</a>
</body>
</html>
지정된 attribute와 단어가 값에 포함된 element를 선택한다. 지정된 단어는 공백으로 분리되어 있어야 한다.
<!DOCTYPE html>
<html>
<head>
  <style>
    /* h1 요소 중에 title 어트리뷰트 값에 "first"를 단어로 포함하는 요소 */
    h1[title~="first"] { color: red; }
  </style>
</head>
<body>
  <h1 title="heading first">Heading first</h1>
  <h1 title="heading-first">Heading-first</h1>
  <h1 title="heading second">Heading second</h1>
  <h1 title="heading third">Heading third</h1>
</body>
</html>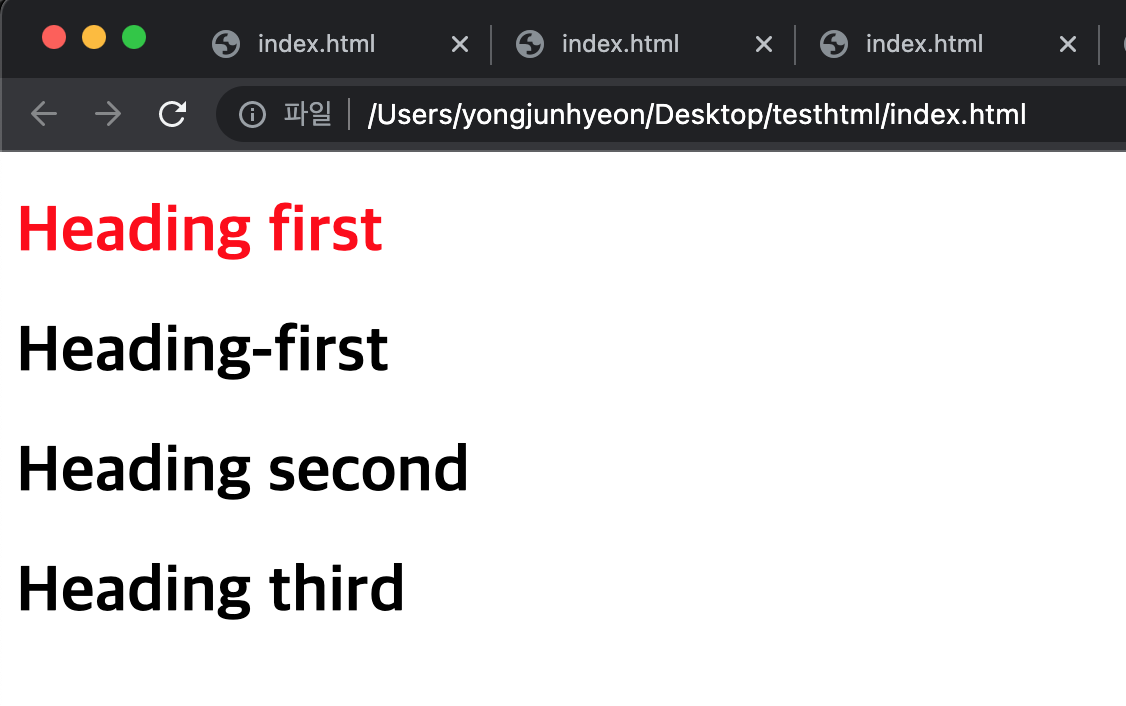
지정된 attribute의 값과 일치하거나, 일치한 값 뒤에 하이픈(-)으로 시작하는 element를 선택한다.
<!DOCTYPE html>
<html>
<head>
  <style>
    /* p 요소 중에 lang 어트리뷰트 값이 "en"과 일치하거나 "en-"로 시작하는 요소 */
    p[lang|="en"] { color: red; }
  </style>
</head>
<body>
  <p lang="en">Hello!</p>
  <p lang="en-us">Hi!</p>
  <p lang="en-gb">Ello!</p>
  <p lang="us">Hi!</p>
  <p lang="no">Hei!</p>
</body>
</html>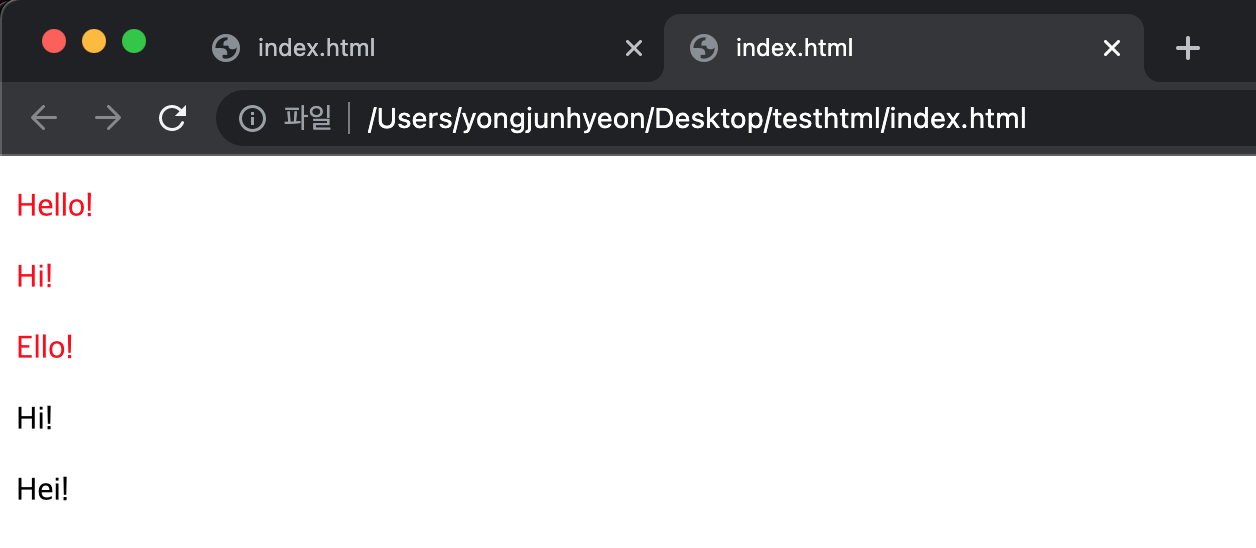
지정된 attribute와 값으로 시작하는 element를 선택한다.
<!DOCTYPE html>
<html>
<head>
  <style>
    /* a 요소 중에 href 어트리뷰트 값이 "https://"로 시작하는 요소 */
    a[href^="https://"] { color: red; }
  </style>
</head>
<body>
  <a href="https://www.test.com">https://www.test.com</a><br>
  <a href="http://www.test.com">http://www.test.com</a>
</body>
</html>
지정된 attribute 값으로 끝나는 element를 선택한다.
<!DOCTYPE html>
<html>
<head>
  <style>
    /* a 요소 중에 href 어트리뷰트 값이 ".html"로 끝나는 요소 */
    a[href$=".html"] { color: red; }
  </style>
</head>
<body>
  <a href="test.html">test.html</a><br>
  <a href="test.jsp">test.jsp</a>
</body>
</html>
지정된 attribute와 단어가 값으로 포함되는 element를 선택한다. 공백으로 구분할 필요없이 단어가 포함되기만 해도 된다.
<!DOCTYPE html>
<html>
<head>
  <style>
    /* div 요소 중에서 class 어트리뷰트 값에 "test"를 포함하는 요소 */
    div[class*="test"] { color: red; }
    /* div 요소 중에서 class 어트리뷰트 값에 "test"를 단어로 포함하는 요소 */
    div[class~="test"] { background-color: yellow; }
  </style>
</head>
<body>
  <div class="first_test">The first div element.</div>
  <div class="second">The second div element.</div>
  <div class="test">The third div element.</div>
  <p class="test">This is some text in a paragraph.</p>
</body>
</html>
Combinator
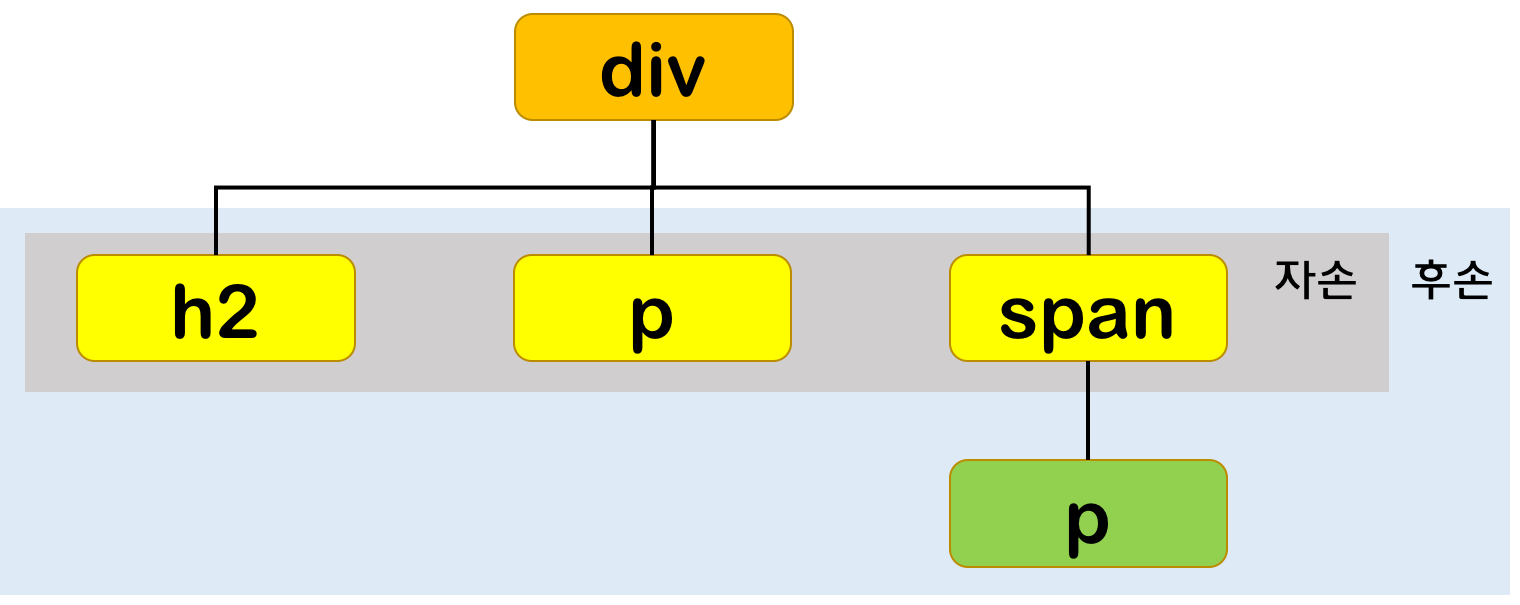
자신의 상위 level에 속하는 element를 부모 element, 하위 level에 속하는 element를 자식 element라 한다.
자신보다 n level 하위에 속하는 element는 후손 element라 한다.
Descendant combinator
Descendant combinator는 selector A의 모든 후손 element 중 selector B와 일치하는 element를 선택한다.
selector A selector B<!DOCTYPE html>
<html>
<head>
<style>
/* div 요소의 후손요소 중 p 요소 */
div p { color: red; }
</style>
</head>
<body>
<h1>Heading</h1>
<div>
<p>paragraph 1</p>
<p>paragraph 2</p>
<span><p>paragraph 3</p></span>
</div>
<p>paragraph 4</p>
</body>
</html>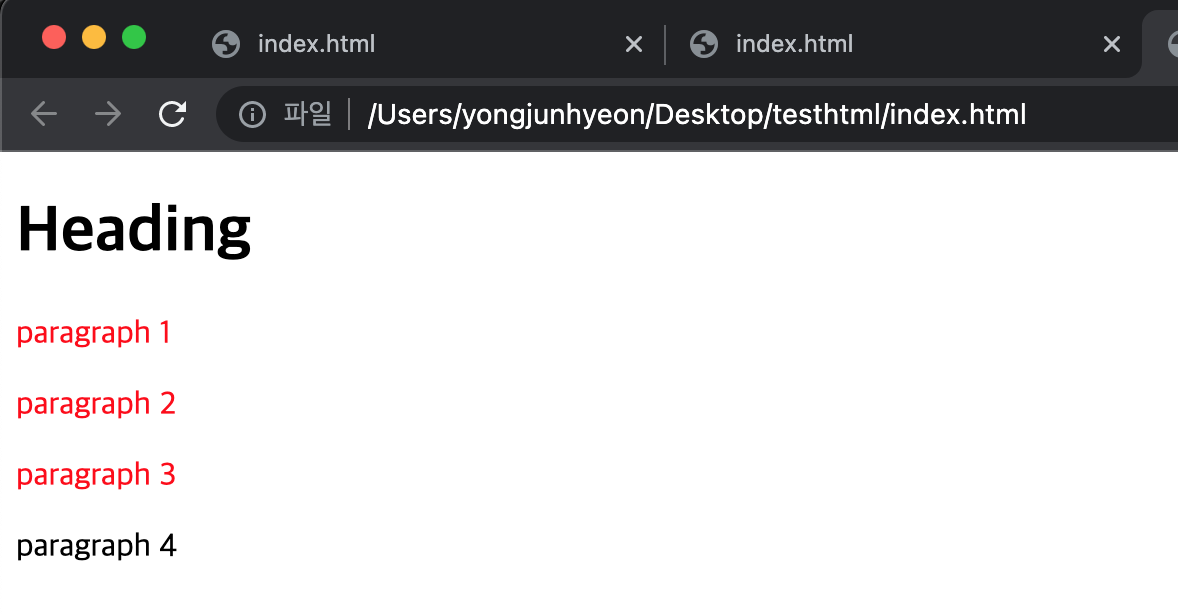
Child Combinator
자식 selector는 selector A의 모든 자식 element 중 selector B와 일치하는 element를 선택한다.
selectorA > selector B<!DOCTYPE html>
<html>
<head>
<style>
/* div 요소의 자식요소 중 p 요소 */
div > p { color: red; }
</style>
</head>
<body>
<h1>Heading</h1>
<div>
<p>paragraph 1</p>
<p>paragraph 2</p>
<span><p>paragraph 3</p></span>
</div>
<p>paragraph 4</p>
</body>
</html>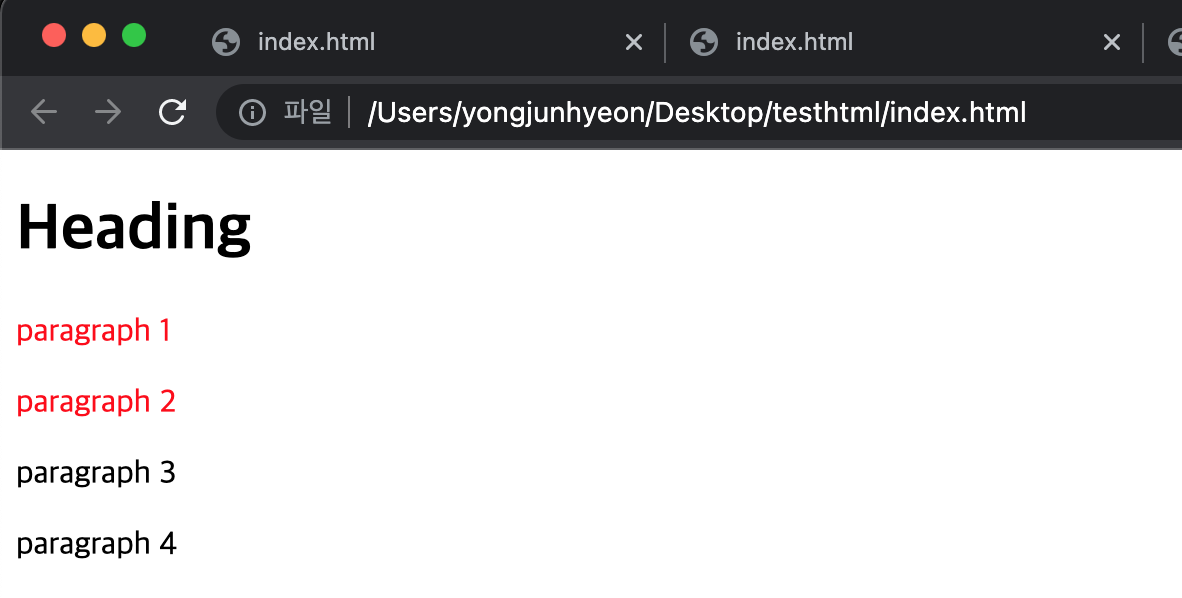
Sibling combinator
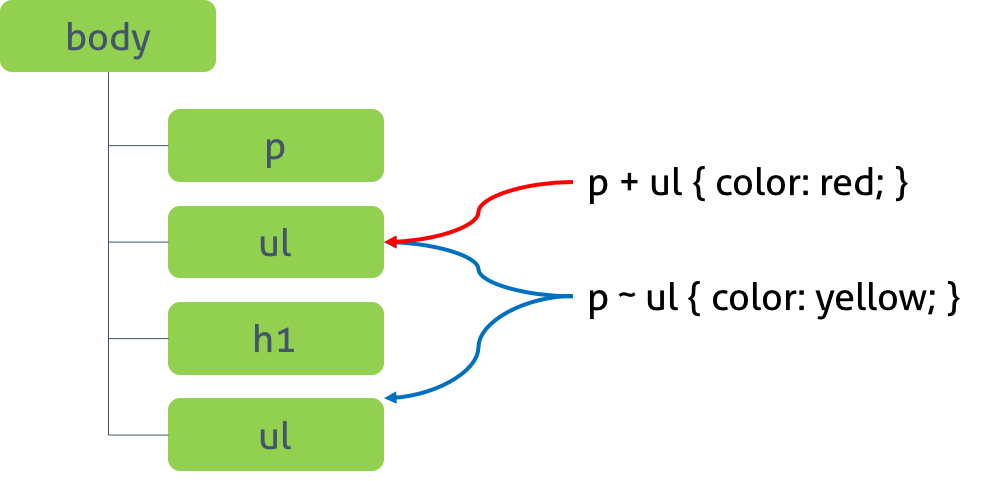
형제 selector는 형제 관계에서 뒤에 위치하는 element를 선택할 때 사용한다.
Adjacent sibling combinator
Selector A의 형제 element 중 selector A 바로 뒤에 위치한 selector B element를 선택한다. A와 B 사이에 다른 element가 존재하면 선택되지 않는다.
selector A + selector B<!DOCTYPE html>
<html>
<head>
<style>
/* p 요소의 형제 요소 중에 p 요소 바로 뒤에 위치하는 ul 요소를 선택한다. */
p + ul { color: red; }
</style>
</head>
<body>
<div>A div element.</div>
<ul>
<li>Coffee</li>
<li>Tea</li>
<li>Milk</li>
</ul>
<p>The first paragraph.</p>
<ul>
<li>Coffee</li>
<li>Tea</li>
<li>Milk</li>
</ul>
<h2>Another list</h2>
<ul>
<li>Coffee</li>
<li>Tea</li>
<li>Milk</li>
</ul>
</body>
</html>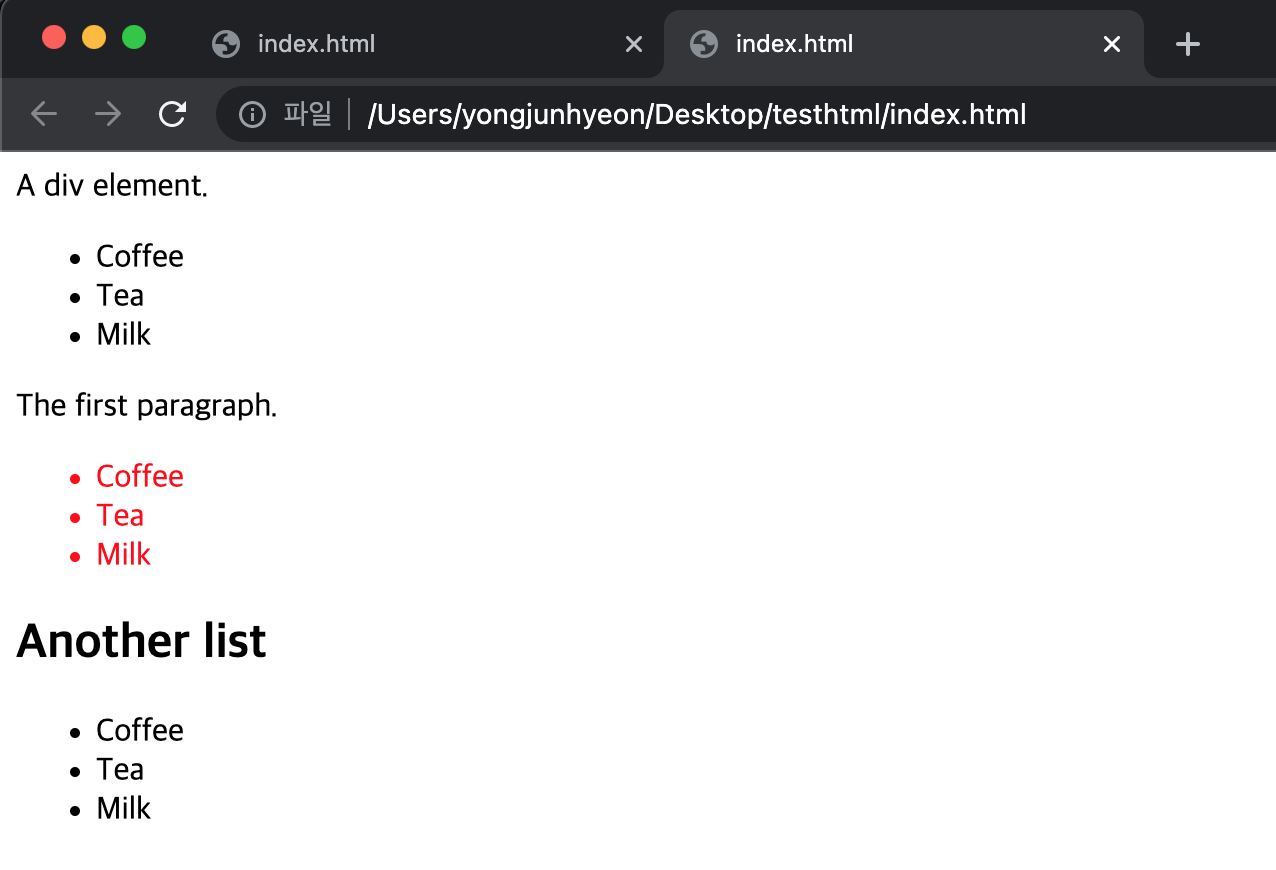
General sibling combinator
Selector A의 형제 element 중 selector A 뒤에 위치하는 selector B element를 모두 선택한다.
selector A ~ selector B<!DOCTYPE html>
<html>
<head>
<style>
/* p 요소의 형제 요소 중에 p 요소 뒤에 위치하는 ul 요소를 모두 선택한다.*/
p ~ ul { color: red; }
</style>
</head>
<body>
<div>A div element.</div>
<ul>
<li>Coffee</li>
<li>Tea</li>
<li>Milk</li>
</ul>
<p>The first paragraph.</p>
<ul>
<li>Coffee</li>
<li>Tea</li>
<li>Milk</li>
</ul>
<h2>Another list</h2>
<ul>
<li>Coffee</li>
<li>Tea</li>
<li>Milk</li>
</ul>
</body>
</html>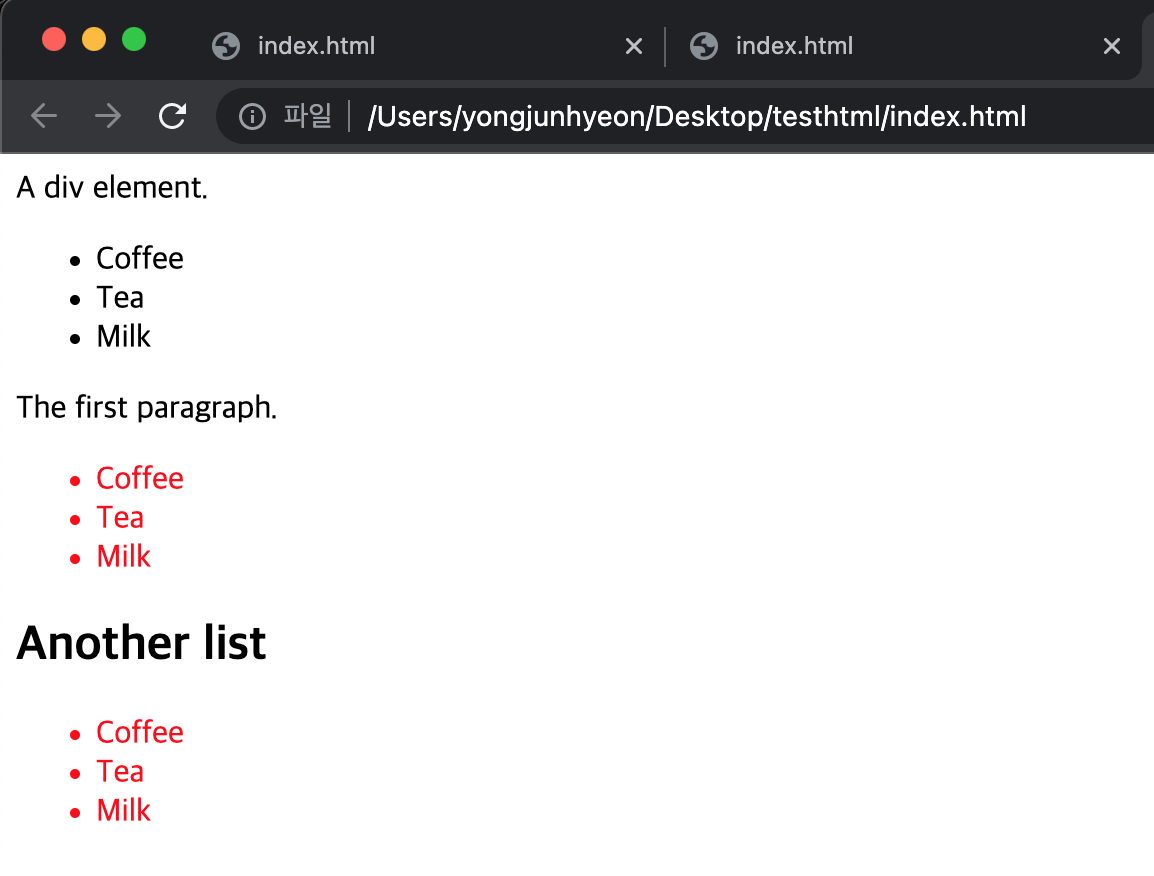
Pseudo-class selector
pseudo-class는 element의 특정 상태에 따라 스타일을 정의할 때 사용된다.
특정 상태란 예를 들어 다음과 같다.
- 마우스가 올라와 있을 때
- 링크를 방문했을 때, 방문하지 않았을 때
- 포커스가 들어와 있을 때
이러한 특정 상태에는 원래 class가 존재하지 않지만, pseudo-class를 임의로 지정하여 선택하는 방법이다.
pseudo-class는 마침표(.) 대신 콜론(:)을 사용한다. CSS 표준에 의해 미리 정의된 이름이 있기 때문에, 임의의 이름을 사용할 수 없다.
selector:pseudo-class {
  property: value;
}
아래 예시는 a element가 hover 상태일 때 링크 색깔을 red로, 입력 칸을 눌렀을 때, input element의 background-color를 yellow로 지정하는 예이다.
<!DOCTYPE html>
<html>
<head>
  <style>
    /* a 요소가 hover 상태일 때 */
    a:hover { color: red; }
    /* input 요소가 focus 상태일 때 */
    input:focus { background-color: yellow; }
  </style>
</head>
<body>
  <a href="#">Hover me</a><br><br>
  <input type="text" placeholder="focus me">
</body>
</html>
Link pseudo-class selector, User action pseudo-class selector
:link- 방문하지 않은 링크일 때:visited- 방문한 링크 일 때:hover- 마우스가 올라와 있을 때:active- 클릭된 상태 일 때:focus- 포커스가 들어와 있을 때
<!DOCTYPE html>
<html>
<head>
  <style>
    /* a 요소가 방문하지 않은 링크일 때 */
    a:link { color: orange; }

    /* a 요소가 방문한 링크일 때 */
    a:visited { color: green; }

    /* a 요소에 마우스가 올라와 있을 때 */
    a:hover { font-weight: bold; }

    /* a 요소가 클릭된 상태일 때 */
    a:active { color: blue; }

    /* text input 요소와 password input 요소에 포커스가 들어와 있을 때 */
    input[type=text]:focus,
    input[type=password]:focus {
      color: red;
    }
    </style>
  </head>
<body>
  <a href="#" target="_blank">This is a link</a><br>
  <input type="text" value="I'll be red when focused"><br>
  <input type="password" value="I'll be red when focused">
</body>
</html>
UI element state pseudo-class selector
:checked- 체크 상태일 때:enabled- 사용 가능한 상태일 때:disabled- 사용 불가능한 상태일 때
<!DOCTYPE html>
<html>
<head>
  <style>
    /* input 요소가 사용 가능한 상태일 때,
       input 요소 바로 뒤에 위치하는 인접 형제 span 요소를 선택 */
    input:enabled + span {
      color: blue;
    }
    /* input 요소가 사용 불가능한 상태일 때,
       input 요소 바로 뒤에 위치하는 인접 형제 span 요소를 선택 */
    input:disabled + span {
      color: gray;
      text-decoration: line-through;
    }
    /* input 요소가 체크 상태일 때,
       input 요소 바로 뒤에 위치하는 인접 형제 span 요소를 선택 */
    input:checked + span {
      color: red;
    }
  </style>
</head>
<body>
  <input type="radio" checked="checked" value="male" name="gender"> <span>Male</span><br>
  <input type="radio" value="female" name="gender"> <span>Female</span><br>
  <input type="radio" value="neuter" name="gender" disabled> <span>Neuter</span><hr>

  <input type="checkbox" checked="checked" value="bicycle"> <span>I have a bicycle</span><br>
  <input type="checkbox" value="car"> <span>I have a car</span><br>
  <input type="checkbox" value="motorcycle" disabled> <span>I have a motorcycle</span>
</body>
</html>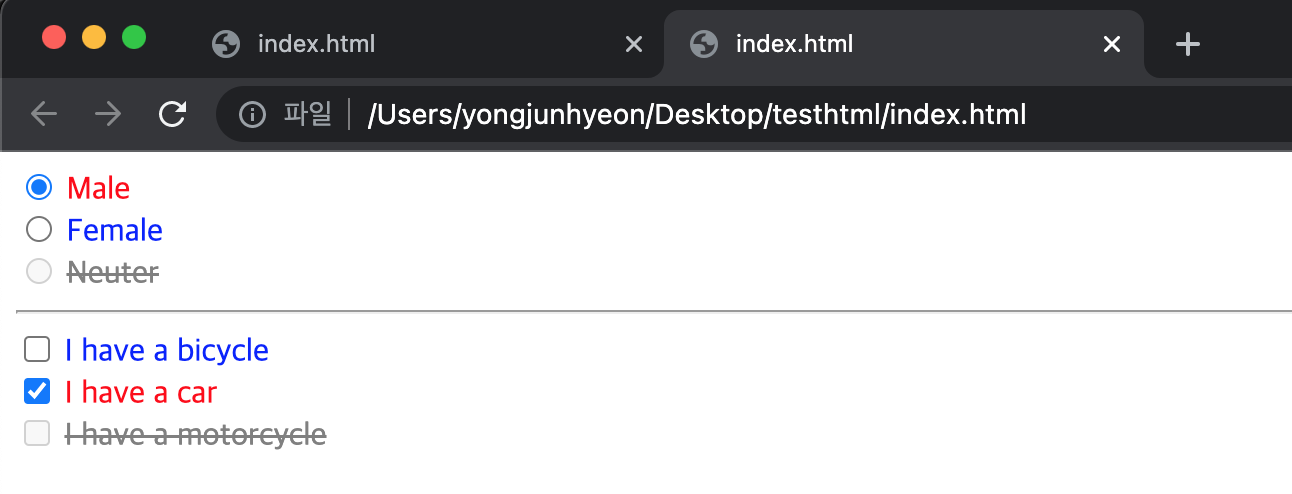
Structural pseudo-class selector
:first-child- selector에 해당하는 모든 element 중 element가 첫 번째 자식 element이면 선택한다.:last-child- selector에 해당하는 모든 모든 element 중 element가 마지막 자식 element이면 선택한다.
<!DOCTYPE html>
<html>
<head>
  <style>
    /* p 요소 중에서 첫번째 자식을 선택 */
    p:first-child { color: red; }

    /* p 요소 중에서 마지막 자식을 선택 */
    /* body 요소의 두번째 p 요소는 마지막 자식 요소가 아니다.
       body 요소의 마지막 자식 요소는 div 요소이다. */
    p:last-child { color: blue; }
  </style>
</head>
<body>
  <p>This paragraph is the first child of its parent (body).</p>

  <h1>Welcome to My Homepage</h1>
  <p>This paragraph is not the first child of its parent.</p>

  <div>
    <p>This paragraph is the first child of its parent (div).</p>
    <p>This paragraph is not the first child of its parent.</p>
  </div>
</body>
</html>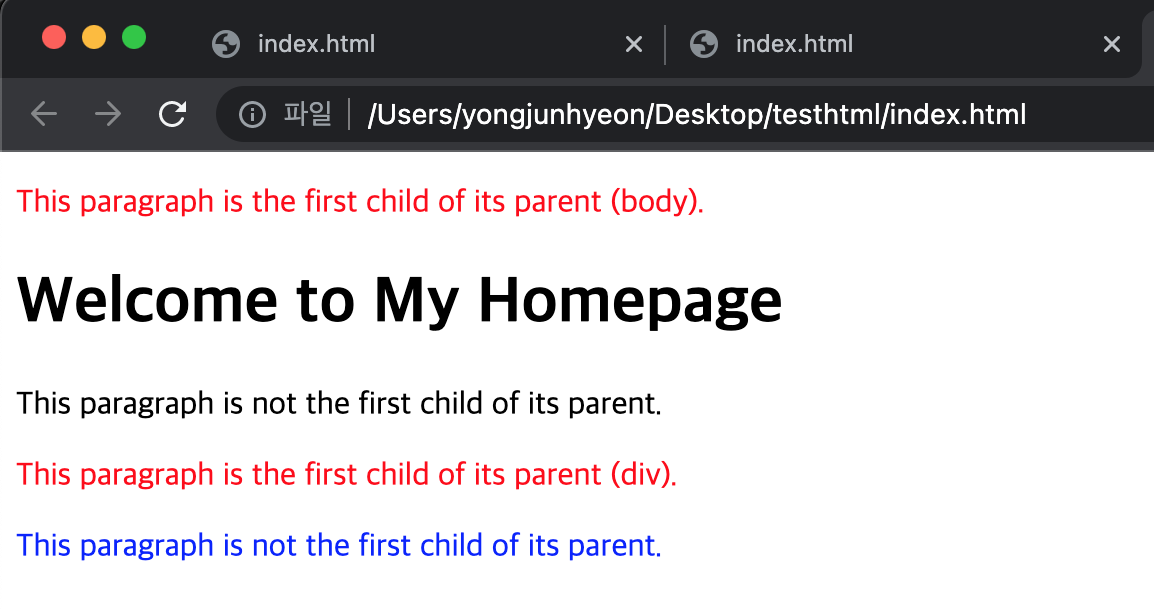
:nth-child(n)- selector에 해당하는 모든 element 중 element가 앞에서 n 번째 자식 element이면 선택한다.:nth-last-child(n)- selector에 해당하는 모든 element 중 element가 뒤에서 n 번째 자식 element이면 선택한다.
n은 0 부터 시작한다.
<!DOCTYPE html>
<html>
<head>
  <style>
    /* ol 요소의 자식 요소인 li 요소 중에서 짝수번째 요소만을 선택 */
    ol > li:nth-child(2n)   { color: orange; }
    /* ol 요소의 자식 요소인 li 요소 중에서 홀수번째 요소만을 선택 */
    ol > li:nth-child(2n+1) { color: green; }

    /* ol 요소의 자식 요소인 li 요소 중에서 첫번쨰 요소만을 선택 */
    ol > li:first-child     { color: red; }
    /* ol 요소의 자식 요소인 li 요소 중에서 마지막 요소만을 선택 */
    ol > li:last-child      { color: blue; }

    /* ol 요소의 자식 요소인 li 요소 중에서 4번째 요소 요소만을 선택 */
    ol > li:nth-child(4)    { background: brown; }

    /* ul 요소의 모든 자식 요소 중에서 뒤에서부터 시작하여 홀수번째 요소만을 선택 */
    ul > :nth-last-child(2n+1) { color: red; }
    /* ul 요소의 모든 자식 요소 중에서 뒤에서부터 시작하여 짝수번째 요소만을 선택 */
    ul > :nth-last-child(2n)   { color: blue; }
  </style>
</head>
<body>
  <ol>
    <li>Espresso</li>
    <li>Americano</li>
    <li>Caffe Latte</li>
    <li>Caffe Mocha</li>
    <li>Caramel Latte</li>
    <li>Cappuccino</li>
  </ol>

  <ul>
    <li>Espresso</li>
    <li>Americano</li>
    <li>Caffe Latte</li>
    <li>Caffe Mocha</li>
    <li>Caramel Latte</li>
    <li>Cappuccino</li>
  </ul>
</body>
</html>
:first-of-type- selector에 해당하는 element의 부모 element의 자식 element 중 첫번 째 element이면 선택한다.:last-of-type- selector에 해당하는 element의 부모 element의 자식 element 중 마지막 element이면 선택한다.:nth-of-type(n)- selector에 해당하는 element의 부모 element의 자식 element 중 앞에서 n번 째 등장하는 element이면 선택한다.:nth-last-of-type(n)- selector에 해당하는 element의 부모 element의 자식 element 중 뒤에서 n번 째 등장하는 element이면 선택한다.
<!DOCTYPE html>
<html>
<head>
  <style>
    /* p 요소의 부모 요소의 자식 요소 중 첫번째 등장하는 p 요소 */
    p:first-of-type  { color: red; }
    /* p 요소의 부모 요소의 자식 요소 중 마지막 등장하는 p 요소 */
    p:last-of-type   { color: blue; }
    /* p 요소의 부모 요소의 자식 요소 중 앞에서 2번째에 등장하는 p 요소 */
    p:nth-of-type(2) { color: green; }
    /* p 요소의 부모 요소의 자식 요소 중 뒤에서 2번째에 등장하는 p 요소 */
    p:nth-last-of-type(2) { color: orange;}

    /* p 요소 중에서 첫번째 자식을 선택 */
    p:first-child { background: brown;}
  </style>
</head>
<body>
  <h1>This is a heading</h1>
  <p>The first paragraph.</p>
  <p>The second paragraph.</p>
  <p>The third paragraph.</p>
  <p>The fourth paragraph.</p>
  <div>
    <h1>This is a heading</h1>
    <p>The first paragraph.</p>
    <p>The second paragraph.</p>
    <p>The third paragraph.</p>
    <p>The fourth paragraph.</p>
  </div>
</body>
</html>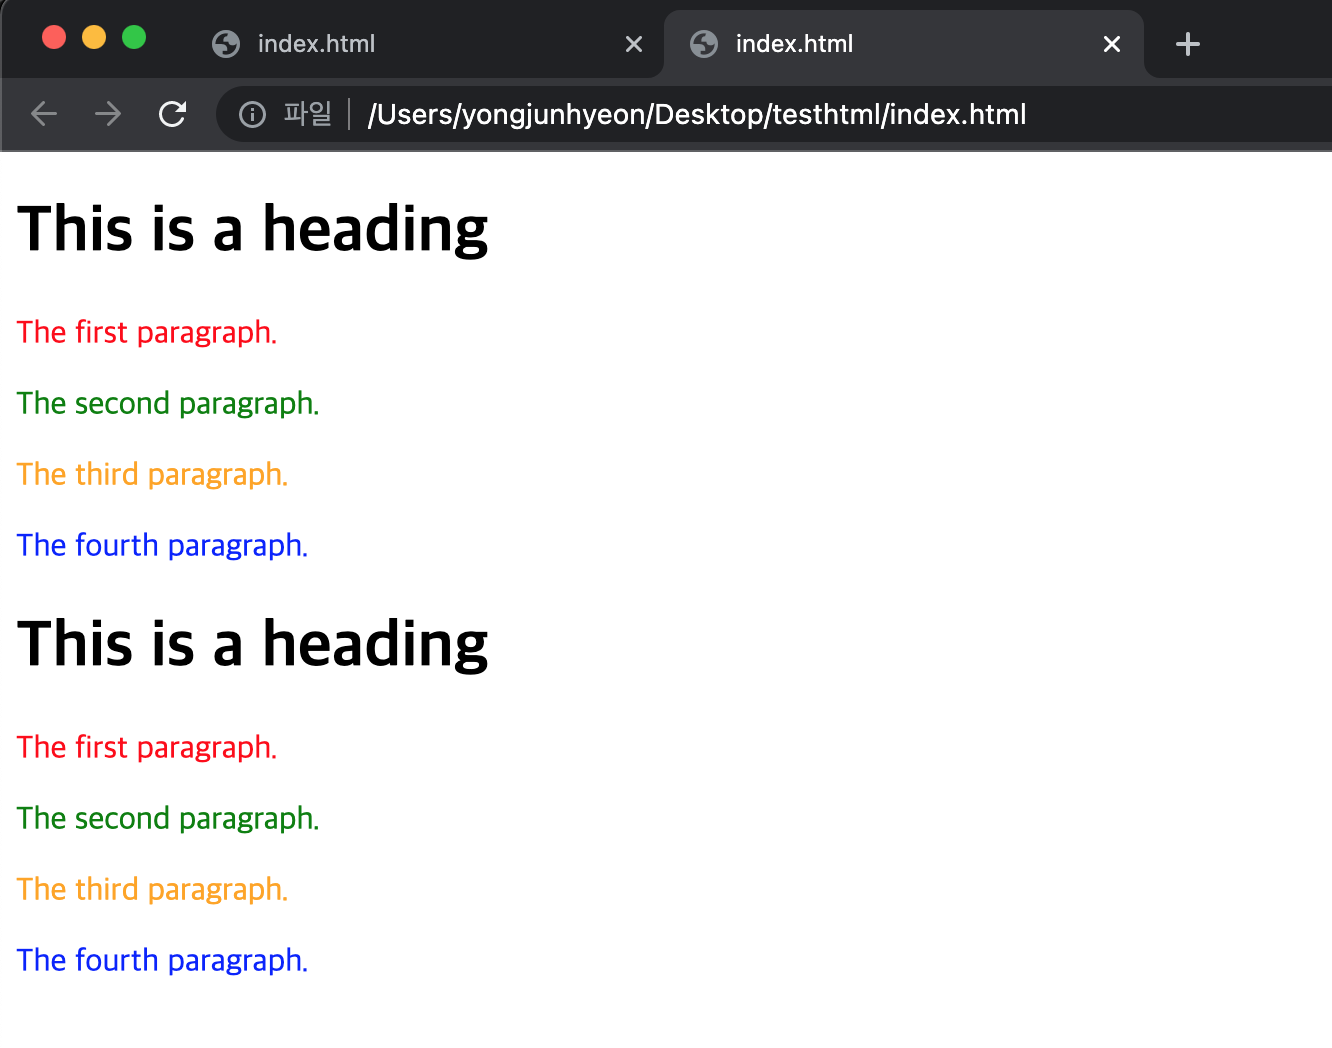
Negation pseudo-class selector
:not(selector)- selector에 해당하지 않는 모든 element를 선택한다.
<!DOCTYPE html>
<html>
<head>
  <style>
    /* input 요소 중에서 type 어트리뷰트의 값이 password가 아닌 요소를 선택 */
    input:not([type=password]) {
      background: yellow;
    }
  </style>
</head>
<body>
  <input type="text" value="Text input">
  <input type="email" value="email input">
  <input type="password" value="Password input">
</body>
</html>
Validity pseudo-class selector
:valid(selector)- 정합성 검증이 성공한 input element 또는 form element를 선택한다.:invalid(selector)- 정합성 검증이 실패한 input element 또는 form element를 선택한다.
<!DOCTYPE html>
<html>
<head>
  <style>
    input[type="text"]:valid {
      background-color: greenyellow;
    }

    input[type="text"]:invalid {
      background-color: red;
    }
  </style>
</head>
<body>
  <label>입력값이 반드시 필요
    <input type="text" required>
  </label>
  <br>
  <label>특수문자를 포함하지 않는 4자리 문자 또는 숫자
    <input type="text" value="ab1!"
      pattern="[a-zA-Z0-9]{4}" required>
  </label>
  <br>
  <label>핸드폰 번호 형식
    <input type="text" value="010-1111-2222"
      pattern="^\d{3}-\d{3,4}-\d{4}$" required>
  </label>
</body>
</html>
Pseudo-Element Selector
Pseudo-element는 element의 특정 부분에 스타일을 적용하기 위해 사용된다.
특정 부분이란 예를 들어 다음과 같다.
- element의 content의 첫글자 또는 첫줄
- element의 content의 앞 또는 뒤
pseudo-element에는 두 개의 콜론(::)을 사용한다. CSS 표준에 의해 미리 정의된 이름이 있기 때문에, 임의의 이름을 사용할 수 없다.
selector::pseudo-element {
  property:value;
}::first-letter- content의 첫 글자를 선택한다.::first-line- content의 첫 줄을 선택한다. block level element에만 적용할 수 있다.::after- content의 뒤에 위치한 공간을 선택한다. 일반적으로 content property와 함께 사용된다.::before- content의 앞에 위치한 공간을 선택한다. 일반적으로 content property와 함께 사용된다.::selection- 드래그한 content를 선택한다. iOS, Safari 등 일부 브라우저에서 동작하지 않는다.
<!DOCTYPE html>
<html>
<head>
  <style>
    /* p 요소 콘텐츠의 첫글자를 선택 */
    p::first-letter { font-size: 3em; }
    /* p 요소 콘텐츠의 첫줄을 선택 */
    p::first-line   { color: red; }

    /* h1 요소 콘텐츠의 앞 공간에 content 어트리뷰트 값을 삽입한다 */
    h1::before {
      content: " HTML!!! ";
      color: blue;
    }
    /* h1 요소 콘텐츠의 뒷 공간에 content 어트리뷰트 값을 삽입한다 */
    h1::after {
      content: " CSS3!!!";
      color: red;
    }

    /* 드래그한 콘텐츠를 선택한다 */
    ::selection {
      color: red;
      background: yellow;
    }
  </style>
</head>
<body>
  <h1>This is a heading</h1>
  <p>Lorem ipsum dolor sit amet, consectetur adipisicing elit. Explicabo illum sunt distinctio sed, tempore, repellat rerum et ea laborum voluptatum! Quisquam error fugiat debitis maiores officiis, tenetur ullam amet in!</p>
</body>
</html>