이번 포스팅에서는 관심 키워드 뉴스가 등록되면 사용자에게 즉시 알림이 오는 기능을 구현해보겠습니다. 이 기능을 구현하기 위해서는 클라이언트와 서버 간의 실시간 통신이 가능해야 합니다. 이때 사용되는 기술이 바로 WebSocket과 SSE 입니다.
실시간 통신 기술에 대해서는 예전부터 익히 들었지만 실제로 사용해본 적이 없는 기술이기 때문에 이번 프로젝트에 기능을 추가하여 직접 경험해보도록 하겠습니다.
실시간 통신 기술 WebSocket과 SSE
서버에서 클라이언트로 실시간 데이터를 전송하는 기술의 양대 산맥은 WebSocket과 SSE(Server-Sent Events)입니다.
WebSocket
클라이언트와 서버 사이에 양방향 통신 채널을 구축하는 프로토콜 입니다. 연결이 되면 클라이언트와 서버 모두 자유롭게 데이터를 주고 받을 수 있습니다. 양방향 통신을 하기 때문에 그만큼 구현이 복잡하고 더 많은 리소스를 필요로 합니다.
- 양방향 통신: 클라이언트가 요청하지 않아도 서버가 클라이언트에게 데이터를 보낼 수 있고, 클라이언트도 서버에 데이터를 보낼 수 있습니다.
- 활용: 실시간성이 중요한 애플리케이션에 적합합니다. 예를 들어, 온라인 게임, 채팅 애플리케이션, 주식 시세, 실시간 협업 도구 등에 사용됩니다.
- 프로토콜: HTTP 프로토콜을 사용해 핸드셰이크(Handshake) 과정을 거쳐 연결을 설정한 후, 독자적인 WebSocket 프로토콜로 전환이 됩니다. 이 덕분에 통신 오버헤드가 적고 효율적입니다.
SSE (Server-Sent Events)
오직 서버에서 클라이언트로 즉, 단방향으로 통신하는 기술입니다.
- 단방향 통신: 서버에서 클라이언트로만 데이터가 전달됩니다. (클라이언트는 서버에 메시지를 보내기 위해 별도의 HTTP 요청을 해야 합니다.)
- 활용: 서버에서 발생하는 이벤트를 실시간으로 클라이언트에게 전달하는 경우에 활용됩니다. 예를 들어, 뉴스 피드 업데이트, 알림, 스포츠 경기 스코어 업데이트 등에 사용됩니다.
- 프로토콜: HTTP를 기반으로 하며, 특별한 Content-Type(text/event-stream)을 사용합니다. 이 때문에 방화벽이나 프록시 서버에 대한 호환성이 좋다는 장점이 있습니다.
주요 차이점 요약
| 특징 | WebSocket | SSE (Server-Sent Events) |
|---|---|---|
| 통신 방향 | 양방향 (Bi-directional) | 단방향 (Server → Client only) |
| 주요 활용처 | 실시간 채팅, 온라인 게임, 화상 통화 | 뉴스 피드, 알림, 실시간 스포츠 점수 |
| 프로토콜 | 별도의 WebSocket 프로토콜 | HTTP 기반 |
| 호환성 | 방화벽이나 프록시 문제 가능성 있음 | HTTP 기반이라 호환성이 좋음 |
| 오버헤드 | 연결 후 적은 오버헤드 | 헤더 정보 포함으로 상대적으로 있음 |
그렇다면 프로젝트에서는 무엇을 써야할까?
이번 프로젝트에서는 스케줄러를 통해 뉴스가 자동으로 수집이 됩니다. 이때 사용자 본인이 등록한 키워드에 해당하는 뉴스가 수집이 되면 "새로운 뉴스가 수집되었음"을 알림으로 제공할 예정입니다. 이 기능을 통해 사용자는 더 이상 중요한 정보를 놓칠까 봐 초조해하며 페이지를 새로고침할 필요 없이, 가장 관심 있는 주제의 최신 뉴스를 누구보다 빠르게 접할 수 있게 됩니다.
"사용자가 관심 키워드로 등록한 새로운 뉴스가 시스템에 수집되는 즉시, 해당 사용자에게 실시간으로 알림을 보내준다."
즉, 현재 요구사항은 "서버가 사용자에게 알림을 보낸다"는 명확한 단방향 통신입니다. 사용자가 알림에 대해 실시간으로 서버에 응답할 필요는 없습니다. 따라서 더 가볍고, 구현이 간단하며, HTTP 표준을 그대로 사용하여 프록시나 방화벽 문제에서 더 자유로운 SSE를 채택하기로 결정했습니다. Spring MVC는 SseEmitter라는 클래스를 통해 SSE를 매우 쉽게 구현할 수 있도록 지원하므로, 별도의 라이브러리 추가도 필요 없었습니다.
SSE 구현
실시간 알림 시스템은 크게 세 가지 요소로 구성됩니다.
- Subscriber (구독자): 알림을 받기 위해 서버에 연결하는 클라이언트
- Emitter (발신자): 서버에서 생성되어 각 클라이언트와의 연결을 유지하는 '파이프라인'
- Trigger (방아쇠): 알림을 보내야 할 특정 이벤트가 발생했을 때, Emitter를 통해 메시지를 발송하는 로직
알림 서비스 및 컨트롤러 구현 (Emitter와 Subscriber)
가장 먼저, 모든 SSE 연결(SseEmitter)을 관리하고 알림을 전송하는 역할을 전담할 NotificationService를 구현했습니다.
- 연결 관리: ConcurrentHashMap을 사용하여 userId와 SseEmitter 객체를 1:1로 매핑하여 관리합니다. 사용자가 접속을 끊거나 타임아웃이 발생하면, 이 맵에서 자동으로 해당 Emitter를 제거하여 메모리 누수를 방지합니다.
@Slf4j
@Service
public class NotificationServiceImpl implements NotificationService {

    private static final Long DEFAULT_TIMEOUT = 60L * 1000 * 60; // 1시간
    private final Map<String, SseEmitter> emitters = new ConcurrentHashMap<>();

    @Override
    public SseEmitter subscribe(String userId) {
        SseEmitter emitter = new SseEmitter(DEFAULT_TIMEOUT);
        emitters.put(userId, emitter);

        emitter.onCompletion(() -> emitters.remove(userId));
        emitter.onTimeout(() -> emitters.remove(userId));
        emitter.onError(e -> emitters.remove(userId));

        sendToClient(userId, "EventStream Created. [userId=" + userId + "]");

        return emitter;
    }

    @Override
    public void send(String userId, Object data) {
        sendToClient(userId, data);
    }

    private void sendToClient(String userId, Object data) {
        SseEmitter emitter = emitters.get(userId);
        if (emitter != null) {
            try {
                emitter.send(SseEmitter.event()
                        .id(String.valueOf(System.currentTimeMillis()))
                        .name("sse")
                        .data(data));
            } catch (IOException e) {
                emitters.remove(userId);
                log.error("SSE 연결 오류 발생 [userId={}]", userId, e);
            }
        }
    }
}
클라이언트가 알림을 구독할 수 있는 API 엔드포인트를 NotificationController에 추가했습니다.
    @GetMapping(value = "/subscribe", produces = MediaType.TEXT_EVENT_STREAM_VALUE)
    public SseEmitter subscribe(Authentication authentication) {
        String userId = authentication.getName();
        return notificationService.subscribe(userId); // 사용자를 위한 Emitter 생성 및 반환
    }
알림 발생 로직 연동 (Trigger)
-
구독자 조회: 새로운 뉴스가 어떤 keywordId와 관련 있는지 알고 있으므로, user_keyword_mapping 테이블을 조회하여 해당 keywordId를 구독하는 모든 userId 목록을 가져오는 매퍼 쿼리를 추가했습니다.
-
알림 전송: insertNews 메소드 안에서, 새로운 뉴스가 DB에 성공적으로 저장된 직후, 위 쿼리를 통해 얻은 모든 구독자에게 NotificationService를 통해 알림을 전송합니다.
List<String> subscribedUserIds = newsMapper.findUserIdsByKeywordId(keywordId);
for (String userId : subscribedUserIds) {
    String notificationMessage = "관심 키워드 관련 새 뉴스가 도착했습니다: " + news.getTitle();
    notificationService.send(userId, notificationMessage);
}
테스트
사용자가 웹사이트에 접속하여 알림 채널을 구독하고 있는 상태에서, 백엔드 스케줄러가 해당 사용자의 관심 키워드와 일치하는 새로운 뉴스를 수집하면, 사용자의 화면에는 페이지 새로고침 없이도 즉시 알림이 표시됩니다.
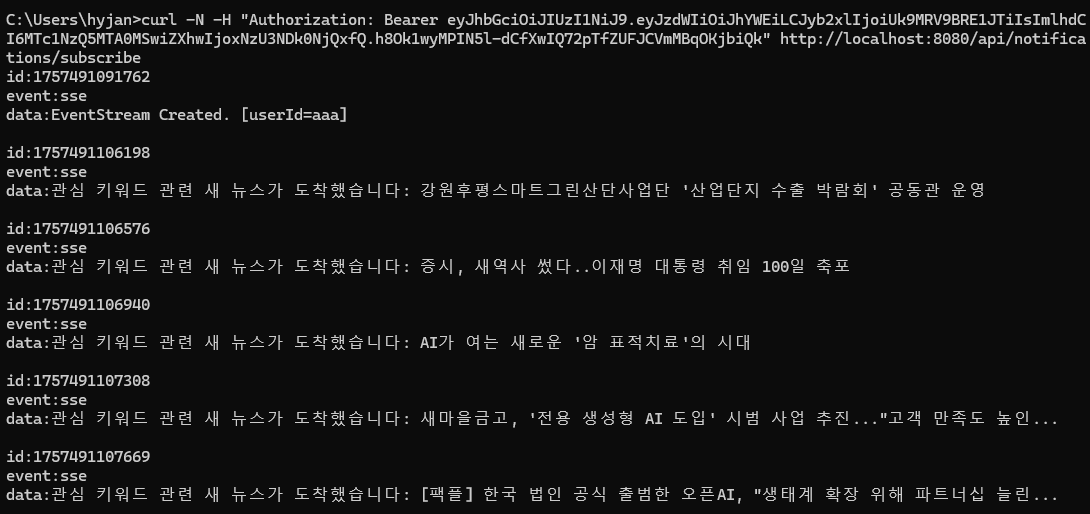
해당 로직은 curl로 연결하여 테스트를 진행하였습니다.
(비교) WebSocket 구현
이번 프로젝트에서는 SSE 를 통한 단방향 통신 기술을 적용하여 기능을 구현해보았습니다. 더 나아가 같은 기능, 예시를 토대로 양방향 통신 기술에 적용하여 두 기술의 차이점을 분명하게 파악해보겠습니다.
HandshakeInterceptor: 로그인 유저 정보 연동하기
WebSocket 은 SSE 와 달리 WebSocketSession 객체를 사용하며, HTTP 요청이 아닌 WebSocket 핸들러를 통해 연결을 관리합니다. 웹소켓은 HTTP 프로토콜이 아니기 때문에 일반 Controller처럼 @AuthenticationPrincipal이나 Authentication 객체에 즉시 접근하기 어렵습니다.
따라서 최초 웹소켓 연결(Handshake)이 일어나는 시점에 Spring Security의 인증 정보를 가로채서 웹소켓 세션 저장소에 저장해 주는 인터셉터가 반드시 필요합니다.
package com.example.notification.websocket;

import lombok.extern.slf4j.Slf4j;
import org.springframework.http.server.ServerHttpRequest;
import org.springframework.http.server.ServerHttpResponse;
import org.springframework.security.core.Authentication;
import org.springframework.security.core.context.SecurityContextHolder;
import org.springframework.web.socket.WebSocketHandler;
import org.springframework.web.socket.server.HandshakeInterceptor;

import java.util.Map;

@Slf4j
public class HttpSessionHandshakeInterceptor implements HandshakeInterceptor {

    @Override
    public boolean beforeHandshake(ServerHttpRequest request, ServerHttpResponse response,
                                   WebSocketHandler wsHandler, Map<String, Object> attributes) throws Exception {

        // Spring Security 인증 정보 추출
        Authentication authentication = SecurityContextHolder.getContext().getAuthentication();

        if (authentication != null && authentication.isAuthenticated()) {
            String userId = authentication.getName(); // 유저 ID 추출

            // 소켓 세션 내부 속성에 userId 저장
            attributes.put("userId", userId);
            log.info("웹소켓 핸드쉐이크 성공: userId = {}", userId);
            return true;
        }
        return false; // 인증 실패 시 연결 거부
    }
}
NotificationWebSocketHandler: 구독 및 발신자 관리
기존 SSE에서 NotificationService와 Map<String, SseEmitter>으로 관리하던 영역입니다.웹소켓에서는 TextWebSocketHandler를 상속받아 구현하며 동시성 보장을 위해 ConcurrentHashMap을 사용해 userId와 WebSocketSession을 1:1 매핑 관리합니다.
package com.example.notification.websocket;

import lombok.extern.slf4j.Slf4j;
import org.springframework.stereotype.Component;
import org.springframework.web.socket.CloseStatus;
import org.springframework.web.socket.TextMessage;
import org.springframework.web.socket.WebSocketSession;
import org.springframework.web.socket.handler.TextWebSocketHandler;

import java.io.IOException;
import java.util.Map;
import java.util.concurrent.ConcurrentHashMap;

@Slf4j
@Component
public class NotificationWebSocketHandler extends TextWebSocketHandler {

    private final Map<String, WebSocketSession> sessions = new ConcurrentHashMap<>();

    // 웹소켓에 연결
    @Override
    public void afterConnectionEstablished(WebSocketSession session) throws Exception {
        String userId = getUserId(session);

        if (userId != null) {
            sessions.put(userId, session);
            log.info("실시간 알림 구독 시작 [userId={}]", userId);

            // 연결 확인 메시지
            session.sendMessage(new TextMessage("EventStream Created. [userId=" + userId + "]"));
        }
    }

    // 특정 사용자에게 실시간 알림 발송
    public void sendNotification(String userId, String message) {
        WebSocketSession session = sessions.get(userId);

        if (session != null && session.isOpen()) {
            try {
                session.sendMessage(new TextMessage(message));
                log.info("알림 전송 성공 [userId={}]", userId);
            } catch (IOException e) {
                log.error("웹소켓 전송 중 오류 발생 [userId={}]", userId, e);
                closeSession(userId, session); // 실패 시 세션 정리
            }
        }
    }

    // 클라이언트가 연결을 끊었을 때 (메모리 누수 방지)
    @Override
    public void afterConnectionClosed(WebSocketSession session, CloseStatus status) throws Exception {
        String userId = getUserId(session);
        if (userId != null) {
            sessions.remove(userId);
            log.info("실시간 알림 구독 종료 [userId={}]", userId);
        }
    }

    // 에러 발생
    @Override
    public void handleTransportError(WebSocketSession session, Throwable exception) throws Exception {
        String userId = getUserId(session);
        if (userId != null) {
            closeSession(userId, session);
            log.error("웹소켓 운송 에러 발생 [userId={}]", userId, exception);
        }
    }

    // 세션 종료
    private void closeSession(String userId, WebSocketSession session) {
        sessions.remove(userId);
        try {
            if (session.isOpen()) {
                session.close();
            }
        } catch (IOException e) {
            log.error("웹소켓 세션 닫기 실패", e);
        }
    }

    // 인터셉터에서 넣어두었던 유저 ID 추출
    private String getUserId(WebSocketSession session) {
        Object userId = session.getAttributes().get("userId");
        return userId != null ? userId.toString() : null;
    }
}
WebSocketConfig: 엔드포인트 및 인터셉터 등록
작성한 핸들러와 핸드쉐이크 인터셉터를 스프링 컨테이너에 바인딩하고 엔드포인트 경로를 지정해 줍니다.
package com.example.notification.config;

import com.example.notification.websocket.HttpSessionHandshakeInterceptor;
import com.example.notification.websocket.NotificationWebSocketHandler;
import org.springframework.context.annotation.Configuration;
import org.springframework.web.socket.config.annotation.EnableWebSocket;
import org.springframework.web.socket.config.annotation.WebSocketConfigurer;
import org.springframework.web.socket.config.annotation.WebSocketHandlerRegistry;

@Configuration
@EnableWebSocket
public class WebSocketConfig implements WebSocketConfigurer {

    private final NotificationWebSocketHandler notificationWebSocketHandler;

    public WebSocketConfig(NotificationWebSocketHandler notificationWebSocketHandler) {
        this.notificationWebSocketHandler = notificationWebSocketHandler;
    }

    @Override
    public void registerWebSocketHandlers(WebSocketHandlerRegistry registry) {
        registry.addHandler(notificationWebSocketHandler, "/ws/subscribe")
                .setAllowedOrigins("*")
                .addInterceptors(new HttpSessionHandshakeInterceptor());
    }
}
NewsService: 알림 발생 로직 연동 (Trigger)
주입받는 대상을 NotificationWebSocketHandler로 교체합니다.
@Service
public class NewsService {

    @Autowired
    private NewsMapper newsMapper;

    @Autowired
    private NotificationWebSocketHandler webSocketHandler; // 웹소켓 핸들러 주입

    public void insertNews(News news, Long keywordId) {
        // 1. 새로운 뉴스를 DB에 저장
        newsMapper.insertNews(news);

        // 2. 해당 키워드를 구독 중인 유저 리스트 조회
        List<String> subscribedUserIds = newsMapper.findUserIdsByKeywordId(keywordId);

        // 3. 매핑된 웹소켓 세션으로 실시간 푸시 전송
        for (String userId : subscribedUserIds) {
            String notificationMessage = "관심 키워드 관련 새 뉴스가 도착했습니다: " + news.getTitle();
            webSocketHandler.sendNotification(userId, notificationMessage);
        }
    }
}
결론
동일한 알림 로직을 SSE와 WebSocket 두 가지 기술로 구현해보았습니다. 실시간 통신 기술 두 가지를 직접 다뤄봄으로써 두 기술의 특징과 구현 방식의 차이를 분명하게 알 수 있었습니다.
SSE와 WebSocket 비교
-
엔드포인트: SSE는 일반 @RestController에서 매핑하지만, 웹소켓은 전용 WebSocketHandler와 WebSocketConfigurer 설정을 거쳐 접속
-
세션 바인딩: SSE는 @GetMapping 핸들러 메서드에서 Authentication 객체에 즉시 접근하기 쉽지만, 웹소켓은 최초 연결(Handshake) 시점에 유저 정보를 가로채서 세션 속성에 담아두고 사용
현재 프로젝트에서는 서버->클라이언트로 보내는 알림 수신만 처리하지만 추후 클라이언트가 알림 읽음 상태를 서버로 실시간 역전송하는 등의 기능이 필요할 때 코드를 갈아엎지 않고 그대로 확장할 수 있다는 점을 확인할 수 있었습니다.