Firebase Authentication 기능을 사용한 사용자 인증 / 로그인
👉 Authentication 기능은 Firebase에서 기본적으로 지원해주는 기능.
- 사용자 인증과 관련된 기능으로 로그인 기능을 지원하는게 대표적이다. 로그인 외에도 익명 로그인, 이메일 인증, 전화번호 인증 등도 지원하고 있고, 소셜 로그인을 통한 인증도 지원하고 있다.
- 소셜 로그인은 Firebase에서 허용한 소셜 로그인 제공 업체만 사용이 가능하며, 주로 사용하는 Google, Apple, Facebook 로그인 사용이 가능하다. 이밖에도 Yahoo, Github, Twitter, Microsoft, Play Games, Geme Center 등을 지원하고 있다.
- Authentication 기능을 사용해서 사용자 인증 처리를 진행하면 UID라고 하는 사용자 인증 코드 생성 및 관리가 편리하다.
- UID : Firestore 데이터 베이스 보안 규칙의 기준이 되는 키
사전준비
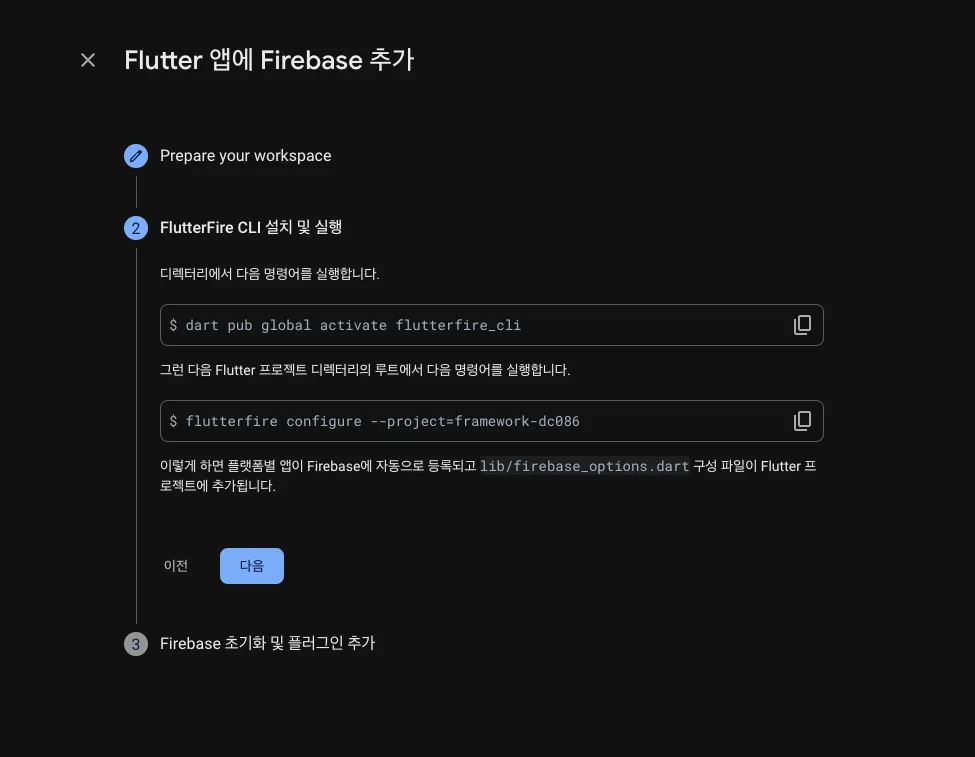
1. Firebase-Flutter 앱 등록
- 필수 명령줄 도구 Firebase CLI 설치 및 실행
-
Flutter 앱에 Firebase 추가
-
Flutter 프로젝트 디렉터리의 루트에서 다음 명령어를 실행
-
Firebase 프로젝트를 어떤 플랫폼에서 사용할지 선택
-
Android 앱의 패키지 이름 (application id) 을 입력
- Flutter 프로젝트:
android/app/build.gradle파일→defaultConfig블록의applicationId
- 큰따옴표 빼고 반드시 id 만 입력 !
- 설정 완료
2. Firebase 초기화 및 플러그인 추가
- Flutter 프로젝트 디렉터리에서 다음 명령어를 실행하여 core 플러그인 설치
flutter pub add firebase_core
- Flutter 프로젝트 디렉터리에서 다음 명령어를 실행하여 Flutter 앱의 Firebase 구성이 최신 상태인지 확인
flutterfire configure
lib/main.dart파일에서 Firebase core 플러그인 및 앞에서 생성한 구성 파일을 가져오기
  	import 'package:firebase_core/firebase_core.dart';
import 'firebase_options.dart';lib/main.dart파일에서 구성 파일로 내보낸DefaultFirebaseOptions객체로 → Firebase 초기화
    void main() async {
      WidgetsFlutterBinding.ensureInitialized();
      await Firebase.initializeApp(
        options: DefaultFirebaseOptions.currentPlatform,
      );
      runApp(const MyApp());
    }
Android 구글 로그인
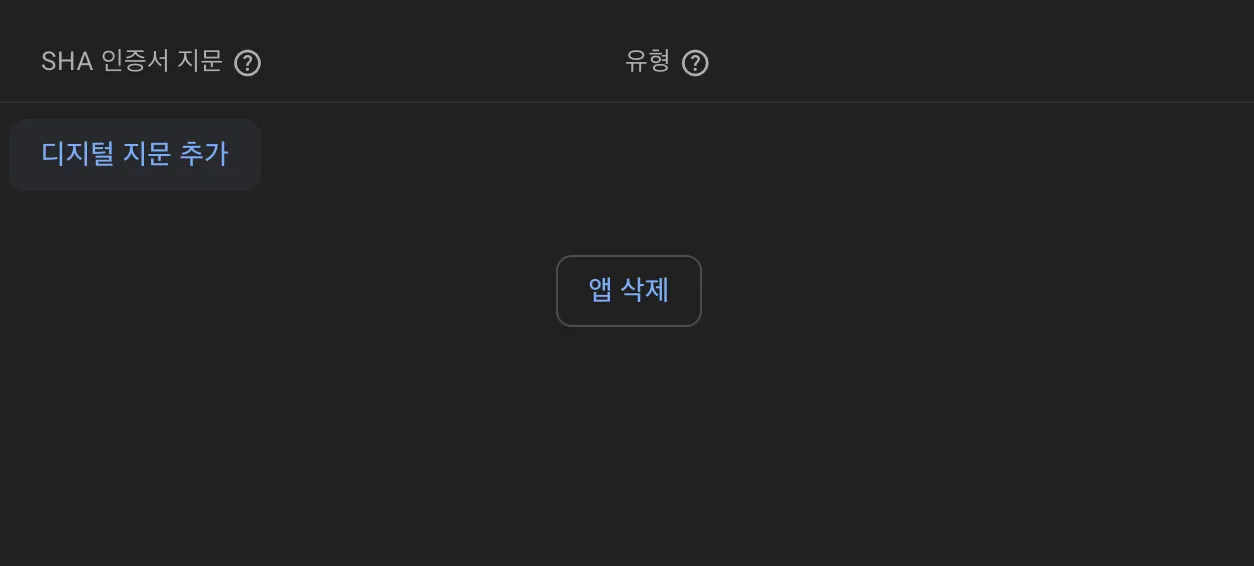
1. Console 에서 앱에 디지털 지문 추가
- 안드로이드용 서명 인증서의 SHA 해시를 받기 위해 Keytool을 사용하는 방법 → https://developers.google.com/android/guides/client-auth
- SHA1: 인증
- SHA256: 푸시알림
2. google-services.json 파일 다운로드
- Firebase 프로젝트 → 프로젝트 설정
- 앱 설정에서 Android 앱을 선택, 패키지 이름
com.example.todo_practice와 정확히 일치하는지 확인 - google-services.json 파일 다운로드 →
android/app디렉토리에 복사

3. AndroidManifest.xml 수정
- 인터넷 권한 허용 코드 추가
<uses-permission android:name="android.permission.INTERNET "/>IOS 구글 로그인
1. GoogleService-Info.plist 파일 다운로드
- Firebase 프로젝트 → 프로젝트 설정
- GooleService-Info.plist 파일 다운로드 →
ios/Runner디렉토리에 복사
2. XCode Reverse ID 설정
- Runner → Info → URL Types-URL Schemes 추가
- ios → Runner → GoogleService-Info.plist :REVERSED_CLIENT_ID그대로 입력

코드 구현 예시
- pubspec.yaml
	dependencies:
google_sign_in: ^6.2.2- signInWithGoogle()
    class FirebaseClient {
      static final FirebaseClient instance = FirebaseClient._internal();
      FirebaseClient._internal();
      factory FirebaseClient() {
        return instance;
      }

      final FirebaseAuth auth = FirebaseAuth.instance;

    	...
      Future<UserCredential> signInWithGoogle() async {
        final googleSignIn = GoogleSignIn();

        // Google 로그인 시작
        final googleAccount = await googleSignIn.signIn();
        if (googleAccount == null) {
          throw PlatformException(
              code: 'CANCELED', message: 'Sign-in process was canceled.');
        }

        final googleAuth = await googleAccount.authentication;
        final credential = GoogleAuthProvider.credential(
          idToken: googleAuth.idToken,
          accessToken: googleAuth.accessToken,
        );

        // Firebase로 로그인
        return auth.signInWithCredential(credential);
      }
    }
🔗 Ref

플러터 개발자 👩🏻💻