
1. HTML
<!DOCTYPE html>
<html lang="en">
<head>
    <meta charset="UTF-8">
    <meta name="viewport" content="width=device-width, initial-scale=1.0">
    <title>Document</title>
    <link rel="stylesheet" href="style.css">
</head>
<body>
    <div id="computer"></div>
    <div>
        <button id="rock" class="btn">가위</button>
        <button id="scissor" class="btn">바위</button>
        <button id="paper" class="btn">보</button>
    </div>
    <script src="main.js"></script>
</body>
</html>
<div id="computer"></div>에 컴퓨터가 내는 가위, 바위, 보의 이미지를 삽입할 것이다.
그 밑에 사용자가 누를 버튼 3개를 구성했다.
2. CSS
#computer {
    width: 450px;
    height: 210px;
    background: url('https://en.pimg.jp/023/182/267/1/23182267.jpg') 0 0;
}
위와 같이 설정하면 화면에 보여지는 결과는 다음 그림과 같다.

여기서 대략 width: 150px로 설정하면, 다음과 같이 바위 그림만 출력된다.

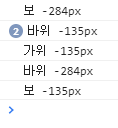
그리고 background: url('https://en.pimg.jp/023/182/267/1/23182267.jpg') -135px 0;
이렇게 바꿔주면 다음 그림과 같이 가위 그림만 출력된다.

이번엔 -135px 대신 -284px을 적용하면, 보 그림만 출력된다.

이렇게 여러 개의 이미지를 하나의 이미지로 합쳐서 관리하는 것을
이미지 스프라이트(image sprite)라고 한다.
최종적인 CSS 코드는 다음과 같으며, 위에 적용했던 px값들은 JS를 통해 다룰 것이다.
#computer {
    width: 150px;
    height: 210px;
    background: url('https://en.pimg.jp/023/182/267/1/23182267.jpg') 0 0;
}
3. JavaScript
let left = 0;

setInterval(function() {
    if (left === 0) {
        left = '-135px'
    } else if (left === '-135px') {
        left = '-284px';
    } else {
        left = 0;
    }
    document.querySelector("#computer").style.background =
        'url(https://en.pimg.jp/023/182/267/1/23182267.jpg) ' + left + ' 0';
}, 100);


document.querySelectorAll('.btn').forEach(function(btn) {
    btn.addEventListener('click', function() {
        console.log(this.textContent, left);
    });
});
setInterval() 메서드를 사용하여 변수 left가 0.1초에 한 번씩 바뀌도록 설정했다.
left 값은 위에서 한 번씩 적용해봤었던 px값들이다.
그리고 querySelectorAll() 으로 HTML에 들어간 btn class들을 모두 찾는다.
그 다음 forEach() 메서드를 사용하여 각각의 버튼들을 배열에서 꺼내 실행시킨다.
addEventListener()를 사용하여 각각의 버튼들을 클릭했을 때
console 창을 통해 사용자가 클릭한 버튼의 textContent와
컴퓨터가 낸 수를 확인할 수 있도록 설정한다.
그럼 버튼을 클릭했을 때 console 창을 통해 보이는 결과는 다음과 같다.
여기서 문제는 컴퓨터가 낸 수가 가위, 바위, 보로 출력되는 것이 아니라
그림의 px값이 출력된다. 이것은 다음 포스팅에서 개선할 것이다.
Ref.
- inflearn_웹 게임을 만들며 배우는 자바스크립트
- http://tcpschool.com/css/css_basic_imageSprites