카메라의 Tilt 설정
틸트 기법으로 원근감을 일부러 왜곡
Asymmetric View Frustum을 Symmetric View Frustum으로 바꿔야함
2D Shearing
- 2D horizontal shear
[x′y′]=[10m1][xy]=[x+myy]
- 2D vertical shear
[x′y′]=[1m01][xy]=[xmx+y]
3D Shear Matrix 계산
Asymmetric View Frustum의 기울어진 중심축을 Symmetric View Frustum으로 이동
- 대응 관계
(2xmax+xmin,2ymax+ymin,−znear)
->(0,0,−znear)
- 행렬식
⎣⎢⎢⎢⎡00−znear1⎦⎥⎥⎥⎤=⎣⎢⎢⎢⎡10000100γδ100001⎦⎥⎥⎥⎤⎣⎢⎢⎢⎡2xmax+xmin2ymax+ymin−znear1⎦⎥⎥⎥⎤
General View Frustum 처리
Shear Matrix H
⎣⎢⎢⎢⎡10000100−2xmax+xmin−2ymax+ymin100001⎦⎥⎥⎥⎤
General Perspective Matrix
비대칭인 View Frustum도 처리하는 원근 행렬
N: Canonical View Volume로 변환하는 Normalize 행렬
S: 정규화를 위한 Scale 행렬
H: Shear 행렬
Mperspective=NSH=⎝⎜⎜⎜⎛1000010000α100β0⎠⎟⎟⎟⎞⎝⎜⎜⎜⎛xmax−xmin2znear0000ymax−ymin2znear0000−100001⎠⎟⎟⎟⎞⎝⎜⎜⎜⎛10000100γδ100001⎠⎟⎟⎟⎞=⎝⎜⎜⎜⎛efc−1abd000⎠⎟⎟⎟⎞=⎝⎜⎜⎜⎛xmax−xmin2znear0000ymax−ymin2znear00xmax−xminxmax+xminymax−yminymax+ymin−zfar−znearzfar+znear−100−zfar−znear2zfarznear0⎠⎟⎟⎟⎞
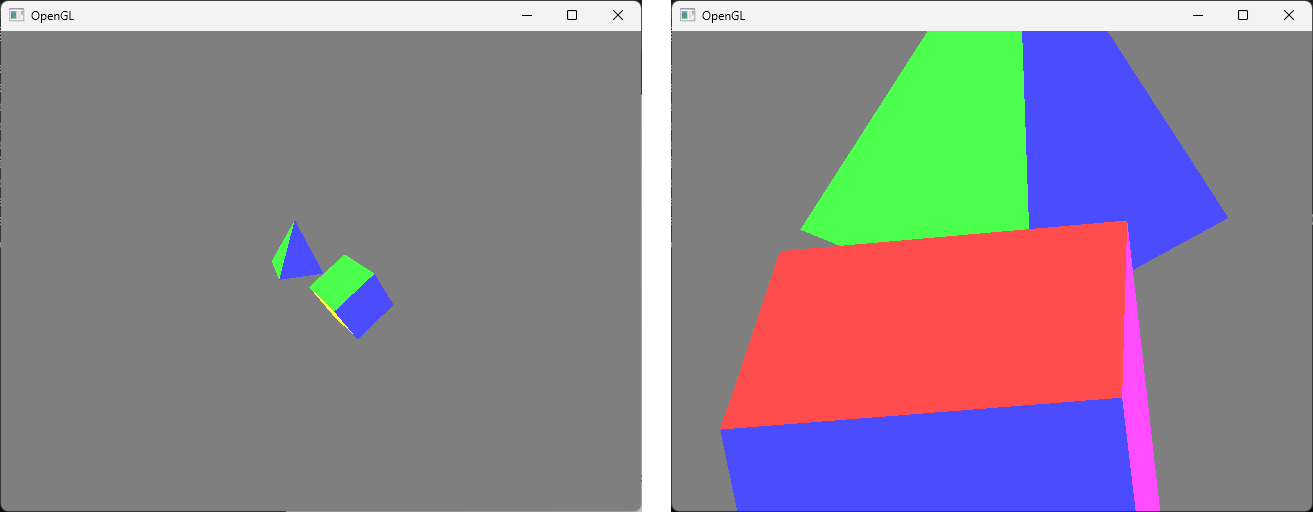
Tilted Camera 프로그램
void updateFunc(void) {
	...
	// projection matrix
	const GLfloat zoom = 0.5F;
	matProj = glm::frustumRH(
		-0.5F * zoom, +1.5F * zoom,
		-0.5F * zoom, +1.0F * zoom,
		+1.0F, +3.0F
	);
}
원근감을 가진 물체가 한쪽으로 치우쳐져 보이며 비대칭한 View Frustum을 가지는 것을 알 수 있음
Low-Level 구현
Perspective 행렬을 직접 설정
Mperspective=⎝⎜⎜⎜⎛xmax−xmin2znear0000ymax−ymin2znear00xmax−xminxmax+xminymax−yminymax+ymin−zfar−znearzfar+znear−100−zfar−znear2zfarznear0⎠⎟⎟⎟⎞
- updateFunc()
glm의 함수를 쓰는 것과 같은 결과
void updateFunc(void) {
	...
	const GLfloat zoom = 0.5F;
#if 0
	matProj = glm::frustumRH(
	              -0.5F * zoom, +1.5F * zoom,
	              -0.5F * zoom, +1.0F * zoom,
	              +1.0F, +3.0F
	          );
#endif
	GLfloat xmin = -0.5F * zoom;
	GLfloat xmax = +1.5F * zoom;
	GLfloat ymin = -0.5F * zoom;
	GLfloat ymax = +1.0F * zoom;
	GLfloat znear = +1.0F;
	GLfloat zfar = +3.0F;

	// projection matrix
	GLfloat a = (xmax + xmin) / (xmax - xmin);
	GLfloat b = (ymax + ymin) / (ymax - ymin);
	GLfloat c = -(zfar + znear) / (zfar - znear);
	GLfloat d = -2.0F * zfar * znear / (zfar - znear);
	GLfloat e = 2.0F * znear / (xmax - xmin);
	GLfloat f = 2.0F * znear / (ymax - ymin);
	matProj[0][0] = e; matProj[1][0] = 0; matProj[2][0] = a; matProj[3][0] = 0;
	matProj[0][1] = 0; matProj[1][1] = f; matProj[2][1] = b; matProj[3][1] = 0;
	matProj[0][2] = 0; matProj[1][2] = 0; matProj[2][2] = c; matProj[3][2] = d;
	matProj[0][3] = 0; matProj[1][3] = 0; matProj[2][3] = -1; matProj[3][3] = 0;
}
Field of View Approach
FOV: 카메라를 기준으로 대칭적으로 θ만큼의 각도를 보겠다는 것을 정의
-
Near와 Far 평면 설정
원점에서 -Z 방향으로 카메라를 볼 때,
Y 방향으로는 아래 위로 각각 θ/2만큼씩 봄
-
관계식: tan(θ/2)=ymax/(−znear)
변환된 식: ymax=−zneartan(θ/2)
-
비례 관계: w/h=xmax/ymax
변환된 식: xmax=(w/h)ymax
(가로 세로 비율을 이용하여 간접적으로 xmax를 계산)
-
xmin, ymin은 대칭으로 계산
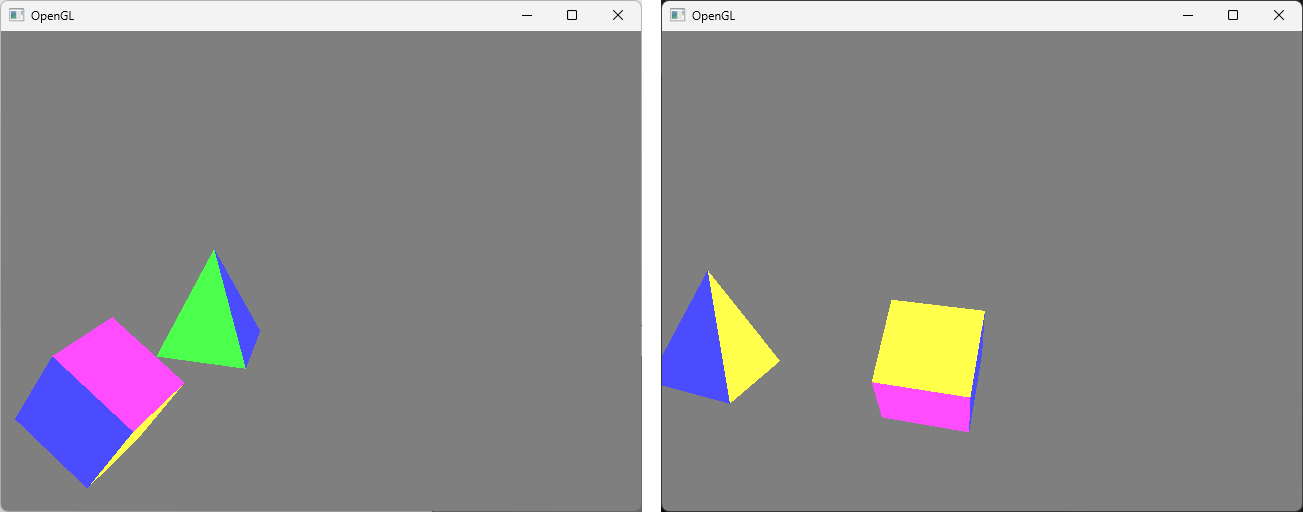
Field of View 프로그램
// FOV를 Y방향으로 몇도인지 설정
// 2pi 라디안이 360도에 대응: radian = (pi/180) * degree
float fovy = ((GLfloat)M_PI / 180.0F) * 30.0F; // 30 degree

void updateFunc(void) {
	...
	// viewing transform
	const GLfloat radius = 2.0F;
	matView = glm::lookAtRH(
		glm::vec3(radius * sinf(theta), 20 * 0.05F, radius * cosf(theta)),
		glm::vec3(0.02F, 0.0F, 0.0F),
		glm::vec3(0.0F, 1.0F, 0.0F)
	);
	// projection matrix
	const GLfloat aspect = (GLfloat)WIN_W / (GLfloat)WIN_H; // 현재 윈도우의 Width/Height
	matProj = glm::perspectiveRH(fovy, aspect, +1.0F, +3.0F); // zNear: +1.0, zFar: +3.0
}
- keyFunc()
키보드 입력으로 FOV 각도를 증가/감소 시키도록 구현
void keyFunc(GLFWwindow* window, int key, int scancode, int action, int mods) {
	switch (key) {
	...
	case GLFW_KEY_J: fovy += ((GLfloat)M_PI / 180.0F) * 1.0F; break;
	case GLFW_KEY_K: fovy -= ((GLfloat)M_PI / 180.0F) * 1.0F; break;
	}
}
J를 누르면 FOV 각도가 증가하며 볼 수 있는 범위가 넓어져 물체는 작아보이고,
K를 누르면 FOV 각도가 감소하며 볼 수 있는 범위가 좁아져 물체는 커보임