terraform에서의 변수 타입
- string → default = “value1”
variable “test” {
   type = string
}
default = ~~로 선언하지 않으면, 적용 시 사용자에게 물어본다. (Enter a value)

- list → default = [”value1”, “value2”]
variable "test" {
  type = list(string)
  default = ["value1", "value2", "value3"]
}- map
default = {
  name = “name1”
  id = “xxxx”
}- flavor 추가
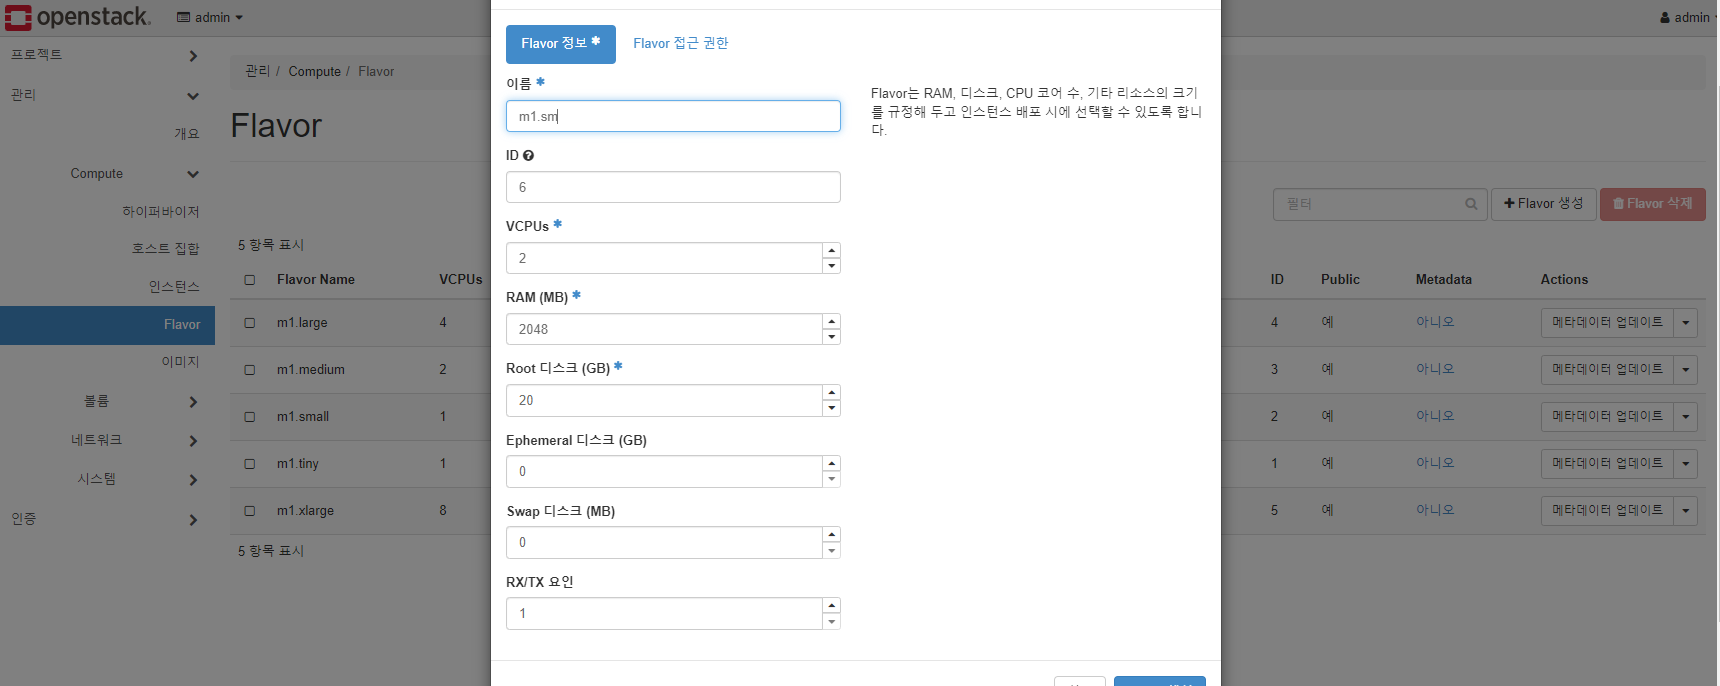
- vars.tf에 flavor 등록 및 count 3으로 조정
variable "instance" {
  default = {
    image_name  = "CentOS7"
    image_id    = "973a59a8-ff61-4404-9e08-d281cdf5f257"
    count       = 3
  }
}

variable "inside" {
  default = {
    name        = "private1"
    id          = "ab0bc22b-f90b-49a2-8182-9a458101620f"
  }
}

variable "outside" {
  default = {
    name        = "extnet"
    id          = "98facebd-53fc-4a1c-80be-013026471da4"
  }
}

variable "flavor" {
  default = {
    id          = "6"
    name        = "m1.sm"
  }
}

variable "keypair" {
  default = {
    name        = "terraformkey"
  }
}- main.tf 에서 index +1로 이름이 되도록
resource "openstack_compute_instance_v2" "instance" {
  name          = "instance-${count.index +1}"
  image_id      = var.instance["image_id"]
  flavor_name   = var.flavor["name"]
  key_pair      = var.keypair["name"]
  security_groups = ["icmp", "webssh"]
  count         = var.instance["count"]

  network {
    name = var.inside["name"]
  }
}
terraform apply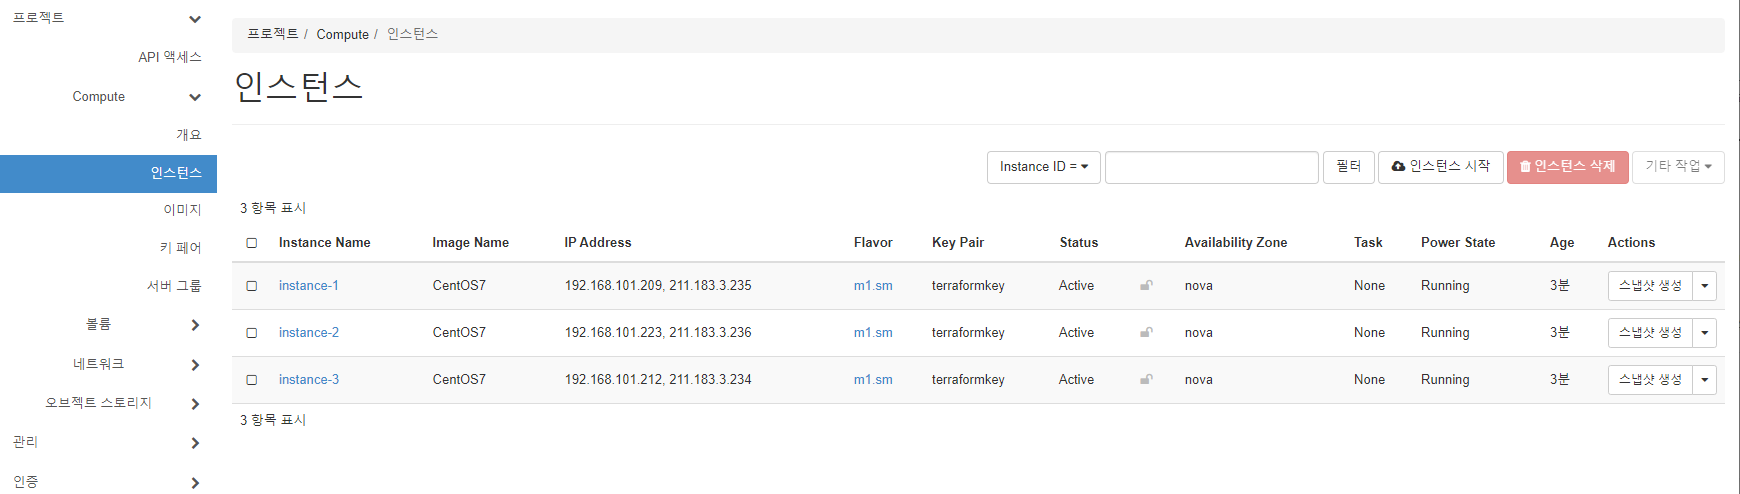
provision
- file (file/디렉토리 복사) 로컬 → 인스턴스
- local-exec (테라폼 서버에서 명령 실행)
- remote-exec (인스턴스에서 명령 실행)
control 인스턴스 생성
main.tf 파일에 resource를 작성/프로비전 하기
- 편의를 위해 현재 동작중인 인스턴스는 destroy
- openstack compute 리소스에 구분자로 “control”을 생성
- flavor : m1.sm
- network : private1
- name : control
- 파일(terraformkey.pem) 파일을 control의 ~/.ssh/id_rsa로 붙여넣기 (centos로 접속하기 때문에 /home/centos/.ssh/id_rsa임)
- 위 작업은 provisioner의 file을 이용
Provisioner: file | Terraform | HashiCorp Developer
- main.tf
resource "openstack_compute_instance_v2" "instance" {
  name                  = "instance-${count.index +1}"
  image_name            = var.instance["image_name"]
  flavor_name           = var.flavor["name"]
  key_pair              = var.keypair["name"]
  security_groups       = ["webssh", "icmp"]
  count                 = var.instance["count"]

  network {
    name = var.inside["name"]
  }
}

resource "openstack_compute_instance_v2" "control" {
  name                  = "control"
  image_name            = var.instance["image_name"]
  flavor_name           = var.flavor["name"]
  key_pair              = var.keypair["name"]
  security_groups       = ["webssh", "icmp"]

  network {
    name = var.inside["name"]
  }

  provisioner "file" {
    source = "/root/lab3/terraformkey.pem"
    destination = "/home/centos/.ssh/id_rsa"

    connection {
      type              = "ssh"
      user              = "centos"
      private_key       = file("/root/lab3/terraformkey.pem")
      host              = "${openstack_networking_floatingip_v2.fip2.address}"
    }
  }
}- floatingip.tf
resource "openstack_networking_floatingip_v2" "fip1" {
  pool = var.outside["name"]
  count = var.instance["count"]
}

resource "openstack_compute_floatingip_associate_v2" "fip1" {
  count         = var.instance["count"]
  floating_ip   = "${openstack_networking_floatingip_v2.fip1[count.index].address}"
  instance_id   = "${openstack_compute_instance_v2.instance[count.index].id}"
}

resource "openstack_networking_floatingip_v2" "fip2" {
  pool = var.outside["name"]
}

resource "openstack_compute_floatingip_associate_v2" "fip2" {
  floating_ip   = "${openstack_networking_floatingip_v2.fip2.address}"
  instance_id   = "${openstack_compute_instance_v2.control.id}"
  fixed_ip      = "${openstack_compute_instance_v2.control.network.0.fixed_ip_v4}"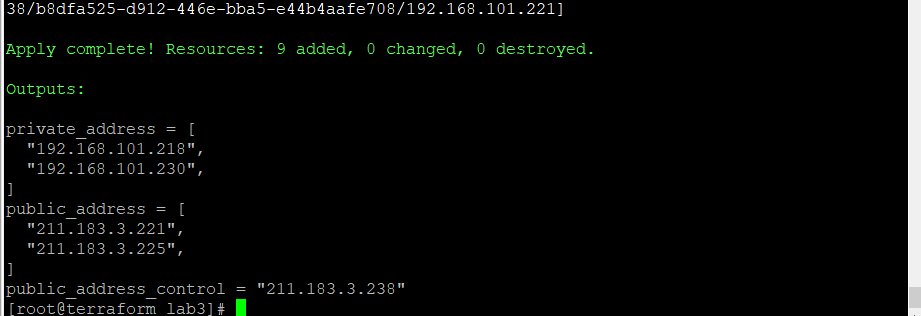
}- outputs.tf
output "private_address" {
  value = "${openstack_compute_instance_v2.instance[*].network.0.fixed_ip_v4}"
}

output "public_address" {
  value = "${openstack_compute_floatingip_associate_v2.fip1[*].floating_ip}"
}

output "public_address_control" {
  value = "${openstack_compute_floatingip_associate_v2.fip2.floating_ip}"
}
설치가 진행될 때 control은 즉시 fip가 붙지 않는다.
이때 오픈스택 인스턴스 리스트에서 오른쪽 에 있는 메뉴 중 “유동 IP 연결”클릭하면 발행된 fip 확인 가능하고 이를 연결하고 기다린다.
- control 접속
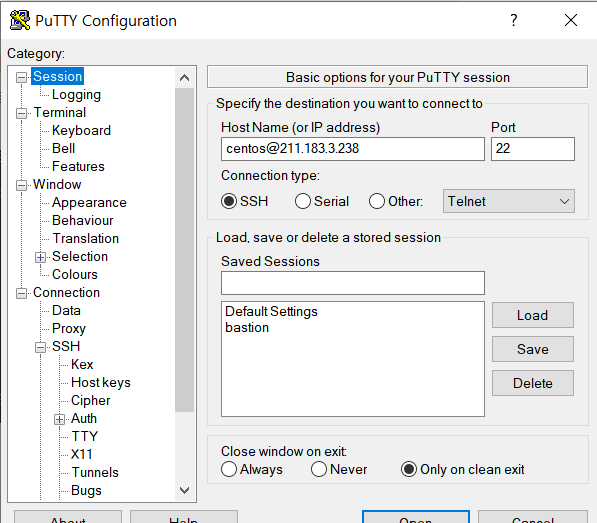
terraformkey.ppk를 SSH Auth에 넣어 실행후 id_rsa를 600으로 바꾸어 준 후, instance에 접속해본다
[centos@control ~]$ chmod 600 ~/.ssh/id_rsa
[centos@control ~]$ ssh 211.183.3.221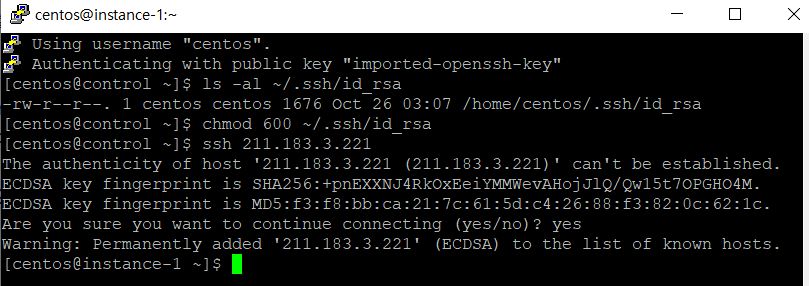
Control에 Ansible 설치
remote-exec 또는 user-data를 사용해 control에 ansible을 설치할 수 있다.
- ansibleinstall.sh
sudo yum install -y epel-release
sudo yum install -y ansible
echo "192.168.101.[201:239]" | sudo tee /etc/ansible/hosts
resource "openstack_compute_instance_v2" "instance" {
name = "instance-${count.index +1}"
image_name = var.instance["image_name"]
flavor_name = var.flavor["name"]
key_pair = var.keypair["name"]
security_groups = ["webssh", "icmp"]
count = var.instance["count"]
network {
name = var.inside["name"]
}
}
resource "openstack_compute_instance_v2" "control" {
name = "control"
image_name = var.instance["image_name"]
flavor_name = var.flavor["name"]
key_pair = var.keypair["name"]
security_groups = ["webssh", "icmp"]
user_data = file("ansibleinstall.sh")
network {
name = var.inside["name"]
}
provisioner "file" {
source = "/root/lab3/terraformkey.pem"
destination = "/home/centos/.ssh/id_rsa"
connection {
type = "ssh"
user = "centos"
private_key = file("/root/lab3/terraformkey.pem")
host = "${openstack_networking_floatingip_v2.fip2.address}"
}
}
}- sh 명령어가 잘 실행되는 지 확인
sudo ps -ef | grep ansible- ansible 설치 확인
ansible -vchmod 600 /home/centos/.ssh/id_rsasudo ansible all -m shell -a "hostname"