같이하는 CSS 코딩
1️⃣ inline-block 을 사용하면 white-space 가 생기는 것을 주의해야한다.


2️⃣ 사이의 bar는 pseudo selector 와 float 으로 처리하는 모습
.cont-movie .list-movieInfo li .link-reserv::after {
    /* display: inline-block; */
    float: right;
    content: "";
    width: 1px;
    height: 100%;
    background: #BDBDBD;
}
3️⃣ icon은 pseudo selector 의 background 활용해서 만든다.
수평정렬을 위해 display: inline-block사용
.cont-movie .list-movieInfo li .link-teaser::before {
    display: inline-block;
    content: "";
    width: 16px;
    height: 16px;
    background: url('../images/btn_play.png');
    vertical-align: top;
    margin: 11px 2px 0 0;
}
4️⃣ a 태그는 inline 요소이기 때문에 margin 속성을 넣어주기 위해 display: block 으로 변경해줬다.
.cont-movie .list-movieInfo .link-movie {
  display: block;
  margin-bottom: 11px;
}
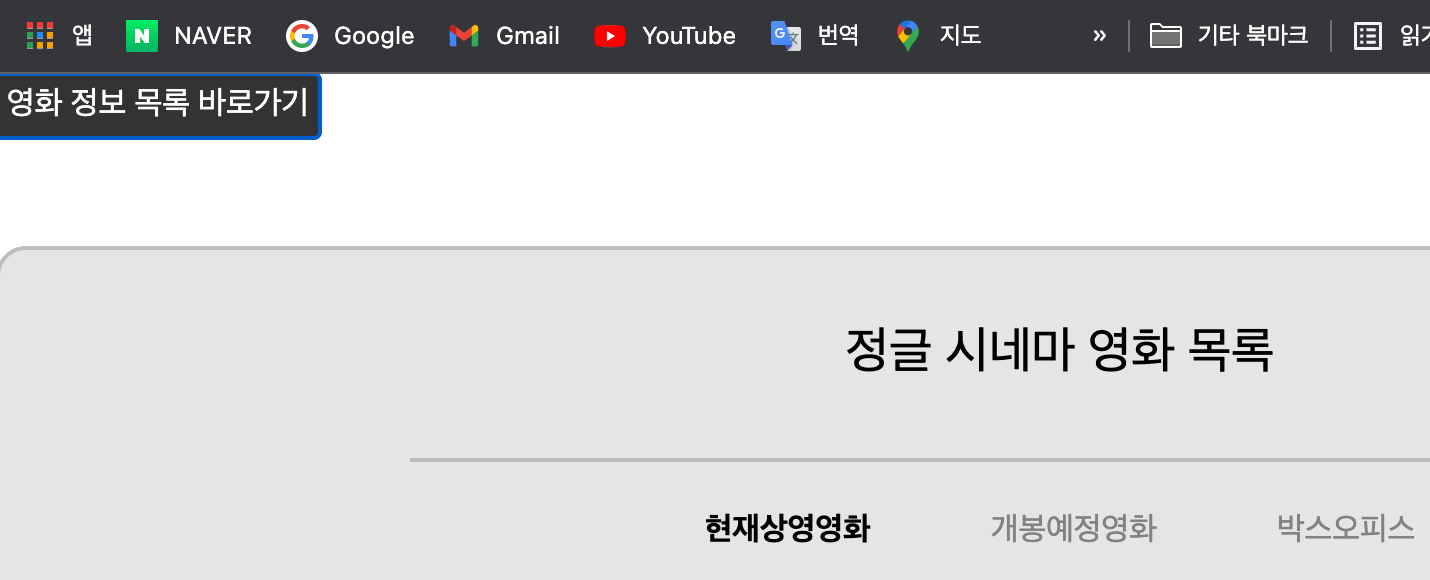
5️⃣ 접근성을 고려한 nav-skip

  <div class="nav-skip">
    <a href="#cont-nav">영화 정보 목록 바로가기</a>
    <a href="#cont-company">회사정보 바로가기</a>
  </div>
/* skip navigation */
.nav-skip a {
position: absolute;
top: -200px;
left: 0;
width: 160px;
line-height: 30px;
border: 1px solid #fff;
color: white;
background: #333;
text-align: center;
}
.nav-skip a:active, .nav-skip a:focus {
top: 0;
}
6️⃣ css validator 이용해서 적합성을 검사할 수 있다.
7️⃣ 말줄임 css는 공통적으로 사용하는 컨벤션이 있다.

/* 한줄 말줄임 */
.sl-ellipsis {
  display: block;
  white-space: nowrap;
  overflow: hidden;
  text-overflow: ellipsis;
}

/* 두 줄 말줄임 */
.multi-ellipsis {
  overflow: hidden;
  display: -webkit-box;
  -webkit-line-clamp: 2;
  -webkit-box-orient: vertical;
  padding-bottom: 3px;
}
css: perspective

<!DOCTYPE html>
<html lang="en">
<head>
  <meta charset="UTF-8">
  <meta http-equiv="X-UA-Compatible" content="IE=edge">
  <meta name="viewport" content="width=device-width, initial-scale=1.0">
  <title>Document</title>
  <style>
    @keyframes spin {
      from {
        transform: rotateY(0deg);
      }
      to {
        transform: rotateY(360deg);
      }
    }
    .scene {
      margin: 100px;
      width: 200px;
      height: 260px;
      perspective: 600px;
    }

    .card {
      width: 100%;
      height: 100%;
      position: relative;
      transform-style: preserve-3d;
      color: white;
      font-size: 40px;
      font-weight: bold;
      line-height: 260px;
      text-align: center;
      animation: 4s spin infinite;
      border: 1px solid rgb(90, 90, 90);
    }

    .card__face {
      position: absolute;
      width: 100%;
      height: 100%;
      backface-visibility: hidden;
    }

    .card__face--front {
      background: rgb(255, 125, 125);
    }

    .card__face--back {
      background: rgb(100, 100, 249);
      transform: rotateY(180deg);
    }
  </style>
</head>
<body>
  <div class="scene">
    <div class="card">
      <div class="card__face card__face--front">front</div>
      <div class="card__face card__face--back">back</div>
    </div>
  </div>
</body>
</html>
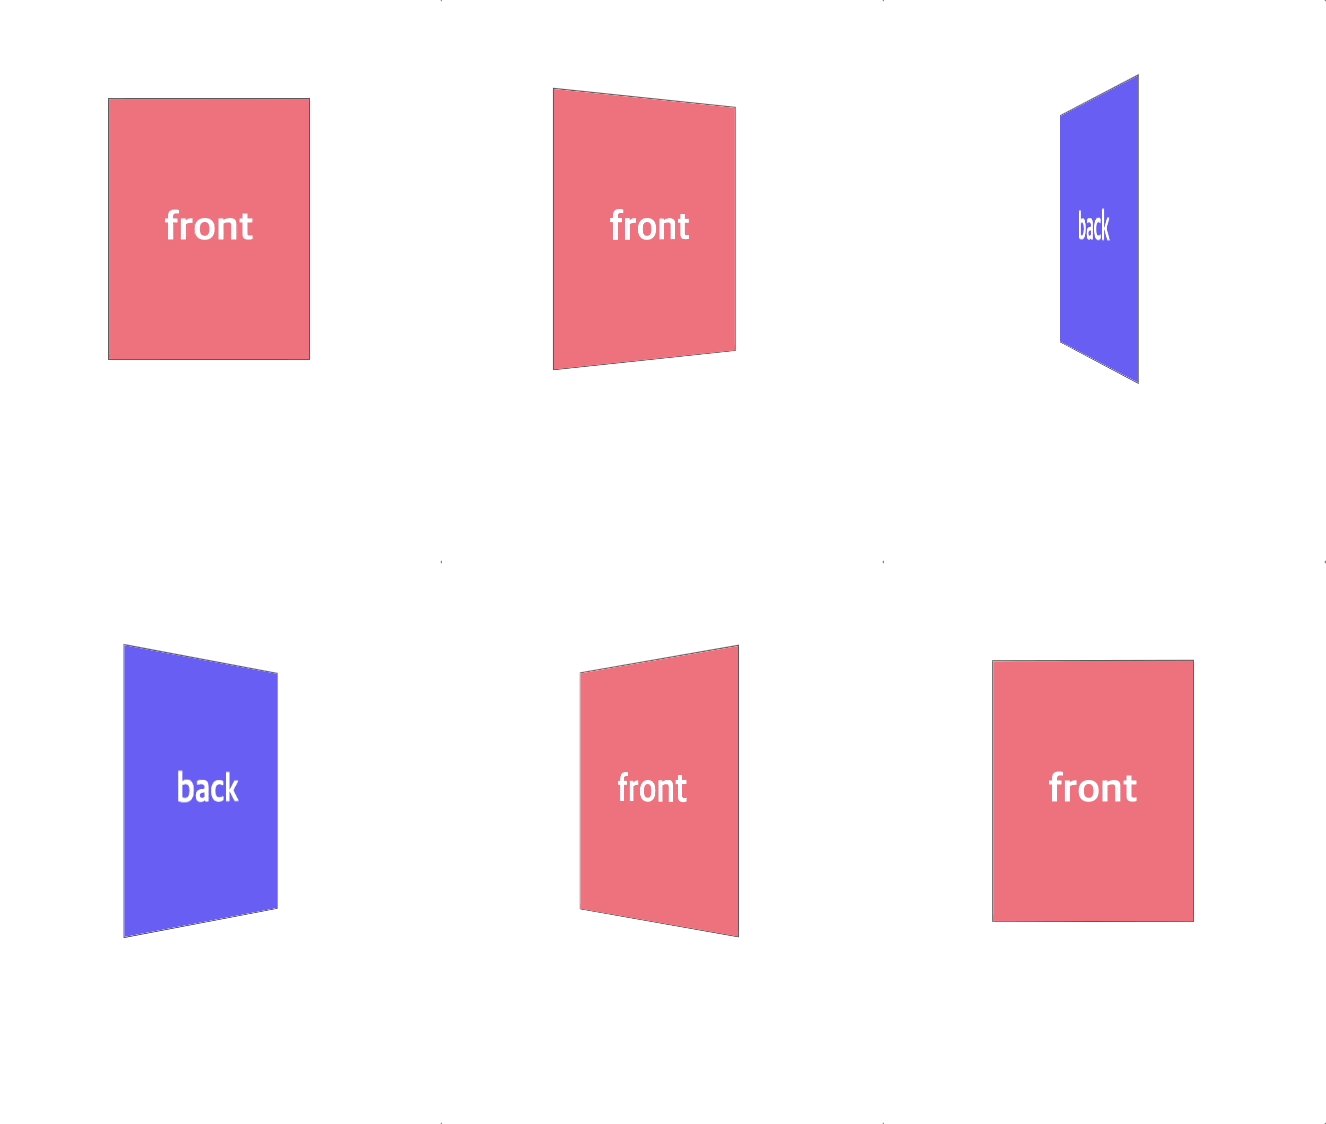
perspective transform-style: preserve-3d; animation transform: rotateY 이용하여 만들어본 카드뒤집기
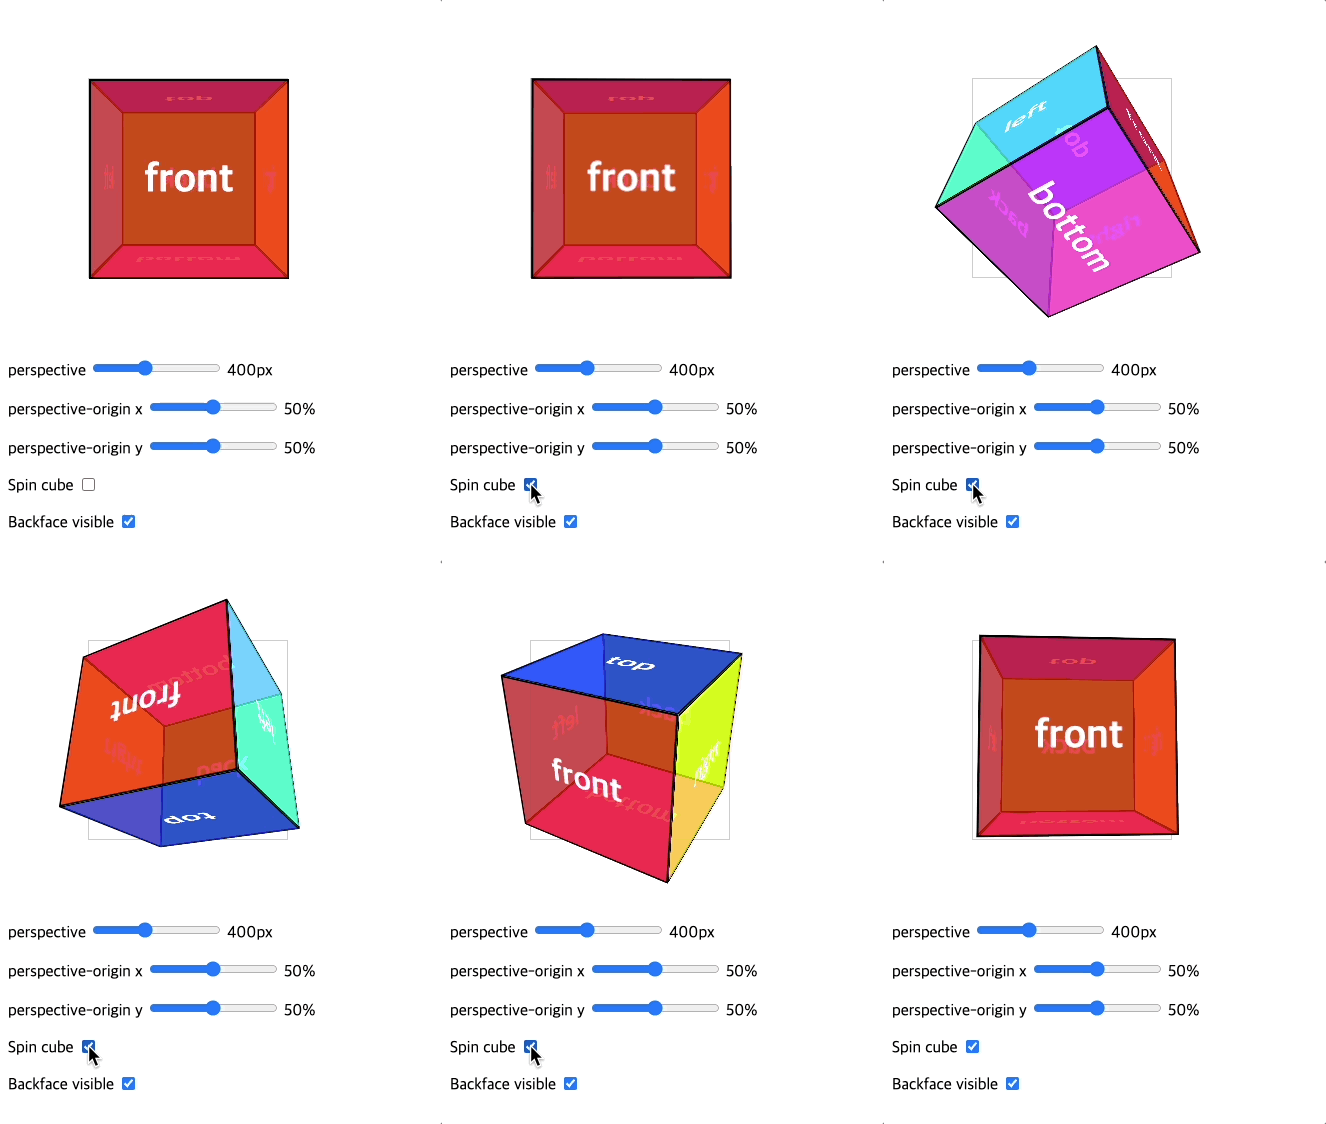
여러가지 속성의 값을 계속 바꿔보면서 특성을 익힐 수 있었다.
잘 활용한다면 이런 정육면체도 구현할 수 있다.


복습하셨군요!