
언리얼엔진의 블루프린트 기능중 Particle Emitters 에 대해 알아보자 !
오늘은 언리얼엔진에서 필요한 기능을 구현하는데 유용한 블루프린트, 그 중에서도 Particle Emitters 에 대해서 알아볼 것이다.
Particle Emitters란?
Particle Emitters란 언리얼엔진 안에서 이름에서 알 수 있듯이Particle System을 조작하고 구현하는 기능을 담당하고있는 노드이다
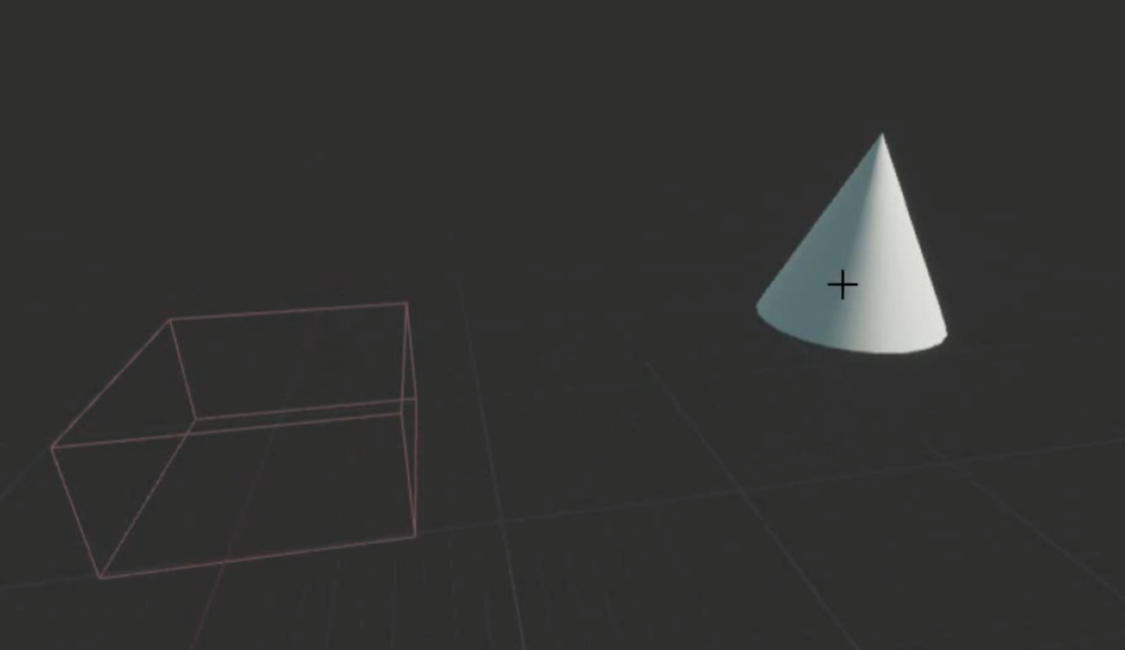
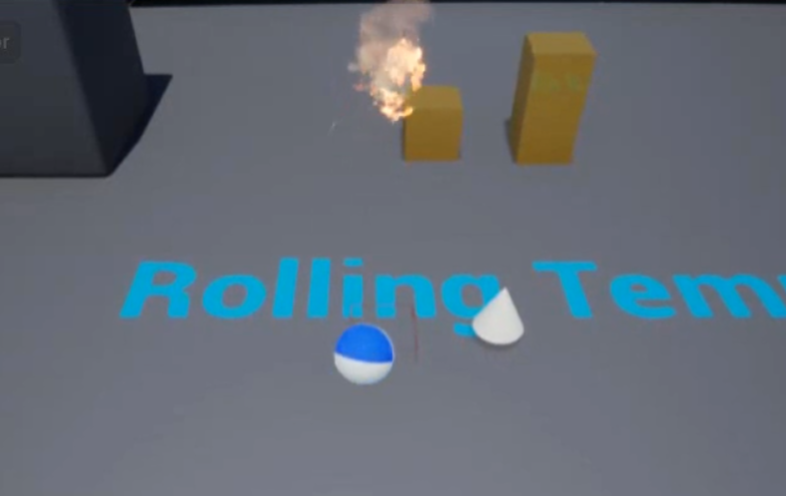
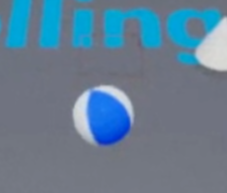
우리는 공이 위 사진의 박스 콜리전과 Overlap 되었을 때 즉시 Particle System이 일어나도록 구현할 것 이다
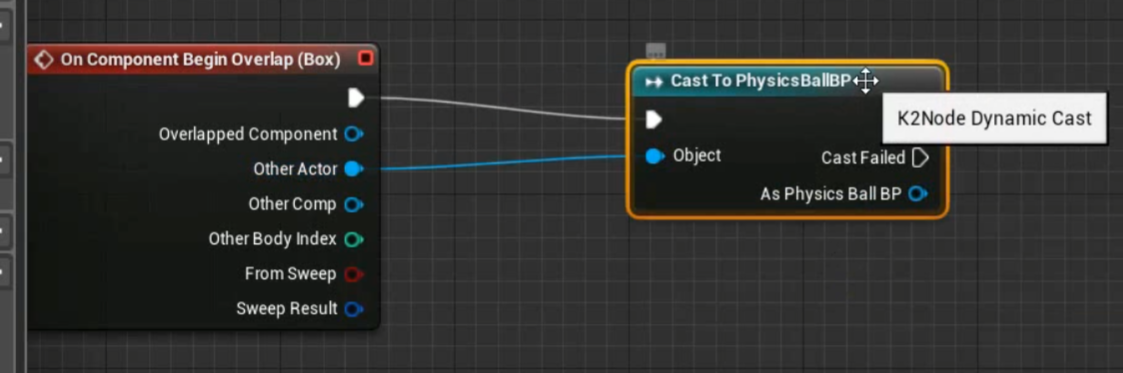
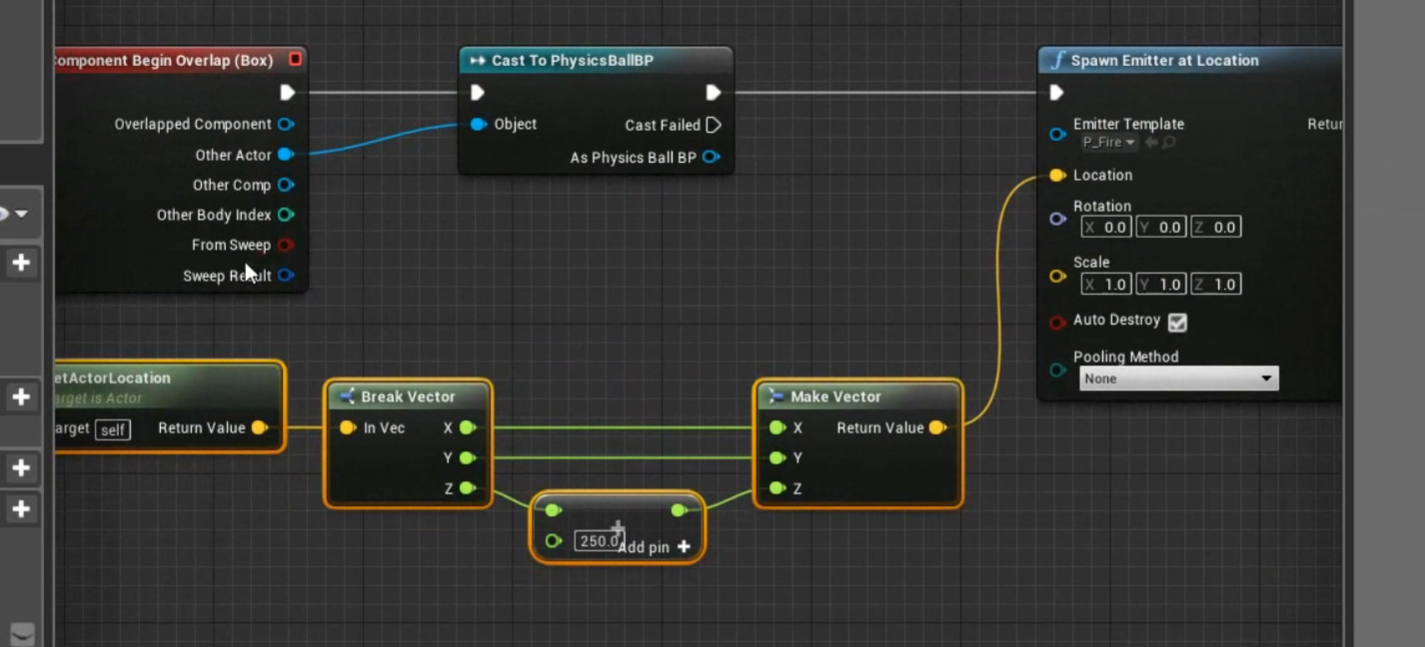
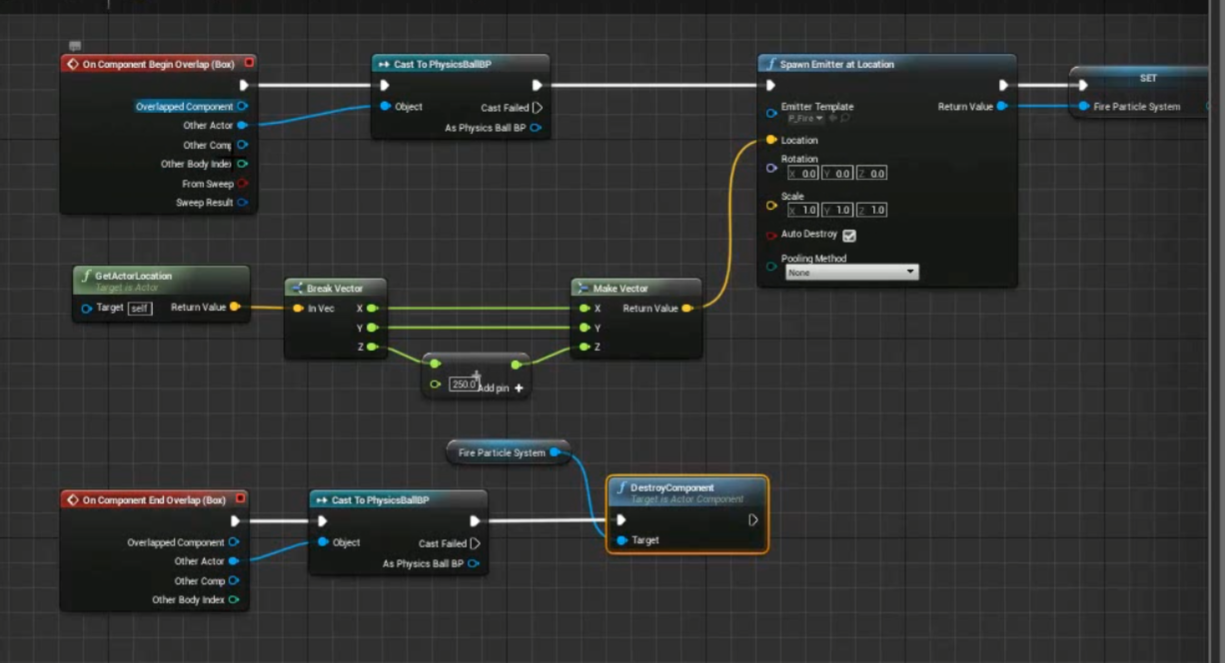
우선 다음과 같이 Box에 Overlap된 대상이 PhysicsBallBP인지 확인하는 노드를 Casting을 이용해 구현해주고
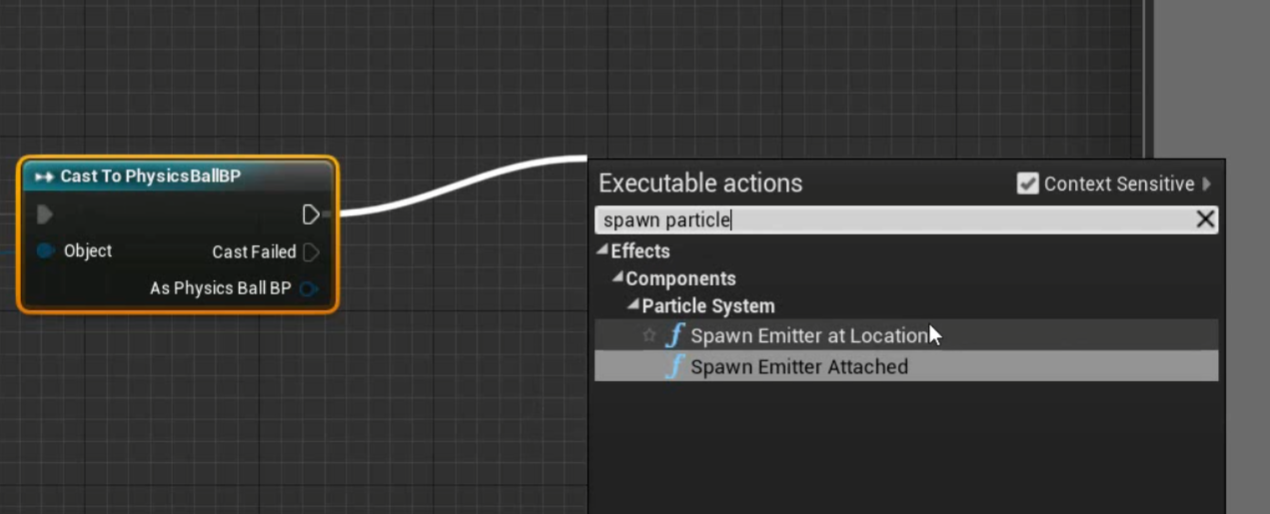
캐스팅에서 노드를 이어 spawn particle을 검색하면 나오는 Spawn Emitter at Location을 생성해준다
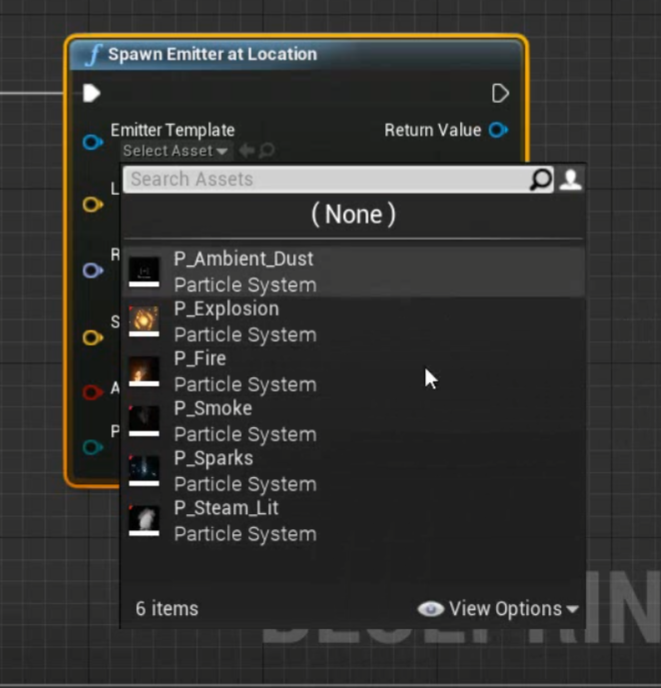
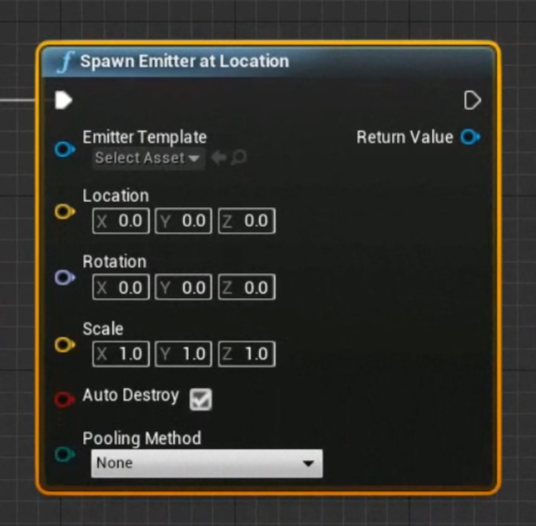
Emitter Template에서 여러 종류의 Particle을 선택할 수 있고
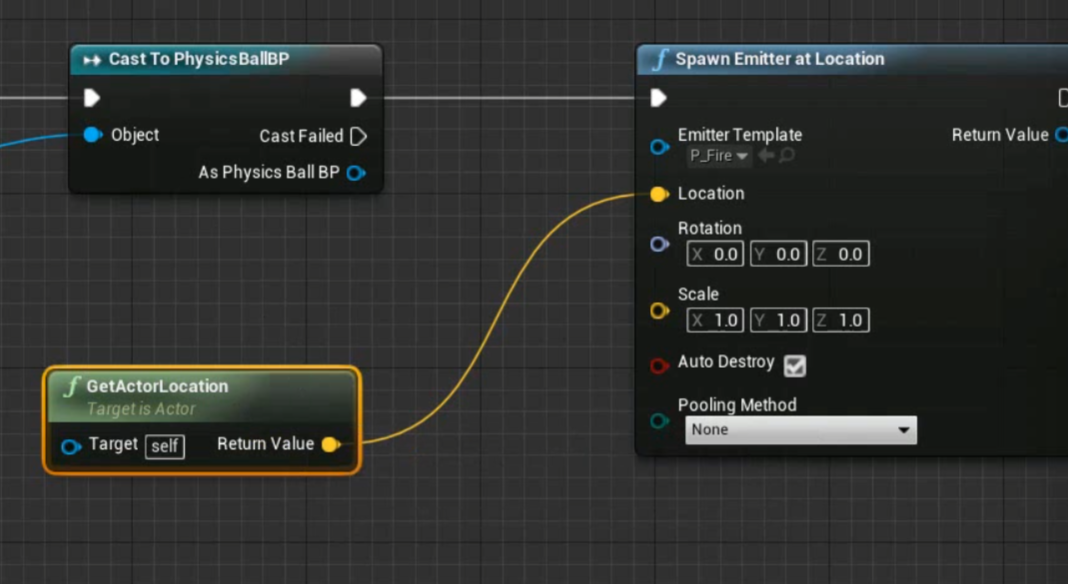
GetActorLocation 함수를 가져와 Particle Emitter의 벡터 위치값의 적용시켜준다
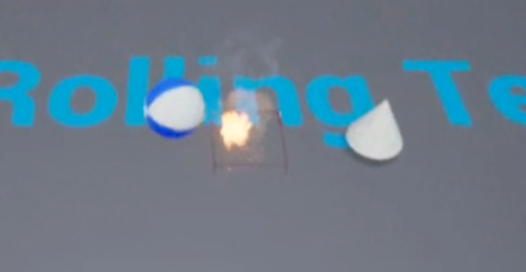
이후 컴파일을 실행하고 PhysicsBallBP를 이동시켜 박스 콜리전과 Overlap했을 경우 파티클이 정상적으로 생성되는 것을 확인할 수 있다
이제 본격적으로 Particle Emitter를 사용해 Particle을 조작해보자
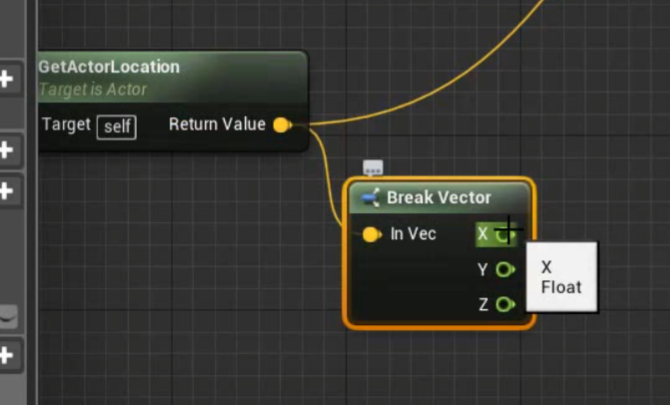
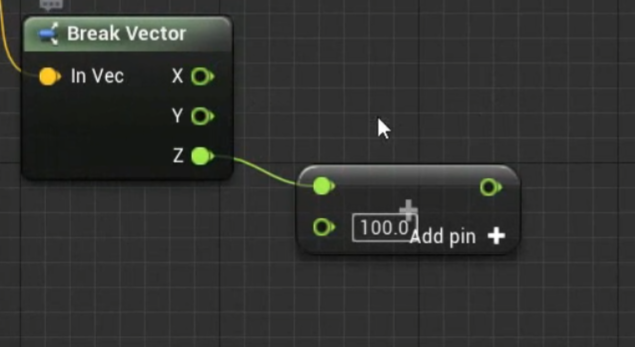
GetActorLocation에서 노드를 이어 Break Vector를 생성하고,
z값의 넣어줄 add함수를 생성해 수치를 조정해준다
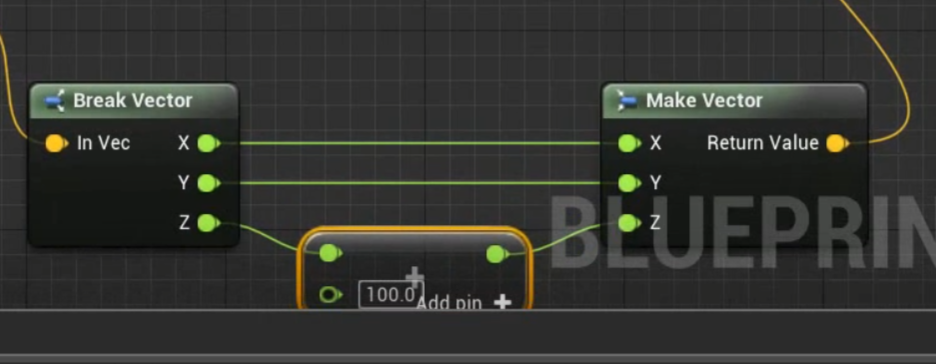
그리고 다시 Make Vector를 생성해주고
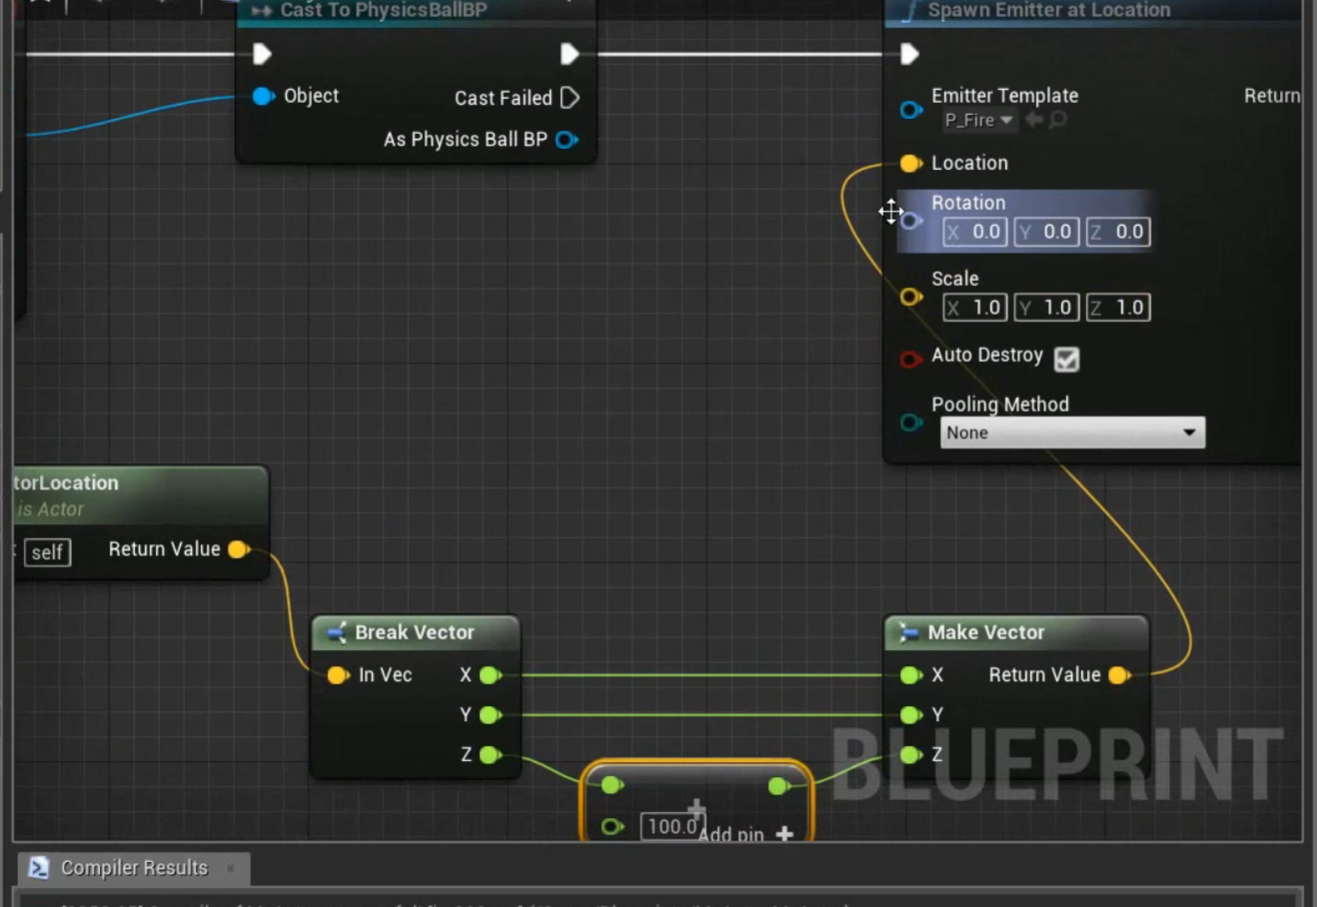
Particle Emitter의 vector 위치값으 이어주면
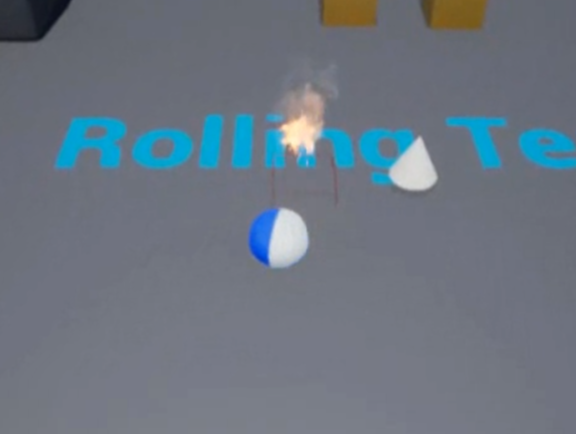
처음과 달리 Particle이 z축으로 100만큼 올라가서 생성된 것을 확인할 수 있다
add수치를 500으로 조정해주면 Particle의 z축이 이동한 것을 더욱 확실하게 알 수 있다
이런식으로 Particle Emitter 함수를 사용하여 간단하게 Particle의 위치를 조정하는 블루프린트를 구현해보았다
하지만 우리가 지금 구현한 블루프린트에서는 PhysicsBallBP가 박스 콜리전에 Overlap 할 때마다 Particle을 중복해서 생성하고 있는 사실을 알 수 있고, 이는 게임 안에서 성능 저하를 일으킬 수 있다.
Particle Emitter은 Particle의 더욱 상세한 부분까지 조작할 수 있다
우리는 Particle이 PhysicsBallBP와 Overlap 되어있을 경우에만 Particle이 발생하고, Overlap이 end가 되면 Particle이 사라지게 만들어 볼 것이다
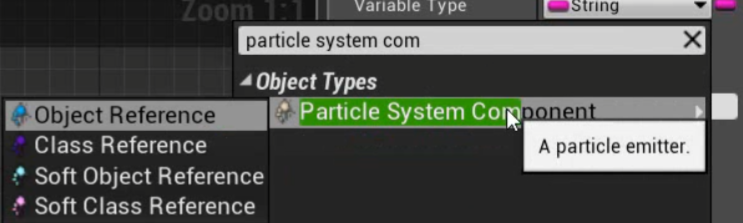
우선 Paricle System Component라는 유형의 변수를 하나 만들어준다
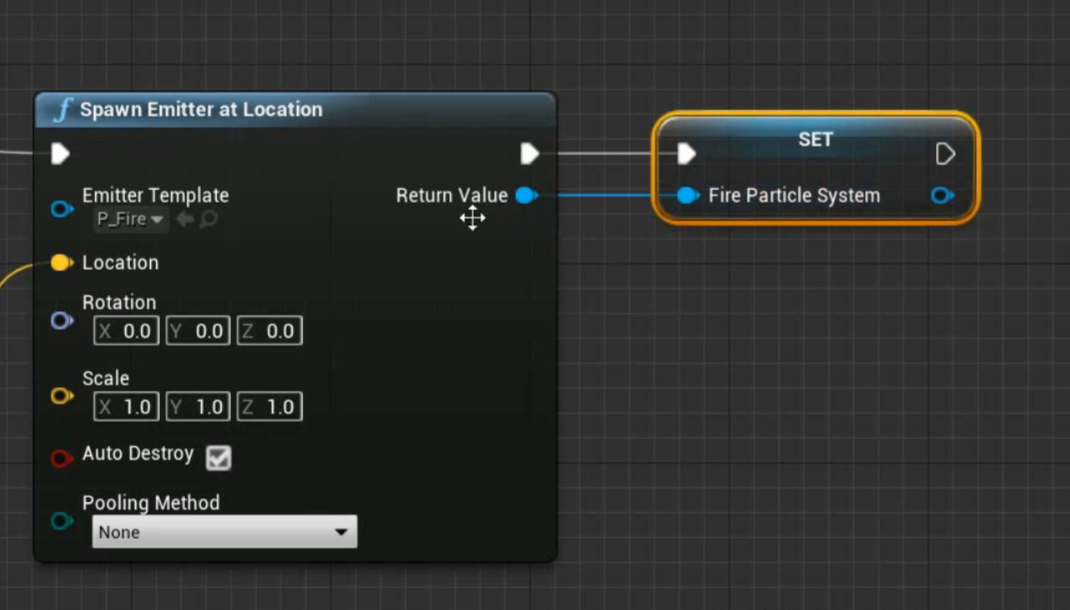
그리고 다음과같이 생성해준 변수를 Set으로 가져와 Emitter함수와 이어준다
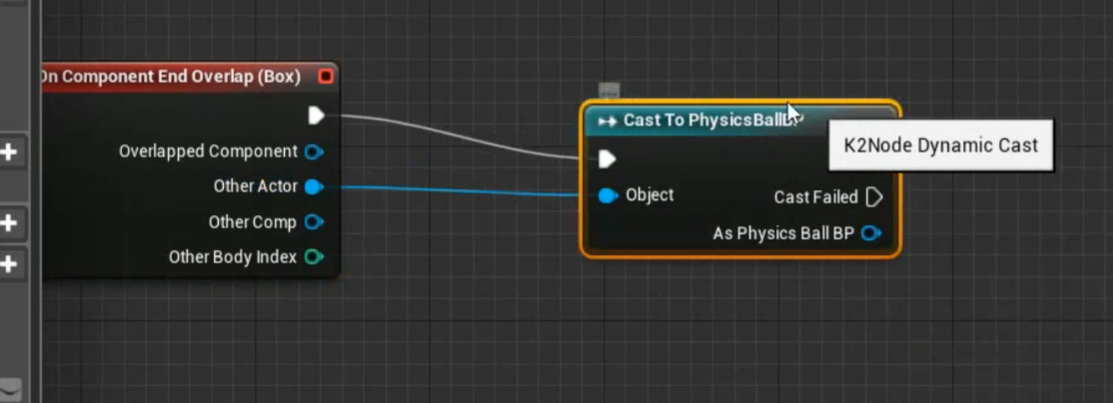
이후 EndOverlap Event와 PhysicsBallBP인지 확인해주는 캐스팅 노드를 이어주고
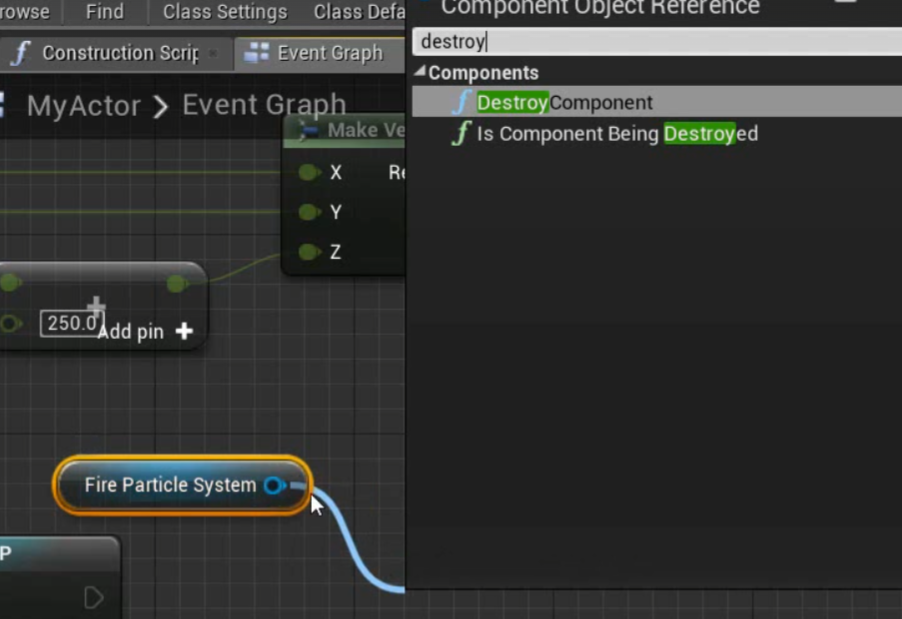
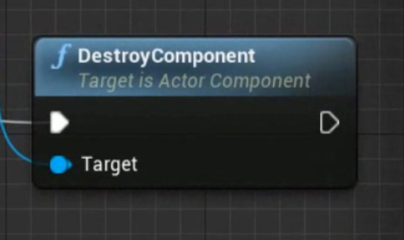
다음과같이 새로 생성해준 변수를 Get으로 가져오고, Destroy Component를 생성,

마지막으로 노드들을 이어주면 구현이 완성되었다.
컴파일을 하고 실행해보면
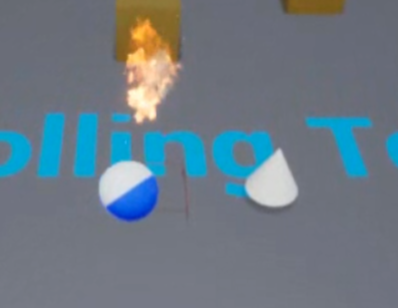
PhysicsBallBP가 Overlap 되었을때는 Particle이 호출되고,
PhysicsBallBP의 Overlap이 end되면 Particle은 사라진다
이런식으로 오늘은 Particle Emitter을 사용한 Particle 조작과 생성, 파괴를 구현해보았고
다음 시간에 Scene Components로 다시 볼 수 있기를 희망한다 !


개인 공부를 정리함니다