How to Perform Epson Printer Ink Replacement Step-by-Step?
Although it may appear difficult at first, changing the ink in your Epson printer is simple, quick, and hassle-free when done correctly. A correct Epson Printer Ink Replacement procedure guarantees the highest print quality and prolongs the life of your printer, regardless of whether you have an EcoTank, Expression, or Workforce model.
1. Set Up Your Printer
First, make sure your printer is connected correctly and turn it on. Use Epson Connect Printer Setup to connect your printer to your computer or Wi-Fi if you're setting it up for the first time. This makes it easier to check ink levels and control print jobs from your linked device.
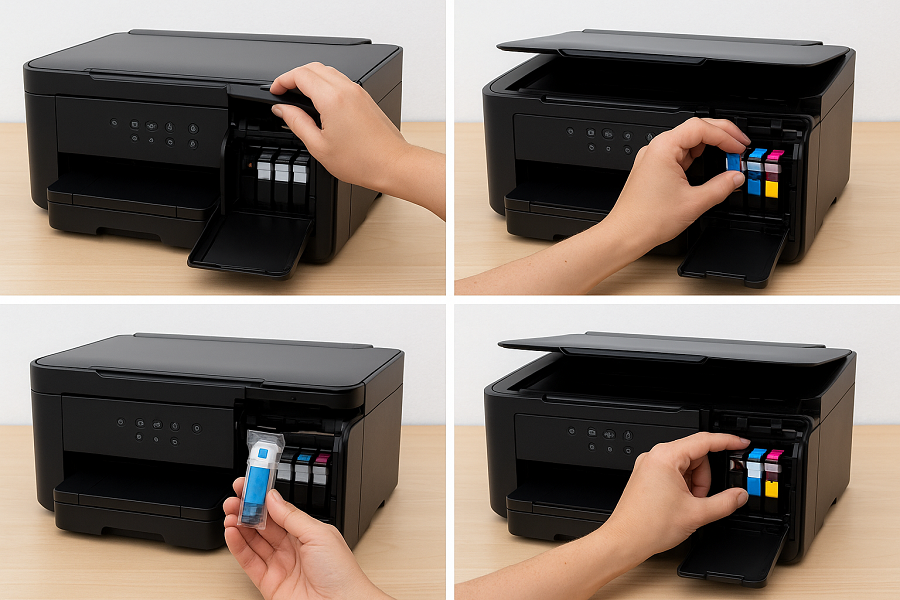
2. Go to the Ink Cartridge Section
Depending on your model, open the ink cartridge lid or the scanning unit. To avoid mechanical damage, wait until the cartridge holder stops moving before continuing.
3. Take Out the Empty Cartridge
Lift out the cartridge you wish to replace by gently pressing its tab. To avoid smudges or mistakes, keep your hands away from the chip or ink port.
4. Put the New Cartridge in
Before opening the new ink cartridge, give it a little shake. Take off any seals or protective tape. When the cartridge snaps into position, insert it into the slot. Check the color guide on your printer to see which slot each color belongs in.
5. Close and Test
To charge the ink, close the printer cover and adhere to the on-screen directions. To guarantee excellent color output and smooth ink flow, run a test print or printhead cleaning.
Use real Epson ink, please.
To preserve color fidelity and avoid clogging, always use authentic Epson ink. Third-party inks may void your warranty and result in printhead problems.
You can maintain your printer operating smoothly and prepared for any printing activity with the help of this Epson Printer Ink Replacement tutorial. For easy ink monitoring and wireless ease, pair it with the Epson Connect Printer Setup. Explore our webpage to know more.