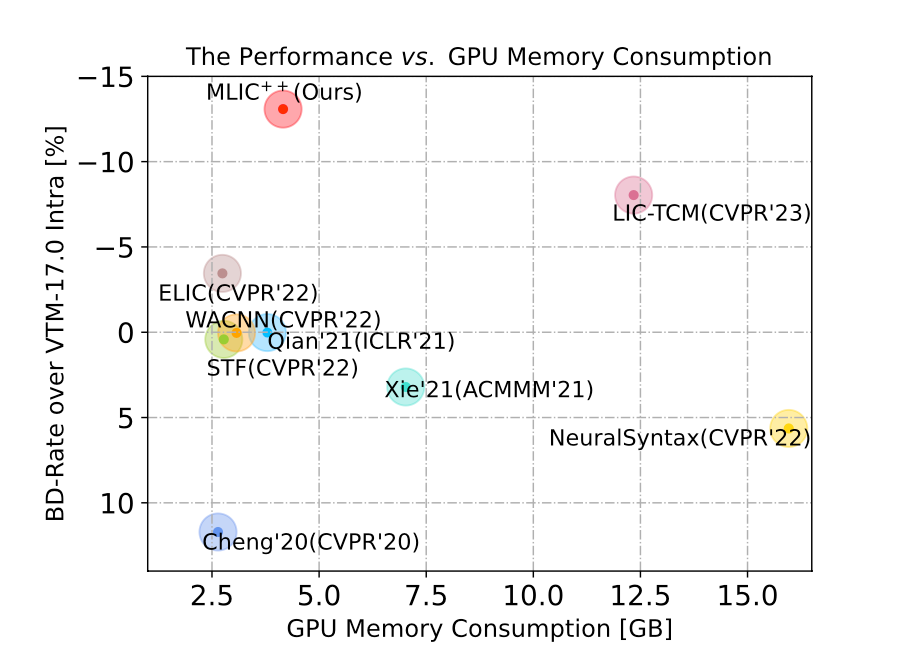
Learned Image Compression 논문을 읽다보면 비교 방법론 중 VTM -17.0 Intra라는 방법이 자주 보입니다.
동영상 압축에 주로 사용하는 VVC 방법 같은데 해당 방법을 사용하기 위해 열심히 (삽질한) 기록입니다.

개발환경
OS : Linux
1. 압축 파일 다운로드
https://vcgit.hhi.fraunhofer.de/jvet/VVCSoftware_VTM/-/releases/VTM-17.0
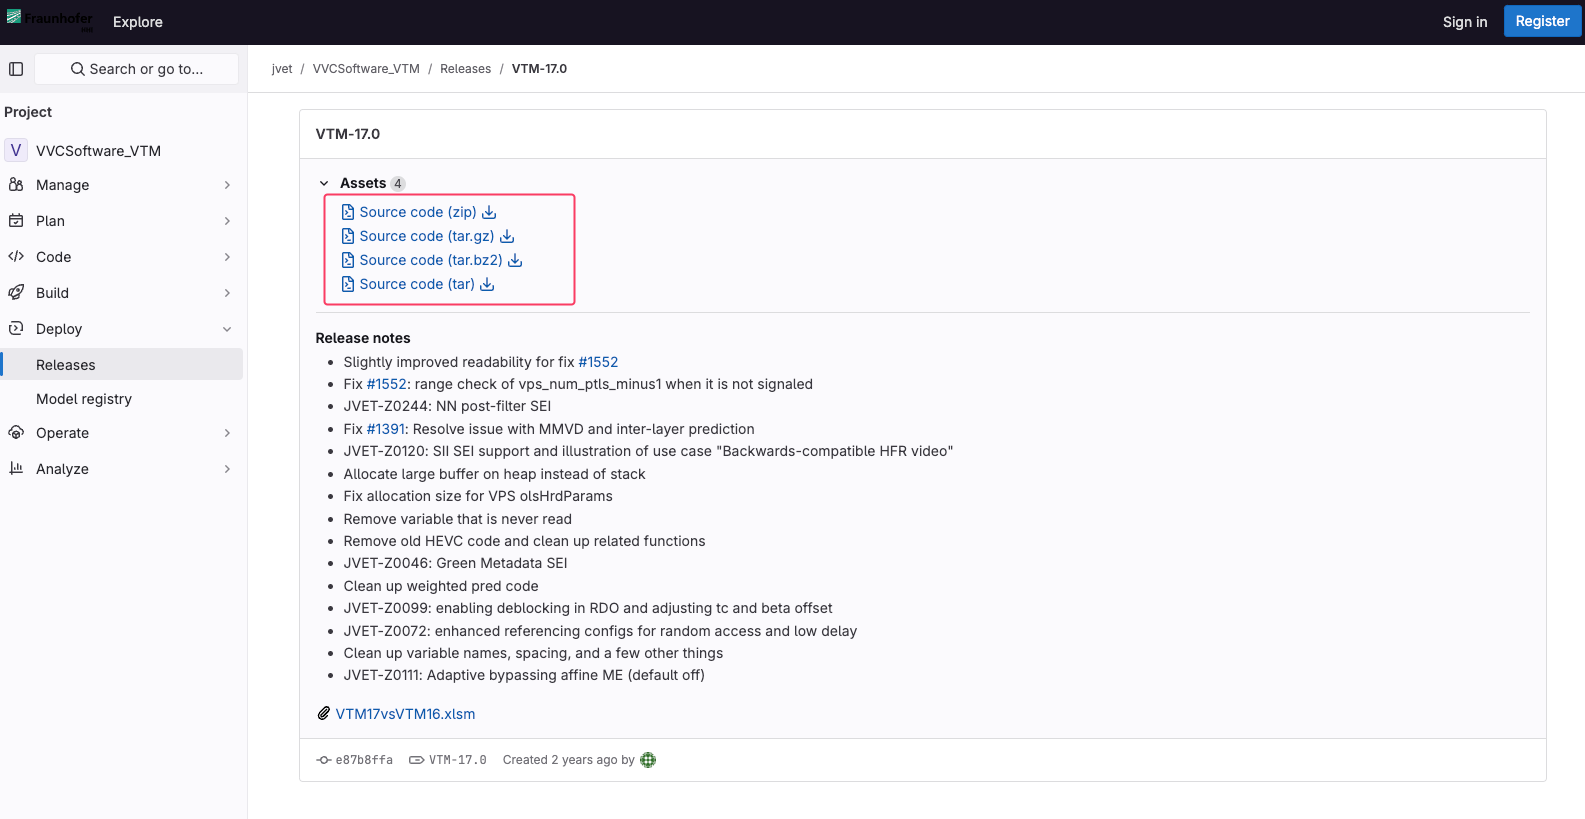
17.0 릴리즈 버전을 선택 후 압축파일을 다운로드하여 개발환경을 구축합니다.
2. 가이드라인 명령어 실행
만약 cmake가 없다면 cmake 설치해주셔야합니다.
cd VVCSoftware_VTM-VTM-17.0
mkdir build
cd build
cmake ..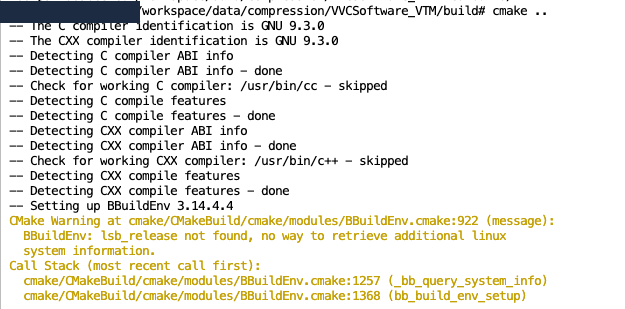
cmake를 진행했다면 make -j를 실행합니다.
make -j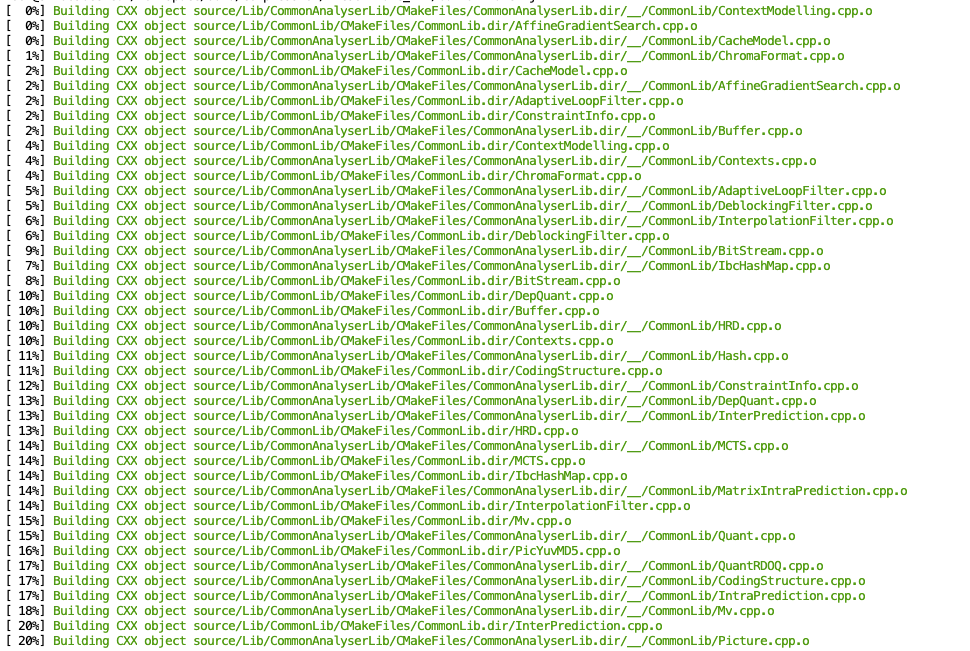
실행하면 다음과같이 Build되는 것을 확인할 수 있습니다.
3. 파이썬에서 실행
파이썬에서 subprocess 라이브러리를 통해 빌드한 VTM을 사용할 수 있습니다.
VTM에서 필요한 것은 인코더, 디코더 및 설정파일의 경로입니다.
/VVCSoftware_VTM-VTM-17.0/bin/umake/gcc-9.3/x86_64/release 경로 내에 EncoderApp, DecoderApp이 존재하며, /VVCSoftware_VTM-VTM-17.0/cfg 경로 내에 VTM intra 설정 파일이 존재합니다.
make -j 실행 중 인코더, 디코더 파일 경로를 확인할 수 있으니 반드시 확인해줘야 합니다.
import os
import numpy as np
from PIL import Image
import matplotlib.pyplot as plt
import tempfile
import subprocess


def rgb_to_yuv(image):
    return image.convert("YCbCr")


def save_yuv(image, file_path):
    yuv_image = rgb_to_yuv(image)
    y, u, v = yuv_image.split()
    with open(file_path, 'wb') as f:
        f.write(y.tobytes())
        f.write(u.tobytes())
        f.write(v.tobytes())


def load_yuv(file_path, width, height):
    with open(file_path, 'rb') as f:
        y_size = width * height
        uv_size = y_size
        y = np.frombuffer(f.read(y_size), dtype=np.uint8).reshape((height, width))
        u = np.frombuffer(f.read(uv_size), dtype=np.uint8).reshape((height, width))
        v = np.frombuffer(f.read(uv_size), dtype=np.uint8).reshape((height, width))
    return Image.merge("YCbCr", [Image.fromarray(y), Image.fromarray(u), Image.fromarray(v)]).convert("RGB")


def compress_image_vtm_rgb_psnr(image, quality):
    with tempfile.NamedTemporaryFile(delete=True, suffix=".yuv") as temp_input, \
         tempfile.NamedTemporaryFile(delete=True, suffix=".bin") as temp_output, \
         tempfile.NamedTemporaryFile(delete=True, suffix=".yuv") as temp_recon:

        # Convert image to YUV and save to temporary file
        width, height = image.size
        save_yuv(image, temp_input.name)

        # 인코더 및 디코더 경로
        encoder_path = "/workspace/data/VVCSoftware_VTM-VTM-17.0/bin/umake/gcc-9.3/x86_64/release/EncoderApp"
        decoder_path = "/workspace/data/VVCSoftware_VTM-VTM-17.0/bin/umake/gcc-9.3/x86_64/release/DecoderApp"
        config_file = "/workspace/data/VVCSoftware_VTM-VTM-17.0/cfg/encoder_intra_vtm.cfg"

        # VTM 인코딩
        subprocess.run([
            encoder_path,
            "-c", config_file,
            "-i", temp_input.name,
            "-b", temp_output.name,
            "-o", temp_recon.name,
            "--SourceWidth=" + str(width),
            "--SourceHeight=" + str(height),
            "--InputBitDepth=8",
            "--InternalBitDepth=8",
            "--QP=" + str(quality), # 이미지 품질 조절
            "--FrameRate=1", # 이미지 = 1
            "--FramesToBeEncoded=1",
            "--InputChromaFormat=444" #yuv444 설정
        ], check=True)

        # VTM 디코딩
        subprocess.run([
            decoder_path,
            "-b", temp_output.name,
            "-o", temp_recon.name
        ], check=True)

        # 복원된 이미지 읽기
        recon_image = load_yuv(temp_recon.name, width, height)

        # Calculate RGB channel-wise PSNR
        original_array = np.array(image)
        recon_array = np.array(recon_image)
        mse_channels = [np.mean((original_array[:, :, i] - recon_array[:, :, i]) ** 2) for i in range(3)]
        psnr_channels = [20 * np.log10(255 / np.sqrt(mse)) if mse > 0 else 100 for mse in mse_channels]
        avg_psnr = np.mean(psnr_channels)
        size = os.path.getsize(temp_output.name)

        return recon_image, psnr_channels, avg_psnr, size


def process_images_in_folder_for_format_rgb(folder_path, compress_function, format_name):
    image_files = [os.path.join(folder_path, file) for file in os.listdir(folder_path) if file.endswith(('png', 'jpg', 'jpeg'))]

    if format_name == "JPEG" or format_name == "JPEG2000":
        qualities = list(range(5, 101, 5))

    elif format_name == "VTM-17.0 intra":
        qualities = [22, 27, 32, 37,42]
    else:
        qualities = list(range(5, 52, 5))

    psnr_values_all = []
    bits_per_pixel_all = []

    for image_file in image_files:
        original_image = Image.open(image_file).convert('RGB')
        width, height = original_image.size
        total_pixels = width * height

        avg_psnr_values = []
        sizes = []

        for quality in qualities:
            _, psnr_channels, avg_psnr, size = compress_function(original_image, quality)
            print(f"Image: {os.path.basename(image_file)}, Quality: {quality}, PSNR (R, G, B): {psnr_channels}, Avg PSNR: {avg_psnr}")
            avg_psnr_values.append(avg_psnr)
            sizes.append(size)

        bits_per_pixel = [size * 8 / total_pixels for size in sizes]

        psnr_values_all.append(avg_psnr_values)
        bits_per_pixel_all.append(bits_per_pixel)

    psnr_values_avg = np.mean(psnr_values_all, axis=0)
    bits_per_pixel_avg = np.mean(bits_per_pixel_all, axis=0)

    return bits_per_pixel_avg, psnr_values_avg


def process_and_plot_comparison(folder_path):
    vtm_bpp, vtm_psnr = process_images_in_folder_for_format_rgb(folder_path, compress_image_vtm_rgb_psnr, "VTM-17.0 intra")
    print(vtm_bpp, vtm_psnr)

    plt.figure(figsize=(10, 5))
    plt.plot(vtm_bpp, vtm_psnr, marker='o', label='VTM-17.0 Intra')
    plt.xlabel('Bits Per Pixel (bpp)')
    plt.ylabel('PSNR (dB)')
    plt.legend(loc='lower right')
    plt.grid(True)
    plt.show()


# Example usage
folder_path = "FOLDER_PATH"
process_and_plot_comparison(folder_path)
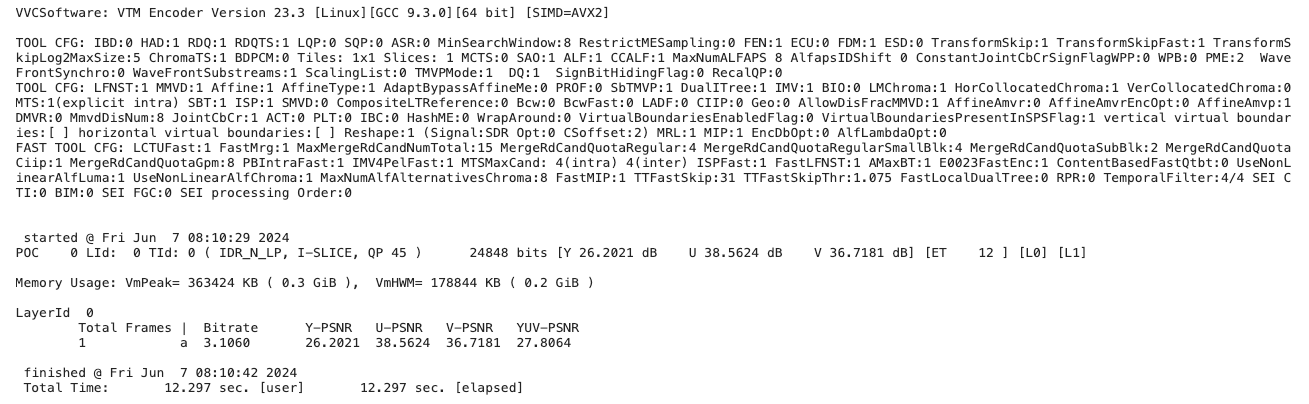
실행결과는 다음과 같이 출력되며, PSNR 및 Bitrate가 출력되는 것을 확인할 수 있습니다.
VTM의 이미지 품질 조절을 위한 파라미터는 논문을 찾아보니 보통 22, 27, 32, 37, 42 이렇게 다섯개 사용한다고 합니다.