
레벨 관련 업데이트를 진행하기 전에, 맵 중앙에만 소환되는 NPC (Probe)를 랜덤한 위치에 소환하도록 하고, 스스로 목적지를 설정해서 이동하는 것을 구현하려고 한다.
1. Probe를 맵의 랜덤한 위치에 소환하기
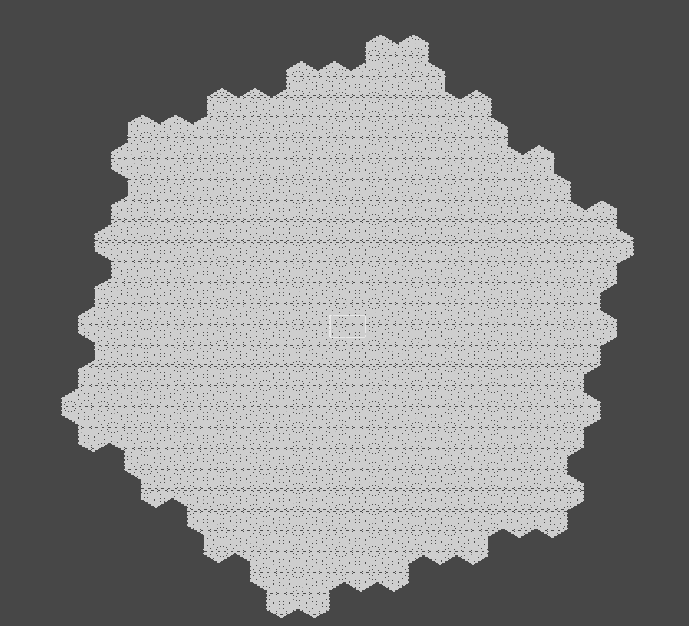
사진 처럼, 맵은 육각형 모양의 타일을 많이 이어 붙인 형태를 띄는데, 전반적으로 약간 오른쪽으로 기울어진 육각형 모양이다.
육각형 공간 안쪽에서 랜덤하게 소환되는 프로세스를 구현하기 위해서는 임의의 점이 육각형 안에 있는지 판단할 수 있어야 한다.
이론 세우기
-
꼭짓점 찾기
먼저 대략적으로 맵의 꼭짓점 좌표를 구했다. 정확할 필요는 없어서 대충 했다. -
내부에 위치하는지에 대한 판별법
각 변을 이루는 두 점의 좌표를 이용해서 일차함수를 구하고, 주어진 점 (임의의 점)의 x 좌표에 대응되는 일차함수의 함숫값을 구해서 점의 y 좌표가 함숫값보다 큰지 작은지 판별하면 된다.
종합적으로, 여섯개의 변을 모두 일차함수로 취급해서 위 쪽 세 변은 점이 함숫값보다 작은지 판별하고, 아래쪽 세 변은 점이 함숫값보다 큰지 판별하면 된다.
보조함수 코드 작성
private static readonly Vector3[] _v = new Vector3[6] {
    new (45,223.42f,0),
    new (216,72.72f,0),
    new (171,-150.72f,0),
    new (-45,-223.42f,0),
    new (-216,-72.72f,0),
    new (-171,150.72f,0),
};
먼저 꼭짓점을 기록했다.
private static float Line(float x, float gradient, Vector3 a)
{
    return gradient * (x - a.x) + a.y;
}
그 뒤, 일차함수의 함숫값을 구하는 메서드를 제작했다. 점 a를 지나는 직선에 대하여 x값에 대응되는 함숫값을 반환한다.
private static bool IsHigherThanLine(Vector3 pos, Vector3 a, Vector3 b)
{
    float grad = (b.y - a.y) / (b.x - a.x);
    return pos.y > Line(pos.x, grad, a);
}
다음은 점이 직선보다 위에 있는지 판별하는 메서드다.
먼저 두 점을 받아서 (a와 b) 기울기를 구하고, 주어진 점의 y 좌표와 함숫값을 비교한다.
private static bool IsLowerThanLine(Vector3 pos, Vector3 a, Vector3 b)
{
    float grad = (b.y - a.y) / (b.x - a.x);
    return !IsHigherThanLine(pos, a, b) && pos.y != Line(pos.x, grad, a);
}
IsLowerThanLine은 만들기 더 편하다.
앞서 만든 IsHigherThanLine에 넣은 값이 false이면서, 함숫값이 y 좌표와 같지 않으면 된다.
마지막으로 임의의 점이 육각형 안에 있는지 판별하는 메서드다.
private static bool IsInHexagon(Vector3 pos)
{
    return IsLowerThanLine(pos, _v[0], _v[1]) &&
           IsHigherThanLine(pos, _v[1], _v[2]) &&
           IsHigherThanLine(pos, _v[2], _v[3]) &&
           IsHigherThanLine(pos, _v[3], _v[4]) &&
           IsLowerThanLine(pos, _v[4], _v[5]) &&
           IsLowerThanLine(pos, _v[5], _v[0]);
}
이렇게, 위쪽 변 세개보다 아래에 있고 아래쪽 변 세개보다 위에 있는지 판별하는 조건을 활용하면 점이 육각형 안에 있는지 확인할 수 있다.
GetRandomPosition 함수 코드 작성
public static Vector3 GetRandomPosition()
{
    Vector3 pos;
    do
    {
        pos = new Vector3(Random.Range(-250, 250), Random.Range(-250, 250), 0);
    } while (!IsInHexagon(pos));
    return pos;
}
이렇게 계속 육각형 안에 있는지 확인하고, 바깥에 있으면 새로 임의의 점을 구하는 식으로 작성했다.
ProbeSpawner 수정
using Unity.Netcode;
using UnityEngine;

public class ProbeSpawner : MonoBehaviour
{
    [SerializeField] private GameObject _probe;
    private static short _counter = 0;
    private bool _initiated = false;
    void Start()
    {
        NetworkManager.Singleton.OnServerStarted += SpawnProbe;
    }

    void FixedUpdate() {
        if (_counter < 100 && _initiated) SpawnProbe();
    }

    private void SpawnProbe()
    {
        Debug.Log("Spawning probe");
        GameObject probe = Instantiate(_probe, RandomUtils.GetRandomPosition(), Quaternion.identity);
        probe.GetComponent<NetworkObject>().Spawn();
        _counter++;
        _initiated = true;
    }
}
기존에는 (0, 0, 0) 에 소환하는 코드였는데, 이제 랜덤한 위치에 소환하는 코드로 변경하였고, OnServerStarted의 콜백으로 SpawnProbe를 넣어주어 서버가 시작되면 바로 생성되도록 만들었다.
또한, FixedUpdate에 조건을 달아서 서버 내에 100기의 Probe가 유지되도록 작성했다.
2. 랜덤 위치로 이동하기
어차피 Probe는 플레이어를 공격하는 설정이 없기 때문에, 그냥 아무 방향으로 이동만 하고 있으면 된다.
따라서 아까 만든 GetRandomPosition 메서드를 활용해 목적지를 설정하고, 목적지 근처에 도달하면 다른 목적지를 설정해 다시 이동하는 코드를 짤 생각이다.
MoveToPivot 메서드 만들기
public void MoveToPivot(Vector3 pos, Vector3 dir, float speed, short angle)
{
    transform.position = new Vector3(pos.x + dir.x * speed, pos.y + dir.y * speed, 0);
    transform.GetChild(0).transform.rotation = Quaternion.Euler(new Vector3(0, 0, angle - 90));
}
이렇게 제작한다. 사실 PlayerController의 MoveToMouse와 똑같다.
랜덤 위치 이동 구현
void Start()
{
    _targetPosition = RandomUtils.GetRandomPosition();
}
void FixedUpdate()
{
    _direction = _targetPosition - transform.position;
    Vector3 normal = _direction.normalized;
    _angle = (short)(Mathf.Atan2(normal.y, normal.x) * Mathf.Rad2Deg);
    MoveToPivot(transform.position, normal, 0.05f, _angle);
}
void Update() {
    if (Vector3.Distance(transform.position, _targetPosition) < 5)
    {
        Debug.Log("Resetting target position");
        _targetPosition = RandomUtils.GetRandomPosition();
    }
}
이렇게, 초기 목적지를 설정 후, Frame 독립적으로 이동하며, 목적지 근처에 도달했을 때 목적지를 재설정한다.