1.DOM(Document Object Model) 문서 객체 모델 조작
자바스크립트는 HTML 파일을 제어하기 위해 만들어진 언어
🍀 DOM 조작이란?
웹페이지의 HTML 요소를 JavaScript를 통해 동적으로 변경하는 것을 의미함!
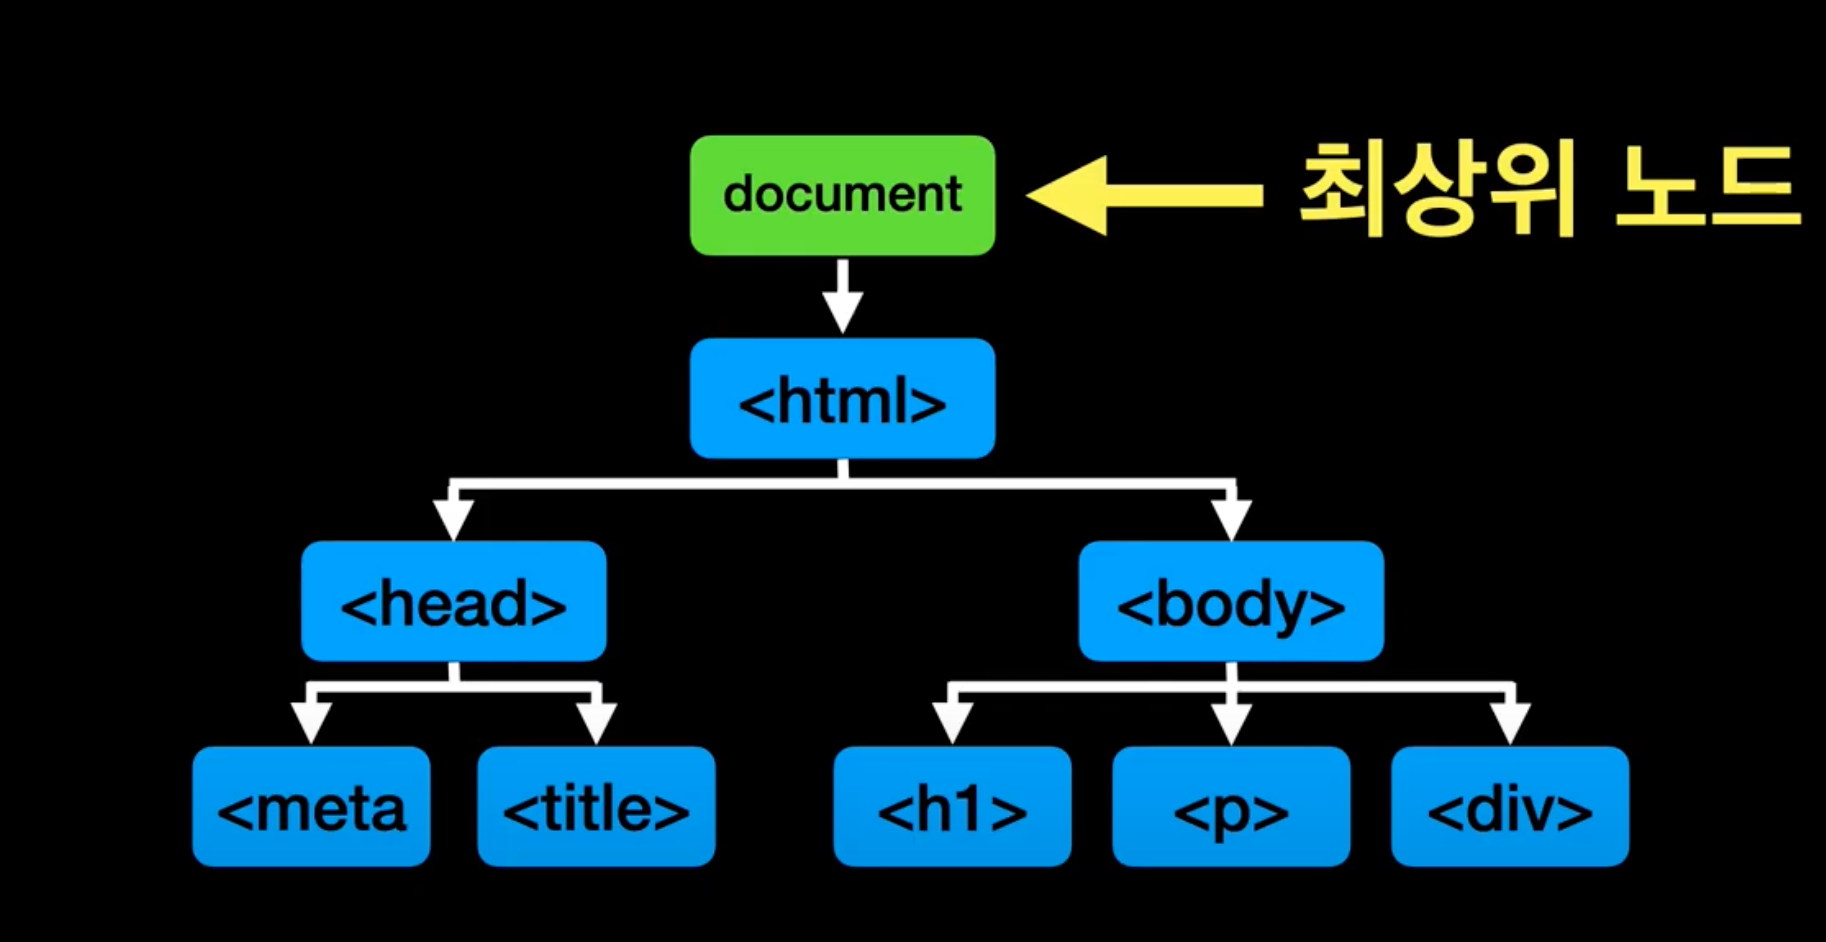
DOM의 구조 (tree 구조)
- HTML요소 생성 :
document.createElement() - 속성 추가 :
setAttribute() - 내용 변경 :
innerHTML - 스타일 변경 :
style속성 활용 - 요소 삭제:
remove()
예제: HTML 요소 동적으로 추가하기
window.onload = function () {
    // 1. <p> 태그 생성
        window.onload = function(){ // 태그들을 메모리에 미리 올린다.
            let tag = document.createElement('p'); // <p>
            let text = document.createTextNode('Hello World'); // Hello World

            tag.appendChild(text); // <p>Hello World</p>
            document.body.appendChild(tag);

            document.write('<hr>');

    // 2. 이미지 추가
  let imgTag = document.createElement('img');
            // imgTag.src = 'img/logo.png';
            // imgTag.width = '200';
            // imgTag.height = '200';
            // setter getter 함수를 사용하면 에러처리 되어있을 가능성 큼 + 정보은닉 용이.
            imgTag.setAttribute('src', 'img/logo.png');
            imgTag.setAttribute('width', '200');
            imgTag.setAttribute('height', '200');
            document.body.appendChild(imgTag); // body 태그 밑에 넣는다.
        };


    // 3. innerHTML을 이용한 요소 삽입
    let str = '<h1>안녕하세요</h1>';
    str += "<img src='./img/logo.png' width='170' height='67' tempData='logoImg'>";
    document.body.innerHTML = str;

    // 4. 특정 요소 스타일 변경
    let pTag = document.getElementById('hello');
    pTag.style.color = 'red';
    pTag.style.fontSize = '30px';
    pTag.innerHTML = '홍길동 입니다.';

    // 5. 요소 삭제
    let jsTitle = document.querySelector('#jsTitle');
    jsTitle.remove();
};
📌 핵심 개념
- createElement(), createTextNode(), appendChild()
- setAttribute(), innerHTML
- querySelector(), getElementById()
- style 속성으로 스타일 변경
- remove()로 요소 삭제
2. 자바스크립트에서 이벤트란?
이벤트(event)는 자바스크립트에서 사용자나 브라우저가 발생시키는 사건 또는 동작을 의미한다. 예를 들어, 사용자가 버튼을 클릭하거나 입력창에 텍스트를 입력하거나 페이지가 로드되는 것 등이 이벤트이다.
링크텍스트
정리가 잘 되있습니다.
<!DOCTYPE html>
<html lang="en">
<head>
    <meta charset="UTF-8">
    <meta name="viewport" content="width=device-width, initial-scale=1.0">
    <title>Document</title>
    <style>
        #cEvent {
            width: 200px;
            height: 100px;
            line-height: 100px;
            text-align: center;
            font-size: 1.2em;
            background-color: #f00;
            color: #fff;
            font-weight: bolder;
        }
    </style>
</head>
<body>
    <div id="cEvent" onclick="headerClick()">클릭이벤트</div>
</body>
<script>
    function headerClick(){
        alert('클릭이벤트');
    }
</script>
</html>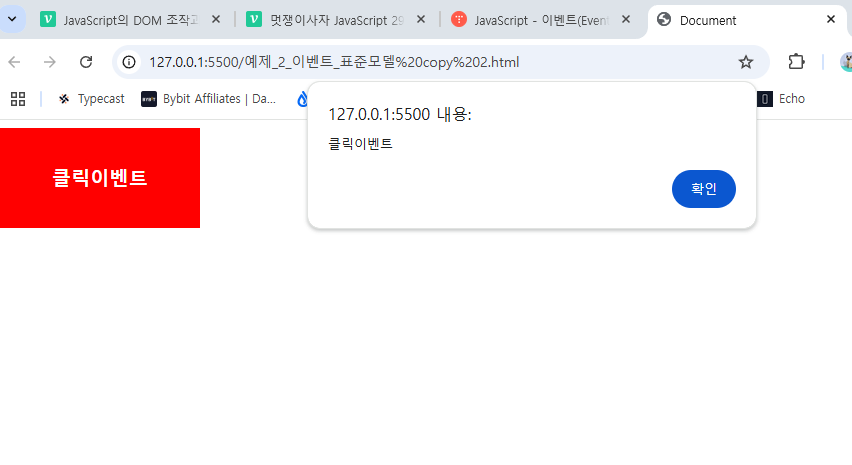
이벤트 추가
객체 이벤트 추가하려면 addEventListner() 메소드를 사용
element.addEventListner(type,eventListner);addEventListener()는 2개의 파라미터를 입력받습니다.
- type : 이벤트 타입
- eventListener : 이벤트가 발생했을 때 실행할 함수
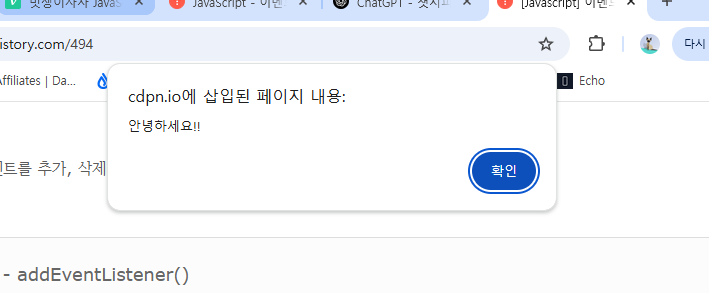
  const my_btn = document.getElementById('my_button');

my_btn.addEventListener('click', () => {
  alert("안녕하세요!!");
});
아래와 같이 안녕하세요!! 라는 alert를 뛰운다.
이벤트 제거
element.removeEventListener(type, eventListener);이 메소드는 아래의 2가지를 파라미터로 입력 받습니다.
- type : 삭제할 이벤트 타입
- eventListener : 삭제할 이벤트 리스터 (addEventListener()의 2번째 파라미터로 전달된 함수)
removeEventListener() 메소드를 사용해서 이벤트를 삭제하기 위해서는
addEventListener() 메소드를 사용하여 이벤트를 등록할 때,
2번째 파라미터로 전달하는 eventListener를 익명함수로 전달하면 안됩니다.
removeEventListener() 메소드를 호출할 때 2번째 파라미터로 넣어주어야 하기 때문입니다.
🎈이벤트 리스너 메서드
이벤트리스너란 이벤트가 발생했을때 그 처리를 담당하는 함수를 가리키며, 이벤트 핸들러 라고도 한다. 지정한 타입의 특정 요소에서 발생하면 웹브라우저는 그 요소에 등록된 이벤트 리스너를 실행시킨다.
마우스이벤트 종류
- click: 클릭할 때 발생
- mouseover: 마우스를 올릴 때 발생
- mouseout: 마우스를 벗어날 때 발생
- mousemove: 마우스를 움직일 때 발생
- mousedown: 마우스를 누를 때 발생
- mouseup: 마우스를 뗄 때 발생
- dblclick: 더블 클릭할 때 발생
window.onload = function () {
    var me = document.getElementById('mouseEvent');

    me.addEventListener('click', function () {
        console.log('click event!!');
    });

    me.addEventListener('mouseover', function () {
        console.log('mouseover event!!');
    });

    me.addEventListener('mouseout', function () {
        console.log('mouseout event!!');
    });

    me.addEventListener('mousemove', function () {
        console.log('mousemove event!!');
    });
};
Form 이벤트
업다운
회고🤣
아래 두개체의 차이점에 대해서 설명하시오.
function GradeExample(name, kor, eng, math) {
	this.name = name;
	this.kor = kor;
	this.eng = eng;
	this.math = math;
	this.total = function () {
		return this.kor + this.eng + this.math;
	};
	this.avg = function () {
		return this.total() / 3;
	};
}

function GradeProto(name, kor, eng, math) {
	this.name = name;
	this.kor = kor;
    this.eng = eng;
  	this.math = math;
}

//프로토타입 객체에 메서드 상속
GradeProto.prototype.total = function () {
	return this.kor + this.eng + this.math;
};

GradeProto.prototype.avg = function () {
	return this.total() / 3;
};

GradeProto.prototype.count = 1;
일반적인 객체는 각 객체마다 자신의 메서드를 가지고 있으나, 프로토타입 메서드의 경우 각 객체가 하나의 공유 프로토타입 메서드와 프로퍼티를 참조한다.
아래가 돌아가도록 Grade 생성자 함수를 만드시오
let hong = new Grade('홍길동', 100, 90, 80);
document.write(hong.total() + '<br>');
document.write(hong.avg() + '<br>');
function Grade(name, kor, eng, math){
	this.name = name;
	this.kor = kor;
  	this.eng = eng;
  	this.math = math;

  	this.total = function(){
    	return this.kor + this.eng + this.math;
    }
  	this.avg = function() {
        return this.total() / 3;
    };
아래를 구현하시오
<!DOCTYPE html>
<html lang="en">
<head>
<meta charset="UTF-8">
<meta name="viewport" content="width=device-width, initial-scale=1.0">
<title>Document</title>
</head>
<body>
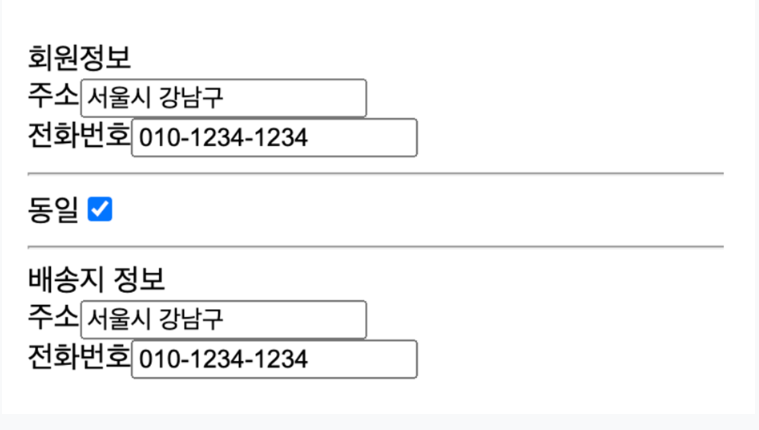
회원정보<br>
주소<input type="text" name="address1" id="address1" value="서울시 강남구"><br>
전화번호<input type="text" name="phone1" id="phone1" value="010-1234-1234"><br>
<hr>
동일<input type="checkbox" name="chk" onclick="check(this)">
<hr>
배송지 정보<br>
주소<input type="text" name="address2" id="address2" value=""><br>
전화번호<input type="text" name="phone2" id="phone2" value=""><br>
</body>
<script>
// window.onload 함수 내부에 있어서 check가 정의가 되어있지 않다고 인식한다.
// 내부함수를 호출할 수 없다.
let add1 = document.getElementById("address1");
let phone1 = document.getElementById("phone1");
function check(checkbox){
let add2 = document.getElementById("address2");
let phone2 = document.getElementById("phone2");
console.log(checkbox);
add2.value = add1.value;
phone2.value = phone1.value;
}
</script>
</html>아래를 구현하시오
<!DOCTYPE html>
<html lang="en">
<head>
<meta charset="UTF-8">
<meta name="viewport" content="width=device-width, initial-scale=1.0">
<title>Document</title>
</head>
<body>
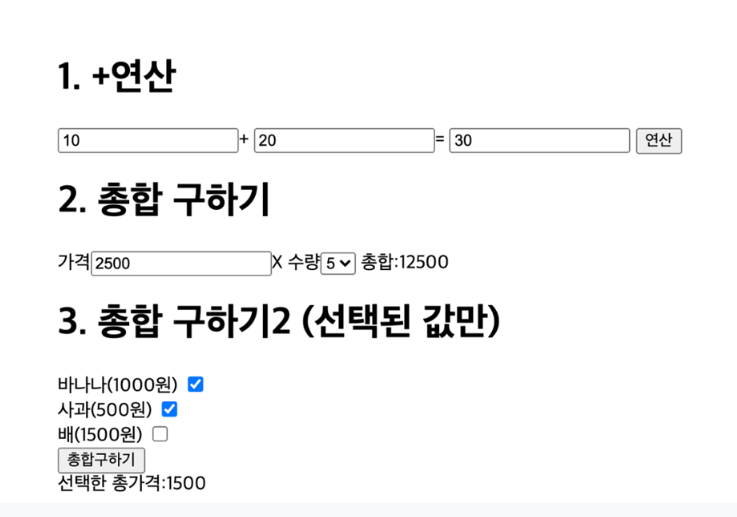
<h1>1. +연산</h1>
<input type="text" name="v1" id="v1" value="10">+
<input type="text" name="v2" id="v2" value="20">=
<input type="text" name="result" id="result" value="">
<button onclick="sum()">연산</button><br>
</body>
<script>
//+연산, 총합구하기, 선택값 총합 구하기 구현
let v1 = document.getElementById("v1");
let v2 = document.getElementById("v2");
function sum(){
document.getElementById("result").value = parseInt(v1.value) + parseInt(v2.value);
}
</script>
</html>