🍀 객체 기본 개념 및 심화, 그리고 부트스트랩 적용 정리
JavaScript의 객체 개념(기본 및 심화), 생성자 함수, 클래스, 프로토 타입, 그리고 부트스트랩을 활용한 UI 구성
📌1. 객체(Object) 기본 개념
JavaScript 객체란 Key: value 형태로 데이터를 저장하는 자료구조이며, 속성 및 메서드를 가질 수 있다.
JavaScript는 객체기반의 스크립트 언어이며 JavaScript를 이루고 있는 거의 모든 것은 객체이다. 객체란 여러 속성을 하나의 변수에 저장할 수 있도록 해주는 데이터 타입이다.
// 함수와 객체의 타입 확인
let fun = function () {};
console.log(typeof fun); // function


let obj = {};
console.log(typeof obj); // object

// 객체 생성
var objData = {
    num: 123,
    str: 'abc',
    boo: true,
    fun: function () {},
    obj: {},
    arr: [1, 2, 3],
    ude: undefined,
};

console.log(typeof objData);
console.log(objData.num); // 123
console.log(objData.str); // 'abc'
console.log(objData.boo); // true
console.log(objData.fun); // function
console.log(objData.obj); // object
console.log(objData.arr); // [1,2,3]
console.log(objData.ude); // undefined
✅ 핵심 개념
객체는 { key: value } 형태로 선언된다.
typeof를 사용하여 객체와 함수의 타입을 확인할 수 있다.
객체 내부에는 숫자, 문자열, 불리언, 함수, 객체, 배열 등의 다양한 타입을 저장할 수 있다.
📌2.객체 속성 추가 및 삭제
객체의 속성은 동적으로 추가 및 삭제가 가능하다
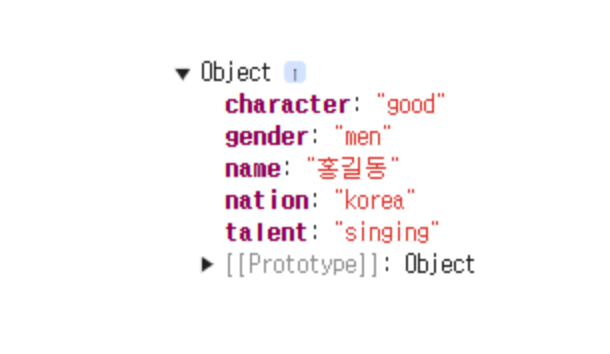
let objName = {
    name: '홍길동',
    nation: 'Korea',
    gender: 'men',
    character: 'good',
};

// 속성 추가
objName.talent = 'singing';
console.log(objName);
// 속성 값 변경
objName.talent = 'fencing';
console.log(objName);
// 속성 삭제
delete objName.talent;
console.log(objName);
📌3. in연산자와 with 키워드
객체 내부에 특정 속성이 존재하는지 확인하는 in 연산자와 with 키워드 활용
console.log('name' in onjName); // true
console.log('age' in objName); // false

//with 키워드 활용 (객체 이름 생략 가능)
with (objName) {
  	console.log(name);
  	console.log(nation);
  	console.log(gender);
  	console.log(character);
}
🍀핵심 개념
속성명 in 객체명→ 객체 내에 속성이 존재하는 확인 (true또는false반환).with(객체명) {}→ 객체 내부 속성을 사용할 때 객체명을 생략할 수 있음.
📌4.객체 심화: 생성자 함수와 클래스 활용
1) 생성자 함수(Constructor Function)
function Airplane(name, color, speed) {
  	this.name = name;
  	this.color = color;
  	this.speed= speed;
 	 this.fly = function () {
        return this.speed + 'km/h로 비행!';
    };
}

let boeing747 = new Airplane('boeing747', 'white', 1000);
console.log(boeing747.fly()); // 1000km/h로 비행!
✅ 핵심 개념
- 생성자 함수는 대문자로 시작하는 것이 관례 (
Airplane). this키워드를 사용하여 객체의 속성을 설정할 수 있다.new키워드를 사용하여 생성자 함수를 호출하면 새로운 객체가 생성된다.
2) ES6 클래스 (Class)
class Car {
  	constructor(name, color, speed) {
      	this.name = name;
      	this.color = color;
      	this.speed = speed;
    }

 	run() {
      	return this.speed + 'km/h';
    }
}
let sonata = new Car('sonata', 'white', 100);
console.log(sonata.run()); // "100km/h"
✅ 핵심 개념
- class 키워드를 사용하여 객체를 정의할 수 있다.
- 생성자(constructor)를 통해 속성을 초기화할 수 있다.
- 메서드는 클래스 내부에 정의되며, 프로토타입으로 등록된다.
3)프로토타입(Prototype)
function GradeProto(name, kor, eng, math) {
    this.name = name;
    this.kor = kor;
    this.eng = eng;
    this.math = math;
}

// 프로토타입으로 메서드 추가
GradeProto.prototype.total = function () {
    return this.kor + this.eng + this.math;
};

GradeProto.prototype.avg = function () {
    return this.total() / 3;
};

let younghee = new GradeProto('영희', 90, 90, 80);
console.log(younghee.avg()); // 86.67
✅ 핵심 개념
- 생성자 함수 내부에 메서드를 정의하면 각 객체마다 메서드가 개별적으로 생성되어 비효율적.
- prototype을 사용하면 메서드를 공유하여 메모리 사용을 절약할 수 있다.
📌5.부트스트랩 적용(Bootstrap 사용법)
Bootstrap을 사용하여 반응형 웹페이지를 쉽게 디자인 가능
<div class="container p-0 border border-1" style="width: 54%">
    <div class="card border-0">
        <div class="card-body" style="background-image: url('bg.png'); background-size: cover;">
            <h1 class="card-title p-5 fs-1 fw-bold" style="color: yellow">요안도라</h1>
        </div>
    </div>

    <div class="row ms-0 me-0 align-baseline" style="height: 50px; background-color: green;">
        <div class="col text-center">이용안내</div>
        <div class="col text-center">객실소개</div>
        <div class="col text-center">예약방법</div>
        <div class="col text-center">예약하기</div>
    </div>
</div>
✅ 핵심 개념
- container: 중앙 정렬을 위한 기본 Bootstrap 클래스.
- row, col: Bootstrap의 그리드 시스템을 활용하여 레이아웃 배치 가능.
- card: Bootstrap의 카드 디자인을 적용.
- fs-1, fw-bold: 폰트 크기 및 굵기 설정.
📌 전체 수업 요약
- 객체 기본 개념 ({ key: value } 형태, 속성 추가/삭제, in 연산자)
- 객체 심화 (생성자 함수, 클래스, 프로토타입)
- 부트스트랩 활용 (container, row, col 등을 사용하여 UI 구성)

파이썬, SQL 개발