OpenGL로 개발을 진행하다 보면 순수하게 코드에 vertex 배열을 타이핑해서 모델을 그리는 방식에는 금방 한계를 느끼게 된다.
그래서 외부 3d 툴인 Blender에서 모델을 만들고 obj 파일로 내보낸 뒤, 이를 C++ 코드로 가져오는 방법을 찾아보았다. 그 과정에서 tinyobjloader라는 라이브러리를 알게 되었다.
그래서 이번 게시물에서는 tinyobjloader를 사용해 3d obj 모델을 파싱하고 OpenGL에서 활용하는 방법을 알아보겠다.
라이브러리
tinyobjloader 다운로드 주소
가져와서 그대로 붙여넣기 하면 된다.
#define TINYOBJLOADER_IMPLEMENTATION
#include <header/tiny_obj_loader.h>
코드
#define TINYOBJLOADER_IMPLEMENTATION
#include <header/tiny_obj_loader.h>

//obj 변환기
bool Loader::loadModel(const std::string& path, std::vector<float>& outVertices, int& outVertexCount)
{
    tinyobj::ObjReaderConfig config;
    config.triangulate = true;

    tinyobj::ObjReader reader;
    if (!reader.ParseFromFile(path, config))
    {
        if (!reader.Error().empty())
            std::cout << "Failed to load model: " << path << " — " << reader.Error() << std::endl;
        else
            std::cout << "Failed to load model: " << path << std::endl;
        return false;
    }
    if (!reader.Warning().empty())
        std::cout << "OBJ warning: " << reader.Warning() << std::endl;

    const tinyobj::attrib_t& attrib = reader.GetAttrib();
    const auto& shapes = reader.GetShapes();
    const auto& materials = reader.GetMaterials();

    outVertices.clear();
    outVertexCount = 0;

    for (const auto& shape : shapes)
    {
        const auto& mesh = shape.mesh;
        size_t indexOffset = 0;

        // 면 단위로 순회 (각 면 = 3 vertex, triangulate=true)
        for (size_t f = 0; f < mesh.num_face_vertices.size(); ++f)
        {
            int matId = (f < mesh.material_ids.size()) ? mesh.material_ids[f] : -1;

            // 머티리얼의 diffuse 색상 (없으면 흰색)
            float r = 1.0f, g = 1.0f, b = 1.0f;
            if (matId >= 0 && matId < (int)materials.size())
            {
                r = materials[matId].diffuse[0];
                g = materials[matId].diffuse[1];
                b = materials[matId].diffuse[2];
            }

            for (size_t v = 0; v < 3; ++v)
            {
                const tinyobj::index_t& idx = mesh.indices[indexOffset + v];

                outVertices.push_back(attrib.vertices[3 * idx.vertex_index + 0]);
                outVertices.push_back(attrib.vertices[3 * idx.vertex_index + 1]);
                outVertices.push_back(attrib.vertices[3 * idx.vertex_index + 2]);

                if (idx.normal_index >= 0)
                {
                    outVertices.push_back(attrib.normals[3 * idx.normal_index + 0]);
                    outVertices.push_back(attrib.normals[3 * idx.normal_index + 1]);
                    outVertices.push_back(attrib.normals[3 * idx.normal_index + 2]);
                }
                else
                {
                    outVertices.push_back(0.0f);
                    outVertices.push_back(1.0f);
                    outVertices.push_back(0.0f);
                }

                outVertices.push_back(r);
                outVertices.push_back(g);
                outVertices.push_back(b);

                outVertexCount++;
            }
            indexOffset += 3;
        }
    }

    return outVertexCount > 0;
}
하나씩 뜯어보자.
config
설정에 관련된 클래스다. 3d 그래픽스의 기본 렌더링 단위는 삼각형 이지만 외부에서 만든 obj 파일에는 사각형이나 다각형이 포하될 수 있다. 대체로 삼각형 obj이니 config.triangulate로 설정하자.
tinyobj::ObjReaderConfig config;
config.triangulate = true;
read
읽는 함수다.
정확히는 reader.ParseFromFile(path, config) 함수가 메인 함수인데
C++이나 C에서 배우는 reader 구조랑 매우 유사하다.
tinyobj::ObjReader reader;
if (!reader.ParseFromFile(path, config))
{
    if (!reader.Error().empty())
        std::cout << "Failed to load model: " << path << " — " << reader.Error() << std::endl;
    else
        std::cout << "Failed to load model: " << path << std::endl;
    return false;
}
if (!reader.Warning().empty())
    std::cout << "OBJ warning: " << reader.Warning() << std::endl;
변환
읽은 정보를 vertex, fragment로 변환시키는 작업이다.
const tinyobj::attrib_t& attrib = reader.GetAttrib();
const auto& shapes = reader.GetShapes();
const auto& materials = reader.GetMaterials();

outVertices.clear();
outVertexCount = 0;

for (const auto& shape : shapes)
{
    const auto& mesh = shape.mesh;
    size_t indexOffset = 0;

    // 면 단위로 순회 (각 면 = 3 vertex, triangulate=true)
    for (size_t f = 0; f < mesh.num_face_vertices.size(); ++f)
    {
        int matId = (f < mesh.material_ids.size()) ? mesh.material_ids[f] : -1;

        // 머티리얼의 diffuse 색상 (없으면 흰색)
        float r = 1.0f, g = 1.0f, b = 1.0f;
        if (matId >= 0 && matId < (int)materials.size())
        {
            r = materials[matId].diffuse[0];
            g = materials[matId].diffuse[1];
            b = materials[matId].diffuse[2];
        }

        for (size_t v = 0; v < 3; ++v)
        {
            const tinyobj::index_t& idx = mesh.indices[indexOffset + v];

            outVertices.push_back(attrib.vertices[3 * idx.vertex_index + 0]);
            outVertices.push_back(attrib.vertices[3 * idx.vertex_index + 1]);
            outVertices.push_back(attrib.vertices[3 * idx.vertex_index + 2]);

            if (idx.normal_index >= 0)
            {
                outVertices.push_back(attrib.normals[3 * idx.normal_index + 0]);
                outVertices.push_back(attrib.normals[3 * idx.normal_index + 1]);
                outVertices.push_back(attrib.normals[3 * idx.normal_index + 2]);
            }
            else
            {
                outVertices.push_back(0.0f);
                outVertices.push_back(1.0f);
                outVertices.push_back(0.0f);
            }

            outVertices.push_back(r);
            outVertices.push_back(g);
            outVertices.push_back(b);

            outVertexCount++;
        }
        indexOffset += 3;
    }
}

return outVertexCount > 0;
속성
const tinyobj::attrib_t& attrib = reader.GetAttrib(); // 정점, 법선, 텍스쳐
const auto& shapes = reader.GetShapes(); //형태 : 어떻게 연결할 것인지
const auto& materials = reader.GetMaterials(); //재질 : 색상, 광택, 텍스쳐 맵
const tinyobj::attrib_t& attrib = reader.GetAttrib();
이 함수는 정점좌표, 법선 좌표, 텍스쳐 좌표를 1차원 배열로 나열된 정보를 가져온다.
const auto& shapes = reader.GetShapes();는 mesh의 index 버퍼를 활용하기 위해 가져왔다.
정점 대입
정점과 색, normal 벡터를 가져와서 outVertices로 가져온다.
outVertices.clear();
outVertexCount = 0;

for (const auto& shape : shapes)
{
    const auto& mesh = shape.mesh; //tinyobj::mesh_t
    size_t indexOffset = 0;

    // 면 단위로 순회 (각 면 = 3 vertex, triangulate=true)
    // 대체로 mesh.num_face_vertices.size() 갯수는 12988 정도 됨
    for (size_t f = 0; f < mesh.num_face_vertices.size(); ++f)
    {
        int matId = (f < mesh.material_ids.size()) ? mesh.material_ids[f] : -1;

        // 머티리얼의 diffuse 색상 (default : 흰색)
        float r = 1.0f, g = 1.0f, b = 1.0f;

        //rgb 가져오는 함수
        if (matId >= 0 && matId < (int)materials.size())
        {
            r = materials[matId].diffuse[0];
            g = materials[matId].diffuse[1];
            b = materials[matId].diffuse[2];
        }


        //vertex 3
        for (size_t v = 0; v < 3; ++v)
        {
            const tinyobj::index_t& idx = mesh.indices[indexOffset + v]; //인덱스 버퍼

            outVertices.push_back(attrib.vertices[3 * idx.vertex_index + 0]); //x
            outVertices.push_back(attrib.vertices[3 * idx.vertex_index + 1]); //y
            outVertices.push_back(attrib.vertices[3 * idx.vertex_index + 2]); //z

            //normal 값이 있다면 normal
            if (idx.normal_index >= 0)
            {
                outVertices.push_back(attrib.normals[3 * idx.normal_index + 0]);
                outVertices.push_back(attrib.normals[3 * idx.normal_index + 1]);
                outVertices.push_back(attrib.normals[3 * idx.normal_index + 2]);
            }
            else //default : normal 기본 위쪽 방향
            {
                outVertices.push_back(0.0f);
                outVertices.push_back(1.0f);
                outVertices.push_back(0.0f);
            }

            //색 주입
            outVertices.push_back(r);
            outVertices.push_back(g);
            outVertices.push_back(b);

            outVertexCount++;
        }
        indexOffset += 3;
    }
}

return outVertexCount > 0;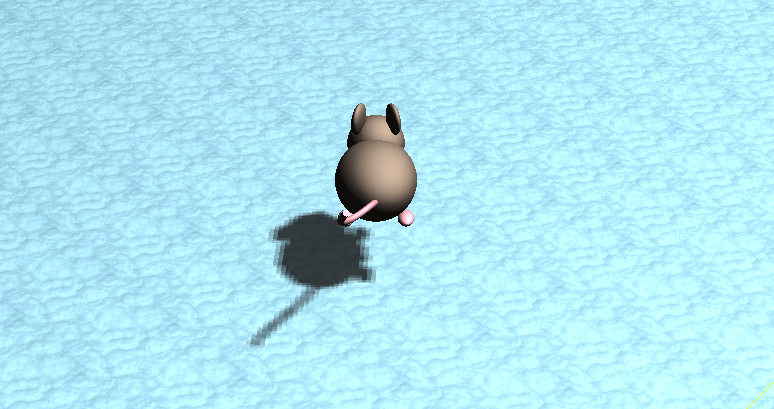
잘 된다. scale 값을 잘못 준 건지 초전도체처럼 붕 떠있지만 아무튼 잘 된다.