
이번 포스팅에서는 로컬주소/articles/new 에서 save 버튼을 누르면
작성한 게시글이 데이터베이스에 저장되도록 해보자.
0. 시작하기 앞서
이번 포스팅에서는 MongoDB와 mongoose 를 통해 DB와 서버, 클라이언트를 연결하는 작업을 한다.
만약 컴퓨터에 MongoDB가 설치되어 있지 않다면,
영상을 보고 컴퓨터에 설치해놓도록 하자.
1. Moongose 모듈 불러오기
// server.js
const mongoose = require('mongoose');

mongoose.connect('mongodb://localhost/blog', {
    useNewUrlParser: true,
    useUnifiedTopology: true
})
mongoose 모듈을 불러와서 로컬호스트의 주소와 연결한다.
이 때 주의할 점은,connect()안에 인자로 들어간 DB의 주소가 이전에 사용한 적이 있는 주소라면 키-값 데이터가 겹쳐서 에러가 날 수 있다.
데이터베이스의 주소는 프로젝트마다 새로운 주소를 쓰도록 하자.
2. Model 만들기
우리가 작성한 게시글을 저장하기 위한 모델을 만든다.
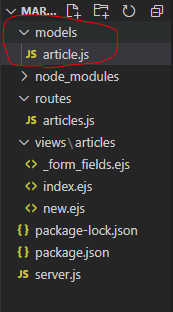
// models/articles.js

const mongoose = require('mongoose');

const articleSchema = new mongoose.Schema({
    title: {
        required: true,
        type : String
    },
    description : {
        type : String
    },
    markdown : {
        required: true,
        type : String
    },
    CreatedAt : {
        type: Date,
        default : Date.now
    }
})
module.exports = mongoose.model("Article", articleSchema);
mongoose 모듈을 불러와서 게시글 저장을 위한 모델링을 해준다.
3. Model 라우팅
// routes/article.js
const Article = require('./../models/article');

router.post('/', (req, res) => {
    const article = new Article({
        // 여기에 위 2번에서 모델링한 데이터가 들어갈 예정이다.
    })
})
4. 서버에 폼에서 작성한 데이터 넘겨주기
// server.js
app.use(express.urlencoded({extended:false}))
app.use('/articles', articleRouter);
이 두 코드의 순서가 중요하다.
5번에서 아티클의 id를 주소를 활용하기 때문에,
url을 먼저 인코딩 하고 상위 주소인 '/articles` 을 라우터 설정해줘야
post 요청의 promise 가 처리될 수 있기 때문이다.
5. id를 주소로 갖는 아티클 생성하기
// routes/article.js

router.get('/new', (req, res) => {
    res.render(`articles/new`);
});


router.get('/:id', (req, res) => {

})

router.post('/', async (req, res) => {
    let article = new Article({
        title : req.body.title,
        description : req.body.description,
        markdown : req.body.markdown
    });

    try {
       article = await article.save()
       res.redirect(`/articles/${article.id}`);
    } catch(e) {
        res.render(`articles/new`, {article : article});
    }
})
폼에서 작성한 데이터들이 모델의 title, description, markdown에 각자 비동기로 저장되고, 성공한 결과는
로컬호스트/articles/article의 id로 보내진다.
실패하게되면로컬주소/articles/new페이지로 리다이렉션된다.
6. 저장 실패에 따른 리다이렉션 처리
save 버튼을 눌렀을 때 게시글이 저장되지 않으면 다시 로컬주소/articles/new 로
리다이렉션 되도록 설정했는데, 지금껏 작성한 제목이나 글이 사라지면
사용자 입장에서는 그 긴 글을 다시 다 써야되는 불편함이 있다.
이를 처리하기 위해 이전에 작성했던 _form_fields.ejs 과 routes/articles.js 내부를 다음과 같이 수정하자.
<!-- _form_fields.ejs -->

<div class="form-group">
    <label for="title">Title</label>
    <input required value="<%= article.title %>" type="text" name="title" id = "title" class = "form-control">
</div>

<div class="form-group">
    <label for="description">Description</label>
    <textarea name="description" id ="description" class ="form-control"><%= article.description %></textarea>
</div>

<div class="form-group">
    <label for="markdown">Markdown</label>
    <textarea required name="markdown" id ="markdown" class ="form-control"><%= article.markdown %></textarea>
</div>

<a href = "/" class="btn btn-secondary">Cancel</a>
<button type = "submit" class = "btn btn-primary">Save</button>
이전에 작성한 제목이나 내용이 없으면 `<=article.속성 %> 부분이 null 일 것이고, 작성은 했으나 저장에 실패하면 이전에 작성한 내용이 그대로 보존된다.
// routes/articles.js

router.get('/new', (req, res) => {
    res.render(`articles/new`, { article: new Article() });
});
models에서 만들어준 기본Article을 만들어둠으로써,
메인화면에서 새 글을 쓸 때와 기존에 작성하던 글의 저장에 실패했을 때의 렌더링을
동일한 형식으로 맞춰준다.
7. /articles/:id 라우팅 설정
save 버튼을 누르면 articles/:id 에 연결되도록 기본 설정은 끝났다.
이제 라우팅 설정을 해보자.
// routes/articles.js

router.get('/:id', async (req, res) => {
    const article = await Article.findById(req.params.id);
    if(article == null) res.redirect('/');
    res.render('articles/show', {article: article});
});
로컬주소/articles/아이디 명으로 연결되는 라우팅을 설정하는데,
만약 해당 id 를 갖는 article이 존재하지 않으면 메인화면으로 리다이렉트한다.
그렇지 않으면 article 객체를 갖는show.ejs파일을 렌더링한다.
다음 포스팅에서는 저장한 게시글을 화면에 띄워보자.
