[개발지식] Web Application의 GateKeeper #12 - 권한관리 및 인가 과정에 대한 분석(Authorization/권한부여 및 관리를 중심으로)
개발지식
1. 개요
지금까지 11회에 걸쳐 Spring Security의 아키텍칭, 구조, 사상 등을 인증(authentication)을 중심으로 분석해보았다.
Spring Security의 꽃은 이러한 인증과정 뿐만 아니라, 인가과정까지 볼 수 있는데, 인가과정까지 이해하고 있어야 Spring Security 전반에 대해 이해하고 있다고 자신있게 말할 수 있을 것이다.
또한, Spring Security의 버전이 진화하면서 인증과정은 거의 변화는 없지만, 인가의 경우 상당히 많은 변화가 있는데, 이번 6.x ver에서는 어떤 부분이 추가되고 변경이 되었는지, deprecated 되었는지 알아보는 단계이기도 할 것이다.
이제부터 Spring Security의 두가지 본질 중 나머지 하나인 인가과정에 대해 알아보고 분석해보고자 한다.
2. 인가
Authorization, 그가 누구인지 확인을 했다면 어떠한 "권한"을 부여해야 하는지 인증 및 인가를 해주는 단계이다.
이러한 인가를 부여하고 정책을 설정하는 방법은 크게 두가지, 요청기반 및 메소드기반 권한 부여가 존재하며, 이러한 권한 부여를 통해 자원접근 시
참고로 이러한 인가를 진행하는 HttpSecurity 인스턴스를 통해 구성하며, 지금까지 계속 봐왔던 http.authorizeReqeusts의 일환이다.
2-1. 요청기반 권한부여(HttpSecurity.authorizeHttpRequest)
말 그대로 요청 엔드포인트에 권한을 부여해주는 것이며, authorizeHttpRequest을 통해 엔드포인트와 필요 권한을 매핑시켜줄 수 있다.
http.authorizeHttpRequests(auth -> auth
		.anyRequest().authenticated()
        );

http.build();
지금까지 계속 봐왔던 설정인데, 모든 엔드포인트는 authenticated된 인증객체 및 보안컨텍스트가 무조건 있어야 한다는 의미이다.
위 과정을 통해 적용된 권한설정 및 엔드포인트는 authorizationFilter에 의해 인가프로세스를 진행한다.
2-1-1. requestMatchers()
엔드포인트, http method, 요청 파라미터 등을 기반으로 특정 요청 및 엔드포인트에 대해 보안설정을 적용할 수 있는 API이다.
csrf 검증 경로를 지정해주는 것도 가능하며, 특정 엔드포인트에 대해서는 인증을 요구하지 않을 수도 있다.
결국은 애플리케이션 보안 요구사항에 맞춰 유연하게, 엔드포인트 별로 세부적으로 분리 운용이 가능한 것이 바로 requestMathcers()이다.
가장 많이 봐왔던 형태로는
requestMatchers("/admin).hasRole("ADMIN");일것이며, 말 그대로 해당 엔드포인트(패턴)에는 admin이라는 권한이 있어야 자원접근이 가능하다는 것을 의미한다.
이처럼 String 형태의 엔드포인트도 가능하며, RequestMatch 형태의 구현체를 사용하거나 HttpMethod 및 엔드포인트 두가지를 설정하여 보안정책을 구성할 수 있다.
2-1-2. Spring Security의 요청기반 권한 설정이 가능한 API요소들
requestMatchers는 빌더패턴을 통해 다양하게 구성, 적용할 수 있다.
http.authorizeHttpRequests(auth -> auth
	.requestMatchers("/test1").hasAuthority("USER")
    .requestMatchers("/test2/**").hasAuthority("USER")
    .requestMatchers(HttpMethod.GET, "/**").hasAuthority("GET")
    .requestMatchers(HttpMethod.POST).hasAuthority("POST")
    .requestMatchers(RegexRequestMatcher.regexMatcher("/test3/[A-Za-z0-9]").hasAuthority("USER")
    .requestMatchers(new AntPathRequestMatcher("/test3/**").hasAuthority("MAN")
    .requestMatchers("/test4/**").hasAnyAuthority("ADMIN", "MAN")
    .anyRequest().authenticated()
    );
엔드포인트(String)에 대한 필요 권한 설정
.requestMatchers("/test1").hasAuthority("USER")
    .requestMatchers("/test2/**").hasAuthority("USER")
이와 같이 엔드포인트 혹은 ant패턴을 통해 하위 모든 엔드포인트에 대해 권한설정을 해줄 수 있다.
HttpMethod에 대한 필요 권한 설정
.requestMatchers(HttpMethod.GET, "/**").hasAuthority("GET")
    .requestMatchers(HttpMethod.POST).hasAuthority("POST")
이와 같이 Http Method 및 엔드포인트에 대해 권한설정을 해줄 수 있다.
RequestMatcher 구현체를 통한 필요 권한 설정
.requestMatchers(RegexRequestMatcher.regexMatcher("/test3/[A-Za-z0-9]").hasAuthority("USER")
    .requestMatchers(new AntPathRequestMatcher("/test3/**").hasAuthority("MAN")
이와 같이 Matcher 구현체를 별도 적용하여 필요 권한을 구성해줄 수 있다.
엔드포인트 및 권한요건(조건) 설정
.requestMatchers("/test4/**").hasAnyAuthority("ADMIN", "MAN")이와 같이 특정 엔드포인트에 대한 권한(둘다 혹은 둘 중 하나)을 설정해줄 수 있다.
모든 요청에 대한 인증 필요
.anyRequest().authenticated()모든 요청에 대해 인증이 필요한 정책을 구성해줄 수 있다.
이때 중요한 유의사항은 First Match Wins (첫 매칭 우선 규칙), 하나의 규칙이 만족된다면 하위 규칙을 더이상 매칭하지 않는다는 특징이다.
http.authorizeHttpRequests(auth -> auth
    .requestMatchers("/admin/**").hasRole("ADMIN")
    .requestMatchers("/admin/test").permitAll()
    .requestMatchers("/**").authenticated()
);
예를 들어 요청 URL이 /admin/test라고 하자.
Spring Security의 매칭 흐름은 다음과 같다.
- /admin/**의 ant 패턴에 의해 첫번째 사항이 일치한다.
그러면 여기서 hasRole("ADMIN") 규칙이 확정됨에 따라, 아래에 어떤 규칙이 있든 더 이상 보지 않는다.
- /admin/test → 아래에 permitAll이 있어도 도달하지 않는다.
따라서, 결과는 ADMIN 권한 없으면 접근 불가로 결정한다.
따라서 요청 기반 권한 설정 시, 좁은(하위) 요청에서 넓은(상위) 요청으로 넓혀가는 형태로 권한 설정을 해주어야 한다.
이 외에도, hasAuthority(ROLE_USER와 같이 prefix 필수)도 있고, authenticated, fullyauthenticated, anonymous, rememberMe, permitAll, denyAll, access 등 여러가지 구성 api가 존재하여 상황에 맞게 활용하면 된다.
| 메서드 | 의미 | 조건 |
|---|---|---|
hasAuthority("A") | 권한 A 하나만 검사 | AND X, 단일 권한 |
hasAnyAuthority("A", "B") | A 또는 B | OR 조건 |
hasRole("ADMIN") | ROLE_ADMIN 검사 | 단일 권한 |
hasAnyRole("ADMIN", "MANAGER") | ROLE_ADMIN 또는 ROLE_MANAGER | OR 조건 |
2-1-3. AuthorizationManager - WebExpressionAuthorizationManager
위 과정을 통해 설정한 요청기반 권한부여 및 이에 대한 정책은 AuthorizationManager에 의해 구성이 된다.
이에 대한 구현체 중에, Spring Security는 표현식을 이용하여 customized한 권한규칙을 생성할 수 있도록, WebExpressionAuthorizationManager구현체를 통한 권한부여 역시 가능하다.
requestMatchers("/resource/{name}").access(new WebExpressionAuthorizationManager("#name==authentication.name")이와 같이 요청으로부터 http 매개변수를 추출하여 authorizationManager에게 인가절차를 위임할 수도 있고,
requestMatchers("/resource/db").access(new WebExpressionAuthorizationManager("hasAuthority('DB') or hasRole('ROLE_ADMIN')"))이와 같이 requestMatchers().access(new AuthorizationManager) 형태로 요청기반 권한부여가 가능하다.
이는
requestMatchers("/admin/db").access(anyOf(hasAuthority("DB").hasRole("ADMIN"))와 같다. 즉, db 자원에 접근하는 요청에 대해서는 ROLE_DB 및 ROLE_ADMIN 둘 중 하나의 권한이 존재해야 한다.
이외에도, 빈객체를 이용하여 customized한 표현식을 주입하여 권한규칙을 설정해줄 수도 있다.
DefaultHttpSecurityExpressionHandler expressionHandler = new DefaultHttpSecurityExpressionHanlder();
expresiionHandler.setApplicationContext(context);

WebExpressionAuthorizationManager expressionManager = new WebExpressionAuthorization("@customWebSecurity.check(authentication,request)");
expressionManager.setExpressionHandler(expressionHandler);

http.authorizeHttpRequests(auth -> auth
	.requestMatchers("/resource/**").access(expressionManager));

return http.build();
이 부분에서
WebExpressionAuthorizationManager expressionManager = new WebExpressionAuthorization("@customWebSecurity.check(authentication,request)");
expressionManager.setExpressionHandler(expressionHandler);
위와 같이 WebExpressionAuthorizationManager에 @customWebSecurity라는 빈 객체를 주입하여 권한설정을 해주고 있다.
이때 빈객체는 아래 컴포넌트 스캔을 통해 등록되며,
@Component("customWebSecurity")
public class CustomWebSecurity{
	public boolean check(Authentication authentication, HttpServletReqeust reqeust){
    	return authentication.isAuthenticated();
    }
}
매개변수인 인증객체(authentication) 및 요청객체(request)를 전달하여, 사용자의 인증여부를 검사하는 절차를 진행하게 된다.
참고. Spring Expression Language에 의한 expression(표현식) 평가 시점에서의 주입
WebExpressionAuthorizationManager는 http매개변수 이외, 인증객체와 같은 authentication은 내부적으로 spEL 평가객체(spring Expression Language Context)를 생성하여 해당 객체를 자동적으로 주입시켜준다.
public class WebSecurityExpressionRoot extends SecurityExpressionRoot
        implements WebSecurityExpressionOperations {

    public WebSecurityExpressionRoot(Authentication authentication, FilterInvocation fi) {
        super(authentication); // ← authentication 을 SecurityExpressionRoot로 전달
        this.request = fi.getHttpRequest();
    }
}
WebSecurityExpressionRoot가 위와 같이 인증객체를 주입하고, spEL에 의해 주입받은 인증객체를 인식할 수 있게 되는 것이다(context로 전달).
- Request 관련 변수
#name: URI 템플릿(예: /user/{name})의 path variable

request: HttpServletRequest

principal: 인증 principal- Security 관련 변수
authentication: 현재 SecurityContext에 저장된 Authentication 객체

hasRole(), hasAuthority() 등 메서드를 포함한 SecurityExpressionRoot
authentication 객체 말고도 위와 같은 구현체들을 주입하여 제공하므로 별도의 주입과정없이도 해당 객체는 인식 가능하다.
2-1-4. Customized RequestMatcher
인가규칙을 부여하는 AuthoirzationManager 뿐만 아니라, 요청을 정의해주는 RequestMatcher도 Customized할 수 있다.
즉, 엔드포인트 또한 RequestMatcher 인터페이스가 제공하는 matcher 및 matches를 통해 정책을 요구사항에 맞게, 유연하게 설정해줄 수 있는 것이다.
public class CustomizedRequestMatcher implements ReqeustMatcher{
	private final String urlPattern;

    public CustomReqeustMatcher(String urlPattern){
    	this.urlPattern = urlPattern;
    }

    @Override
    public boolean matches(HttpServletRequest request){
    	String requestUrl = request.getRequestUrl();
        return requestUrl.startsWith(urlPattern);
    }
}
위와 같이 RequestMatcher를 구현하여(implements), matches에 대한 customized 로직을 구성해줄 수 있으며, 이 부분이 참일때 해당 요청의 엔드포인트 규칙을 설정해줄 수 있다.
http.authorizaHttpRequest((auth -> auth
		.reqeustMatchers(new CustomizedRequestMatcher("/api/**)).hasAuthority("USER")
        .anyRequest().authenticated()
        );
이후 해당 엔드포인트에 대한 규칙과 함께, hasAuthority와 같은 인가규칙까지 설정해주어 세부적인 정책을 customized해줄 수 있다.
2-2. 특정요청기반 권한부여(HttpSecurity.securityMatcher())
일전의 HttpSecurity.authorizeHttpRequests 및 ReqeustMatcher들은 기본적으로 모든 요청에 대해 해당 정책부합여부를 검사한다.
하지만 securityMatcher를 적용할 경우 해당 패턴을 만족하는 요청에 대해서만 정책부합여부를 검사하게 되며, 중복하여 정의할 경우 마지막에 설정한 정책에 대해서만 검사한다.
http
	.securityMatcher("/api/**")
	.authorizeHttpRequests(auth -> auth.reqeustMatchers ..)
이와 같은 빌더패턴으로 설정이 가능하며, 이에 따라 모든 요청이 아닌 "/api/**"의 패턴을 가지는 요청에 대해서만 filterChainProxy/SecurityFilterChain/RequestMatcher/filter 들의 일련의 보안절차를 수행하게 된다.
2-2-1. SecurityMatchers를 통한 다중 패턴 설정
securityMatchers를 여러번 설정하여, 다중 패턴에 대한 보안규칙을 설정해줄 수 있다.
requestMatchers는 가장 최초로 부합하는 규칙에 대해서만 적용이 되었다면, securityMatchers는 다중 패턴 적용인 만큼 해당 규칙에 대해 모두 검사한다.
다중 패턴 설정 시,
http.securityMatchers((matchers) -> matchers.requestMatchers("/api/**", "/oauth/**"));이와 같이 여러 문자열로 설정해줄 수도 있고,
http.securityMatchers((matchers) -> matchers.requestMatchers("/api/**").requestMatchers("/ouath/**");이와 같이 빌더패턴을 다중 사용할 수도 있고,
http.securityMatchers((matchers) -> matchers.requestMatchers("/api/**")
	.securityMatchers((matchers) -> matchers.reqeustMatchers("/oauth/**"));
securityMatchers 자체를 다중 구성하여 사용할 수도 있겠다.
참고사항. 다중 filterChain 및 우선순위와 함께 securityMatchers 구성
바로 본론부터 들어가도록 하겠다.
securityMatchers를 다중 구성할 수 있는 것처럼, filterChain도 다중 구성할 수 있으며, 이러한 filterChain 다중 구성을 활용하여 securityMatchers 적용의 우선순위를 조정할 수도 있다.
@Bean
    public SecurityFilterChain securityFilterChain1(HttpSecurity http, ApplicationContext context) throws Exception {

        http
                .authorizeHttpRequests(auth -> auth
                        .anyRequest().authenticated()
                )
             .formLogin(Customizer.withDefaults())
            ;

        return http.build();
    }

    @Bean
    @Order(1)
    public SecurityFilterChain securityFilterChain2(HttpSecurity http, ApplicationContext context) throws Exception {

        http
                .securityMatchers(matchers -> matchers.requestMatchers("/api/**", "/oauth/**"))
                .authorizeHttpRequests(auth -> auth
                        .anyRequest().permitAll() //for comparison
                )
        ;

        return http.build();
    }
위와 같이 securityFilterChain이 두개 있다고 하고, 아래의 filter chain 빈객체를 적용우선순위 1번으로 두었다고 하자.
이에 따르면 "/api/" 패턴으로 오는 모든 요청들은 적용 우선순위에 따라 가장 먼저 해당 securityfilterChain(체인 2번)을 선택받는다.
아래 후술하겠지만, 내부적으로 securityMatchers는 filterChain의 matches와 연관되어, 어떤 필터체인을 선택할지 판단하는 "기준패턴"이 된다.
이후 filters를 동작하게 되는데, 위 로직에 따르면 api 패턴요청은 인증과정없이 모두 자원접근을 허가하게 된다.
1번 체인에 따르면 모든 요청은 인증허가를 받아야 하지만, 우선순위 적용에 따라 2번 체인을 먼저 적용하게 되어 /api 요청에 대해서는 인증을 수행하지 않는다.
이러한 동작 원리를 아래 좀 더 자세하게 살펴보았다.
2-2-2. SecurityMatcher ~ SecurityFilterChain 및 RequestMatcher의 동작 원리 및 과정
SecurityMatcher를 사용했을때의 filterChain이 어떻게 동작하는지 다시 한번 정리해보았다.
요청 → SecurityMathcer → FilterChainProxy → SecurityFilterChain 선택(RequestMatcher로 판단) → 해당 체인 Filters 순차 실행 → DispatcherServlet → Controller
일전에는 FilterChainProxy로 전달되는 대상이 모든 요청이었지만, 이제는 SecurityMatcher에 맞는 요청인지 사전필터링 되므로 인가과정이 조금 더 엄격해졌다고 볼 수 있다.
이후 내부적으로 securityFilterChain과 내부적인 filters 동작과정은 requestMatchers에 의해 선별이 된다는 것을 기억하자.
| 키워드 | 의미 | 동작지점 |
|---|---|---|
| SecurityMatcher | SecurityFilterChain이 “어떤 요청을 대상으로 할지” 결정하는 규칙 | SecurityFilterChain.matches(request) 내부 |
| FilterChainProxy | Spring Security 필터 체인의 게이트웨이. 요청을 받고 어떤 SecurityFilterChain을 쓸지 결정 | 모든 요청 초입 |
| SecurityFilterChain | 다수의 Security Filter 묶음. 요청 패턴마다 다른 체인을 둘 수 있음 | FilterChainProxy가 선택 후 실행 |
| RequestMatcher | 특정 URL, HTTP Method 등을 기준으로 request가 일치하는지 판단 | SecurityFilterChain.matches() 내부 |
| Filters (Security Filters) | 실제 인증/인가/예외처리/CSRF 등의 로직이 실행되는 필터들 | SecurityFilterChain 내부 순차 실행 |
이러한 핵심 컴포넌트를 이해하고 아래 도식화를 통해 전체적인 보안처리과정을 숙지하고 있도록 하자.
[클라이언트 요청]
        │
        ▼
──────────────────────────────────────────────────────────────
1. Servlet Container (예: Tomcat)
        │
        ▼
2. DispatcherServlet 이전 단계에서
   FilterChain 중 하나로 SpringSecurity의 FilterChainProxy 진입
        │
        ▼
──────────────────────────────────────────────────────────────
3. FilterChainProxy (Security의 관문 역할)
        │
        │  (여기서 등록된 여러 SecurityFilterChain 중
        │   어느 체인을 적용할지를 판단)
        ▼
   ┌───────────────────────────────────────────────┐
   │   SecurityFilterChain 목록(List<SecurityFilterChain>)   │
   └───────────────────────────────────────────────┘
        │
        ▼
──────────────────────────────────────────────────────────────
4. SecurityFilterChain 선택 과정

   For each SecurityFilterChain:
       └─ SecurityFilterChain.matches(request)?
             → 내부에서 RequestMatcher 동작
             → ex) requestMatchers("/api/**"), antMatcher(), mvcMatcher() 등

   ✔ 최초로 matches() = true 를 반환한 하나의 SecurityFilterChain이 선택됨
   ✖ 나머지 체인은 무시됨 ("첫 번째 일치 규칙만 사용"이라는 말의 의미)

        │
        ▼
──────────────────────────────────────────────────────────────
5. 선택된 SecurityFilterChain 내부의 Filters 적용

   선택된 체인의 filters:
       - SecurityContextPersistenceFilter
       - UsernamePasswordAuthenticationFilter
       - CsrfFilter
       - AuthorizationFilter
       - ExceptionTranslationFilter
       - ... (구성에 따라 다양)

   FilterChainProxy는 이 필터들을 순차적으로 실행함:

   For each Filter in selectedChain.filters:
       └─ filter.doFilter(request, response, nextFilter)

        │
        ▼
──────────────────────────────────────────────────────────────
6. 각 Security Filter에서 수행하는 역할 예시

   - SecurityContextPersistenceFilter
       → 기존 SecurityContext 로드

   - AuthenticationFilter들 (ex. UsernamePasswordAuthenticationFilter)
       → 인증 시도 및 Authentication 생성

   - CsrfFilter
       → CSRF 토큰 검증

   - AuthorizationFilter
       → 인가(권한) 판단
         이때 `access(...)`, `hasRole(...)` 등 표현식 평가

   - ExceptionTranslationFilter
       → AuthenticationException, AccessDeniedException 처리
       → 인증 안 되어 있으면 AuthenticationEntryPoint 작동
       → 권한 부족이면 AccessDeniedHandler 작동

        │
        ▼
──────────────────────────────────────────────────────────────
7. 모든 Security Filter 처리 완료 후
        │
        ▼
8. 다음 Filter로 이동하다가 DispatcherServlet 도달
   → Controller 로직 실행

        │
        ▼
9. 응답(Response) 반환

──────────────────────────────────────────────────────────────
(필요 시 SecurityContextPersistenceFilter가 SecurityContext 저장)
──────────────────────────────────────────────────────────────
2-3. 메서드기반 권한 부여
지금까지는 "요청" "패턴"을 중점적으로 권한부여를 해주었다면, 어노테이션을 활용하여 메서드/기능호출 단에서의 권한부여가 가능하다.
이것이 메서드 기반 권한 부여이며, 이를 위해 기본적으로 필요한 환경설정 어노테이션인 @EnableMethodSecurity가 존재한다.
이에 대해 좀 더 자세하게 살펴보도록 한다.
2-3-1. EnableMethodSecurity
EnableMethodSecurity 어노테이션은 아래와 같이 정의되어있다.
@Retention(RetentionPolicy.RUNTIME)
@Target(ElementType.TYPE)
@Documented
@Import(MethodSecuritySelector.class)
public @interface EnableMethodSecurity {

	boolean prePostEnabled() default true;

	boolean securedEnabled() default false;

	boolean jsr250Enabled() default false;

	boolean proxyTargetClass() default false;

	AdviceMode mode() default AdviceMode.PROXY;

}
이 중, jsr250Enabled(), prePostEnabled(), securedEnabled()를 많이 사용하며 각각에 대한 기능은 아래와 같이 정의할 수 있다.
- jsr250Enabled - JSR-250 관련, 여러 Java 플랫폼에서 공통적으로 사용할 수 있는 어노테이션 표준을 제공한다(@RolesAllowed, @PermitAll, @DenyAll).
- @PreAuthorize, @PostAuthorize, @PreFilter, @PostFilter를 제공한다.
- @Secured를 활성화한다.
prePostEnabled를 제외한 나머지 기능들은 기본값이 false로 제공된다.
2-3-2. @preAuthorize, @postAuthorize
이 중 메서드 실행에 대한 권한부여를 위해 preAuthorize, postAuthorize 어노테이션을 많이 활용한다.
말 그대로, 서비스 혹은 컨트롤러 레이어에서 특정 메서드를 실행하기 전/후에 사용자 인증 정보 및 보안 검사를 진행하며, 해당 검사를 통과하였을 경우에만 메서드를 실행하거나 결과반환이 가능하도록 해주는 포인트 컷이다.
@PreAuthorize("hasAuthority('ROLE_ADMIN')")
public void admin(){
	//only manager
}
위와 같이 해당 메서드를 실행하는 주체의 권한을 설정해주거나
@PreAuthorize("#id == authentication.name")
public void authenticate(String id){
	//do sth with id
}
해당 메서드 실행 전에 먼저 본인 인증이 되었는지 확인하며, 매개변수를 전달받아 특정 로직을 진행할 수도 있다.
@PostAuthorize("returnObject.owner == authentication.name")
public Account getAccount(Long id){
	return Account();
}
또한 postAuthorize를 사용하여, 계정을 반환하기 직전에 해당 계정의 소유자인지 확인하며 검증실패 시 반환을 하지 않는다.
@PostAuthorize("hasAuthority('ROLE_ADMIN') and returnObject.isSecure")
public Account getAccount(Long id){
	return Account();
}
더불어 이와 같이, 계정이 admin이고 반환객체가 인증된 상태여야 반환값을 전달하도록 해줄 수도 있다.
2-3-3. @preFilter, @PostFilter
일전의 preAuthorize, postAuthorize와 동작 자체는 포인트 컷 관점에서는 유사하지만, 본질적으로 둘은 다르다.
preAuthorize, postAuthorize의 초점이 메서드 실행 전/후로 메서드의 실행 혹은 결과값 반환에 대한 권한검증이라면, preFilter와 postFilter는 결과값 필터링, 즉 보안요건에 부합하는 객체에 대해서만 반환값을 선별할 수 있도록 하는 것이 주요 목적이다.
이때, preFilter는 메서드 실행 전에 어떠한 매개변수 컬렉션을 전달할지에 초점을 두고 postFilter는 메서드 실행 후에 어떠한 반환값 컬렉션을 전달할지에 초점을 둔다.
Collection, Map, Stream, array(배열) 등의 타입에 대해 적용이 가능하며, 메서드 기반 권한부여와 동일하게 spEL기반의 표현식(authentication, principle 등)을 적용할 수 있다.
@Service
public class ItemService {
    // 전달된 items 컬렉션에서, 각 요소의 owner가 인증된 사용자와 같지 않으면 제거
    @PreFilter("filterObject.owner == authentication.name")
    public void processItems(List<Item> items) {
        // items는 이미 인증자(owner)와 일치하는 요소만 남아 있음
        items.forEach(this::process);
    }
}
예를 들어 위와 같이 적용한다면, 계좌정보를 반환하기 위해 해당 메서드를 실행하기 전에 전달할 매개변수를 필터링할 수 있다.
만약 해당 조건을 판별하여 거짓(false)일 경우 매개변수로 전달하지 않으며, 이에 따라 조건에 맞는 매개변수만 전달하여 서비스를 실행한다.
@Service
public class DocumentService {
    @PostFilter("filterObject.isPublic() or filterObject.owner == authentication.name")
    public List<Document> listDocuments() {
        // 모든 문서를 조회한 뒤, 반환 직전에 필터링됨
        return repo.findAll();
    }
}
또한 위와 같이 PostFilter를 적용하여, 반환할 객체를 필터링하여 최종 전달한다.
참고로 filterObejct, returnObject 등은 spEL에서 제공하는 표현식이며, 반환객체형태에 따라 filterObject.proeprty(배열/리스트) 혹은 filterObject.value.property(맵) 등으로 spEL을 적절하게 구성해주어야 한다.
참고. JSR-250(Java Specification Request 250)
Java 표준 어노테이션(표준 API) 중에서 “보안, 라이프사이클, 리소스 접근” 관련 기능을 정의한 스펙으로, java언어를 사용하는 플랫폼 혹은 프레임워크라면 공통적으로 사용할 수 있는 보안기능을 제공하는 것이며,
이 중 일부를 Spring Security에서 지원하여 보안기능을 제공해주는 것이다.
Spring Security에서는 @EnableMethodSecurity( jsr250Enabled = true ) 옵션을 통해 JSR-250 보안 어노테이션을 활성화할 수 있고,
@RolesAllowed("ADMIN")
public void deleteUser() { ... }
이와 같이 메소드에 대한 권한심사가 가능해지는 것이다.
중요한 것은 Java EE시절부터, 표준 인터페이스로 제공해주었던 명세(어노테이션)이자 기능인데, Spring Security에서 이를 채택하여 보안관련 기능을 지원해주는 것으로 생각하면 되겠다.
참고. EnableMethodSecurity 어노테이션 명세
좀 더 나아가서, EnableMethodSecurity를 구성하는 각각의 포인트 컷이 어떤 것을 의미하는지 알아보았다.
- @EnableMethodSecurity 내부 어노테이션의 의미
기본적으로, Spring Security의 메서드 보안 기능을 켜는 설정 어노테이션이 바로 @EnableMethodSecurity이다.
이 어노테이션은 사실상 스프링 컨텍스트에 Method Security(메소드 기반 권한부여) 관련 Bean 설정을 가져오도록 지시하는 메타 어노테이션이다.
- @Retention(RetentionPolicy.RUNTIME)
해당 어노테이션이 런타임까지 유지됨을 의미한다.
스프링은 런타임에 리플렉션(reflection)으로 설정/구성 정보를 읽는다.
따라서 런타임에 사라지면 스프링이 @EnableMethodSecurity가 붙어 있는 것을 감지할 수 없게 된다.
즉, 메서드 보안 설정이 실행 시점에 반영되도록 하기 위해 필수적이며, 참고로 애플리케이션 최초 실행 시점부터 적용된다.
- @Target(ElementType.TYPE)
해당 어노테이션은 클래스, 인터페이스, @Configuration 같은 타입 수준 선언에만 적용 가능함을 명시한다.
@Configuration
@EnableMethodSecurity
public class SecurityConfig { ... }
메서드 보안은 설정 클래스(@Configuration)에 적용되기 때문에
"이 어노테이션은 클래스에만 붙일 수 있다" 라는 범위를 지정한 것이다.
- @Documented
JavaDoc 생성 시 이 어노테이션을 사용했음을 문서에 포함시켜라, 라는 의미이다.
실행 동작에는 영향을 주지 않는 “문서화용” 어노테이션이다.
- @Import(MethodSecuritySelector.class)
Spring에게 메서드 보안을 위해, EnableMehthodSecurity를 동작하기 위해 필요한 여러 Configuration 클래스를 로딩하라고 지시하는 역할.
이 어노테이션은 스프링에게
“이 설정 클래스를 스프링 컨텍스트에 함께 가져다 써라(import)”
라고 말하는 역할을 한다.
여기서 import되는 클래스가 아래와 같고,
MethodSecuritySelector이 클래스를 로딩함으로써
MethodSecurityConfiguration
PrePostMethodSecurityConfiguration
SecuredMethodSecurityConfiguration
Jsr250MethodSecurityConfiguration
이러한 컴포넌트 빈 객체를 주입받는 효과를 얻을 수 있다.
2-3-4. @Secured, JSR-250 외 제공하는 부가 기능들
이외 다양한 어노테이션 및 메타주석(포인트컷)을 사용하여 다양한 인가장치를 마련할 수 있다.
먼저, @EnableMethodSecurity(securedEnabled = true)로 설정하여 secured 어노테이션 사용을 활성화한다.
@Secured("ROLE_USER")
public void transfer(){
}
이후 @Secured 어노테이션을 활용할 경우, 해당 메소드를 실행하는 ROLE권한을 직접 명시해줄 수 있다.
더불어 @EnableMethodSecurity(jsr250Enabled = =true)로 설정하여, jsr250 기능을 활성화한다.
@RolesAllowed("USER")
public void transfer(){
}
@RolesAllowed를 통해 특정 Authority에서 해당 메소드의 실행을 허가해줄 수 있다.
@PermitAll
public void transfer(){
}
@DenyAll
public void transfer(){
}permitAll, denyAll은 각각 메소드의 실행을 모두에게 허가하거나 거부할 수 있다.
뿐만아니라 본인이 직접 customized한 포인트컷을 만들고 이를 메타주석으로 등록하여 사용할 수 있다.
@Target({ElementType.METHOD, ELementType.TYPE})
@Retention(RetentionPolicy.RUNTIME)
@PreAuthorize("hasRole('ADMIN')")
public @interface isAdmin{}
이와 같이 preAuthorize에 대한 메타주석을 설정해주거나
@Target({ElementType.METHOD, ELementType.TYPE})
@Retention(RetentionPolicy.RUNTIME)
@PostAuthorize("returnObject.owner == authentication.name")
public @interface isAdmin{}
이와 같이 postAuthorize에 대한 메타주석을 설정해줄 수도 있다.
위 메타주석을 설정한 후,
@isAdmin
public void...
해당 어노테이션을 직접 구성가능하다.
또한, @EnableMethodSecurity의 prePostEnabled=false로 한 후, 특정 어노테이션만 활성화하는 것이 가능하다.
@EnableMethodSecurity(prePostEnabled = false)
class MethodSecurityConfig{
	@Bean
   @Role(BeanDefinition.ROLE_INFRASTRUCTURE)
   Advisor postAuthorize(){
   	return AuthorizationManagerAfterMethodInterceptor.postAuthorize();
   }
}
위와 같이 AuthorizationManagerAfterMethodInterceptor의 postAuthorize();을 직접 명시해주어 해당 기능만을 활성화해줄 수 있다.
또한 어노테이션내 표현식에 사용할 커스텀빈 및 이에 대한 customized 검증로직을 구현할 수도 있다.
@GetMapping("/delete")
@PreAuthorize(@authorizer.isUser(#root)")
public void transfer(){

}
이때 preAuthroize에서 authorizer의 컴포넌트에 등록된 isUser라는 특정 검증로직을 통해 확인하게되며,
@Component("authorizer")
class authorize{
	public boolean isUser(MethodSecurityExpressionOperations root){
    	boolean decision = root.hasAuthority("ROLE_USER");
        return decision;
    }
}
이처럼 특정 빈객체(authorize)를 정의하고, 해당 검증로직(isUser)를 수행할 수 있도록 유도할 수도 있다.
2-3-5. 클래스 레벨 권한 부여 및 인가검증의 우선순위
Spring MVC구조에서 Controller에 설정한 권한은 기본적으로 해당 컨트롤러에 속한 모든 컨트롤러의 API에 적용한다.
@Controller
@PreAuthorize("hasAuthority('ROLE_USER')")
public class Controller{
	@GetMapping("/api")
    public ...
}
예를 들어 위와 같을때, Controller에서 제공하는 모든 api는 preautorize 적용을 받는다.
클래스 수준의 권한부여가 된 것이다.
그러나, 메소드에 또다른 권한부여가 된다면, 해당 메소드의 권한부여가 더 우선적이다.
@Controller
@PreAuthorize("hasAuthority('ROLE_USER')")
public class Controller{
	@GetMapping("/api")
    @PreAuthorize("hasAuthority('ROLE_ADMIN')")
    public ...
}
이 경우, 해당 메소드에 설정한 인가검증(PreAuthorize)이 더 우선적으로 이루어진다.
유사한 원리로, 인터페이스를 상속받은 클래스가 있을때 인터페이스의 권한부여가 적용된다.
다만 서로 다른 권한부여가 적용된 인터페이스를 상속받는다면 해당 클래스의 권한부여는 모호하여 실패하지만, 이 경우 위와 같이 메소드 자체적인 권한부여를 해줌으로써 모호성을 해결할 수 있다.
3. 정적자원에 대한 보안적용예외 지정
Spring Security에서는 정적자원(img/src 등)에 접근할때 RequestMatcher를 통해 보안적용을 하지 않도록(예외지정) 할 수 있다.
이에 대한 방법은 6.x ver 이전과 최신버전 하, 서로 적용방법이 많이 달라졌다.
이전의 경우 Bean객체를 따로 만들어 지정해주었지만,
@Bean
public WebSecurityCustomizer webSecurityCustomizer(){
	return (webSecurity) -> {
    	webSecurity.ignoring().requestMatchers(PathRequest.toStaticResources().atCommonLocations());
    };
}
6.x ver이상의 최신환경에서는 requestMatchers를 통해 직접 정적자원의 url을 명시해주고, 이에 대해 permitAll()하는 방법을 공식적으로 권장하고 있다.
http.authorizeHttpRequests(auth -> auth
	.requsetMatchers("/css/**", "/images/**", "/js/**", "/webjars/**", "/favicon.*", "/*/icon-*").permitAll()
    .requestMatchers(PathRequest.toStaticResources().atCommonLocations()).permitAll()
    .anyRequest().authenticated()
    );
이와 같이 직접적인 permitAll()을 명시해주도록 하는 것을 권장하며, 이전버전의 경우 정적자원요청에 대한 permitAll 지정 시 해당 요청에 대해 세션검증이 항상 이루어져서 성능하락이 있었다.
지금은 필요시에만(Supplier/lazy authentication) 인증객체를 추출하기 위한 세션접근을 진행하기에, 성능하락이 발생하지 않는다.
또한, 이러한 필터를 통한 방법 자체가 정적자원요청을 지정함으로써, Spring Security 흐름 내에서 요청을 controll할 수 있도록 한다. 따라서, 요청헤더 등의 안전성을 최소한으로 보장하여, XSS 공격 등에 대해서 안전하게 자원접근을 보장할 수 있다.
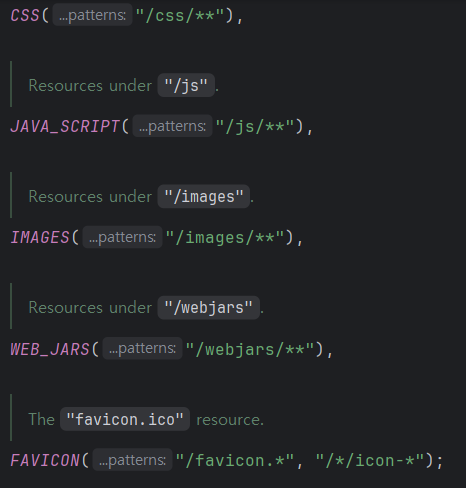
참고로 Spring Security가 지정한 정적자원의 경로는 위와 같다.
이때 root 경로는 resources.static임을 기억하자.
4. 계층적 권한(Role Hierarchy)]
Spring Security는 모든 인가주체(권한)을 계층적 구조로 생각하지 않는다.
즉, 인증 주체의 권한이 여러개라면 이를 포함하는 상위권한을 고려하지 않고 각각의 권한을 모두 별개로 부여해야 하는 번거로움이 발생한다.
이에 대한 구조적 한계를 벗어나고자, RoleHirerachy라는 계층적 구조를 제공하여, 권한의 포함관계를 중심으로 역할을 관리 및 이를 통한 요청권한규칙을 정의하는 등의 편의성을 향상할 수 있다.
계층적 권한을 사용하여 액세스 규칙을 지정하는 소모 자체가 줄어들 수 있다.
<property name = "hierarchy">
<value>
ROLE A > ROLE B
ROLE B > ROLE C
</value>
</property>
이와 같이 xml 형태의 구조 내에서 ROLE의 계층구조를 설정해줄 수 있으며, 본 계층구조의 경우 ROLE A를 가지면 ROLE B와 ROLE C를 모두 포함하는 가장 최상위 권한상태를 보유하게 된다.
이를 빈객체화하면, RoleHierarchy 인터페이스의 구현체인 RoleHierarchy를 사용하여 권한구조를 지정해주면 되겠다.
RoleHierarchyImpl hierarchy = new RoleHierarchyImpl();

hierarchy.setHierarchy("ROLE_ADMIN > ROLE_MANAGER" +"\n" + "ROLE_MANAGER > ROLE_USER");

return hierarchy;
위와 같이 계층구조를 지정해주면, getReachableGrantedAuthorities를 통해 직접 할당한 권한과 함께 도달 가능한 모든 권한까지 지정이 가능해진다.
따라서, 기존 authentication 인증를 진행할때 hasRole/hasAuthoritiy를 통해 할당된 단일 권한만 비교하였다면, hierarchy에서 지정한 계층구조를 통해 도달가능한 모든 권한까지 비교하여 인증을 수행할 수 있도록 한다.
5. 결론
이로써 인가(권한부여) 및 권한체계를 관리할 수 있는 방안에 대해 분석하는 과정을 마쳤다.
인가과정은 단순히 권한을 부여해주는 과정이 아닌, 메소드/클래스/인터페이스 등 아키텍칭 어디에서도 적용가능한, Spring Security 프레임워크에서 제공하는 편의적인 부분에 해당하는 것을 알 수 있었다.
사실 지금의 분석과정은 Spring Security를 통해 지정할 수 있는 인가과정 그 자체를 중심이었다면, 이제부터는 이러한 과정이 가능하도록 하는 구조적/원리적 근거를 알아보고자 한다.
본질과 근거중심의 이해를 통해 Spring Security를 실무적으로 활용할 수 있도록 준비해놓도록 하자.