[Spring] xml configuration을 java configuration으로 변경하기 (1) ApplicationContext

🤦🏻 사실 스프링 배치를 추가하다가 xml과 java configuration을 섞어쓰는게 버거워서 전부 java 설정으로 변경한 뒤 배치를 추가해보려고 한다. 😢 아무튼 이번 글의 목적은 xml 설정을 사용하고 있던 스프링 프로젝트를 java configuration으로 변경하는 것이다.
준비하기
필자는 freeboard04 프로젝트를 복제하여 freeboard04_java_config라는 프로젝트를 새로 만들었다.
이전 글 중에 깃 레파지토리에 저장된 프로젝트를 복제(fork X copy O)하는 내용이 있으니 (구글에 검색해도 많이 나온다.) 설명을 생략하도록 하겠다.
ApplicationContext
ImportResource
config 패키지를 생성하고 하위에 ApplicationContext 클래스를 만들어주자. xml 설정에서 사용했던 applicationContext.xml 파일을 대체할 클래스이다.
@Configuration
public class ApplicationContext {
}
applicationContext.xml만 필요로하는 테스트 코드를 골라 xml 파일 경로를 클래스로 대체해준다.
🔎 변경 전

🔎 변경 후

이 상태로 테스트를 실행하고자하면 아무 설정이 없기때문에 당연히 에러가 발생할 것이다.
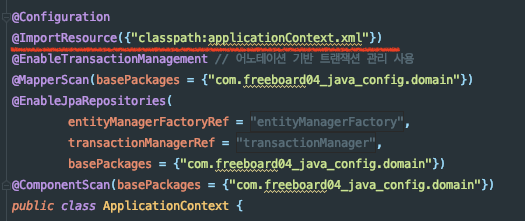
@ImportResource 어노테이션을 사용하여 ApplicationContext 클래스를 읽어들일 때 xml 파일을 함께 읽을 수 있도록 해주자!
@Configuration
@ImportResource({"classpath:applicationContext.xml"})
public class ApplicationContext {

}
여기서 주의할 점이 있는데 바로 classpath이다. 이 classpath가 가리키는 곳은 resources인데, 해당 프로젝트는 applicationContext.xml 파일이 resources와 같은 depth의 폴더인 webapp/WEB-INF 하위에 들어있다.
열심히 저 경로로 찾아 갈 수 있도록 노력해봤으나 😑 계속해서 파일이 존재하지 않는다는 에러가 나길래 resources 하위에 같은 파일을 복제하였다. 아무튼 결과적으로는 제거될 파일이니 일단 이렇게 사용하도록 하겠음!
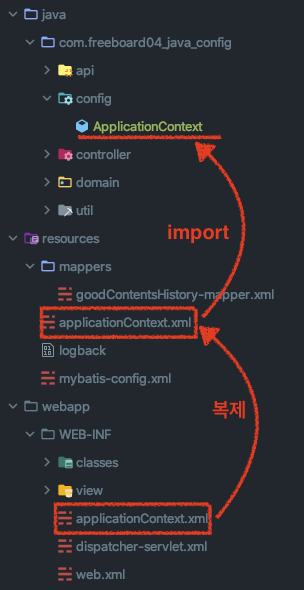
이전에 에러가 발생했던 테스트 코드를 다시 실행하면 문제없이 잘 돌아갈 것이다.
❗️NOTE
class와 locations를 모두 사용하면 안되나요? 🤔그럼 모두 사용하도록 어노테이션 argument를 넘겨주고 테스트를 실행해보자.
다음과 같이 에러메세지가 뜨면서 작동이 중단된다. 읽어보면 locations와 classes를 함께 사용할 수 없다고 말하고 있다.
Suppressed: java.lang.IllegalArgumentException: Cannot process locations AND classes for context configuration [ContextConfigurationAttributes@3ad83a66 declaringClass = 'com.freeboard04_java_config.domain.board.BoardServiceIntegrationTest', classes = '{class com.freeboard04_java_config.config.ApplicationContext}', locations = '{file:src/main/webapp/WEB-INF/applicationContext.xml}', inheritLocations = true, initializers = '{}', inheritInitializers = true, name = [null], contextLoaderClass = 'org.springframework.test.context.ContextLoader']: configure one or the other, but not both.
DataSource
xml :
    <bean id="dataSource" class="org.springframework.jdbc.datasource.DriverManagerDataSource">
        <property name="driverClassName" value="com.mysql.cj.jdbc.Driver"/>
        <property name="url" value="jdbc:mysql://127.0.0.1:3306/free_board?serverTimezone=UTC&useSSL=false"/>
        <property name="username" value="robin"/>
        <property name="password" value="robin549866pass!"/>
    </bean>
java :
    @Bean
    public DataSource dataSource(){
        DriverManagerDataSource dataSource = new DriverManagerDataSource();
        dataSource.setDriverClassName("com.mysql.cj.jdbc.Driver");
        dataSource.setUrl("jdbc:mysql://127.0.0.1:3306/free_board?serverTimezone=UTC&useSSL=false");
        dataSource.setUsername("robin");
        dataSource.setPassword("robin549866pass!");

        return dataSource;
    }
xml에서 설정한 내용을 그대로 setter를 이용하면 되기때문에 작성하는 것이 어렵지는 않다. xml의 datasource 부분은 주석 처리하고 테스트 코드를 돌려 잘 적용되는지 확인하도록 한다.
TransactionManager
xml :
    <bean id="entityManagerFactory" class="org.springframework.orm.jpa.LocalContainerEntityManagerFactoryBean">
        <property name="dataSource" ref="dataSource" />
        <property name="packagesToScan" value="com.freeboard04_java_config.domain" />
        <property name="jpaVendorAdapter">
            <bean class="org.springframework.orm.jpa.vendor.HibernateJpaVendorAdapter" />
        </property>
        <property name="jpaProperties">
            <props>
                <prop key="hibernate.hbm2ddl.auto">update</prop>
                <prop key="hibernate.dialect">org.hibernate.dialect.MySQL5Dialect</prop>
                <prop key="format_sql">true</prop>
                <prop key="hibernate.connection.autocommit">true</prop>
            </props>
        </property>
    </bean>

    <bean id="transactionManager" class="org.springframework.orm.jpa.JpaTransactionManager">
        <property name="entityManagerFactory" ref="entityManagerFactory" />
    </bean>
java :
    @Bean
    public PlatformTransactionManager transactionManager() {
        JpaTransactionManager transactionManager = new JpaTransactionManager();
        transactionManager.setEntityManagerFactory(entityManagerFactory().getObject());
        return transactionManager;
    }

    @Bean
    public LocalContainerEntityManagerFactoryBean entityManagerFactory() {
        LocalContainerEntityManagerFactoryBean em = new LocalContainerEntityManagerFactoryBean();
        em.setDataSource(dataSource());
        em.setPackagesToScan(new String[] {"com.freeboard04_java_config.domain"});

        JpaVendorAdapter vendorAdapter = new HibernateJpaVendorAdapter();
        em.setJpaVendorAdapter(vendorAdapter);
        em.setJpaProperties(additionalProperties());

        return em;
    }

    private Properties additionalProperties() {
        Properties properties = new Properties();
        properties.setProperty("hibernate.hbm2ddl.auto", "update");
        properties.setProperty("hibernate.dialect", "org.hibernate.dialect.MySQL5Dialect");
        properties.setProperty("format_sql", "true");
        properties.setProperty("hibernate.connection.autocommit", "true");

        return properties;
    }
주의 할 점이 있는데, 사실 여기서 자꾸 빈 생성 에러가 나서 삽질을 했었다. @Bean 어노테이션을 이용해 빈을 생성할 때, name 파라미터를 이용하여 이름을 지정하지 않으면 메소드명으로 빈이 생성된다.
즉,
@Bean
public BeanClassA myCustomBeanA(){
	...
    return beanClassA;
}
이런 빈 등록 메소드가 있으면 "BeanClassA" 타입의 이름이 "myCustomBeanA"인 빈으로 등록된다는 것이다.
@Bean(name = "beanClassA")
public BeanClassA myCustomBeanA(){
	...
    return beanClassA;
}
위와 같이 작성하면 "BeanClassA" 타입이며 이름은 "beanClassA"인 빈이 등록된다.
이때문에 처음에 emf 빈을 아래와 같이 작성하면서 에러가 발생했었다.
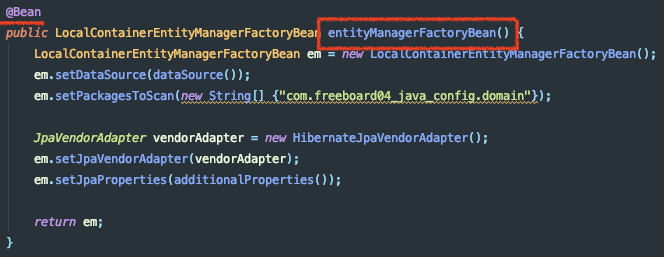

"entityManagerFactory"라는 이름의 빈을 찾을 수 없다길래 JpaTransactionManager를 빈 등록하는 와중에 생기는 에러인 줄 알고 한참 헤매다가 빈을 등록하는 과정을 디버깅 함으로써 진짜 원인을 찾을 수 있었다.
사실 저 에러가 발생한건 jpaRepository를 상속받고있는 BoardRepository라는 커스텀 레파지토리를 빈으로 등록하는 순간이었다.
빈으로 "등록은 잘 됐으나" 단순히 그 이름으로 찾아오지 못하는 것이었음 🤔
아무튼 메소드이름을 entityManagerFactory로 바꿔주니 에러없이 테스트 코드를 통과하였다.
MyBatis 관련 설정
xml :
    <bean id="sqlSessionFactory" class="org.mybatis.spring.SqlSessionFactoryBean">
    <property name="dataSource" ref="dataSource"/>
        <property name="configLocation" value="classpath:mybatis-config.xml"/>
        <property name="mapperLocations" value="classpath:/mappers/*.xml"/>
    </bean>

    <bean id="goodContentsHistoryMapper" class="org.mybatis.spring.mapper.MapperFactoryBean">
        <property name="mapperInterface" value="com.freeboard04_java_config.domain.goodContentsHistory.GoodContentsHistoryMapper"/>
        <property name="sqlSessionFactory" ref="sqlSessionFactory"/>
    </bean>
java :
// @Mapper 어노테이션이 붙은 클래스를 빈으로 등록한다.
@MapperScan(basePackages = {"com.freeboard04_java_config.domain"})
public class ApplicationContext {

	///생략....

    @Bean
    public SqlSessionFactory sqlSessionFactory() throws Exception {
        SqlSessionFactoryBean sqlSessionFactoryBean = new SqlSessionFactoryBean();
        sqlSessionFactoryBean.setDataSource(dataSource());
        sqlSessionFactoryBean.setConfigLocation(applicationContext.getResource("classpath:mybatis-config.xml"));
        sqlSessionFactoryBean.setMapperLocations(applicationContext.getResource("classpath:mappers/goodContentsHistory-mapper.xml"));
        return sqlSessionFactoryBean.getObject();
    }

    @Bean
    public SqlSessionTemplate sqlSession() throws Exception {
        return new SqlSessionTemplate(sqlSessionFactory());
    }

}
직접 써봤다면 (혹은 눈썰미가 좋다면) 이번 코드는 xml 파일과 차이가 큼을 알 수 있을 것이다. 우선 xml 설정에서는 goodContentsHistoryMapper이라는 id로 직접 Mapper를 등록했었는데, 대신 @MapperScan 어노테이션을 사용하여 com.freeboard04_java_config.domain 하위에 @Mapper가 붙어있는 클래스를 빈으로 자동 등록하도록 하였다.
또한 SqlSessionTemplate 빈을 추가하여 트랜잭션을 보장할 수 있도록 해주었다. (이 코드가 생략돼도 테스트 코드는 돌아간다.)
🤦🏻 sqlSessionFactory 메소드를 자세히 보면 mapper.xml 리소스 경로값이 다른데, (이유는 모르겠지만)
*.xml라고 쓰는 경우에 빈으로 등록하는 과정에서 존재하지 않는 파일이라는 오류가 뜬다.
구체적인 파일명까지 작성해주니 그런 오류가 뜨지 않아서 일단은 저렇게 써넣어주었다. 🤔
repository
xml :
<jpa:repositories base-package="com.freeboard04_java_config.domain" />@Repository 어노테이션이 붙은 클래스를 레파지토리(빈)으로 등록해주는 부분인데 위에서 보았던 Bean의 형태가 아니라 다른 방법으로 처리한다.
java :
@EnableJpaRepositories(
        entityManagerFactoryRef = "entityManagerFactory",
        transactionManagerRef = "transactionManager",
        basePackages = {"com.freeboard04_java_config.domain"})
public class ApplicationContext {
	///...생략
}
바로 위와 같이 @EnableJpaRepositories를 사용하는 것이다. 핵심은 basePackages 인자인데 이 값으로 지정된 패키지에서 @Repository 어노테이션이 붙은 클래스를 빈으로 등록한다.
❗️NOTE
<tx:annotation-driven />은 다른 설정 추가없이 그냥 제거해도 문제가 되지 않아서 일단은 제거만 해주었다.
component-scan
xml :
    <context:component-scan base-package="com.freeboard04_java_config.domain">
        <context:include-filter type="annotation" expression="org.springframework.stereotype.Repository" />
        <context:include-filter type="annotation" expression="org.springframework.stereotype.Service" />
        <context:include-filter type="annotation" expression="org.springframework.stereotype.Component" />
        <context:exclude-filter type="annotation" expression="org.springframework.stereotype.Controller"/>
    </context:component-scan>
이 부분도 바로 위에서 다룬 것과 동일하게 어노테이션으로 처리한다.
java :
@ComponentScan(basePackages = {"com.freeboard04_java_config.domain"})
public class ApplicationContext {
	/// 생략...
}
아마 착실하게 변환한 내용에 대한 xml 설정을 주석처리하고 있었다면 모두 주석처리가 되었을 것이다.
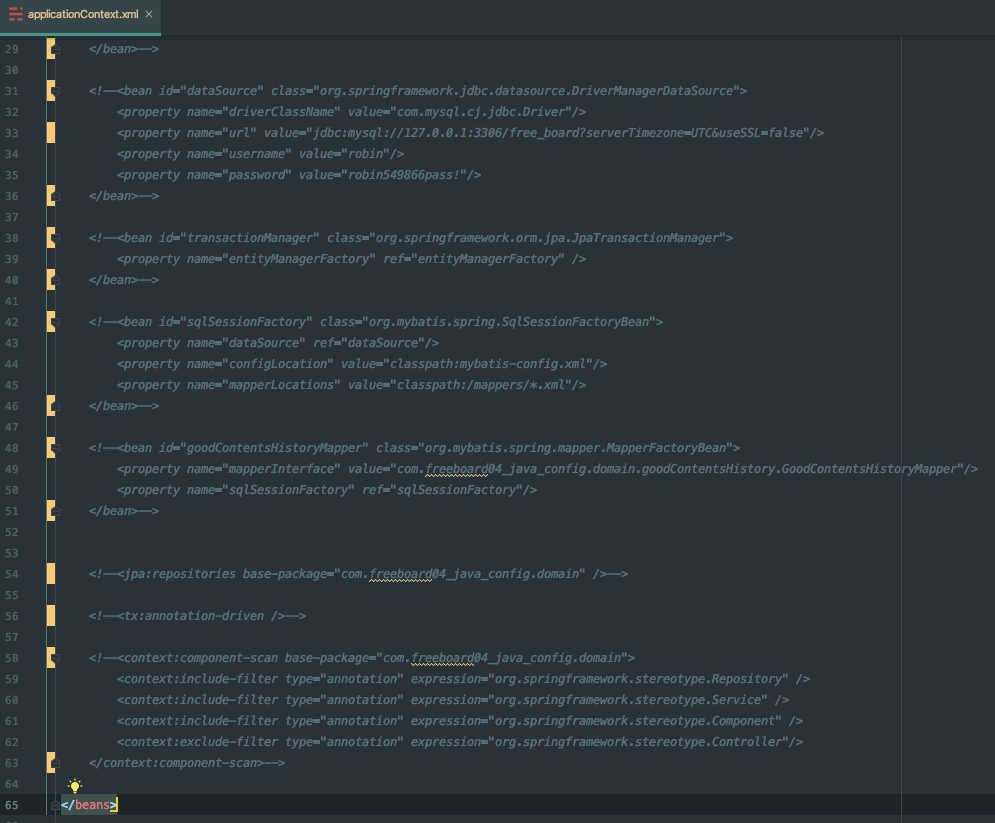
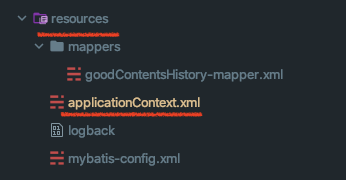
테스트코드가 멀쩡히 돌아간다면 resources 폴더 하위의 applicationContext.xml은 과감하게 지워주자!
마지막으로 ApplicationContext 클래스에 붙어있던 @ImportResource 어노테이션을 삭제한다.
최종 코드
@Configuration
@EnableTransactionManagement // 어노테이션 기반 트랜잭션 관리 사용
@MapperScan(basePackages = {"com.freeboard04_java_config.domain"})
@EnableJpaRepositories(
        entityManagerFactoryRef = "entityManagerFactory",
        transactionManagerRef = "transactionManager",
        basePackages = {"com.freeboard04_java_config.domain"})
@ComponentScan(basePackages = {"com.freeboard04_java_config.domain"})
public class ApplicationContext {

    @Autowired
    org.springframework.context.ApplicationContext applicationContext;

    @Bean
    public DataSource dataSource() {
        DriverManagerDataSource dataSource = new DriverManagerDataSource();
        dataSource.setDriverClassName("com.mysql.cj.jdbc.Driver");
        dataSource.setUrl("jdbc:mysql://127.0.0.1:3306/free_board?serverTimezone=UTC&useSSL=false");
        dataSource.setUsername("robin");
        dataSource.setPassword("robin549866pass!");

        return dataSource;
    }

    @Bean
    public PlatformTransactionManager transactionManager() {
        JpaTransactionManager transactionManager = new JpaTransactionManager();
        transactionManager.setEntityManagerFactory(entityManagerFactory().getObject());
        return transactionManager;
    }

    @Bean
    public LocalContainerEntityManagerFactoryBean entityManagerFactory() {
        LocalContainerEntityManagerFactoryBean em = new LocalContainerEntityManagerFactoryBean();
        em.setDataSource(dataSource());
        em.setPackagesToScan(new String[]{"com.freeboard04_java_config.domain"});

        JpaVendorAdapter vendorAdapter = new HibernateJpaVendorAdapter();
        em.setJpaVendorAdapter(vendorAdapter);
        em.setJpaProperties(additionalProperties());

        return em;
    }

    private Properties additionalProperties() {
        Properties properties = new Properties();
        properties.setProperty("hibernate.hbm2ddl.auto", "update");
        properties.setProperty("hibernate.dialect", "org.hibernate.dialect.MySQL5Dialect");
        properties.setProperty("format_sql", "true");
        properties.setProperty("hibernate.connection.autocommit", "true");

        return properties;
    }

    @Bean
    public SqlSessionFactory sqlSessionFactory() throws Exception {
        SqlSessionFactoryBean sqlSessionFactoryBean = new SqlSessionFactoryBean();
        sqlSessionFactoryBean.setDataSource(dataSource());
        sqlSessionFactoryBean.setConfigLocation(applicationContext.getResource("classpath:mybatis-config.xml"));
        sqlSessionFactoryBean.setMapperLocations(applicationContext.getResource("classpath:mappers/goodContentsHistory-mapper.xml"));
        return sqlSessionFactoryBean.getObject();
    }

    @Bean
    public SqlSessionTemplate sqlSession() throws Exception {
        return new SqlSessionTemplate(sqlSessionFactory());
    }

}
모든 코드는 github에서 확인 할 수 있습니다.


