Spring 프로젝트를 진행하면서 만들어둔 Api를 이용한다. handlebars로 구현되어 있는 클라이언트를 리엑트+리덕스로 리펙토링한다.
이 글은 리액트를 공부하면서 쓰는 글입니다.사용할 Spring 서버 관련 게시글은 여기에서 확인 할 수 있다.
React - Spring server 연동하기
npx create-react-app 프로젝트 이름 커맨드를 이용하여 React 프로젝트를 새로 생성해주자.
서버로 사용할 스프링 프로젝트와 클라이언트로 사용할 리액트 프로젝트를 모두 실행시킨 뒤 터미널에 아래 명령어를 날려보자
curl -d '{"accountId":"react-test","password":"pass"}' -H "Content-Type: application/json" -X POST http://localhost:3000/freeboard02/api/users
아마 cross-origin requests로 인해 서버에 정상적으로 접근되지 않을 것이다.
❗️NOTE
CORS (Cross Origin Resource Sharing) : 도메인 또는 포트가 다른 서버에서 자원을 요청하는 것. 보안 때문에 기본적으로 동일한 도메인에서만 오는 요청만 허가된다.
리액트 프로젝트의 package.json에 다음처럼 "proxy": "http://localhost:8080"를 추가해주자.
 다시 위의 명령어를 날리면 오류가 생기지 않고 데이터 베이스의 user 테이블에 요청한 데이터로 유저가 생성될 것이다.
그럼 본격적으로 클라이언트를 리액트로 변경해보자
디렉토리 구조
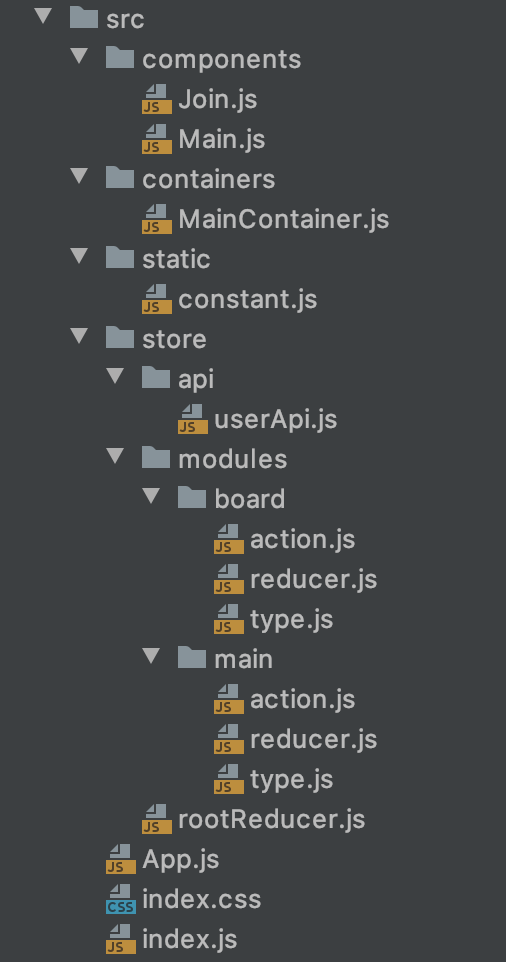 어떤 디렉토리 구조가 가장 좋을지 이것저것 찾아보다가 결과적으론 이런 형태가 됐다. Component와 Container는 도메인에 상관없이 한 디렉토리에 몰아 넣을 것이고, store 디렉토리에는 domain별로 module폴더를 분리해 action을 관리할 것이다.
Main 페이지 만들기
종속성 추가하기
redux를 사용할 것이므로 다음의 명령어를 이용해 필요한 종속성을 추가해주었다.
yarn add redux
yarn add redux-actions
yarn add react-redux
yarn add redux-thunk
Server에 요청하기 위한 Api 만들기
constants.js
우선 static 폴더 하위에 constants js 파일을 만들어 준다.
localhost:8080까지만 도메인으로 사용되고 있기 때문에 /login 으로 요청을 보내면 localhost:8080/login이라는 uri가 만들어진다.
따라서 localhost:8080/freeboard02/login으로 요청을 보내기 위해 다음과 같은 상수를 저장해두었다.
export const DOMAIN = "/freeboard02"해당 파일에는 이렇듯 전역에서 사용할 상수를 정의하면 된다.
userApi.js
store/api 하위에 userApi js 파일을 만들어 준다.
import axios from 'axios';
import { DOMAIN } from '../../static/constants';


export async function loginApi(accountId, password) {
    try {
        const response = await axios.post(DOMAIN+'/api/users?type=LOGIN',
            {accountId: accountId, password: password});
        return response;
    } catch (error) {

    }

}
컴포넌트 생성
Main
components폴더 하위에 Main.js 파일을 추가해주자.
필자는 UX/UI 디자인에 소질이 없으므로 Material-ui를 사용할 것이다.
이미 만들어진 로그인 페이지를 그대로 가져왔으며 필요하지 않은 컴포넌트는 제거했다.
import React, {useState} from 'react';
import Avatar from '@material-ui/core/Avatar';
import Button from '@material-ui/core/Button';
import CssBaseline from '@material-ui/core/CssBaseline';
import TextField from '@material-ui/core/TextField';
import Link from '@material-ui/core/Link';
import Grid from '@material-ui/core/Grid';
import Box from '@material-ui/core/Box';
import LockOutlinedIcon from '@material-ui/icons/LockOutlined';
import Typography from '@material-ui/core/Typography';
import {makeStyles} from '@material-ui/core/styles';
import Container from '@material-ui/core/Container';

function Copyright() {
    return (
        <Typography variant="body2" color="textSecondary" align="center">
            {'Copyright © '}
            <Link color="inherit" href="https://material-ui.com/">
                Your Website
            </Link>{' '}
            {new Date().getFullYear()}
            {'.'}
        </Typography>
    );
}

const useStyles = makeStyles((theme) => ({
    paper: {
        marginTop: theme.spacing(8),
        display: 'flex',
        flexDirection: 'column',
        alignItems: 'center',
    },
    avatar: {
        margin: theme.spacing(1),
        backgroundColor: theme.palette.secondary.main,
    },
    form: {
        width: '100%', // Fix IE 11 issue.
        marginTop: theme.spacing(1),
    },
    submit: {
        margin: theme.spacing(3, 0, 2),
    },
}));

export default function Main({handleClick, message}) {
    const classes = useStyles();

    const [accountId, setAccountId] = useState("");
    const [password, setPassword] = useState("");


    return (
        <Container component="main" maxWidth="xs">
            <CssBaseline />
            <div className={classes.paper}>
                <Avatar className={classes.avatar}>
                    <LockOutlinedIcon />
                </Avatar>
                <Typography component="h1" variant="h5">
                    Sign in
                </Typography>
                <Typography variant="subtitle1" gutterBottom>
                    {message}
                </Typography>
                <form className={classes.form} noValidate onSubmit={(event) => {event.preventDefault(); handleClick(accountId, password)}}>
                    <TextField
                        variant="outlined"
                        margin="normal"
                        required
                        fullWidth
                        id="email"
                        label="Email Address"
                        name="email"
                        autoComplete="email"
                        autoFocus
                        value={accountId}
                        onChange={event => setAccountId(event.target.value)}
                    />
                    <TextField
                        variant="outlined"
                        margin="normal"
                        required
                        fullWidth
                        name="password"
                        label="Password"
                        type="password"
                        id="password"
                        autoComplete="current-password"
                        value={password}
                        onChange={event => setPassword(event.target.value)}
                    />
                    <Button
                        type="submit"
                        fullWidth
                        variant="contained"
                        color="primary"
                        className={classes.submit}
                    >
                        Sign In
                    </Button>
                    <Grid container>
                        <Grid item xs>
                            <Link href="#" variant="body2">
                                Forgot password?
                            </Link>
                        </Grid>
                        <Grid item>
                            <Link href="/join" variant="body2">
                                {"Don't have an account? Sign Up"}
                            </Link>
                        </Grid>
                    </Grid>
                </form>
            </div>
            <Box mt={8}>
                <Copyright />
            </Box>
        </Container>
    );
}
이 컴포넌트는 메인 페이지인 로그인 페이지와 회원 가입 페이지에 모두 사용될 것이다.
코드를 조금 보도록 하자.
 Sing in 버튼을 누르면 server로 로그인 요청을 보내게 되는데, 그 때 전송할 입력받은 아이디와 패스워드를 Main 컴포넌트의 상태로 관리하고 있다.
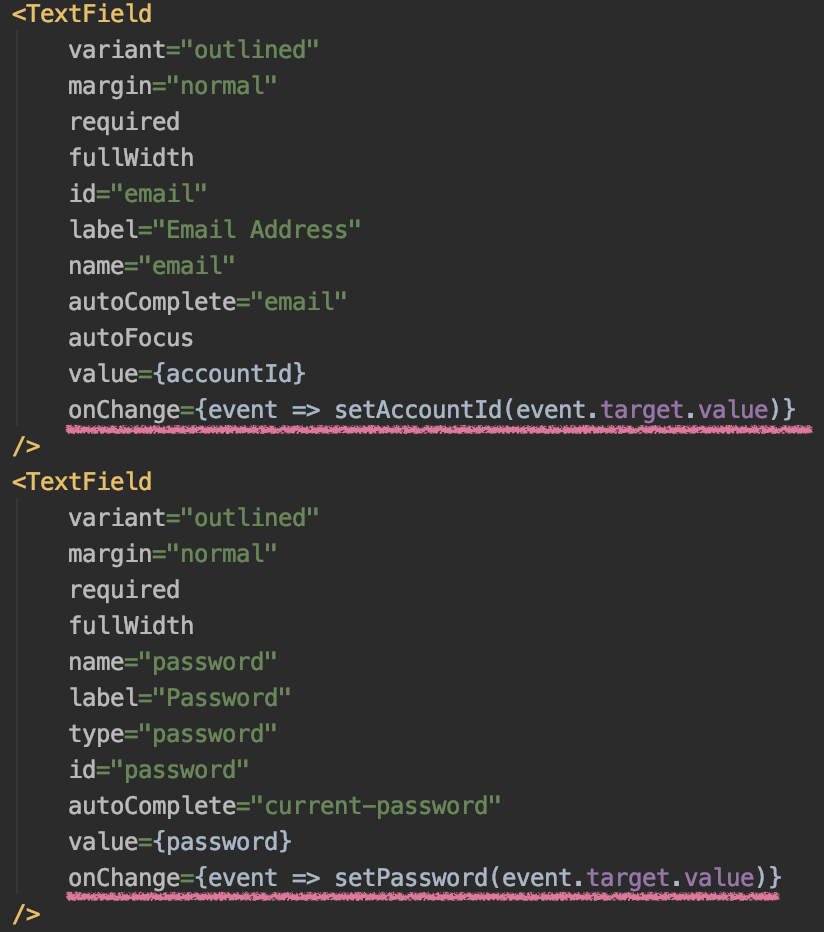 위 이미지처럼 Input 태그에 값이 변경 될 때 마다 상태를 변화시키기 때문에 Sing in 버튼을 누르면 (가장 최신의 입력받은 데이터=)현재 상태값을 이용해 로그인 요청을 수행할 수 있다.
<form className={classes.form} noValidate
   onSubmit={(event) => {event.preventDefault(); handleClick(accountId, password)}}>
form 태그 내부에 전송 버튼이 들어가 있기 때문에 Submit되는 동시에 Submit 이벤트를 중단시킨다. (event.preventDefault()) 데이터를 전송하는 것이 목적이 아니라 handleClick이라는 함수를 실행시키는 것이 목적이기 때문이다.
store/modules/main
메인에 관련된 액션, 액션생성함수, 리듀서를 만든다.
우선은 "로그인"만 구현할 것이기 때문에 LOGIN_SUCCESS, LOGIN_FAIL 두 개의 액션만 만들었다.
🔎type.js
export default {
    LOGIN_SUCCESS : 'MAIN/LOGIN_SUCCESS',
    LOGIN_FAIL : 'MAIN/LOGIN_FAIL'
}🔎action.js
import {createAction} from "redux-actions";
import type from './type'

export const loginSuccess = createAction(
    type.LOGIN_SUCCESS, accountId => accountId
);

export const loginFail = createAction(
    type.LOGIN_FAIL, errorMessage => errorMessage
)🔎reducer.js
import {handleActions} from 'redux-actions'
import type from './type';

const initialState = {
    accountId : null,
    isLogged : false,
    errorMessage : null
}

export default handleActions({
        [type.LOGIN_SUCCESS] : (state, action) => ({
            ...state,
            accountId: action.payload,
            isLogged: true
        }),
        [type.LOGIN_FAIL] : (state, action) => ({
            ...state,
            isLogged: false,
            errorMessage: action.payload
        })
    }, initialState
);
MainContainer
import React from "react";
import {connect} from 'react-redux';

import Main from "../components/Main";

import {loginApi} from '../store/api/userApi';
import {loginSuccess, loginFail} from "../store/modules/main/action";


const MainContainer = ({accountId, isLogged, errorMessage, loginSuccess, loginFail}) => {

    const loginSubmit = async (id, password) => {
        var response = await loginApi(id, password);
        debugger;
        if (typeof response.data.code != "undefined"){
            loginFail(response.data.message);
        } else {
            loginSuccess(id);
        }
    }

    return <Main
        handleClick={loginSubmit}
        message={errorMessage}
        />;
}

const mapStateToProps = state => ({
    accountId: state.main.accountId,
    isLogged: state.main.isLogged,
    errorMessage: state.main.errorMessage
})

const mapDispatchToProps = dispatch => ({
    loginSuccess: (accountId) => dispatch(loginSuccess(accountId)),
    loginFail: (errorMessage) => dispatch(loginFail(errorMessage))
})

export default connect(
    mapStateToProps,
    mapDispatchToProps
)(MainContainer);
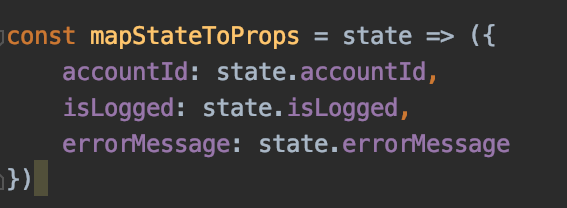
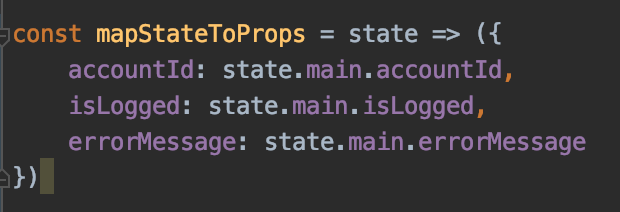
📌여기서 엄청나게 삽질을 해댔는데 🤦🏻 아규먼트로 받아오는 상태들(accountId, isLogged, errorMessage)이 죄다 undefined인 문제였다.
조금 뒤에 나올 것이지만 도메인 별로 리듀서를 만들기 때문에 store를 생성할 때 RootReducer를 인자로 넣어준다. 따라서 state에서 RootReducer가 가지고 있는 각각의 reducer의 이름으로 오브젝트가 생기기 때문에 mapStateToProps(state) 함수에서 state.${reducerName}.${stateName}으로 접근해줘야 값을 제대로 가져올 수 있다. 하..😑
| 수정 전 | 수정 후 |
|---|---|
 |  |
Router 추가하기
react-router와 react-router-dom
- react-router-dom : 웹에서 사용되는 컴포넌트 모음
- react-router-native : react-native를 활용한 앱개발에 쓰이는 컴포넌트 모음
- react-router :
react-router-dom과react-router-native를 합친 패키지
따라서 웹 개발을 위해서는 react-router-dom 설치하면 된다.
yarn add react-router-dom 명령어를 사용하자!
Join 컴포넌트 추가
Main 컴포넌트를 복사해서 살짝 바꾼 Join 컴포넌트를 만들었다. 라우터 테스트를 위해서 만든 것이므로 최종적으로는 사용하지 않을 것!
import React, {useState, useRef} from 'react';
import Avatar from '@material-ui/core/Avatar';
import Button from '@material-ui/core/Button';
import CssBaseline from '@material-ui/core/CssBaseline';
import TextField from '@material-ui/core/TextField';
import Link from '@material-ui/core/Link';
import Grid from '@material-ui/core/Grid';
import Box from '@material-ui/core/Box';
import VpnKeyIcon from '@material-ui/icons/VpnKey';
import Typography from '@material-ui/core/Typography';
import { makeStyles } from '@material-ui/core/styles';
import Container from '@material-ui/core/Container';

function Copyright() {
    return (
        <Typography variant="body2" color="textSecondary" align="center">
            {'Copyright © '}
            <Link color="inherit" href="https://material-ui.com/">
                Your Website
            </Link>{' '}
            {new Date().getFullYear()}
            {'.'}
        </Typography>
    );
}

const useStyles = makeStyles((theme) => ({
    paper: {
        marginTop: theme.spacing(8),
        display: 'flex',
        flexDirection: 'column',
        alignItems: 'center',
    },
    avatar: {
        margin: theme.spacing(1),
        backgroundColor: theme.palette.secondary.main,
    },
    form: {
        width: '100%', // Fix IE 11 issue.
        marginTop: theme.spacing(1),
    },
    submit: {
        margin: theme.spacing(3, 0, 2),
    },
}));

export default function Main({handleClick: handleSubmit}) {
    const classes = useStyles();

    const [accountId, setAccountId] = useState("");
    const [password, setPassword] = useState("");


    return (
        <Container component="main" maxWidth="xs">
            <CssBaseline />
            <div className={classes.paper}>
                <Avatar className={classes.avatar}>
                    <VpnKeyIcon />
                </Avatar>
                <Typography component="h1" variant="h5">
                    Sign up
                </Typography>
                <form className={classes.form} noValidate onSubmit={(event) => {event.preventDefault(); handleSubmit(accountId, password)}}>
                    <TextField
                        variant="outlined"
                        margin="normal"
                        required
                        fullWidth
                        id="email"
                        label="Email Address"
                        name="email"
                        autoComplete="email"
                        autoFocus
                        value={accountId}
                        onChange={event => setAccountId(event.target.value)}
                    />
                    <TextField
                        variant="outlined"
                        margin="normal"
                        required
                        fullWidth
                        name="password"
                        label="Password"
                        type="password"
                        id="password"
                        autoComplete="current-password"
                        value={password}
                        onChange={event => setPassword(event.target.value)}
                    />
                    <Button
                        type="submit"
                        fullWidth
                        variant="contained"
                        color="primary"
                        className={classes.submit}
                    >
                        Sign Up
                    </Button>
                    <Grid container>
                        <Grid item xs>
                            <Link href="#" variant="body2">
                                Forgot password?
                            </Link>
                        </Grid>
                        <Grid item>
                            <Link href="/" variant="body2">
                                {"Sign In"}
                            </Link>
                        </Grid>
                    </Grid>
                </form>
            </div>
            <Box mt={8}>
                <Copyright />
            </Box>
        </Container>
    );
}
App 구성하기
App.js
index > App > XxContainer > Xx (가장 작은 크기의 컴포넌트) 순으로 컴포넌트를 쌓을 것이다.
또한, App이 라우터 설정을 포함하게된다.
import React from "react";
import { BrowserRouter, Route, Switch, Link } from "react-router-dom";
import Join from "./components/Join";
import MainContainer from "./containers/MainContainer";

const App = () => {
    return (
        <BrowserRouter>
            <Switch>
                <Route path="/" exact component={MainContainer} />
                <Route path="/join" component={Join}/>
            </Switch>
        </BrowserRouter>
    )

}

export default App;
react-router-dom의 라우터는 <BrowserRouter>와 <HashRouter> 두가지가 있다.
- <BrowserRouter> : HTML5의 history API를 활용해 UI를 업데이트
- <HashRouter> : URL의 hash를 활용한 라우터, 정적인 페이지에 적합
일반적으로 request-response로 이루어지는 동적 페이지를 제작하므로 BrowserRouter가 사용된다.
- <Route> : 요청받은 path name에 해당하는 컴포넌트를 렌더링한다.
- <Switch> : path의 충돌이 일어나지 않게 Route를 관리한다.
- 요청에 의해 매칭되는 Route들이 다수 검색될 때는 가장 먼저 매칭되는 path로 실행한다.
- Route간의 이동시 발생할 수 있는 충돌을 막아준다.
- 매칭되는 것이 없는 경우에는 default(path 속성을 명시하지 않은 Route)의 실행이 보장된다.
- <Link> : 링크를 생성한다.
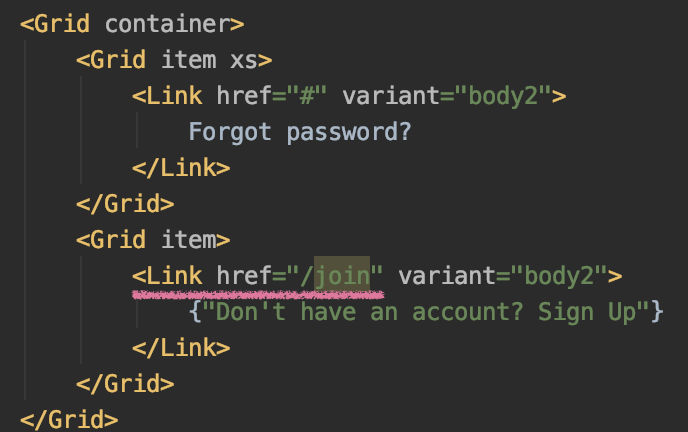
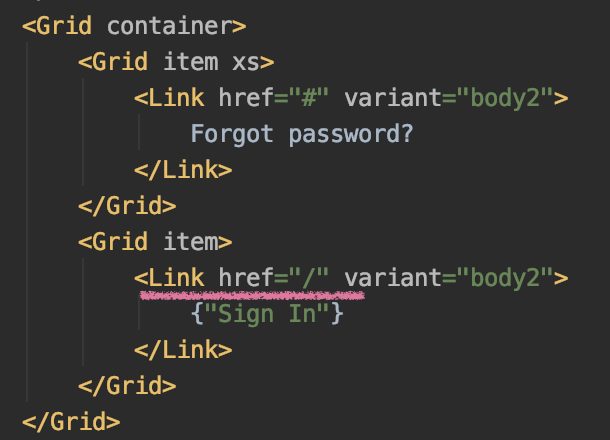
<Link>는 <a> 태그를 사용하듯 필요한 위치에 만들어주면 된다. Main 컴포넌트와 Join 컴포넌트에도 다음처럼 Link 컴포넌트가 포함되어있다. 이 컴포넌트의 href 링크가 Route의 path와 일치하면 라우팅된다.
| Main.js | Join.js |
|---|---|
 |  |
rootReducer
store/modules하위에 rootReducer.js를 생성한다.
import {combineReducers, createStore} from "redux";

import board from './modules/board/reducer'
import main from './modules/main/reducer'

const rootReducer = combineReducers({
    main,
    board
});

export default rootReducer;
리덕스에서 rootReducer에 포함되는 하위 리듀서들은 "reducer"라는 명칭을 붙이지 않는 것이 좋다고 하였기 때문에 위와 같이 명명하였다.
위에 삽질에서 언급했듯이 state에는 다음처럼 상태들이 저장된다.
state : {
   main : {
      mainState1 : value1,
      mainState2 : value2,
      ...
   },
   board : {
      boardState1 : value1,
      boardState2 : value2,
      ...
   }
}
따라서 컴포넌트에서 상태값을 가져올 때 state를 argument로 받아오면 뒤의 객체형태로 들어오기 때문에 state.main.mainState1 등으로 접근해야 올바른 값을 받아올 수 있다.❗️
index
import React from "react";
import ReactDOM from 'react-dom';

import {createStore} from 'redux';
import rootReducer from './store/rootReducer';

import {Provider} from 'react-redux';

import './index.css';
import App from './App';


const store = createStore(rootReducer);
console.log(store.getState());

ReactDOM.render(
    <Provider store={store}>
        <App/>
    </Provider>,
    document.getElementById('root')
);
rootReducer를 이용하여 Store를 만들고 App 컴포넌트를 랜더링한다.
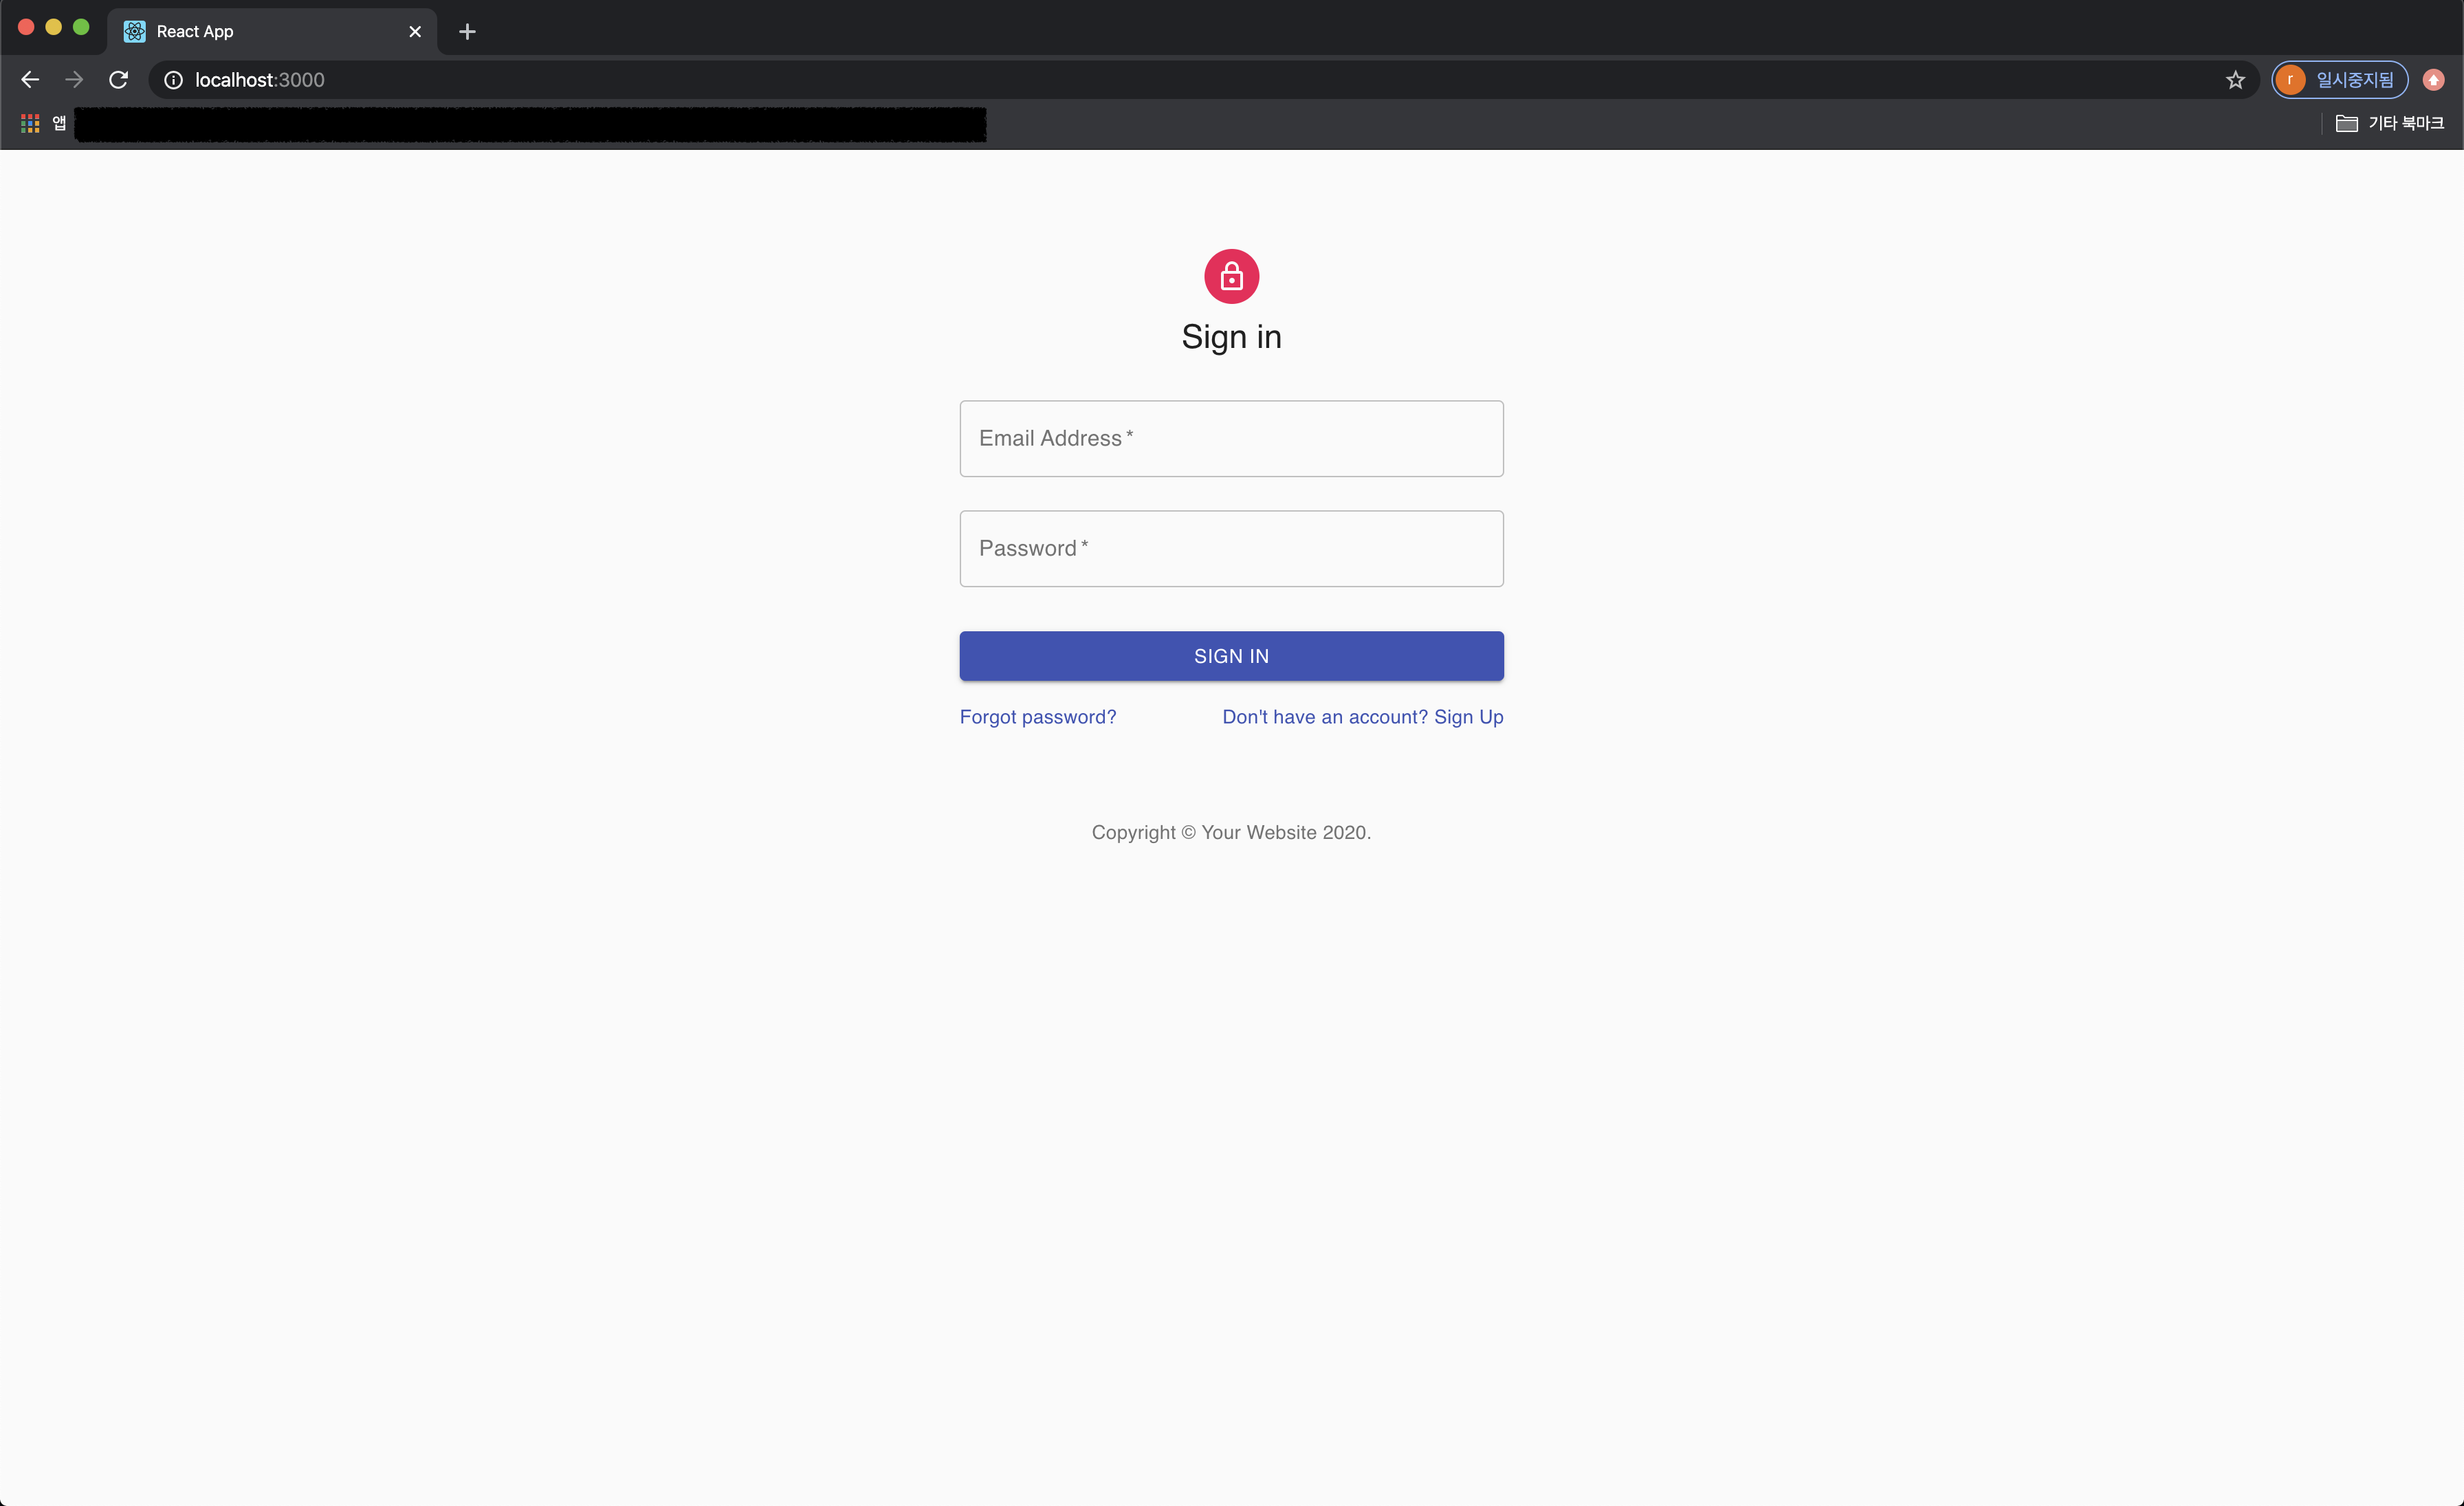
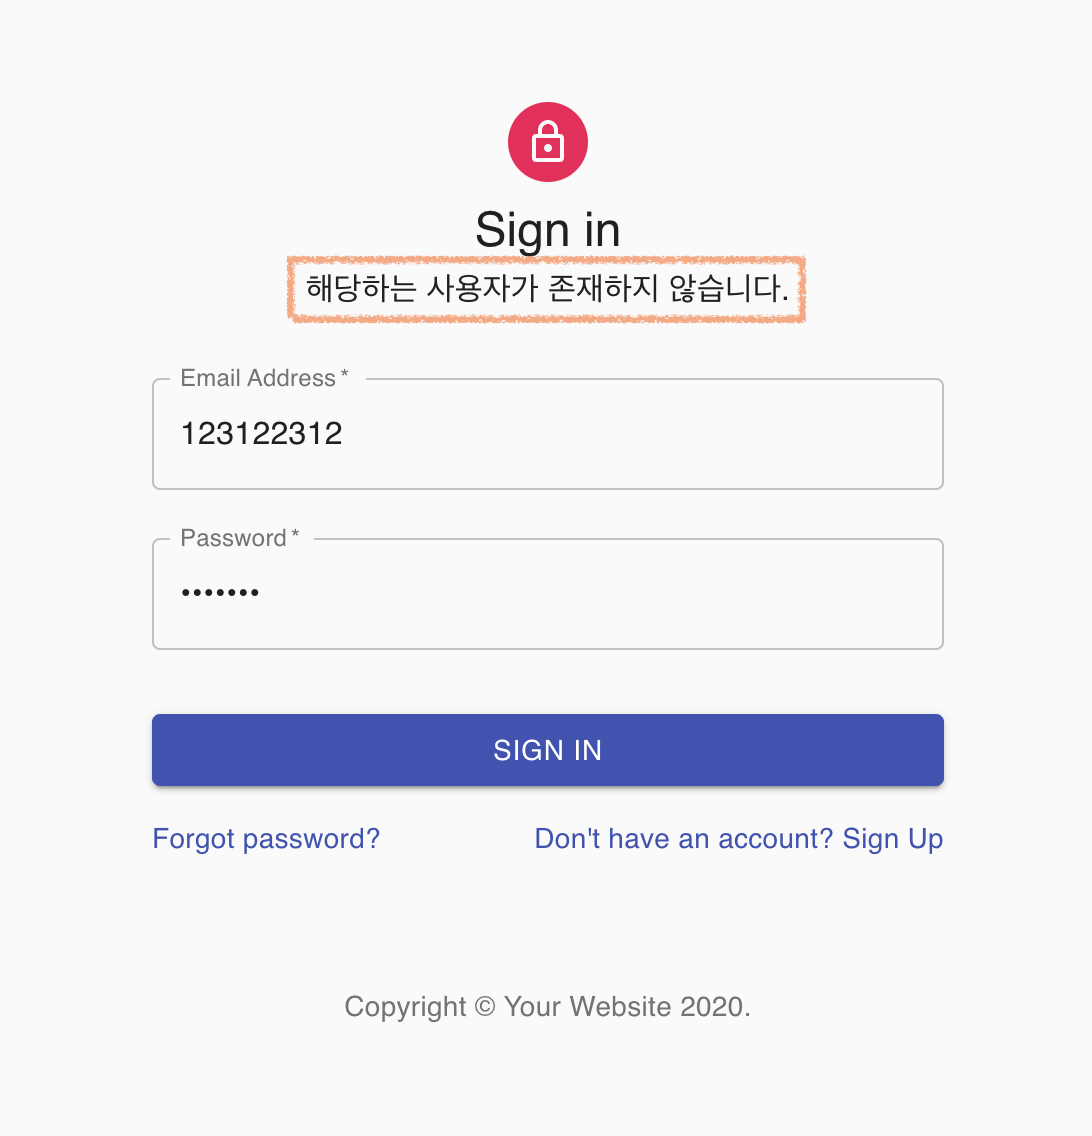
서버를 올리고, yarn start로 실행시켜보자.
| Id 잘못입력 | Password 잘못입력 |
|---|---|
 | 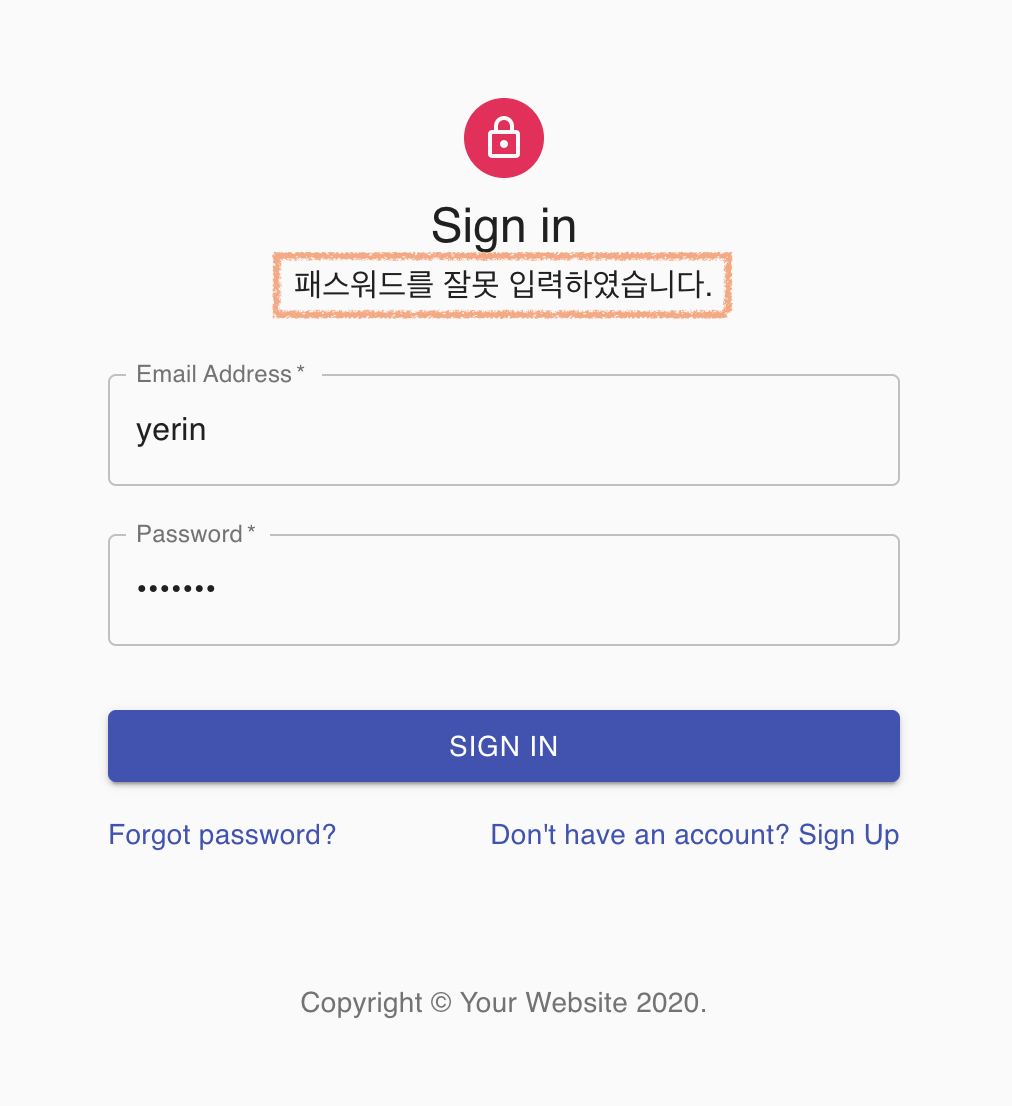 |
우측 하단의 Sign up 링크를 눌러보자
| path = '/' | path = '/join' |
|---|---|
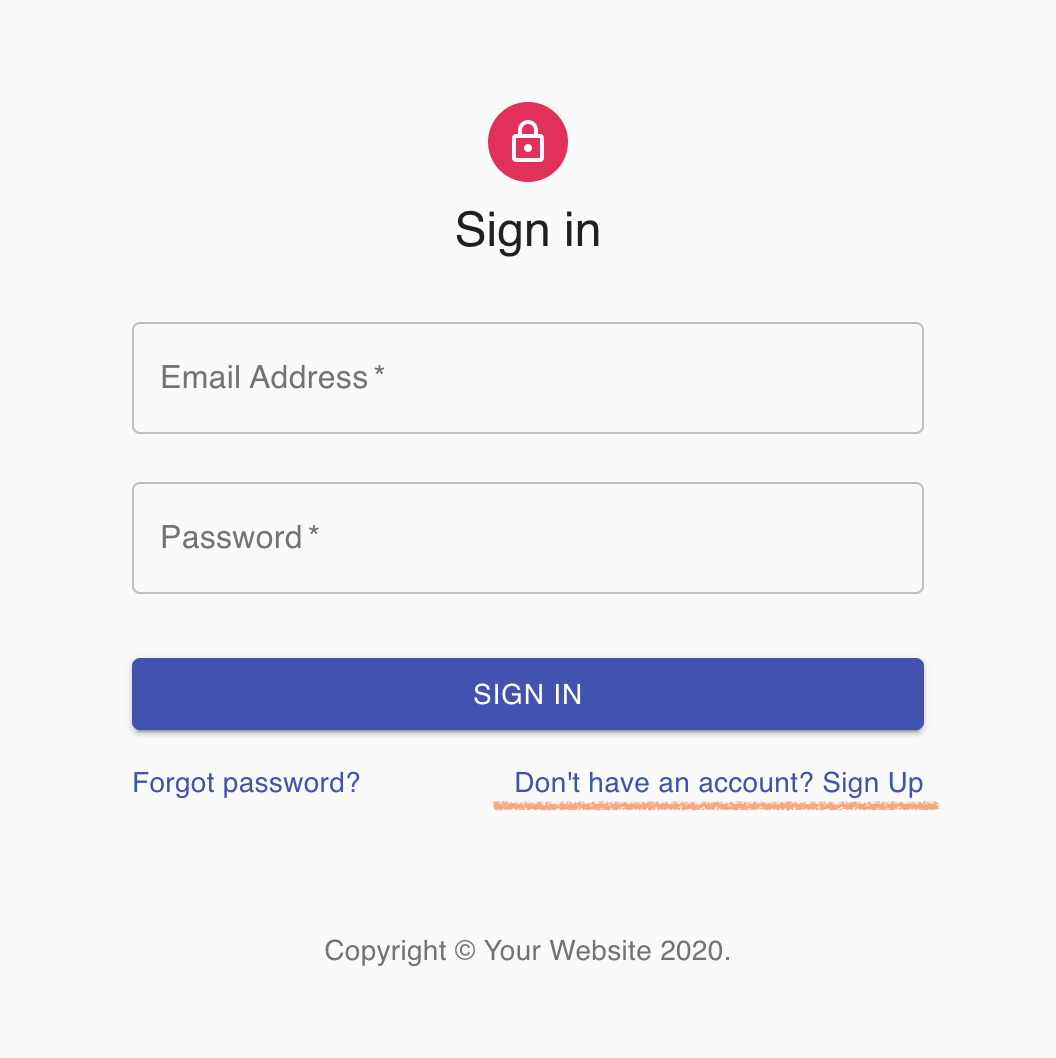 | 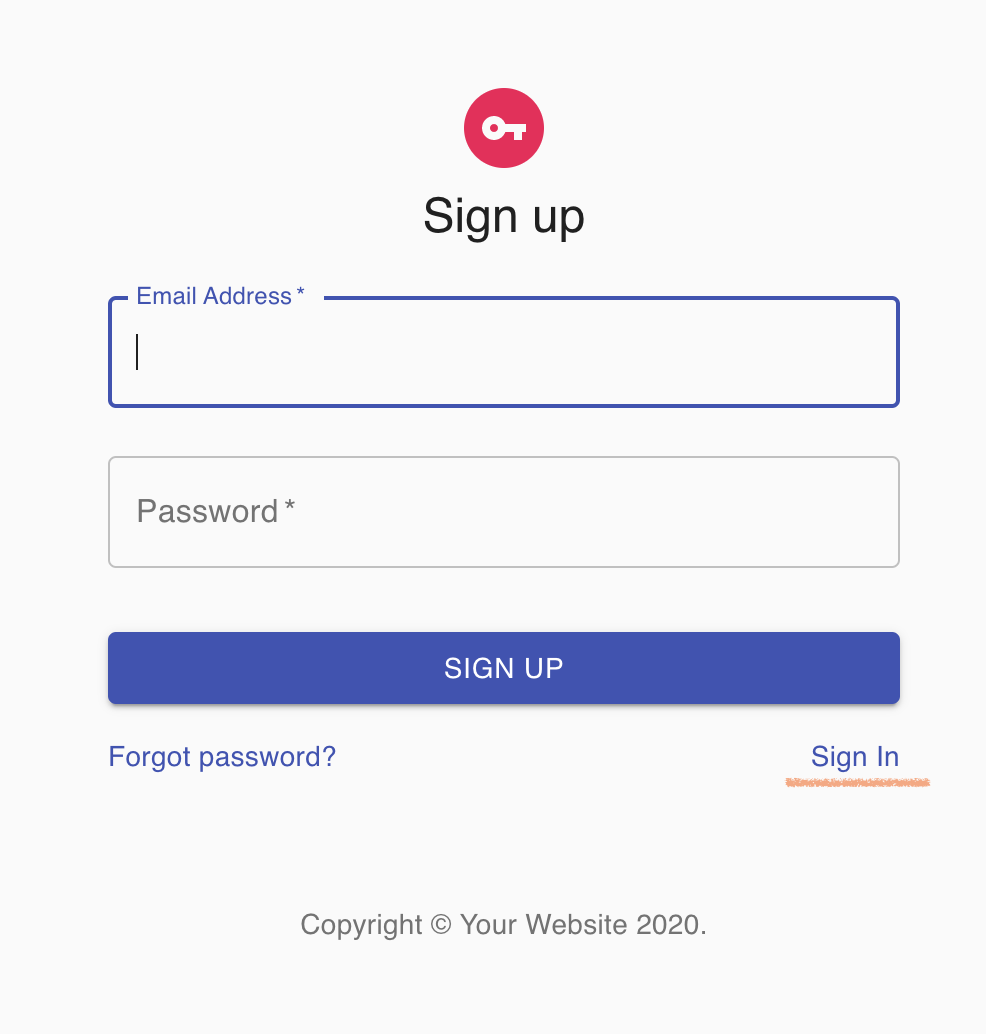 http://localhost:3000/join 으로 Uri가 바뀜 |
전체 코드는 github에서 확인할 수 있습니다.

