How to add Buttons to SwiftUI application
- It seems .tint(.red) has replaced .accentColor(.red)
- .foregroundColor() 대신에 .foregroundStyle() 쓰기.
- .foregroundColor() → 다음 버전의 iOS에서 deprecated 될 예정이라고 함
- 다음 버전에서 deprecated 될 예정인 것들은 xcode에서 알려주고 대신 사용할 수 있는 것도 같이 알려준다.
import SwiftUI
struct ButtonsBootcamp: View {
//@State -> means it might change
@State var title: String = "This is my title"
var body: some View {
VStack(spacing: 20) {
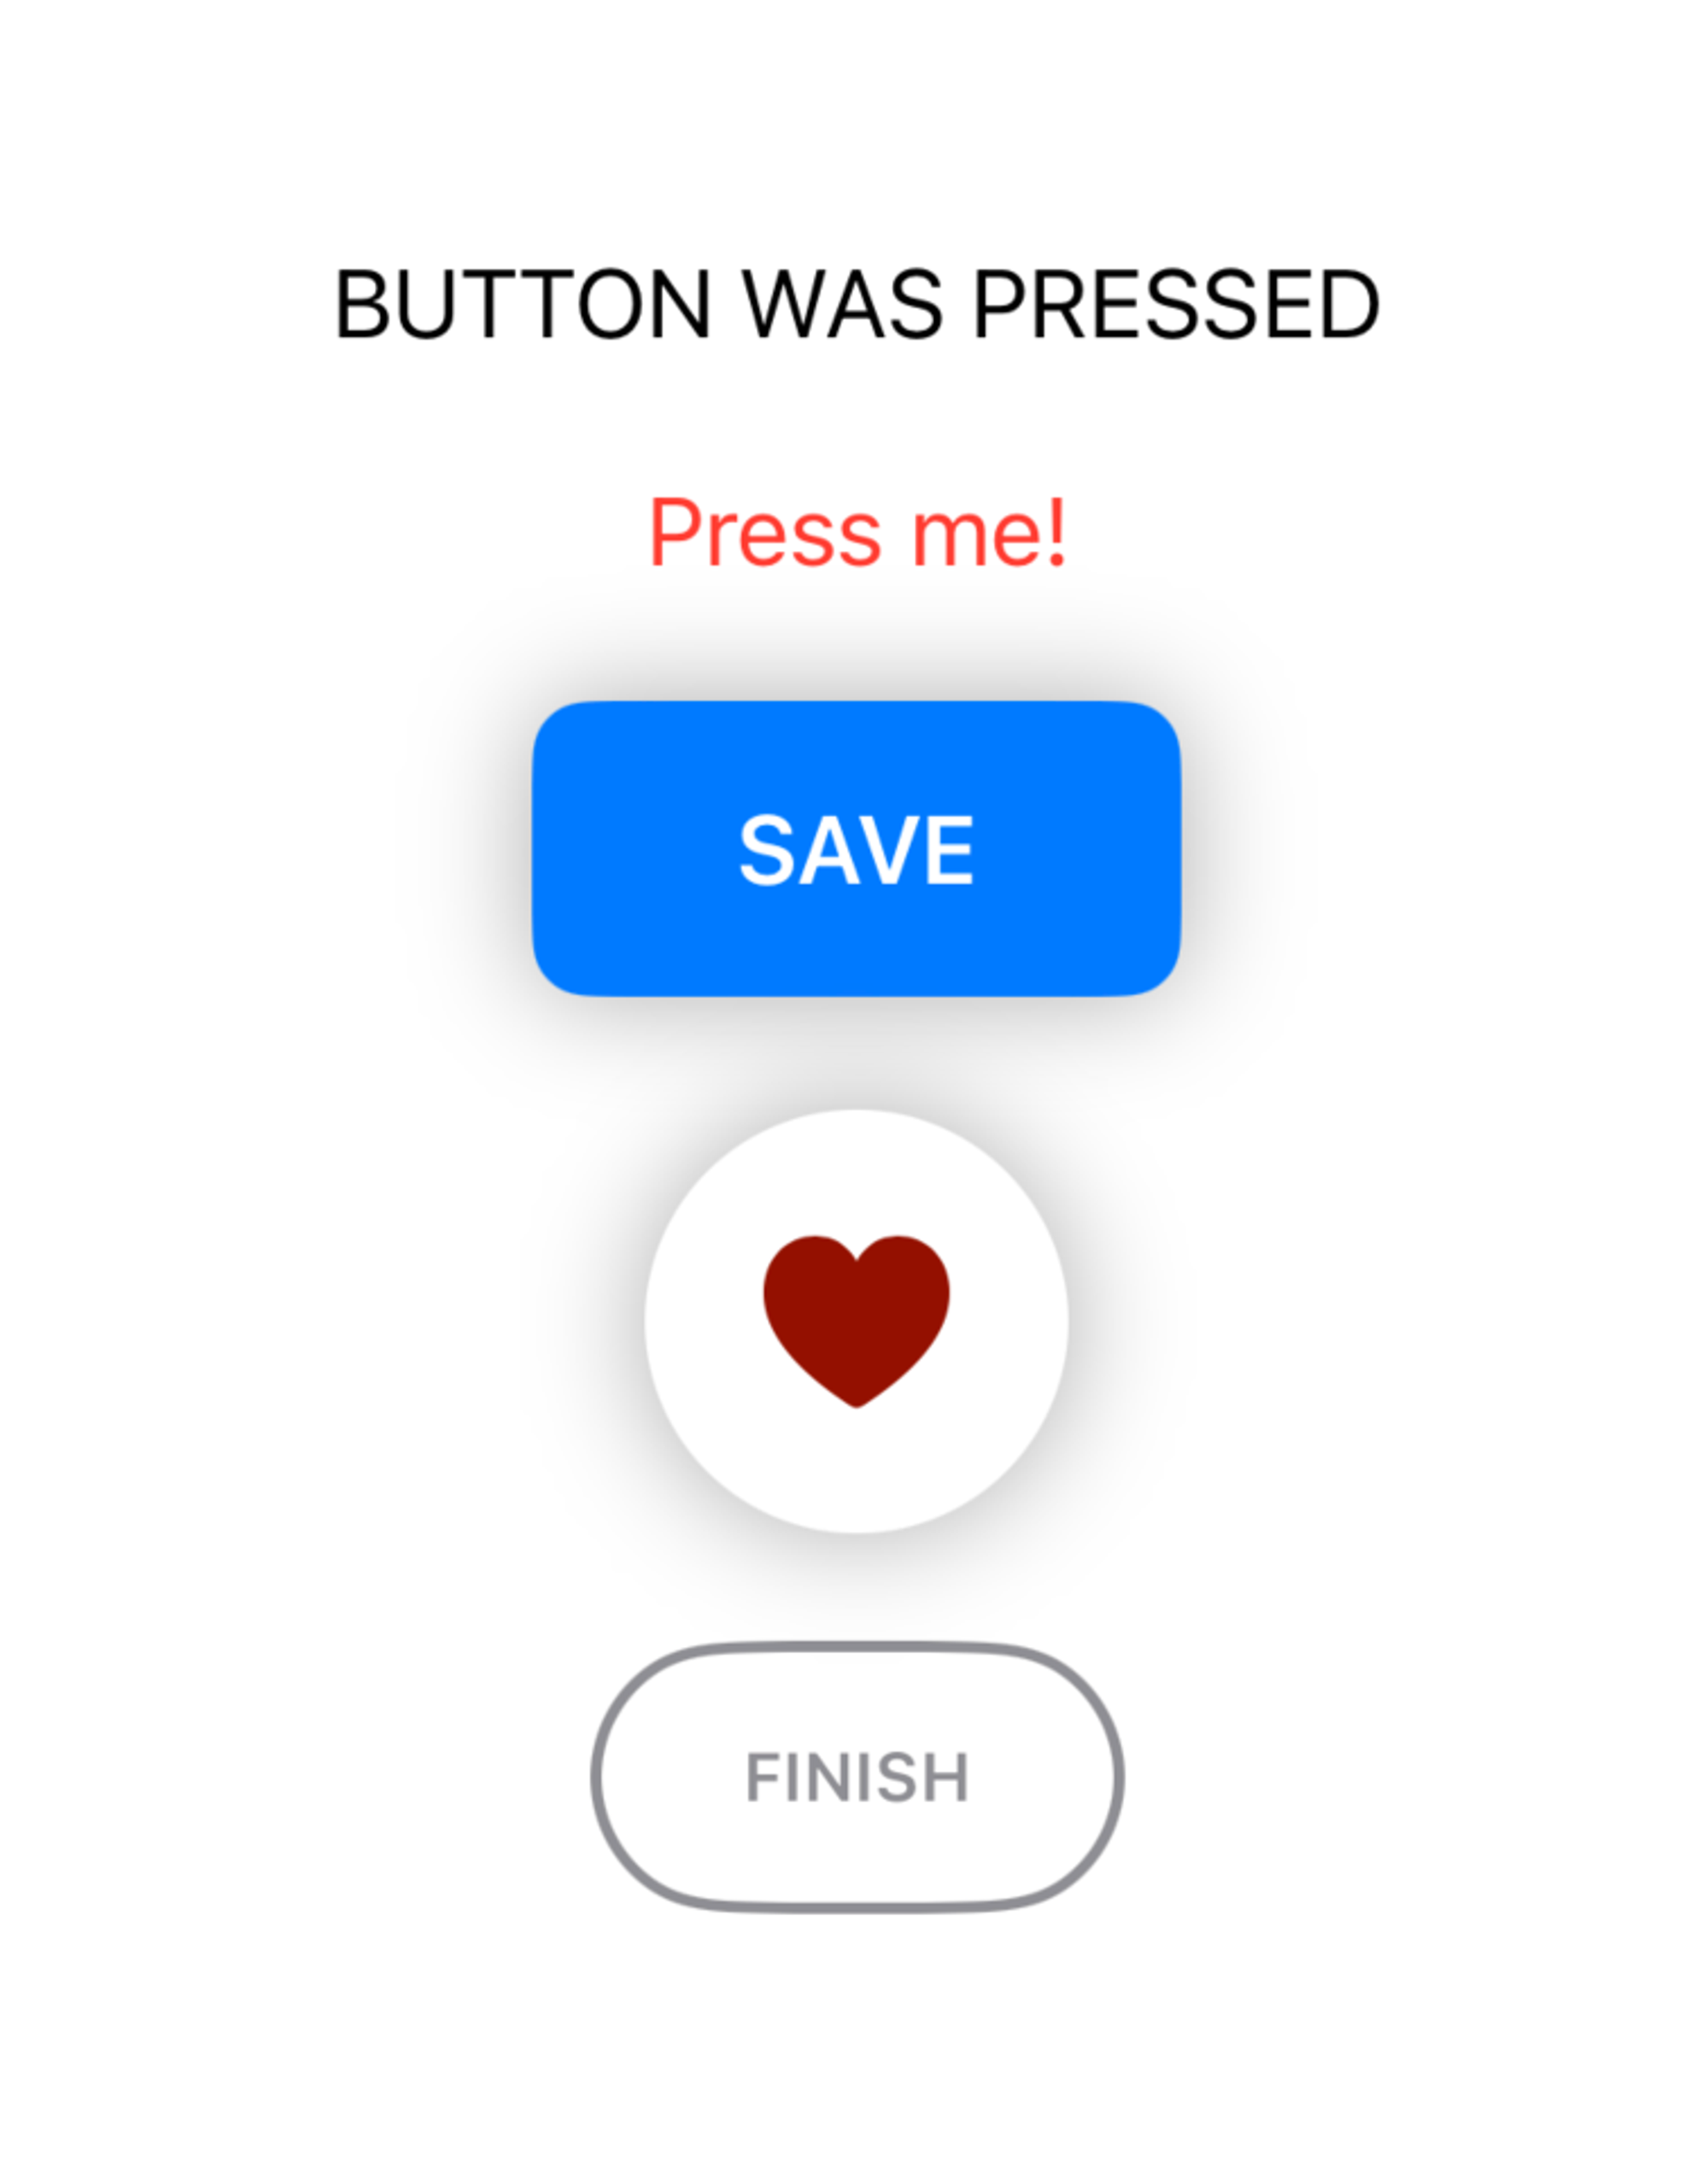
Text(title)
//방법 1
//in this button, the initializer is a string. it works but it's not pretty.
Button("Press me!") {
//this is going to execute when the button is pressed.
self.title = "BUTTON WAS PRESSED"
}
//button formatting 글자색 바꾸기
//.accentColor(.red) //옛날 방식
.tint(.red) //this is the new way of doing it.
//방법 2
//this is more dynamic way of doing it.
Button(action: {
//this is what's gonna happen when we press the button.
self.title = "Button #2 was pressed"
}, label: {
Text("Save".uppercased())
.font(.headline)
.fontWeight(.semibold)
.foregroundColor(.white)
.padding()
.padding(.horizontal, 20)
.background(
Color.blue
.cornerRadius(10)
.shadow(radius: 10)
)
})
//방법 3
Button(action: {
self.title = "Button #3"
}, label: {
Circle()
.fill(Color.white)
.frame(width: 75, height: 75)
.shadow(radius: 10)
.overlay(
Image(systemName: "heart.fill")
.font(.largeTitle)
.foregroundStyle(Color(#colorLiteral(red: 0.5807225108, green: 0.066734083, blue: 0, alpha: 1)))
)
})
//방법 4
Button(action: {
self.title = "Button #4"
}, label: {
Text("Finish".uppercased())
.font(.caption)
.bold()
.foregroundStyle(.gray)
.padding()
.padding(.horizontal, 10)
.background(
Capsule()
.stroke(Color.gray, lineWidth: 2.0)
)
})
}
}
}
#Preview {
ButtonsBootcamp()
}