Supabase Auth란?
Supabase는 자칭 Firebase를 대체하고자 하는 오픈소스 BaaS이다. 프론트엔드 개발자로서 혼자 앱 개발을 진행하면서 Supabase를 쓸까 Firebase를 쓸까 고민을 많이 했는데 결론적으로는 Supabase를 중점적으로 쓰기로 했다. BaaS 선택 과정에 대해서는 나중에 글을 따로 작성해 보려 한다.
Supabase도 Firebase와 마찬가지로 소셜로그인 기능을 위한 OAuth Authentication을 제공하는데 Supabase에서는 "카카오"까지 제공된다는 점이 마음에 들었다.
Supabase 공식문서만 보고는 구글 소셜로그인 기능을 구현하는 데 어려움이 많았기 때문에 구현 과정을 기록으로 남기려 한다. (특히 React Native CLI로 구현하는 방법은 아예 찾아볼 수가 없었다..)
Supabase Auth로 Google 소셜로그인 구현하기
1. React Native에 Supabase Auth 설치 및 기초 세팅하기
yarn add @supabase/supabase-js @react-native-async-storage/async-storage react-native-elements react-native-url-polyfill- Supabase Auth를 사용하는 데 필요한 라이브러리를 설치한다.
import { AppState } from 'react-native'
import 'react-native-url-polyfill/auto'
import AsyncStorage from '@react-native-async-storage/async-storage'
import { createClient } from '@supabase/supabase-js'

const supabaseUrl = YOUR_REACT_NATIVE_SUPABASE_URL
const supabaseAnonKey = YOUR_REACT_NATIVE_SUPABASE_ANON_KEY

export const supabase = createClient(supabaseUrl, supabaseAnonKey, {
  auth: {
    storage: AsyncStorage,
    autoRefreshToken: true,
    persistSession: true,
    detectSessionInUrl: false,
  },
})

// Tells Supabase Auth to continuously refresh the session automatically
// if the app is in the foreground. When this is added, you will continue
// to receive `onAuthStateChange` events with the `TOKEN_REFRESHED` or
// `SIGNED_OUT` event if the user's session is terminated. This should
// only be registered once.
AppState.addEventListener('change', (state) => {
  if (state === 'active') {
    supabase.auth.startAutoRefresh()
  } else {
    supabase.auth.stopAutoRefresh()
  }
})- Supabase 기초 세팅을 위한
lib/supabase.ts파일을 생성한다.
const supabaseUrl = YOUR_REACT_NATIVE_SUPABASE_URL
const supabaseAnonKey = YOUR_REACT_NATIVE_SUPABASE_ANON_KEY- 두 변수는 보안을 위해
.env파일에 따로 관리하는 것이 좋다.
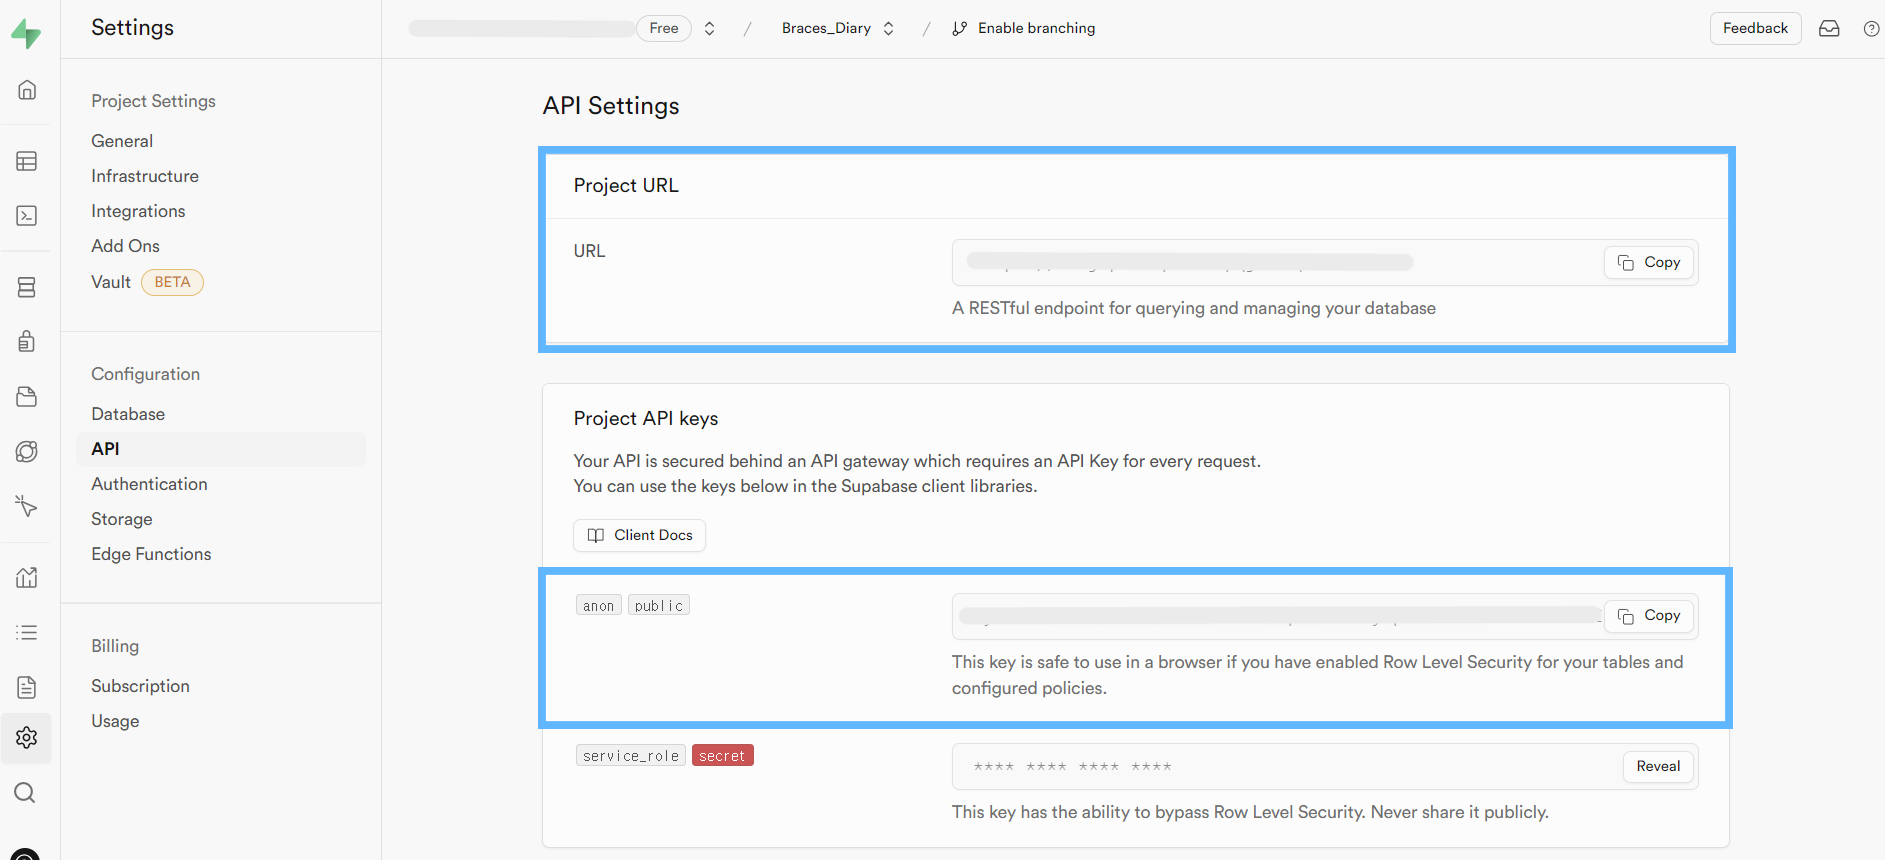
- Supabase
URL과ANON_KEY는 Supabase대시보드 > Project Settings > API에서 확인할 수 있다.
2. 구글 클라우드 플랫폼에서 OAuth 클라이언트 ID 생성
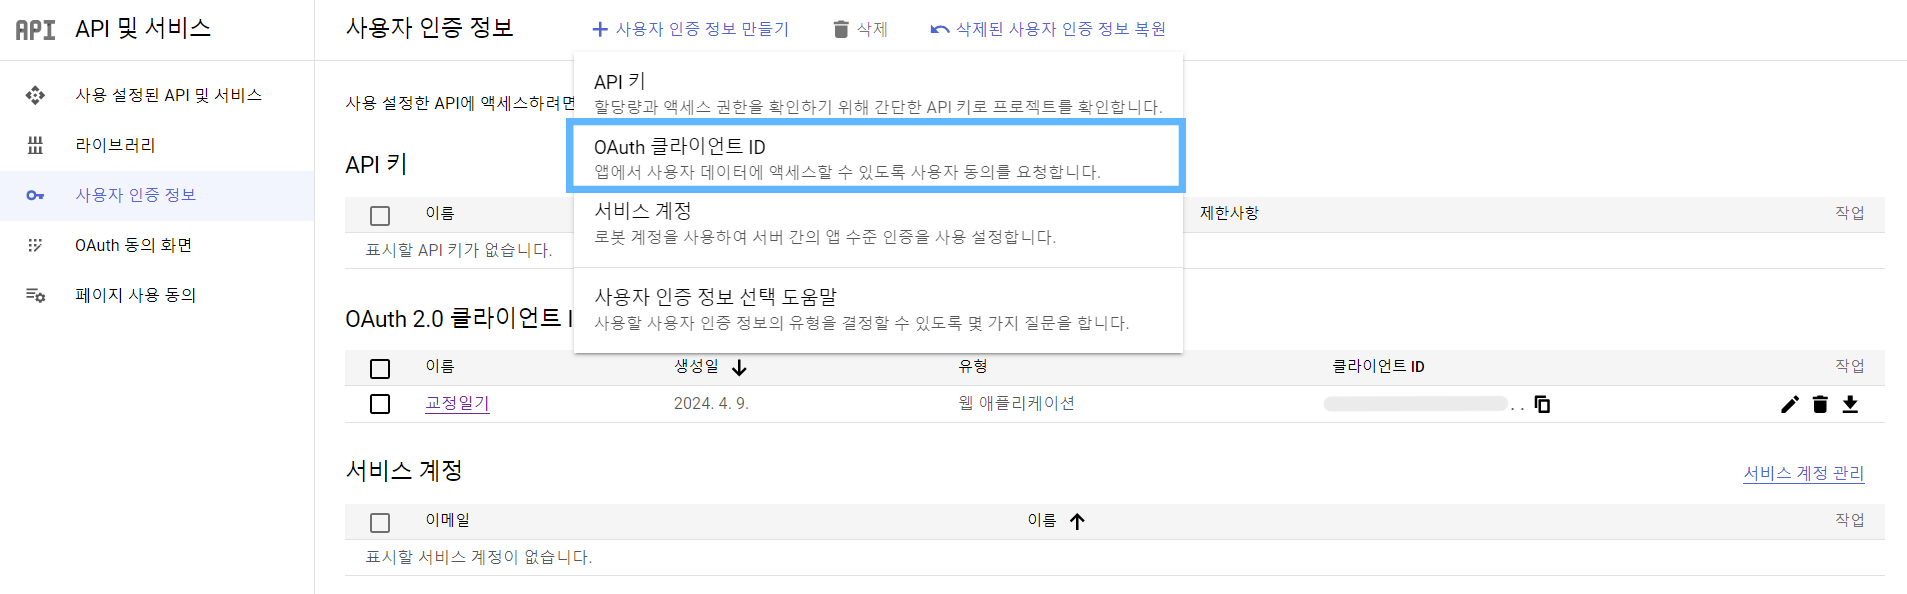
- 구글 클라우드 플랫폼에서 새 프로젝트를 생성한 후
API 및 서비스 > 사용자 인증 정보에서OAuth 클라이언트 ID를 생성한다.
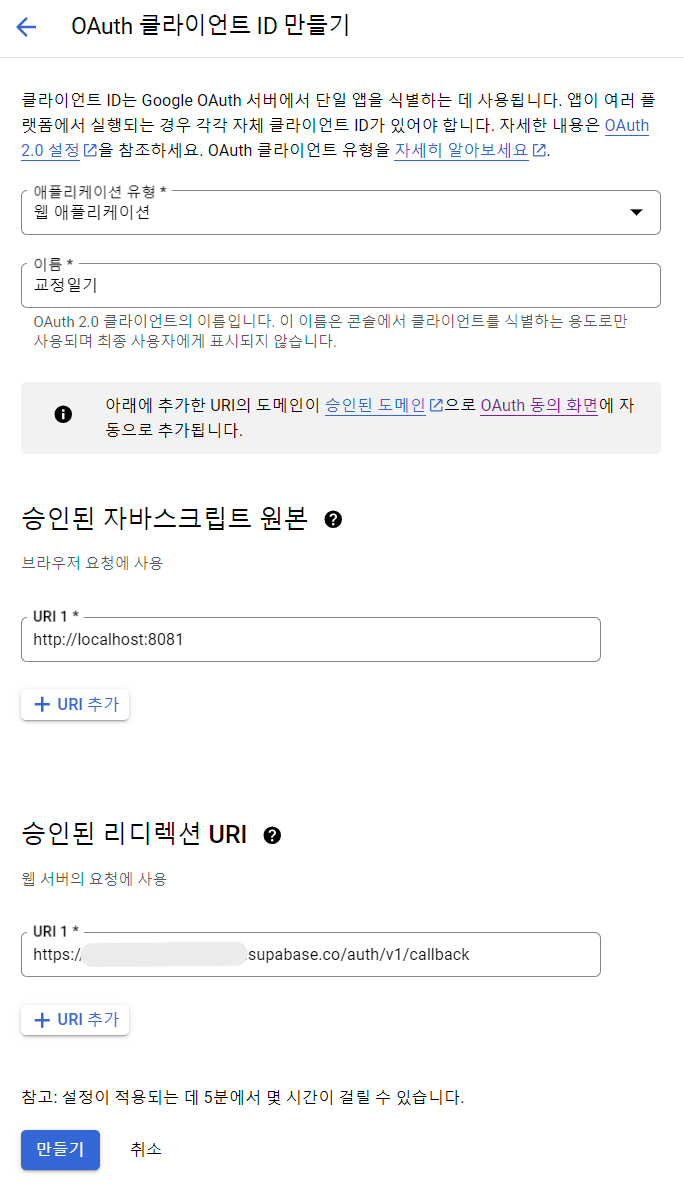
- 리액트 네이티브의 경우 애플리케이션 유형은
웹 애플리케이션을 선택한다.
- 승인된 자바스크립트 원본은 앱이라 어떤 URI를 적어야 되는지 몰라서 일단
http://localhost와http://localhost:80812개를 작성했다. - 구글 공식문서에서 "로컬 테스트 또는 개발의 경우
http://localhost및http://localhost:<port_number>를 모두 추가하세요."라고 알려주고 있다.
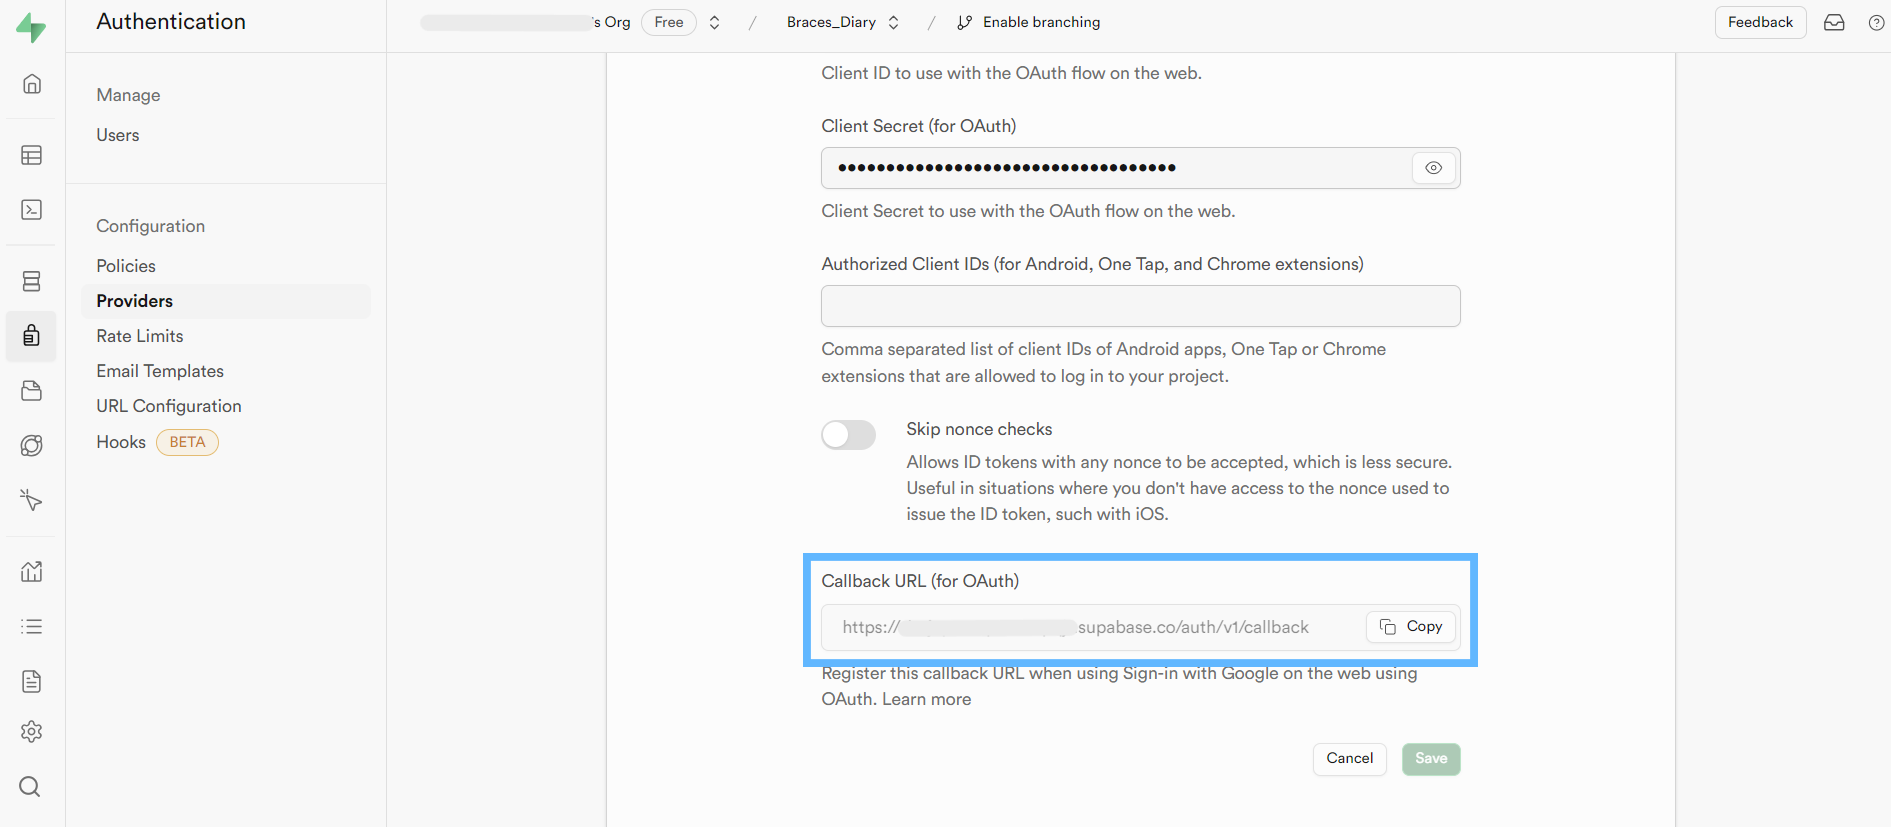
- 승인된 리디렉션 URI는 Supabase
대시보드 > Authentication > Providers > Google아코디언을 열어서Callback URL (for OAuth)의 URL을 작성하면 된다.
3. Supabase Authentication 대시보드 세팅
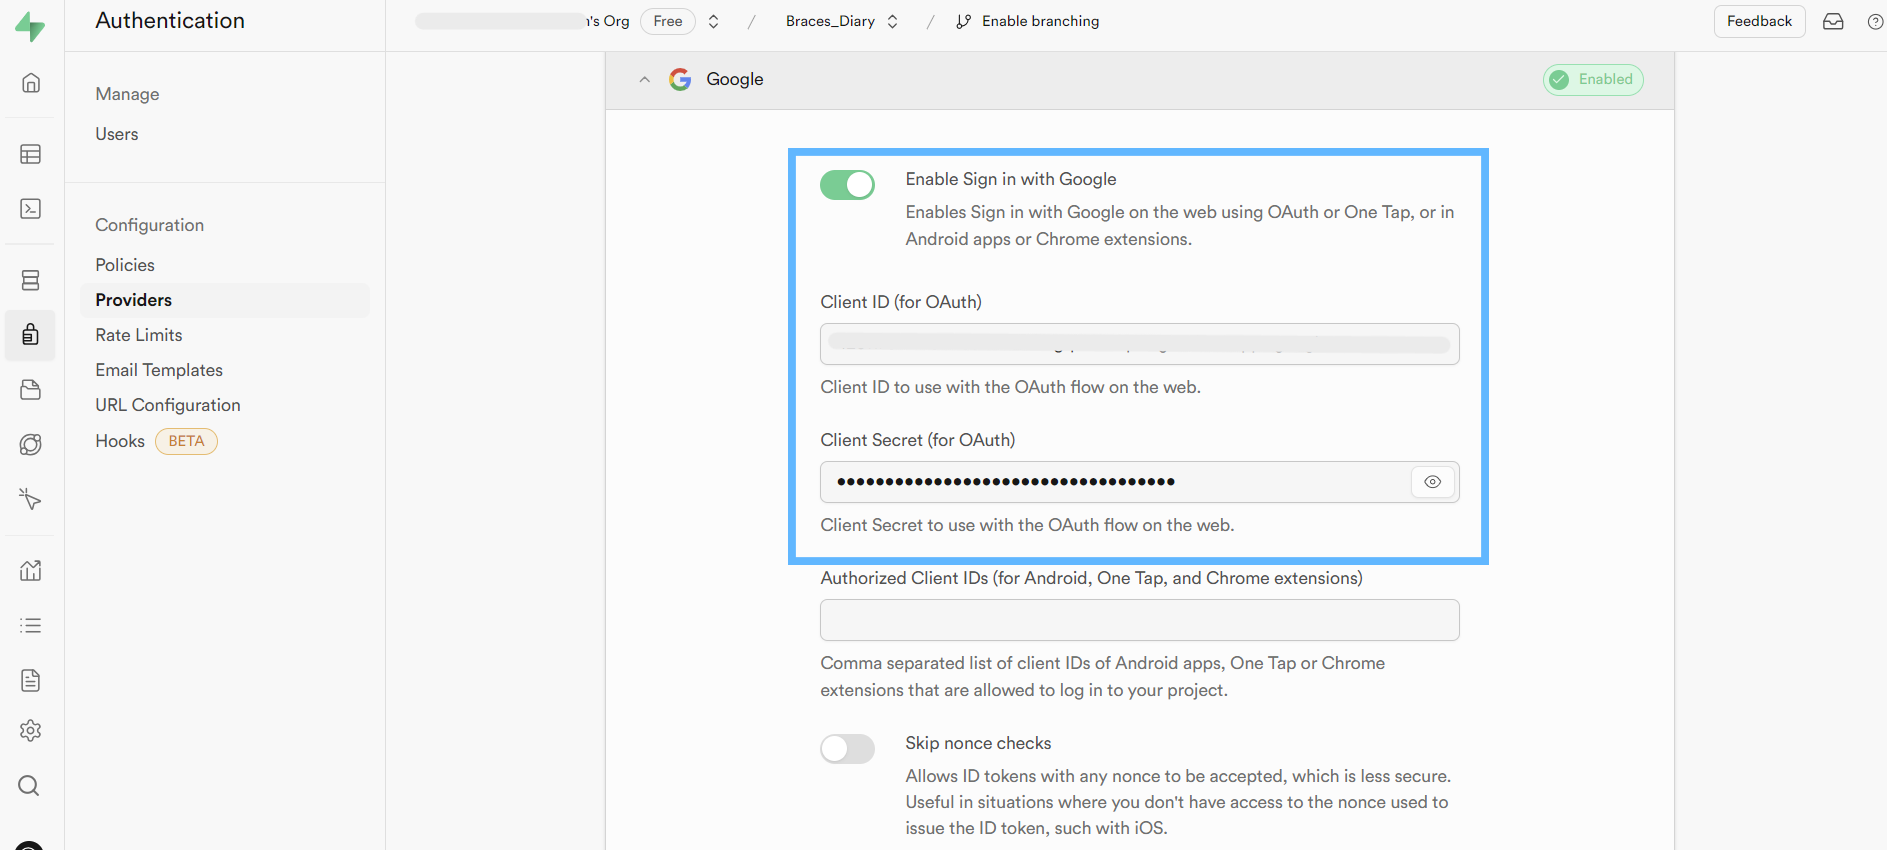
대시보드 > Authentication > Providers > Google아코디언을 열어서Enable Sign in with Google을 활성화한다.
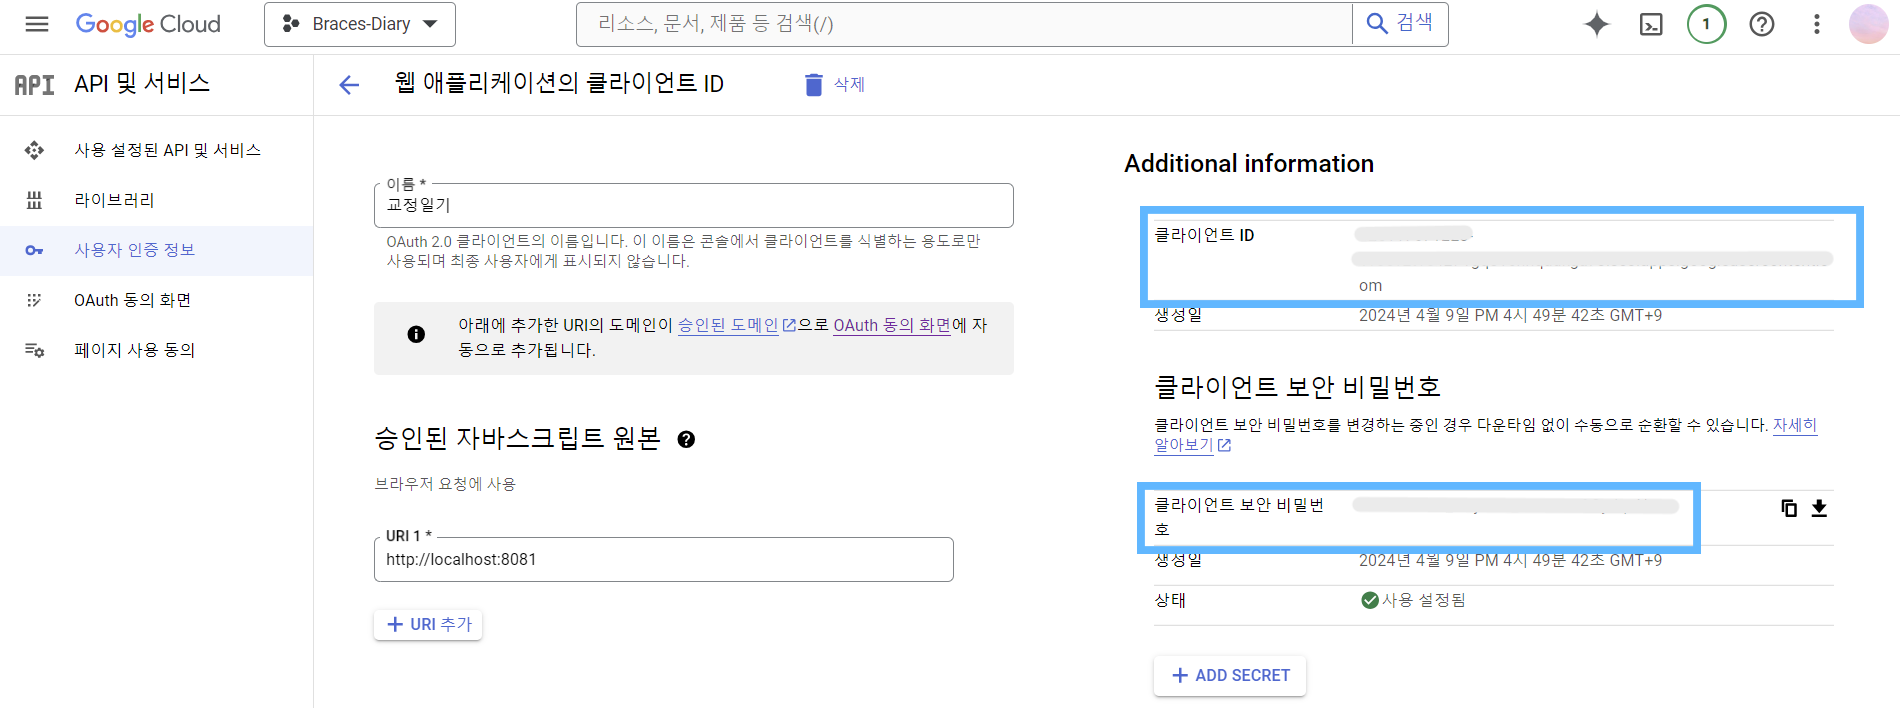
- Client ID와 Client Secret은 구글 클라우드의
API 및 서비스 > 사용자 인증 정보 > OAuth 2.0 클라이언트 ID에 생성된 항목을 클릭해서 들어가면 확인할 수 있다.
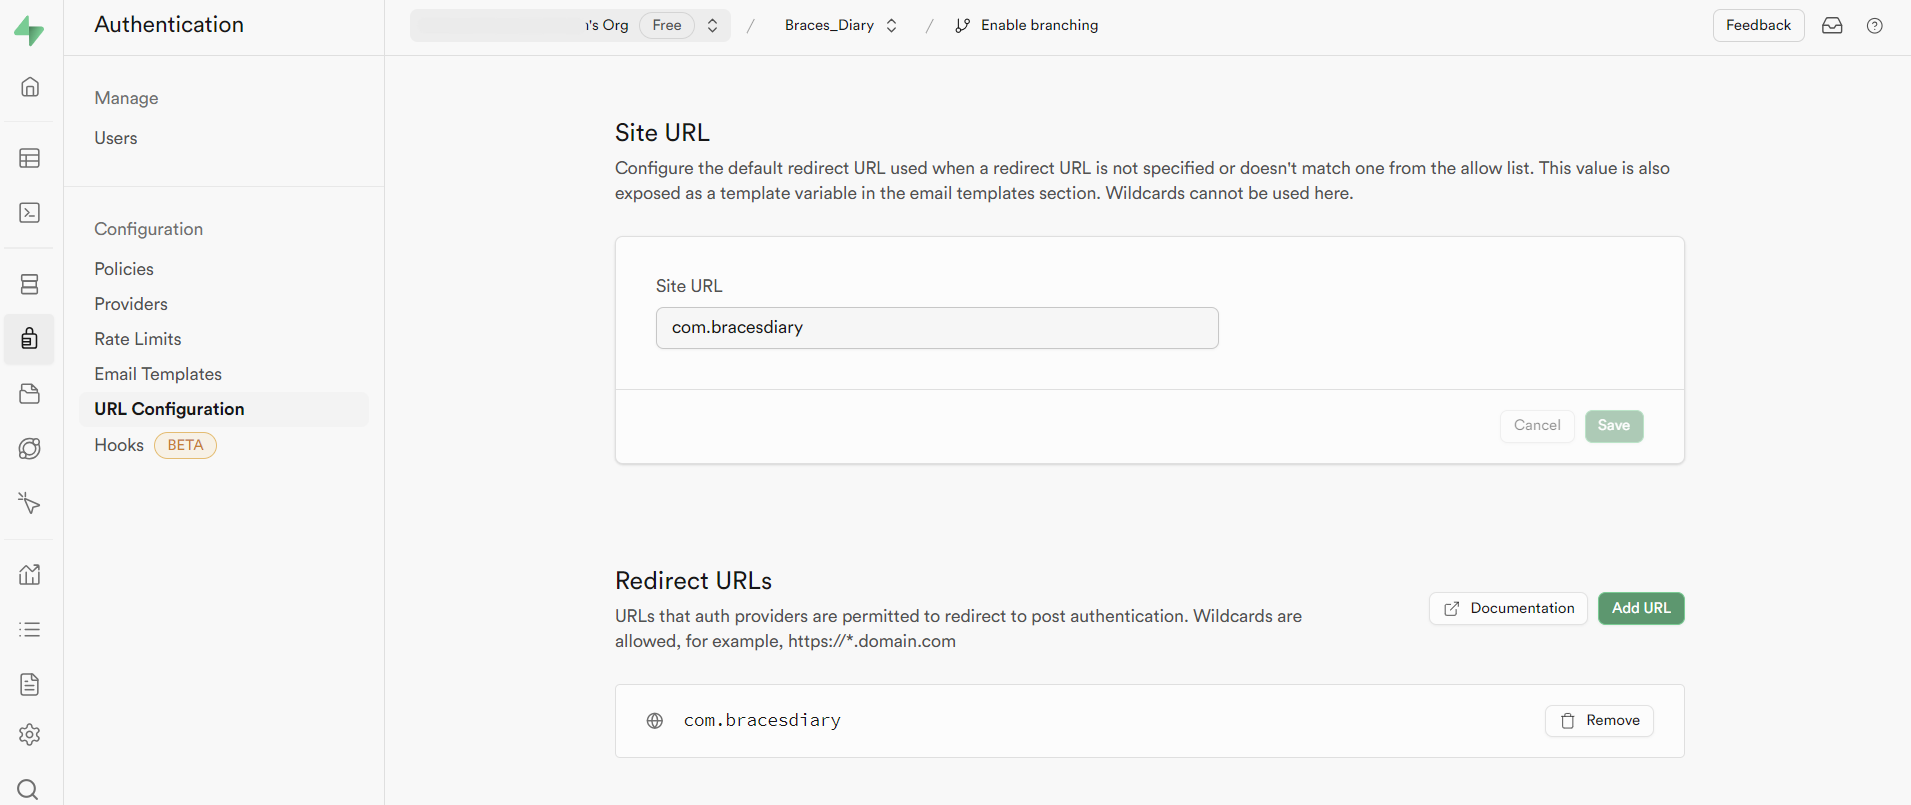
대시보드 > Authentication > URL Configuration에서 Redirect URLs을 설정해야 한다.- 앱이라 어떤 URL을 넣어야 하는지 몰라서 일단
application id를 넣었는데 로그인 기능 구현에는 문제가 없는 거 같다. (잘 아시는 분 있으면 댓글 남겨주세요!)
4. 구글 소셜로그인 구현 코드 작성
const { data, error } = await supabase.auth.signInWithOAuth({
  provider: 'github'
})- 처음에는
signInWithOAuth메서드를 이용해서 간단하게 구현해 보려 했지만 터미널에서 콘솔로 찍은data.url로 받은 구글 소셜로그인 페이지 링크만 확인할 수 있을 뿐, 구글 로그인 버튼을 클릭했을 때 자동으로 구글 소셜로그인 페이지로 이동하지는 않았다. - 그래서 공식문서에서 제공하는
signInWithIdToken메서드를 이용하는 방법으로 변경했다.
yarn add @react-native-google-signin/google-signin- 일단 구글 소셜로그인에 필요한 라이브러리를 설치한다.
import {
  GoogleSignin,
  GoogleSigninButton,
  statusCodes,
} from '@react-native-google-signin/google-signin'
import { supabase } from '../utils/supabase'

export default function () {
  GoogleSignin.configure({
    scopes: ['https://www.googleapis.com/auth/drive.readonly'],
    webClientId: 'YOUR CLIENT ID FROM GOOGLE CONSOLE',
  })

  const signInWithGoogle = async () => {
    try {
      await GoogleSignin.hasPlayServices();
      const userInfo = await GoogleSignin.signIn();
      if (userInfo.idToken) {
        const { data, error } = await supabase.auth.signInWithIdToken({
          provider: "google",
          token: userInfo.idToken,
        });
        console.log(error, data);
      } else {
        throw new Error("no ID token present!");
      }
    } catch (error: any) {
      if (error.code === statusCodes.SIGN_IN_CANCELLED) {
        // user cancelled the login flow
      } else if (error.code === statusCodes.IN_PROGRESS) {
        // operation (e.g. sign in) is in progress already
      } else if (error.code === statusCodes.PLAY_SERVICES_NOT_AVAILABLE) {
        // play services not available or outdated
      } else {
        // some other error happened
      }
    }
  };

  return (
    <GoogleSigninButton
      size={GoogleSigninButton.Size.Wide}
      color={GoogleSigninButton.Color.Dark}
      onPress={signInWithGoogle}
    />
  )
}webClientId에는대시보드 > Authentication > Providers > Google아코디언을 열어서 추가했던Client ID를 그대로 작성하면 된다. (물론.env파일로 관리할 것)
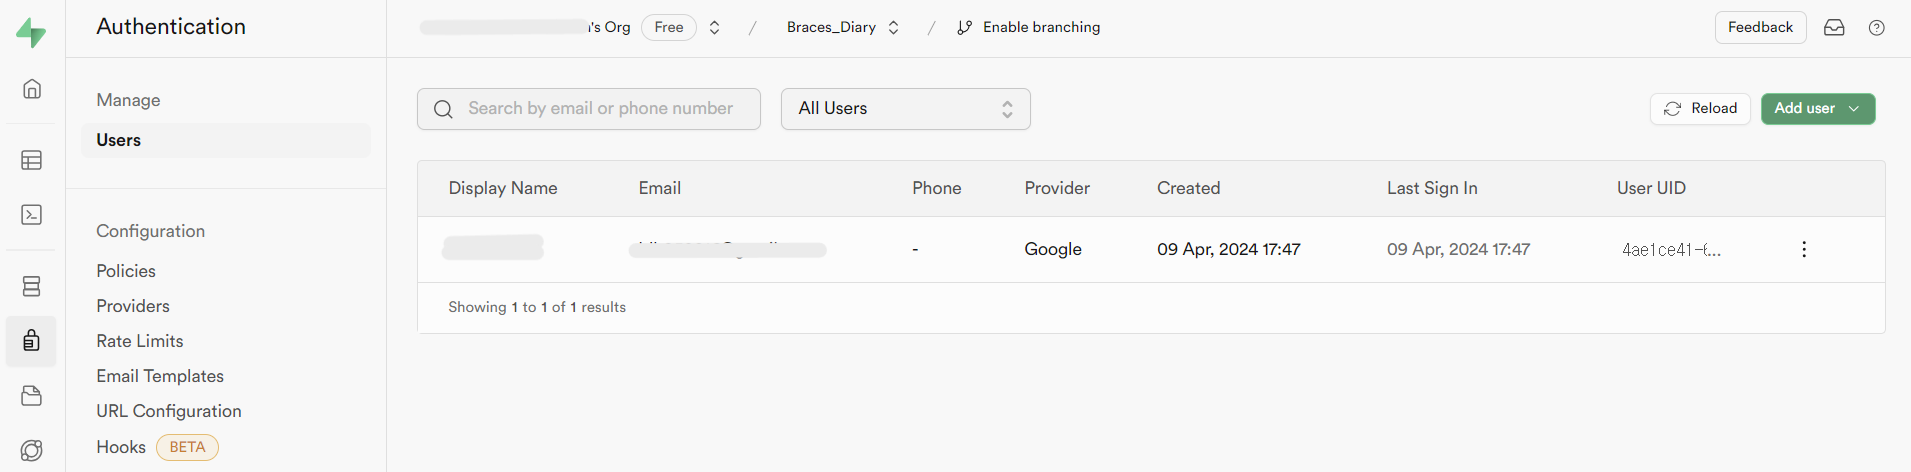
- 구글 소셜로그인에 성공하면
대시보드 > Authentication > Users에서 저장된 유저 데이터를 확인할 수 있다.
Auth UI
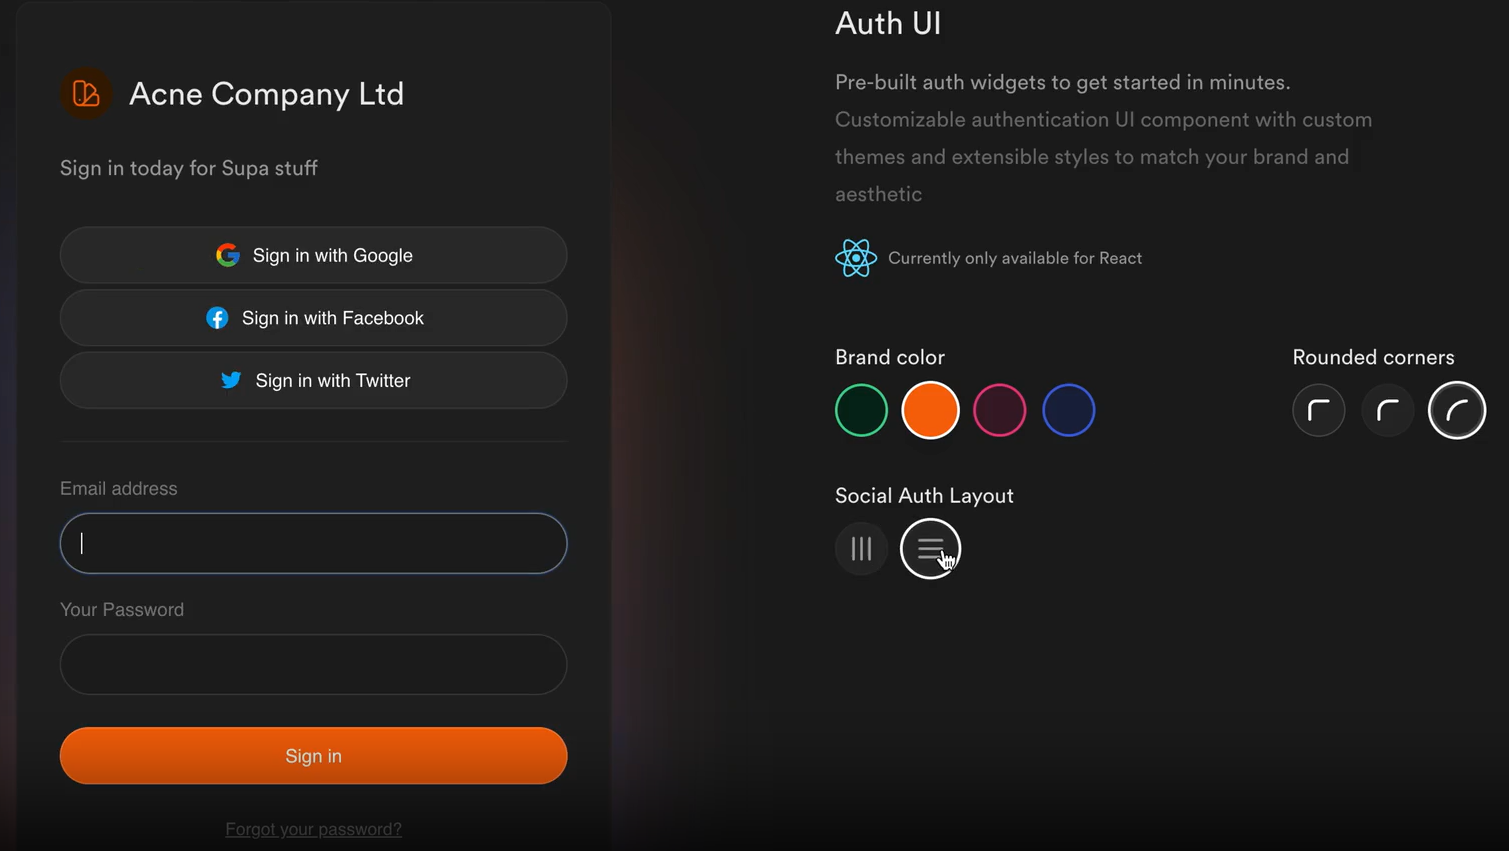
- 참고로 Supabase에서
@supabase/auth-ui-react라는 라이브러리를 제공하는데 이를 통해 Auth UI를 간단하게 그릴 수 있다.
References

Small Steps make a Big Difference.🚶🏻♀️