
Overview
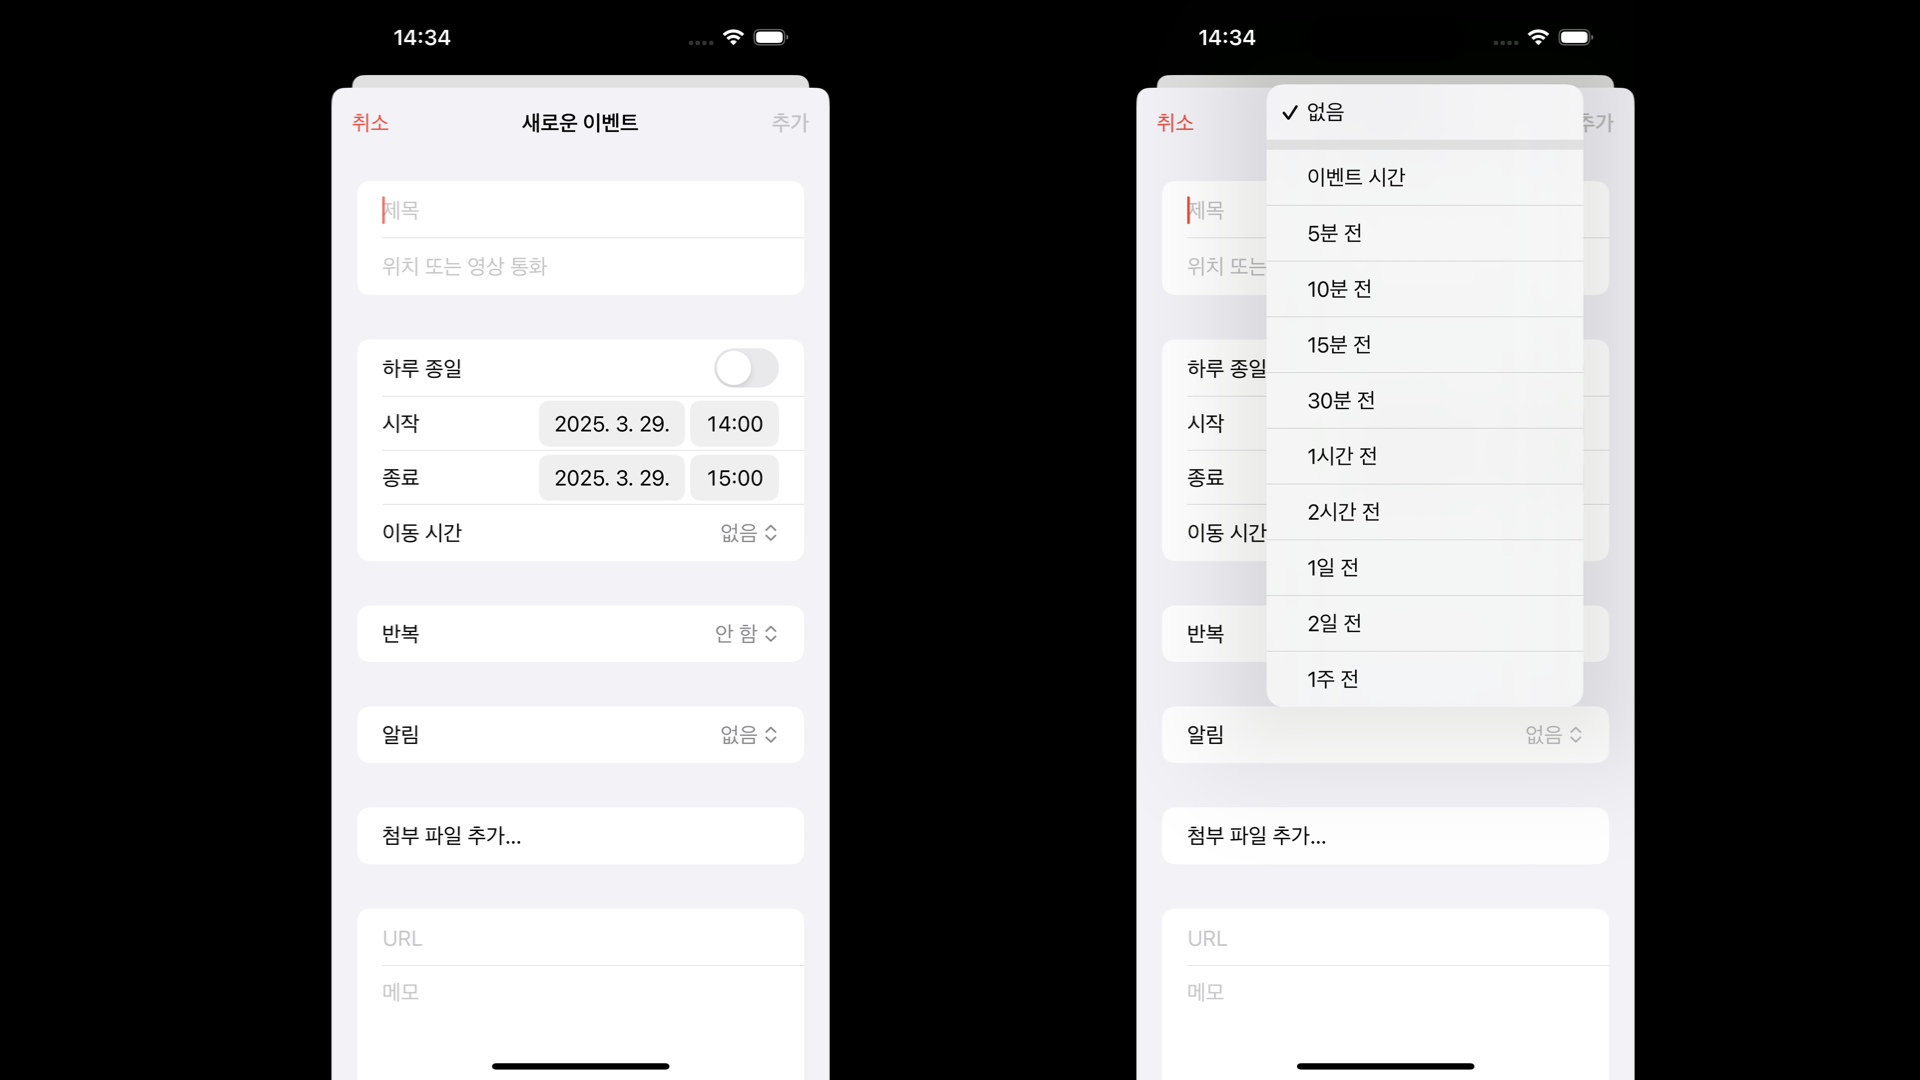
캘린더 앱을 실행했을 때 이동시간, 반복, 알림과 같이 cell의 accessoryView에 Pull Down Button을 추가하는 작업
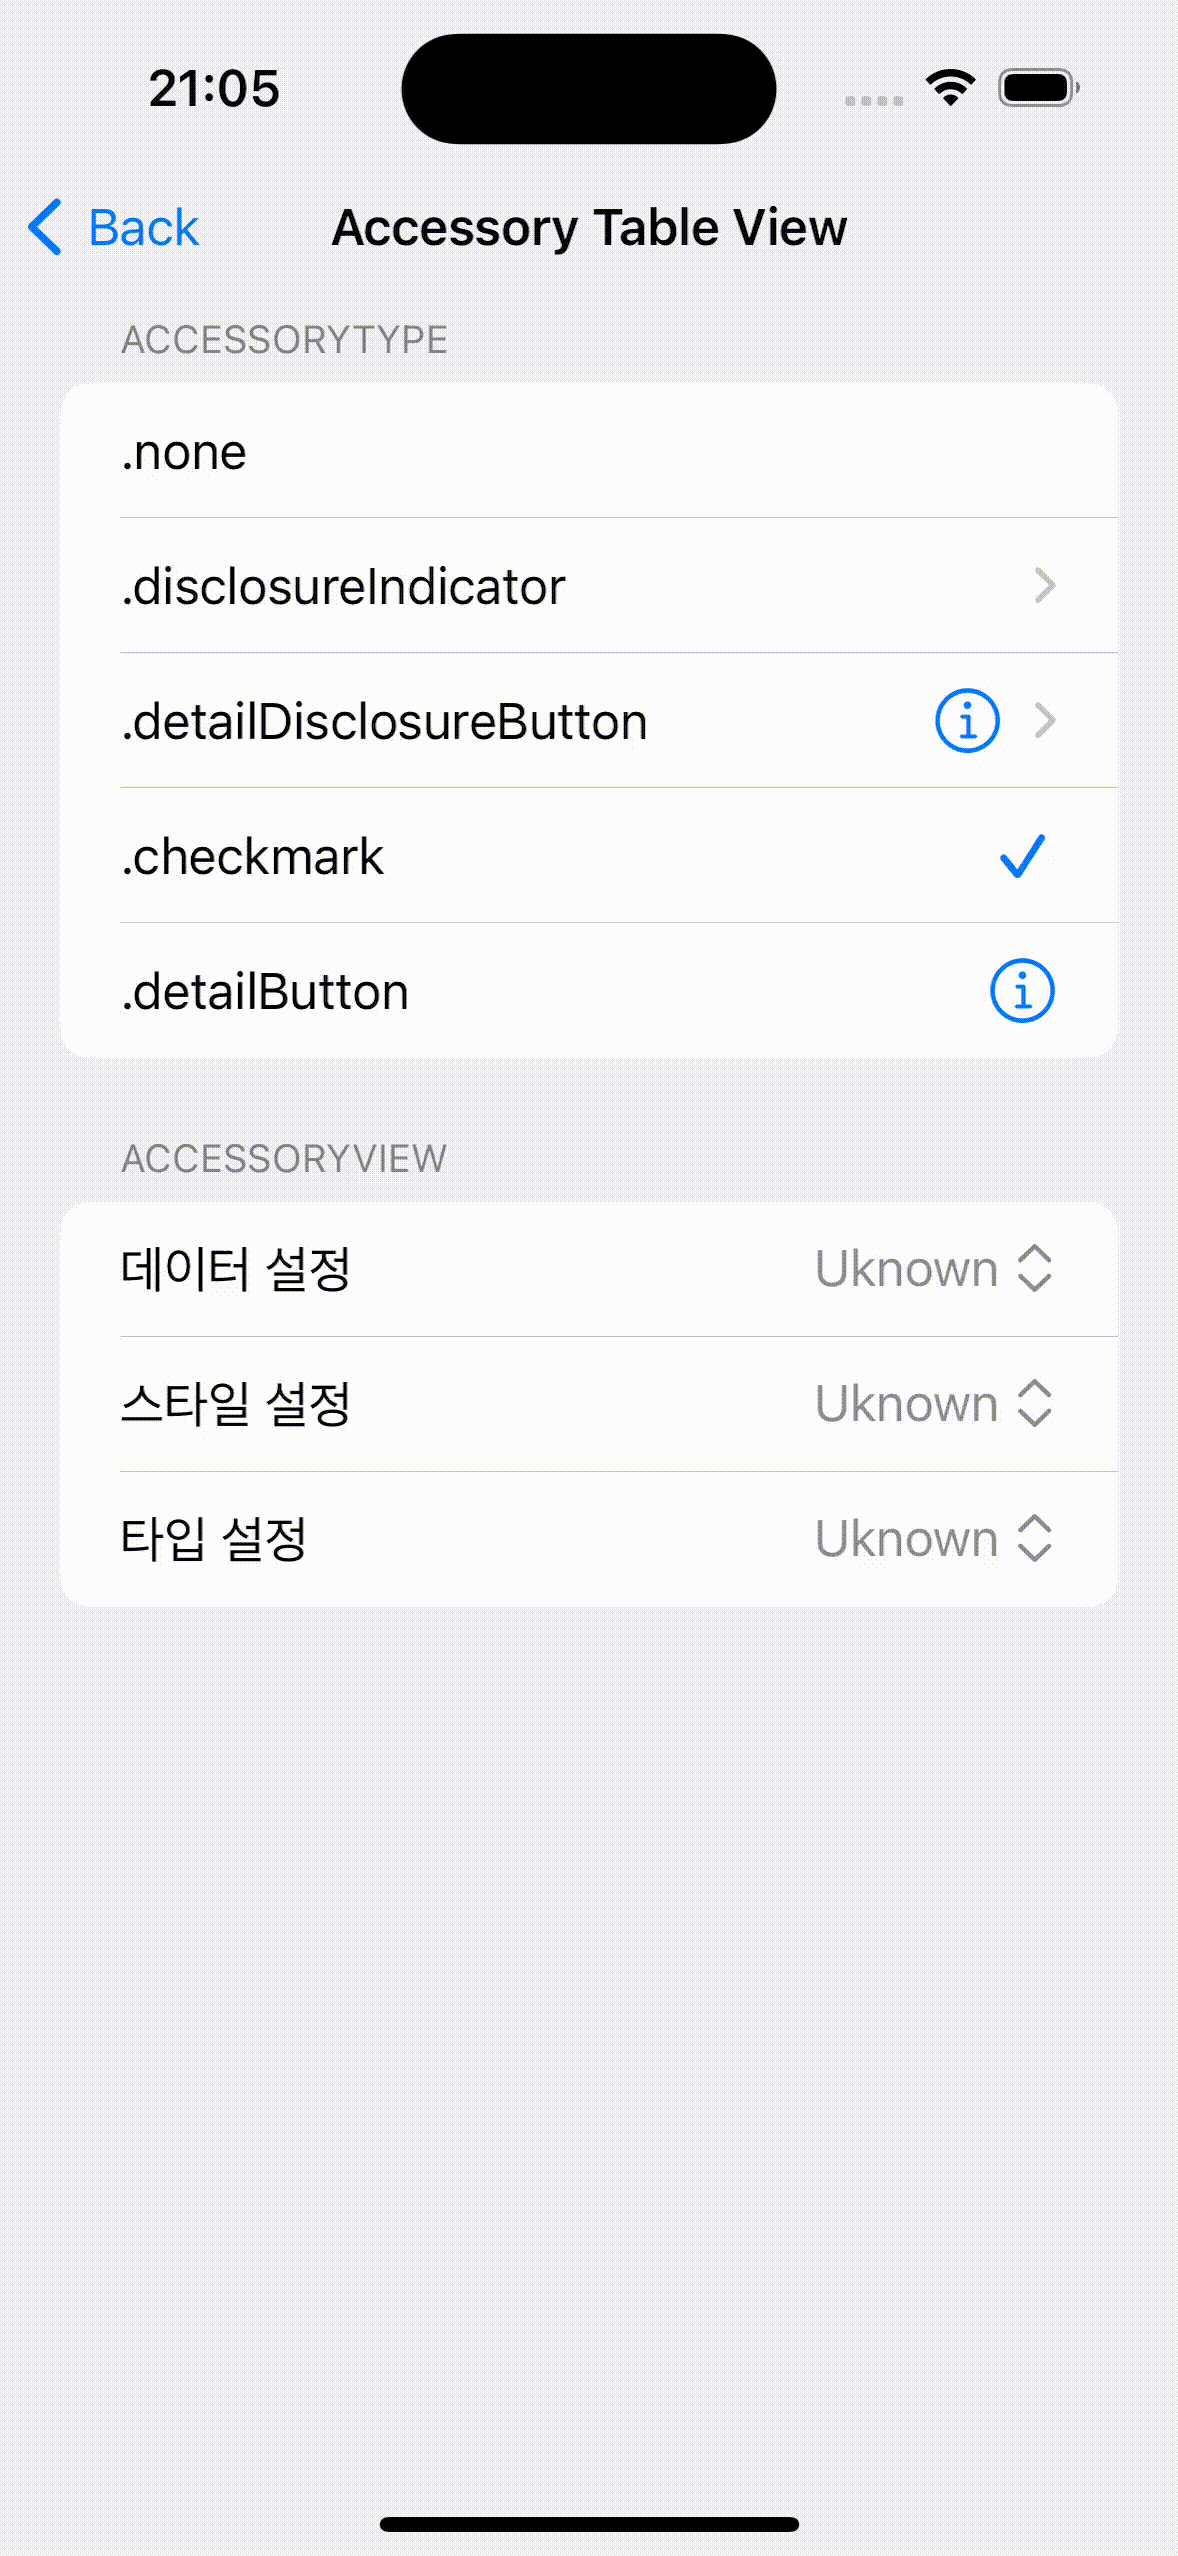
accessoryType & accessoryView
- UITableViewCell에서 accessoryView는 셀의 오른쪽 끝에 표시되는 맞춤형 뷰를 설정할 수 있는 속성
- 셀의 오른쪽 끝에 표시되는 맞춤형 뷰를 설정할 수 있는 속성에는 기본 제공되는 accessoryType 커스텀 UI로 사용하는 accessoryView가 있음
1️⃣ accessoryType
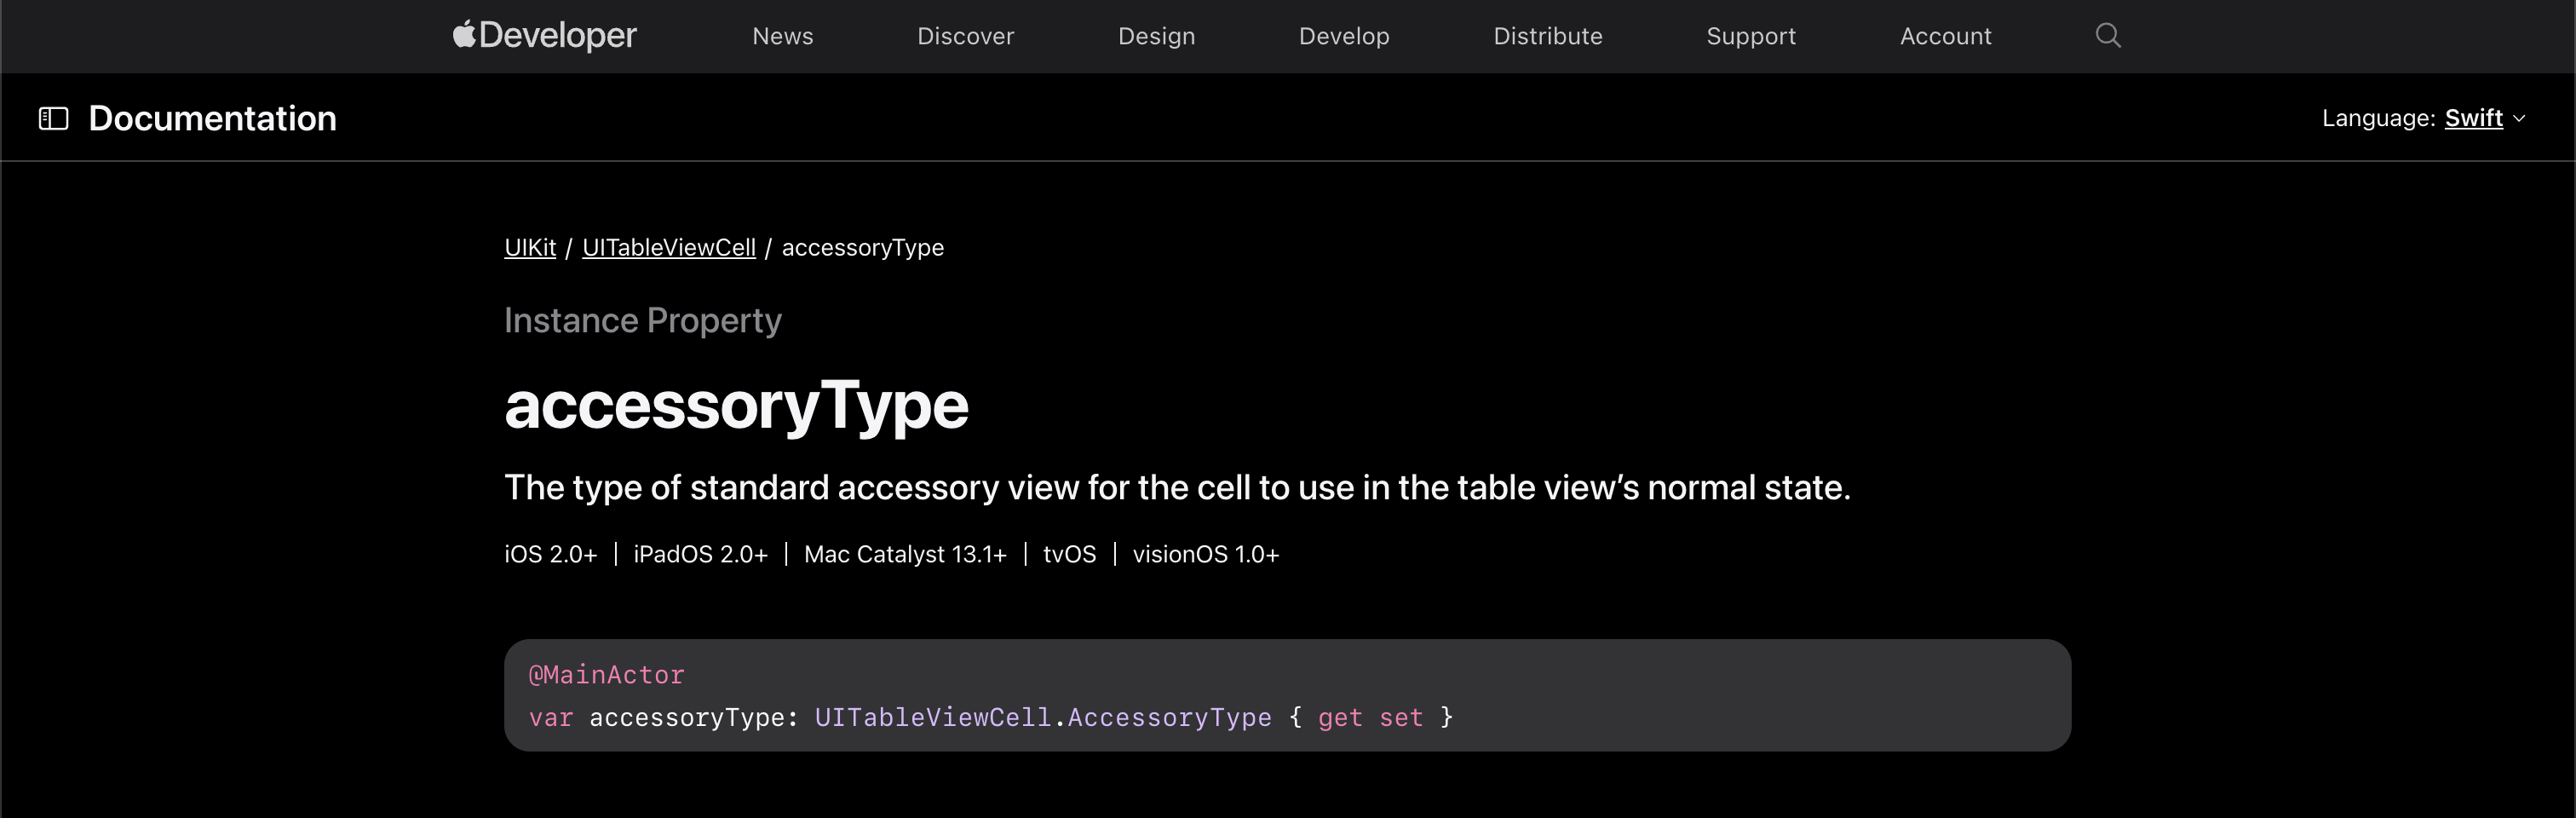
- accessoryType은 UIKit에서 기본 제공하는 액세서리 유형을 설정하는 속성
- UITableViewCell.AccessoryType 열거형 값 중 하나를 설정하면 자동으로 액세서리가 표시됨
- 기본값은
.none이며 액세서리가 없음.
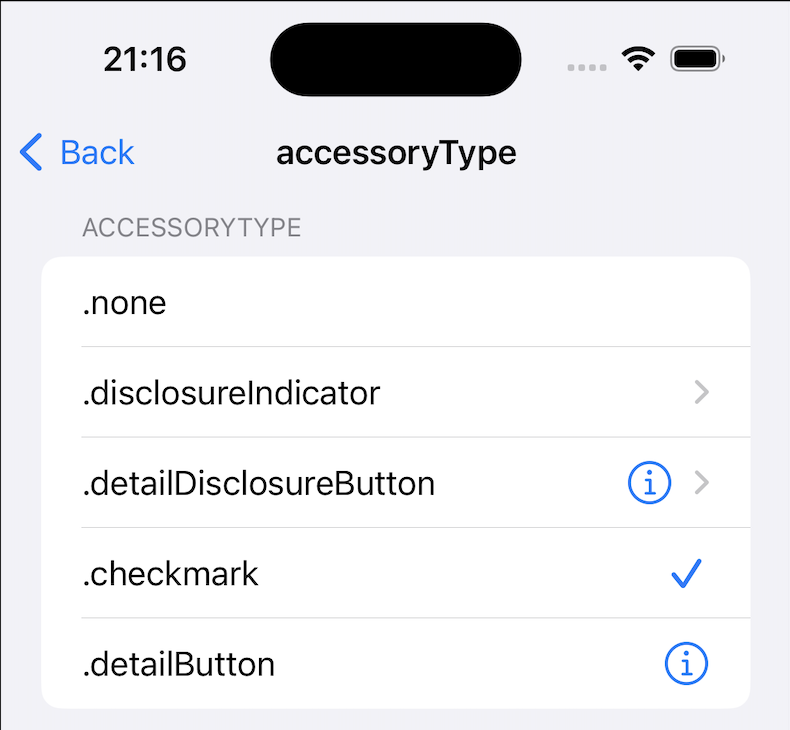
accessoryType 종류
| accessoryType | accessory | 설명 |
|---|---|---|
| .none | 액세서리 없음 | 기본값 |
| .disclosureIndicator | > | 다음 View로 이동하는 Cell에 사용 |
| .detailDisclosureButton | ℹ️ > | 탭하여 이벤트 가능 |
| .checkmark | ☑️ | |
| .detailButton | ℹ️ | 이벤트 가능하며 detailDisclosureButton와 다름 |
accessoryType 코드
func tableView(_ tableView: UITableView, cellForRowAt indexPath: IndexPath) -> UITableViewCell {
	let cell = tableView.dequeueReusableCell(withIdentifier: "Cell") ?? UITableViewCell(style: .default, reuseIdentifier: "Cell")
    cell.textLabel?.font = UIFont.preferredFont(forTextStyle: .body)
    switch indexPath.section {
    case 0:
    	switch indexPath.row {
        case 0:
        	cell.textLabel?.text = sections[indexPath.section].items[indexPath.row].title
            cell.accessoryType = .none
        case 1:
        	cell.textLabel?.text = sections[indexPath.section].items[indexPath.row].title
          	cell.accessoryType = .disclosureIndicator
        case 2:
        	cell.textLabel?.text = sections[indexPath.section].items[indexPath.row].title
            cell.accessoryType = .detailDisclosureButton
        case 3:
        	cell.textLabel?.text = sections[indexPath.section].items[indexPath.row].title
        	cell.accessoryType = .checkmark
        case 4:
        	cell.textLabel?.text = sections[indexPath.section].items[indexPath.row].title
            cell.accessoryType = .detailButton
        default: break
        }
    }
    return cell
}
accessoryType 결과
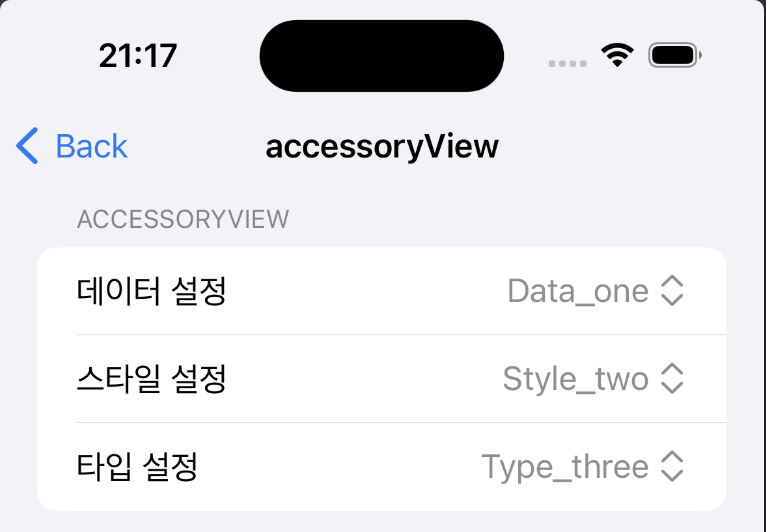
2️⃣ accessoryView
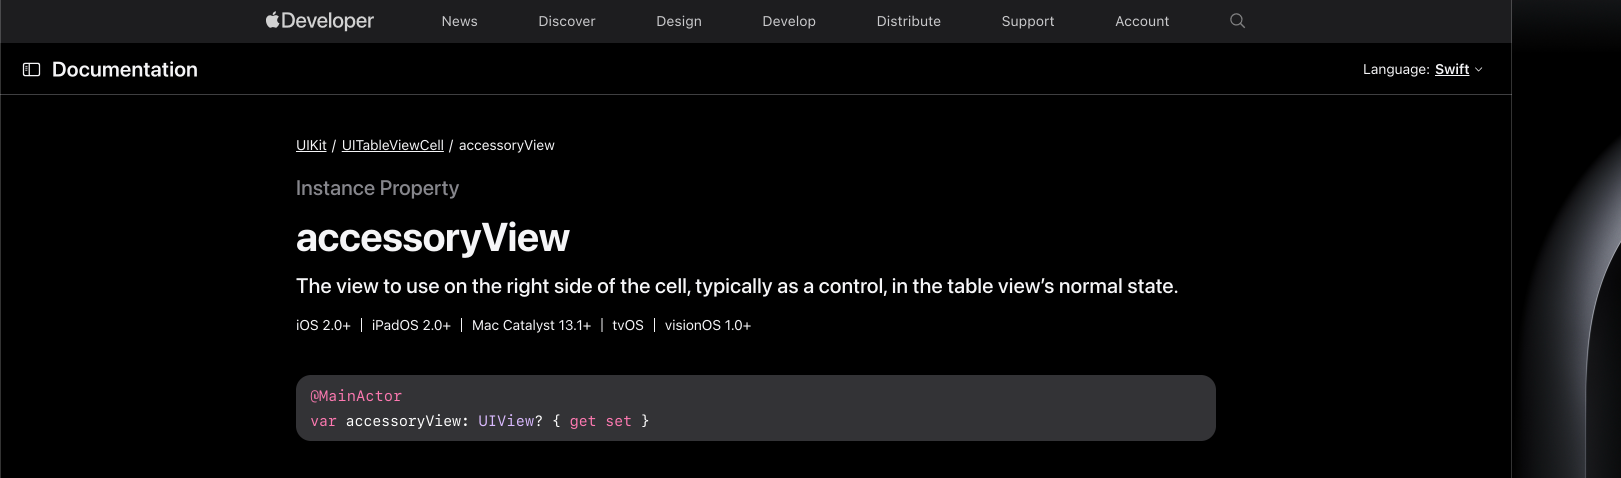
- accessoryView는 기본 제공 액세서리 대신 커스텀 UI 요소를 표시할 때 사용
- UIView 타입의 객체를 할당하여 셀의 오른쪽 끝에 해당 뷰 표시
- 기본값은 nil이며 이 경우 accessoryType 적용
- accessoryView를 설정하면 accessoryType은 무시됨
accessoryView 코드
func tableView(_ tableView: UITableView, cellForRowAt indexPath: IndexPath) -> UITableViewCell {
	let cell = tableView.dequeueReusableCell(withIdentifier: "Cell") ?? UITableViewCell(style: .default, reuseIdentifier: "Cell")
    cell.textLabel?.font = UIFont.preferredFont(forTextStyle: .body)
    switch indexPath.section {
    case 1:
    	switch indexPath.row {
    	case 0:
    		cell.textLabel?.text = sections[indexPath.section].items[indexPath.row].title
            cell.accessoryView = PullDownButton(configModel: pullDownOption, keyPath: \.data, options: dataOptions)
        case 1:
        	cell.textLabel?.text = sections[indexPath.section].items[indexPath.row].title
            cell.accessoryView = PullDownButton(configModel: pullDownOption, keyPath: \.style, options: styleOptions)
        case 2:
        	cell.textLabel?.text = sections[indexPath.section].items[indexPath.row].title
            cell.accessoryView = PullDownButton(configModel: pullDownOption, keyPath: \.type, options: typeOptions)
        default:
        	cell.textLabel?.text = sections[indexPath.section].items[indexPath.row].title
            cell.accessoryView = nil
        }
    default: break
    }
    return cell
}- accessoryView에 커스텀 UI인 PullDownButton를 만들어 적용
PullDownButton 코드
class PullDownButton<T>: UIButton {
    private var keyPath: WritableKeyPath<PullDownOption, T>!
    private var configModel: PullDownOption!

    init(configModel: PullDownOption, keyPath: WritableKeyPath<PullDownOption, T>, options: [T]) {
        super.init(frame: .zero)
        self.configModel = configModel
        self.keyPath = keyPath
        self.showsMenuAsPrimaryAction = true
        self.tintColor = .systemGray
        self.contentHorizontalAlignment = .trailing
        self.titleLabel?.font = UIFont.preferredFont(forTextStyle: .body)

        updateTitle(with: configModel[keyPath: keyPath])

        self.menu = UIMenu(children: options.map { option in
            UIAction(title: "\(option)") { [weak self] _ in
                guard let self = self else { return }
                self.configModel[keyPath: self.keyPath] = option
                self.updateTitle(with: option)
            }
        })

        self.sizeToFit()
        self.frame.size = CGSize(width: max(self.frame.width, 80), height: max(self.frame.height, 30))
    }

    required init?(coder: NSCoder) {
        fatalError("init(coder:) has not been implemented")
    }

    private func updateTitle(with value: T) {
        let image = UIImage(systemName: "chevron.up.chevron.down")!
        let attributedString = NSMutableAttributedString(string: "\(value) ")
        let attachment = NSTextAttachment()
        attachment.image = image.withRenderingMode(.alwaysTemplate)
        attributedString.append(NSAttributedString(attachment: attachment))
        attributedString.addAttribute(.foregroundColor, value: UIColor.systemGray, range: NSRange(location: 0, length: attributedString.length))
        self.setAttributedTitle(attributedString, for: .normal)
        self.sizeToFit()
    }
}
PullDownButton
- String, Int, Enum 등 다양한 값을 처리하기 위해 제네릭 사용
- PullDownOption 의 KeyPath 업데이트하기 위해 WritableKeyPath 사용
- UIMenu와 UIAction을 사용하여 드롭다운 메뉴 기능 생성
- 버튼의 제목을 동적으로 변경하기 위해 updateTitle(with:) 메서드 생성
WritableKeyPath
- 특정 프로퍼티(PullDownOption의 selectedOption)를 동적으로 참조하기 위해 KeyPath 사용하여 PullDownOption의 어떤 프로퍼티인지 저장
private var keyPath: WritableKeyPath<PullDownOption, T>!
private var configModel: PullDownOption!- KeyPath를 이용하여 프로퍼티 이름을 명시하지 않고도 동적으로 값을 업데이트
self.configModel[keyPath: self.keyPath] = optionaccessoryView 결과
전체코드
PullDownButton
https://github.com/zongbeen/AboutiOS/blob/main/AboutiOS/Component/PullDownButton.swift
실행영상

vis ta vie