이번 주에 한 일
- 관리자 페이지에서 데이터 수정하기
- 드래그 앤 드롭으로 순서 변경하는 UI 만들기
- 로고 바꾸기
1. 관리자 페이지에서 데이터 수정하기 (미완)
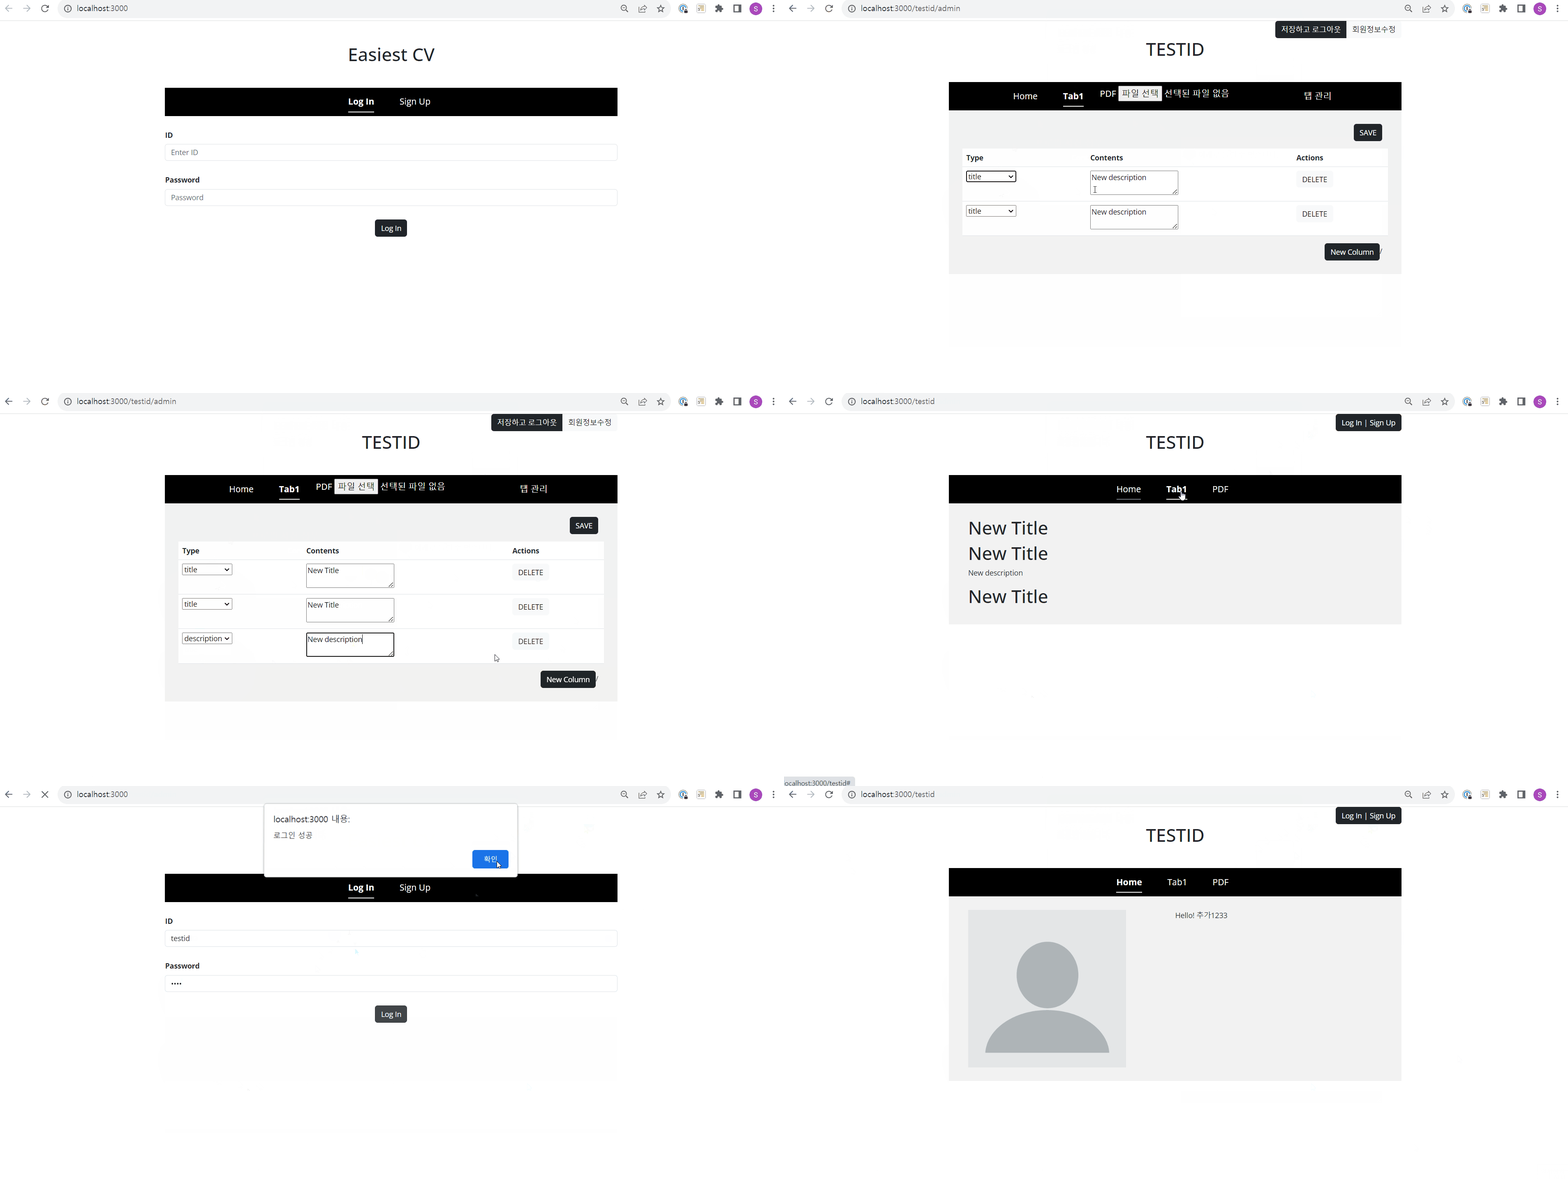
원래는 '저장하고 로그아웃' 버튼을 누르면 모든 수정사항을 한꺼번에 업데이트할 생각이었는데
중간에 생각이 바뀌었다. 그냥 탭별로 저장 버튼이 따로 있는 게 낫겠더라.
- 한꺼번에 저장하려면 너무 오래 걸릴 것 같기도 하고,
- 따로 저장 안 해두고 탭 이동하려면 onChange마다 state가 아니라 Redux store에 저장한 뒤 다시 불러와야 하는 것도 불편했고,
- 중간저장 버튼이 없는 게 사용자를 불안하게 만드는 느낌이었다. 오히려 UX가 안 좋을 것 같더라.
그래서 현재는 Home 탭의 내용은 '저장하고 로그아웃' 버튼을 눌렀을 때 DB로 전송되고,
Tab 의 내용은 우측 상단의 SAVE 버튼을 눌렀을 때 DB로 전송된다.
다음 주에 Home 탭에도 SAVE 버튼을 추가할 예정이다. 로그아웃 버튼에서는 저장 기능을 제거하고.
근데 분명 어제 Tab 저장 기능 만들 때는 잘 저장됐었는데 오늘 블로그 글 쓰면서 gif 캡쳐하려고 보니 저렇게 엉망진창이 되어있다. 내일 저것부터 고쳐야겠다...
get_contents에는 문제없는 듯하고 DB에 전송할 때 이상하게 되는 것 같다. 쿼리를 잘못 짜서 중복으로 들어가고 누락되고 난리가 난 게 아닌가 추측된다. 그리고 관리자 페이지에서 contents를 테이블에 뿌리는 과정에서도 뭔가 문제가 있는 것 같고.
Next.js 13에서 Redux 쓰는 법
참고: https://codevoweb.com/setup-redux-toolkit-in-nextjs-13-app-directory/
/src/redux/provider.tsx
"use client";

import { store } from "./store";
import { Provider } from "react-redux";

export function Providers({ children }: { children: React.ReactNode }) {
  return <Provider store={store}>{children}</Provider>;
}
/src/redux/store.tsx
import { configureStore, createSlice, PayloadAction } from "@reduxjs/toolkit";

type Userinfo = {
  userid: string;
  username?: string;
  intro?: string;
  img?: string;
  pdf?: string;
};

const initialState: Userinfo = {
  userid: "initialID",
  username: "",
  intro: "",
  img: "",
  pdf: "",
};

const userinfo = createSlice({
  name: "userinfo",
  initialState,
  reducers: {
    setUserInfo: (state, action: PayloadAction<Userinfo>) => {
      // Update state here
      return action.payload;
    },
    // ... other reducers can be defined here
  },
});

export const store = configureStore({
  reducer: {
    userinfo: userinfo.reducer,
  },
  devTools: process.env.NODE_ENV !== "production",
});

export type RootState = ReturnType<typeof store.getState>;
export type AppDispatch = typeof store.dispatch;
테스트용으로 userinfo를 추가해 봤다.
테스트페이지
/src/app/InitPage.tsx
"use client";
import { useSelector } from "react-redux";
...
export default function InitPage() {
...
  // for test redux
  let a = useSelector((state) => {
    return state;
  });
  console.log(a); //
  ...
 }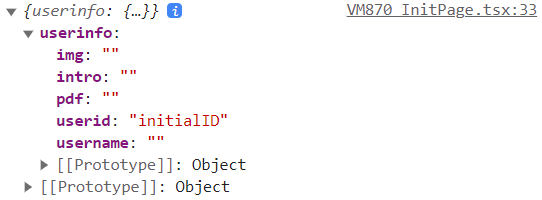
이렇게 나온다.
이걸 활용해서 저장하고 로그아웃 버튼을 눌렀을 때 Userinfo를 DB로 put하게 했다.
/src/app/[userid]/admin/AdminLayout.tsx
export default function AdminLayout({ userid }: { userid: string }) {
  const [isUserExist, setIsUserExist] = useState(false);
  const redux = useSelector((state: RootState) => state);
  const dispatch = useDispatch<AppDispatch>();
  //   console.log("redux", redux);

  const getUserInfo = async () => {
    const res = await axios.get(`/api/get/userinfo?userid=${userid}`);
    // console.log(res.data); // [ {img: null,  intro: "Hello!", pdf: null, userid: "testid"} ] or []

    if (res.data.length > 0) {
      setIsUserExist(true);
      dispatch(setUserInfo(res.data[0])); // save into redux
    }
  };
  const getTabs = async () => {
    const res = await axios.get(`/api/get/tabs?userid=${userid}`);
    // console.log(res.data); // [ {tid: 1,  tname: "Tab1", userid: "test2"} ] or []

    if (res.data.length > 0) {
      dispatch(setTabs(res.data)); // save into redux
    }
  };

  const handleLogout = async () => {
    // update redux into db
    const res = await axios.put("/api/put/logout", redux);
    // console.log(res.data);

    // delete session
    sessionStorage.removeItem("userid");
    sessionStorage.removeItem("token");
    window.location.href = `/${userid}`;
  };

  const handleTest = () => {
    console.log(redux);
  };

  useEffect(() => {
    getUserInfo();
    getTabs();
  }, []);

  return (
    <Container>
      <Row style={{ textAlign: "right" }}>
        <Col>
          <ButtonGroup>
            <Button variant="dark" onClick={handleLogout}>
              저장하고 로그아웃
            </Button>
            <Button variant="light" onClick={handleTest}>
              회원정보수정
            </Button>
          </ButtonGroup>
        </Col>
      </Row>
      <Row>
        <h1 className="title">{userid.toUpperCase()}</h1>
      </Row>
      <Row>
        <AdminPage />
      </Row>
    </Container>
  );
}
/src/pages/api/put/logout.ts
import { NextApiRequest, NextApiResponse } from "next";
import { query } from "../../../util/database";

export default async function handler(
  req: NextApiRequest,
  res: NextApiResponse
) {
  if (req.method === "PUT") {
    console.log(req.body); // redux
    let { userinfo, tabs } = req.body;
    // console.log(userinfo); // { userid: 'testid', intro: 'Hello! 추가', img: null, pdf: null }
    // console.log(tabs); // [ { userid: 'testid', tid: 1, tname: 'Tab1' } ]
    let { userid, username, intro, img, pdf } = userinfo;

    // try update DB
    try {
      // `easiest-cv`.userinfo 테이블에서, userid가 userinfo.userid와 같은 column을 찾아서 업데이트
      const result = await query(
        "UPDATE `easiest-cv`.userinfo SET intro = ?, img = ?, pdf = ? WHERE userid = ?",
        [intro, img, pdf, userid]
      );
      console.log("result", result);
      res.status(200).json("ok");
    } catch (e: any) {
      console.log("server error", e);
      res.status(500).json({ message: e.message });
    }
  }
}
2. 드래그 앤 드롭으로 순서 변경하기
참고자료
https://github.com/thebikashweb/react-drag-drop-without-library
https://www.youtube.com/watch?v=CYKDtVZr_Jw
react-beautiful-dnd인가 그 라이브러리는 최신 Next.js 13 버전에서 잘 작동하지 않는다는 얘기가 있고,
위 자료를 보니 라이브러리 없이 구현하는 게 어렵지 않길래 감사히 복붙해왔다.
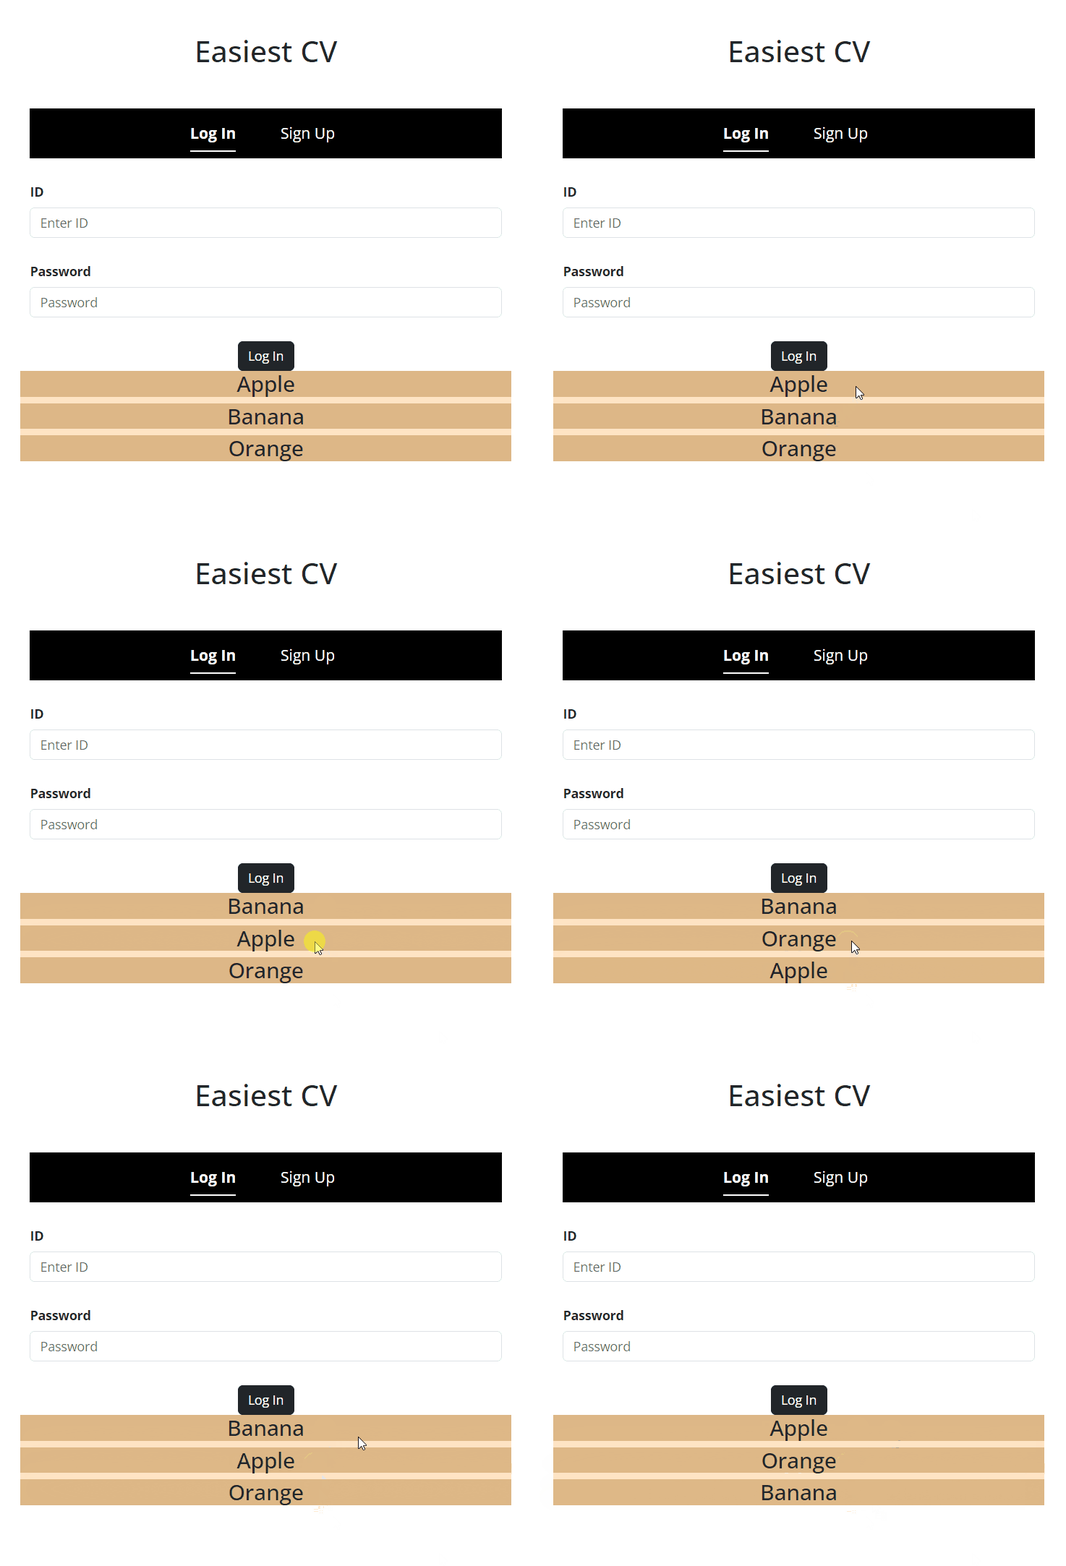
이건 테스트용.
"use client";

import { useState, useRef } from "react";

export default function Draggable() {
  const [fruitItems, setFruitItems] = useState(["Apple", "Banana", "Orange"]);

  //save reference for dragItem and dragOverItem
  const dragItem = useRef<any>(null); // 내가 드래그중인 아이템
  const dragOverItem = useRef<any>(null); // 내가 드래그하고 있는 아이템이 들어갈 위치

  //const handle drag sorting
  const handleSort = () => {
    //duplicate items
    let _fruitItems = [...fruitItems];

    //remove and save the dragged item content
    const draggedItemContent = _fruitItems.splice(dragItem.current, 1)[0];

    //switch the position
    _fruitItems.splice(dragOverItem.current, 0, draggedItemContent);

    //reset the position ref
    dragItem.current = null;
    dragOverItem.current = null;

    //update the actual array
    setFruitItems(_fruitItems);
  };

  return (
    <div style={{ backgroundColor: "bisque" }}>
      {fruitItems.map((item, index) => (
        <div
          key={index}
          style={{ backgroundColor: "burlywood" }}
          draggable
          onDragStart={(e) => (dragItem.current = index)}
          onDragOver={(e) => {
            e.preventDefault();
            dragOverItem.current = index;
          }}
          onDragEnd={handleSort}
        >
          <h3>{item}</h3>
        </div>
      ))}
    </div>
  );
}
테스트용으로 InitPage.tsx에 넣어뒀었던 Draggable.tsx 파일의 코드이다.
useRef로 내가 드래그중인 아이템과 걔가 드롭될 위치의 인덱스를 각각 저장하고,
fruitItems state의 array 순서를(=인덱스를) 바꿔서 다시 setFruitItems해주는 방식이다.
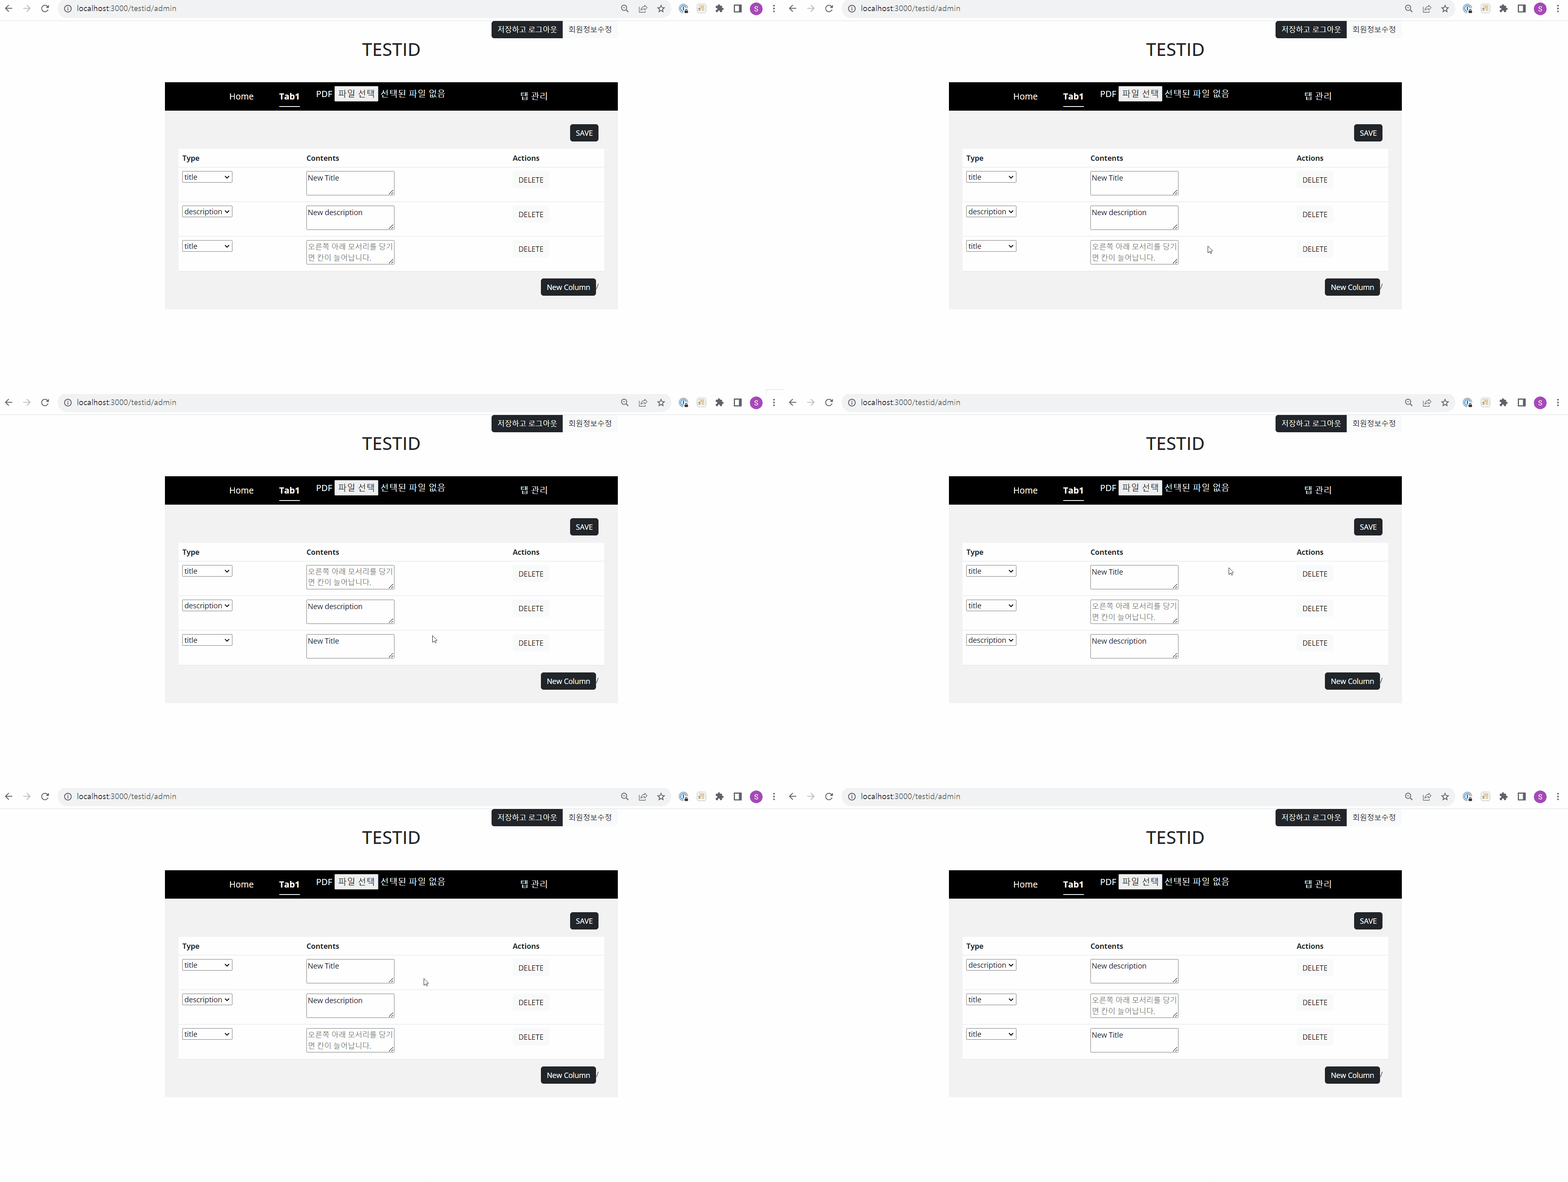
원래 이거 저장도 바뀐 순서대로 잘 됐었는데 오늘 해보니까 위에서 말했듯이 안돼서... 내일 수정해보도록 하겠다. 코드도 다음주에 올려야지.
3. 로고 바꾸기

png 파일 이름을 그냥 favicon.ico 로 바꾸고 얘를 app 폴더 밑에 두면 된다. 기존의 favicon.ico는 삭제하고.
icon.png로 둔 상태에서 별 짓을 다해봤는데 안 되더라. 공식문서가 하라는 대로 했는데.
사이트 제목은 /src/app/layout.tsx 에 있는 title을 바꾸면 된다.
import "./globals.css";
import type { Metadata } from "next";
import { Inter } from "next/font/google";
import { Providers } from "@/redux/provider"; // not "Provider"

const inter = Inter({ subsets: ["latin"] });

export const metadata: Metadata = {
  title: "Easiest CV",
  description: "Generated by create next app",
};

export default function RootLayout({
  children,
}: {
  children: React.ReactNode;
}) {
  return (
    <html lang="en">
      <body className={inter.className + " custom-body"}>
        <Providers>{children}</Providers>
      </body>
    </html>
  );
}
총평 & 다음주에 할 일
다음주에 할 일
- 탭 내부 contents 이상하게 저장되는 거 수정하기
- Home 페이지에도 저장 버튼 따로 만들기
- 탭 관리 기능 추가하기: 탭 이름 수정, 탭 순서변경, 탭 추가 및 삭제
- 이미지, pdf 저장할 클라우드
하기싫어병에 걸렸다. 이렇게 질질 끌 내용이 아닌데...
허리가 아픈 게 문제인 것 같기도 하다. 허리가 아프니까 앉아있기가 싫은 거지.
달리 방법이 없어서 그냥 스스로를 어르고 달래가면서 꾸역꾸역 하고 있다.
단 걸 좀 먹여봤더니 효과는 좋은데 당연하게도 살이 좀 찌는 것 같다.

유익한 글이었습니다.