이번 포스팅에서는
https://cafe.naver.com/openrt/3043
https://seansun79.tistory.com/19
여기 링크를 참고하여, 토픽을 발행하고 구독하는 패키지를 생성하고, 빌드한 후 실행해보자.
1. 패키지 생성
$ cd ~/catkin_ws/src
$ catkin_create_pkg ros_tutorials_topic std_msgs roscpp message_generation
의존성 패키지로 std_msgs와 roscpp, message_generation을 사용한다는 뜻이다.
2. package.xml 파일 수정
VScode 혹은 gedit을 통해 다음과 같이 수정한다.
<?xml version="1.0"?>
<package format="2">
  <name>ros_tutorials_topic</name>
  <version>0.1.0</version>
  <description>The ros_tutorials_topic package</description>
  <maintainer email="alpha12334@naver.com">kimhoyun</maintainer>
  <license>Apache 2.0</license>

  <buildtool_depend>catkin</buildtool_depend>

  <build_depend>message_generation</build_depend>
  <build_depend>roscpp</build_depend>
  <build_depend>std_msgs</build_depend>

  <build_export_depend>roscpp</build_export_depend>
  <build_export_depend>std_msgs</build_export_depend>
  <build_export_depend>message_generation</build_export_depend>

  <exec_depend>roscpp</exec_depend>
  <exec_depend>std_msgs</exec_depend>
  <exec_depend>message_runtime</exec_depend>

  <export>
  </export>
</package>
3. CMakeLists.txt 파일 수정
다음과 같이 수정하자.
cmake_minimum_required(VERSION 3.0.2)
project(ros_tutorials_topic)

# 빌드 할 때 필요한 구성요소 패키지들
find_package(catkin REQUIRED COMPONENTS
  message_generation
  roscpp
  std_msgs
)

# 내가 작성한 커스텀 메시지 파일
add_message_files(
  FILES
  MsgTutorial.msg
)

# 커스텀 메시지 파일의 의존성
generate_messages(
  DEPENDENCIES
  std_msgs
)

# catkin 패키지 옵션으로, 라이브러리, catkin 빌드 의존성, 시스템 의존 패키지 기술
catkin_package(
  INCLUDE_DIRS include
  LIBRARIES ros_tutorials_topic
  CATKIN_DEPENDS message_generation roscpp std_msgs
)

# include 디렉토리 설정
include_directories(
  ${catkin_INCLUDE_DIRS}
)

## topic_publisher 노드에 대한 빌드 옵션이다.
## 실행 파일, 타깃 링크 라이브러리, 추가 의존성 등을 설정한다.
add_executable(topic_publisher src/topic_publisher.cpp)
# 실행 파일을 생성하라는 의미를 가지고 있는 함수
add_dependencies(topic_publisher ${${PROJECT_NAME}_EXPORTED_TARGETS}
${catkin_EXPORTED_TARGETS})
target_link_libraries(topic_publisher ${catkin_LIBRARIES})

## topic_subscriber 노드에 대한 빌드 옵션이다.
add_executable(topic_subscriber src/topic_subscriber.cpp)
# 실행 파일을 생성하라는 의미를 가지고 있는 함수
add_dependencies(topic_subscriber ${${PROJECT_NAME}_EXPORTED_TARGETS}
${catkin_EXPORTED_TARGETS})
target_link_libraries(topic_subscriber ${catkin_LIBRARIES})
msg 파일 만들기
ros_tutorials_topic 패키지 내부에 msg 폴더를 생성하고, 그 안에 MsgTutorial.msg 파일을 만을어주자.
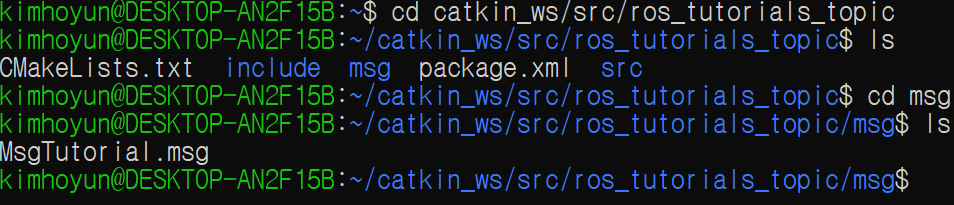
구조가 이런 식으로 될 것이다.
이후에 MsgTutorial.msg 파일 내부에 다음과 같이 작성해주자.
time stamp
int32 data
퍼블리셔와 서브스크라이버 노드 생성
퍼블리셔
src 폴더 아래에 topic_publisher.cpp 이름으로 생성한다.
#include "ros/ros.h" // ROS 기본 헤더 파일
#include "ros_tutorials_topic/MsgTutorial.h"
// 내가 작성한 커스텀 메시지 파일 헤더 파일 include
// 빌드 후에 헤더 파일은 자동으로 생성된다.

int main(int argc, char **argv){
    ros::init(argc, argv, "topic_publisher"); // 노드명 초기화
    ros::NodeHandle nh; // ROS 시스템과의 통신을 위한 노드 핸들 선언

    ros::Publisher ros_tutorial_pub = nh.advertise<ros_tutorials_topic::MsgTutorial>("ros_tutorial_msg",100);
    // 퍼블리셔 선언이다. ros_tutorials_topic 패키지의 MsgTutorial 메시지 파일을 이용해서
    // 퍼블리셔 ros_tutorial_pub를 작성한다.
    // 토픽명은 ros_tutorial_msg이며, 퍼블리셔 queue 사이즈를 100으로 설정한다.

    ros::Rate loop_rate(10);
    // 10Hz 간격으로 반복 주기를 설정한다.

    ros_tutorials_topic::MsgTutorial msg;
    // 메시지 파일 형식으로 msg 메시지 선언

    int count = 0;

    while (ros::ok()) { // ROS 노드가 살아있을 때까지
        msg.stamp = ros::Time::now(); // 현재 시간을 stamp 메시지에 담는다.
        msg.data = count; // data 메시지에 count를 담는다.

        ROS_INFO("send_msg = %d", msg.stamp.sec);
        ROS_INFO("send_msg = %d", msg.stamp.nsec);
        ROS_INFO("send_msg = %d", msg.data);
        // 스크린 창에 메시지를 표시한다.

        ros_tutorial_pub.publish(msg); // 메시지 발행한다.
        loop_rate.sleep(); // loop rate 만큼 sleep하며 반복하기

        ++count; // count 변수 증가하기
    }
    return 0;
}
서브스크라이버
src 폴더 아래에 topic_subscriber.cpp 이름으로 생성한다.
#include "ros/ros.h"
#include "ros_tutorials_topic/MsgTutorial.h"
// 퍼블리셔와 동일하다.

void msgCallback(const ros_tutorials_topic::MsgTutorial::ConstPtr& msg){
    ROS_INFO("Recieve msg = %d", msg->stamp.sec);
    ROS_INFO("Recieve msg = %d", msg->stamp.nsec);
    ROS_INFO("Recieve msg = %d", msg->data);
}
// 토픽을 통해서 메시지를 수신받았을 때 동작하는 함수이다.
// 입력 메시지로 ros_tutorials_topic 패키지의 MsgTutorial 메시지를 받도록 되어있다.

int main(int argc, char **argv){
    ros::init(argc, argv, "topic_subscriber");
    ros::NodeHandle nh;

    ros::Subscriber ros_tutorial_sub = nh.subscribe("ros_tutorial_msg", 100, msgCallback);
    // 서브스크라이버를 선언한다.
    // ros_tutorial_msg라는 이름의 토픽을 수신하며
    // 수신받을 때 msgCallback 함수를 실행한다.

    ros::spin();
    // 콜백함수 호출을 위한 함수로, 수신시 콜백 함수를 실행한다.
    return 0;
}
빌드하기
위의 모든 작업을 마쳤다면, 패키지 구조는 다음과 같다.

이제 catkin_ws로 가서, catkin_make 명령어를 통해서 빌드하면 된다.
빌드 이후에는 다음과 같다.
// 1번째 터미널
$ roscore

// 2번째 터미널
$ cd catkin_ws && source devel/setup.bash
$ rosrun ros_tutorials_topic topic_publisher

// 3번째 터미널
$ cd catkin_ws && source devel/setup.bash
$ rosrun ros_tutorials_topic topic_subscriber
그러면 토픽을 주고 받는 것을 스크린 창에서 확인이 가능하다.

로봇, 드론, SLAM, 제어 공학 초보