/**
 * Enables the edge-to-edge display for this [ComponentActivity].
 *
 * To set it up with the default style, call this method in your Activity's onCreate method:
 * ```
 *     override fun onCreate(savedInstanceState: Bundle?) {
 *         enableEdgeToEdge()
 *         super.onCreate(savedInstanceState)
 *         ...
 *     }
 * ```
 *
 * The default style configures the system bars with a transparent background when contrast can be
 * enforced by the system (API 29 or above). On older platforms (which only have 3-button/2-button
 * navigation modes), an equivalent scrim is applied to ensure contrast with the system bars.
 *
 * See [SystemBarStyle] for more customization options.
 *
 * @param statusBarStyle The [SystemBarStyle] for the status bar.
 * @param navigationBarStyle The [SystemBarStyle] for the navigation bar.
 */
@JvmName("enable")
@JvmOverloads
fun ComponentActivity.enableEdgeToEdge(
    statusBarStyle: SystemBarStyle = SystemBarStyle.auto(Color.TRANSPARENT, Color.TRANSPARENT),
    navigationBarStyle: SystemBarStyle = SystemBarStyle.auto(DefaultLightScrim, DefaultDarkScrim)
) {
    val view = window.decorView
    val statusBarIsDark = statusBarStyle.detectDarkMode(view.resources)
    val navigationBarIsDark = navigationBarStyle.detectDarkMode(view.resources)
    val impl = Impl ?: if (Build.VERSION.SDK_INT >= 29) {
        EdgeToEdgeApi29()
    } else if (Build.VERSION.SDK_INT >= 26) {
        EdgeToEdgeApi26()
    } else if (Build.VERSION.SDK_INT >= 23) {
        EdgeToEdgeApi23()
    } else if (Build.VERSION.SDK_INT >= 21) {
        EdgeToEdgeApi21()
    } else {
        EdgeToEdgeBase()
    }.also { Impl = it }
    impl.setUp(
        statusBarStyle, navigationBarStyle, window, view, statusBarIsDark, navigationBarIsDark
    )
}
StatusBar와 NavigationBar까지 화면을 확장시키고 싶을 때, onCreate() 함수 내에서 enableEdgeToEdge를 사용할 수 있다. 내부를 보면 이렇게 버전 별로 처리를 해주고 있는 것을 확인할 수 있다.
이 글에서는 각 버전 별로 어떻게 작동하는지 함수를 뜯어본다. API 21을 다운받을 수 없어서, API 24, 26, 33 에뮬레이터를 가지고 실험해봤다.
SystemBarStyle
/**
 * The style for the status bar or the navigation bar used in [enableEdgeToEdge].
 */
class SystemBarStyle private constructor(
    private val lightScrim: Int,
    internal val darkScrim: Int,
    internal val nightMode: Int,
    internal val detectDarkMode: (Resources) -> Boolean
) {

    companion object {

        /**
         * Creates a new instance of [SystemBarStyle]. This style detects the dark mode
         * automatically.
         * - On API level 29 and above, the bar will be transparent in the gesture navigation mode.
         *   If this is used for the navigation bar, it will have the scrim automatically applied
         *   by the system in the 3-button navigation mode. _Note that neither of the specified
         *   colors are used_. If you really want a custom color on these API levels, use [dark] or
         *   [light].
         * - On API level 28 and below, the bar will be one of the specified scrim colors depending
         *   on the dark mode.
         * @param lightScrim The scrim color to be used for the background when the app is in light
         * mode.
         * @param darkScrim The scrim color to be used for the background when the app is in dark
         * mode. This is also used on devices where the system icon color is always light.
         * @param detectDarkMode Optional. Detects whether UI currently uses dark mode or not. The
         * default implementation can detect any of the standard dark mode features from the
         * platform, appcompat, and Jetpack Compose.
         */
        @JvmStatic
        @JvmOverloads
        fun auto(
            @ColorInt lightScrim: Int,
            @ColorInt darkScrim: Int,
            detectDarkMode: (Resources) -> Boolean = { resources ->
                (resources.configuration.uiMode and Configuration.UI_MODE_NIGHT_MASK) ==
                    Configuration.UI_MODE_NIGHT_YES
            }
        ): SystemBarStyle {
            return SystemBarStyle(
                lightScrim = lightScrim,
                darkScrim = darkScrim,
                nightMode = UiModeManager.MODE_NIGHT_AUTO,
                detectDarkMode = detectDarkMode
            )
        }

        /**
         * Creates a new instance of [SystemBarStyle]. This style consistently applies the specified
         * scrim color regardless of the system navigation mode.
         *
         * @param scrim The scrim color to be used for the background. It is expected to be dark
         * for the contrast against the light system icons.
         */
        @JvmStatic
        fun dark(@ColorInt scrim: Int): SystemBarStyle {
            return SystemBarStyle(
                lightScrim = scrim,
                darkScrim = scrim,
                nightMode = UiModeManager.MODE_NIGHT_YES,
                detectDarkMode = { _ -> true }
            )
        }

        /**
         * Creates a new instance of [SystemBarStyle]. This style consistently applies the specified
         * scrim color regardless of the system navigation mode.
         *
         * @param scrim The scrim color to be used for the background. It is expected to be light
         * for the contrast against the dark system icons.
         * @param darkScrim The scrim color to be used for the background on devices where the
         * system icon color is always light. It is expected to be dark.
         */
        @JvmStatic
        fun light(@ColorInt scrim: Int, @ColorInt darkScrim: Int): SystemBarStyle {
            return SystemBarStyle(
                lightScrim = scrim,
                darkScrim = darkScrim,
                nightMode = UiModeManager.MODE_NIGHT_NO,
                detectDarkMode = { _ -> false }
            )
        }
    }

    internal fun getScrim(isDark: Boolean) = if (isDark) darkScrim else lightScrim

    internal fun getScrimWithEnforcedContrast(isDark: Boolean): Int {
        return when {
            nightMode == UiModeManager.MODE_NIGHT_AUTO -> Color.TRANSPARENT
            isDark -> darkScrim
            else -> lightScrim
        }
    }
}
이게 SystemBarStyle의 전체 코드이다. ‘scrim’이라는 용어를 볼 수 있는데 이게 무슨 의미일까?
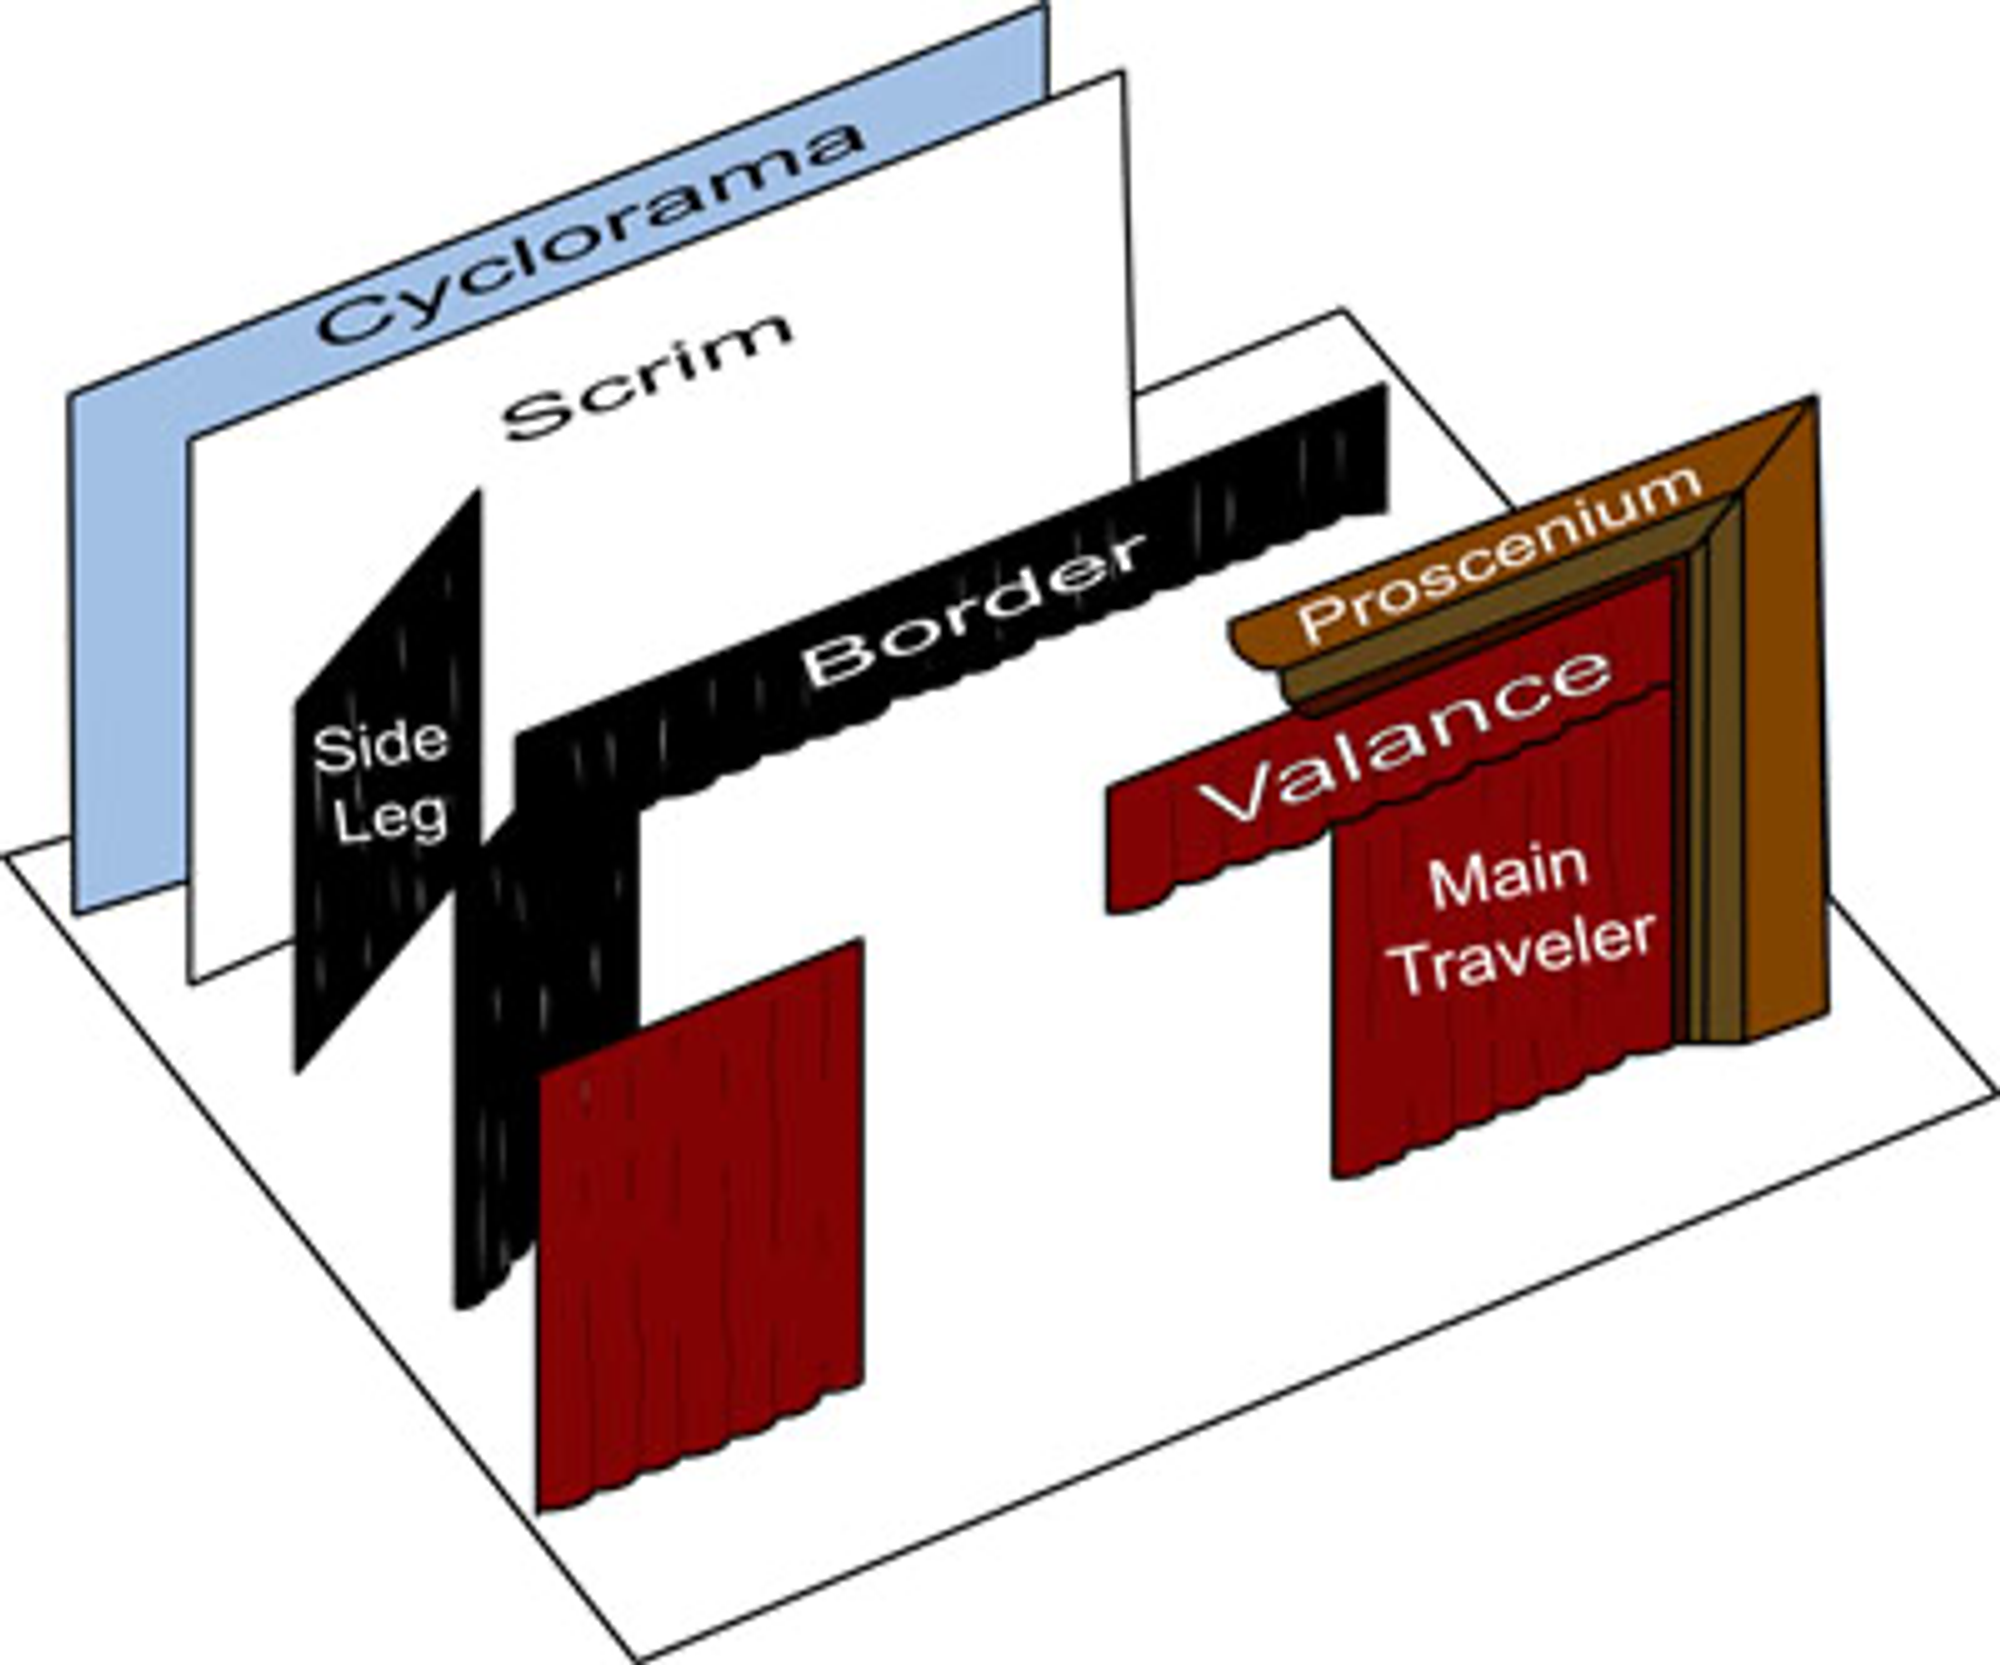
스택오버플로우 답변에서는, 연극에서 scrim의 의미를 사용하고 있다고 말한다. 앞쪽에 빛을 비추면 불투명하고, 뒤쪽에 빛을 비추면 투명하거나 반투명하게 보이는 theater drop을 의미한다고 하는데 이 링크에서도 비슷한 설명을 볼 수 있다.
따라서, 앱이 실행되는 런타임 상황에 의존하여 StatusBar, NavigationBar가 적절하게 표시되도록 설정하는 것이 바로 SystemBarStyle이다.
아 그럼, 라이트/다크모드 각각 지정해주면 그 색상이 나오겠구나?
라고 생각했지만 주석을 읽어보니 꼭 그런 것만은 아니었다.
Creates a new instance of SystemBarStyle. This style detects the dark mode automatically.
On API level 29 and above, the bar will be transparent in the gesture navigation mode. If this is used for the navigation bar, it will have the scrim automatically applied by the system in the 3-button navigation mode. Note that neither of the specified colors are used. If you really want a custom color on these API levels, use dark or light.
On API level 28 and below, the bar will be one of the specified scrim colors depending on the dark mode.
SystemBarStyle의 새 인스턴스를 만든다. 이 스타일은 다크 모드를 자동으로 감지한다.
API 레벨 29 이상에서는 제스처 네비게이션 모드에서 바가 투명해진다. 이 스타일을 네비게이션 바에 사용하면 3-버튼 네비게이션 모드에서 시스템에서 자동으로 스크림을 적용한다. 지정된 색상 중 어느 것도 사용되지 않는다는 점에 주의해라. 이러한 API 수준에서 사용자 지정 색상을 사용하려면 dark나 light를 사용해라.
API 레벨 28 이하에서는 다크 모드에 따라 바가 지정된 스크림 색상 중 하나가 된다.
@JvmStatic
@JvmOverloads
fun auto(
	@ColorInt lightScrim: Int, // 앱이 라이트모드일 때 사용
	@ColorInt darkScrim: Int, // 다크모드일 때 사용
	detectDarkMode: (Resources) -> Boolean = { resources ->
		(resources.configuration.uiMode and Configuration.UI_MODE_NIGHT_MASK) ==
		Configuration.UI_MODE_NIGHT_YES // UI가 다크 모드를 사용하는지 여부
	}
): SystemBarStyle {
	return SystemBarStyle(
		lightScrim = lightScrim,
		darkScrim = darkScrim,
		nightMode = UiModeManager.MODE_NIGHT_AUTO,
		detectDarkMode = detectDarkMode
	)
}

@JvmStatic
fun dark(@ColorInt scrim: Int): SystemBarStyle {
	return SystemBarStyle(
		lightScrim = scrim,
		darkScrim = scrim,
		nightMode = UiModeManager.MODE_NIGHT_YES,
		detectDarkMode = { _ -> true }
	)
}

@JvmStatic
fun light(@ColorInt scrim: Int, @ColorInt darkScrim: Int): SystemBarStyle {
	return SystemBarStyle(
		lightScrim = scrim,
		darkScrim = darkScrim,
		nightMode = UiModeManager.MODE_NIGHT_NO,
		detectDarkMode = { _ -> false }
	)
}
API 29 이상에서는 auto 팩토리 함수를 사용해서 넣어주면 지정된 색상이 사용되지 않는다. 만약 정말로 그 특정 색상을 적용해주고 싶다면 dark나 light를 사용하여 style을 생성해야 한다.
// In onCreate
val lightColor = Color.parseColor("#ff6a00") // 주황색
val darkColor = Color.parseColor("#ff6a80") // 핑크색
// enableEdgeToEdge(statusBarStyle = SystemBarStyle.dark(scrim = darkColor))
// enableEdgeToEdge(statusBarStyle = SystemBarStyle.light(scrim = lightColor))
enableEdgeToEdge(
statusBarStyle = SystemBarStyle.auto(lightScrim = lightColor, darkScrim = darkColor),
navigationBarStyle = SystemBarStyle.auto(lightScrim = lightColor, darkScrim = darkColor),
)
binding.vLight.setBackgroundColor(lightColor)
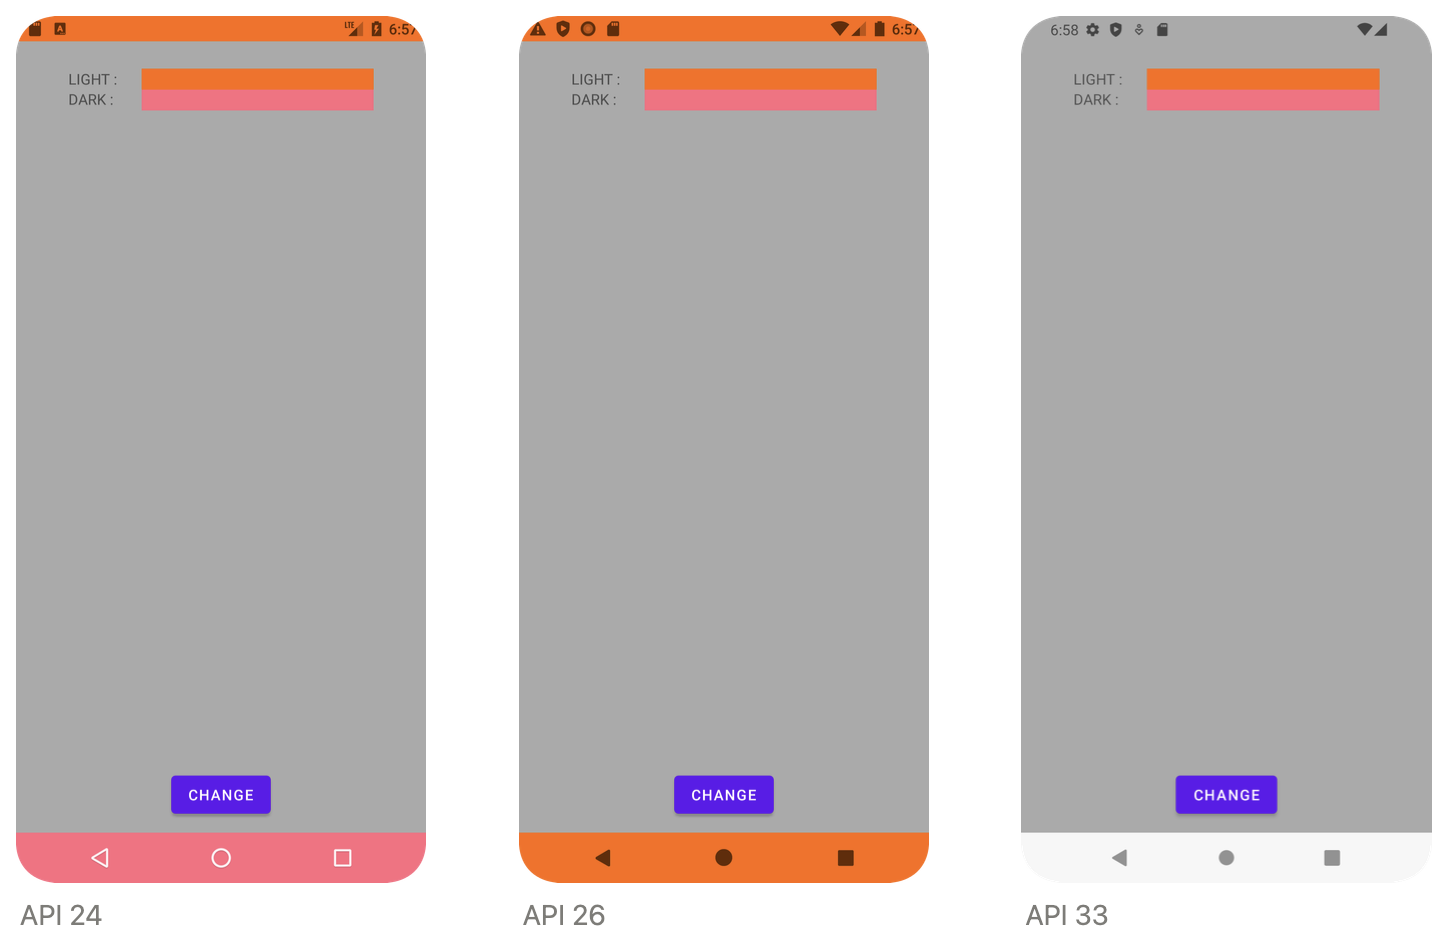
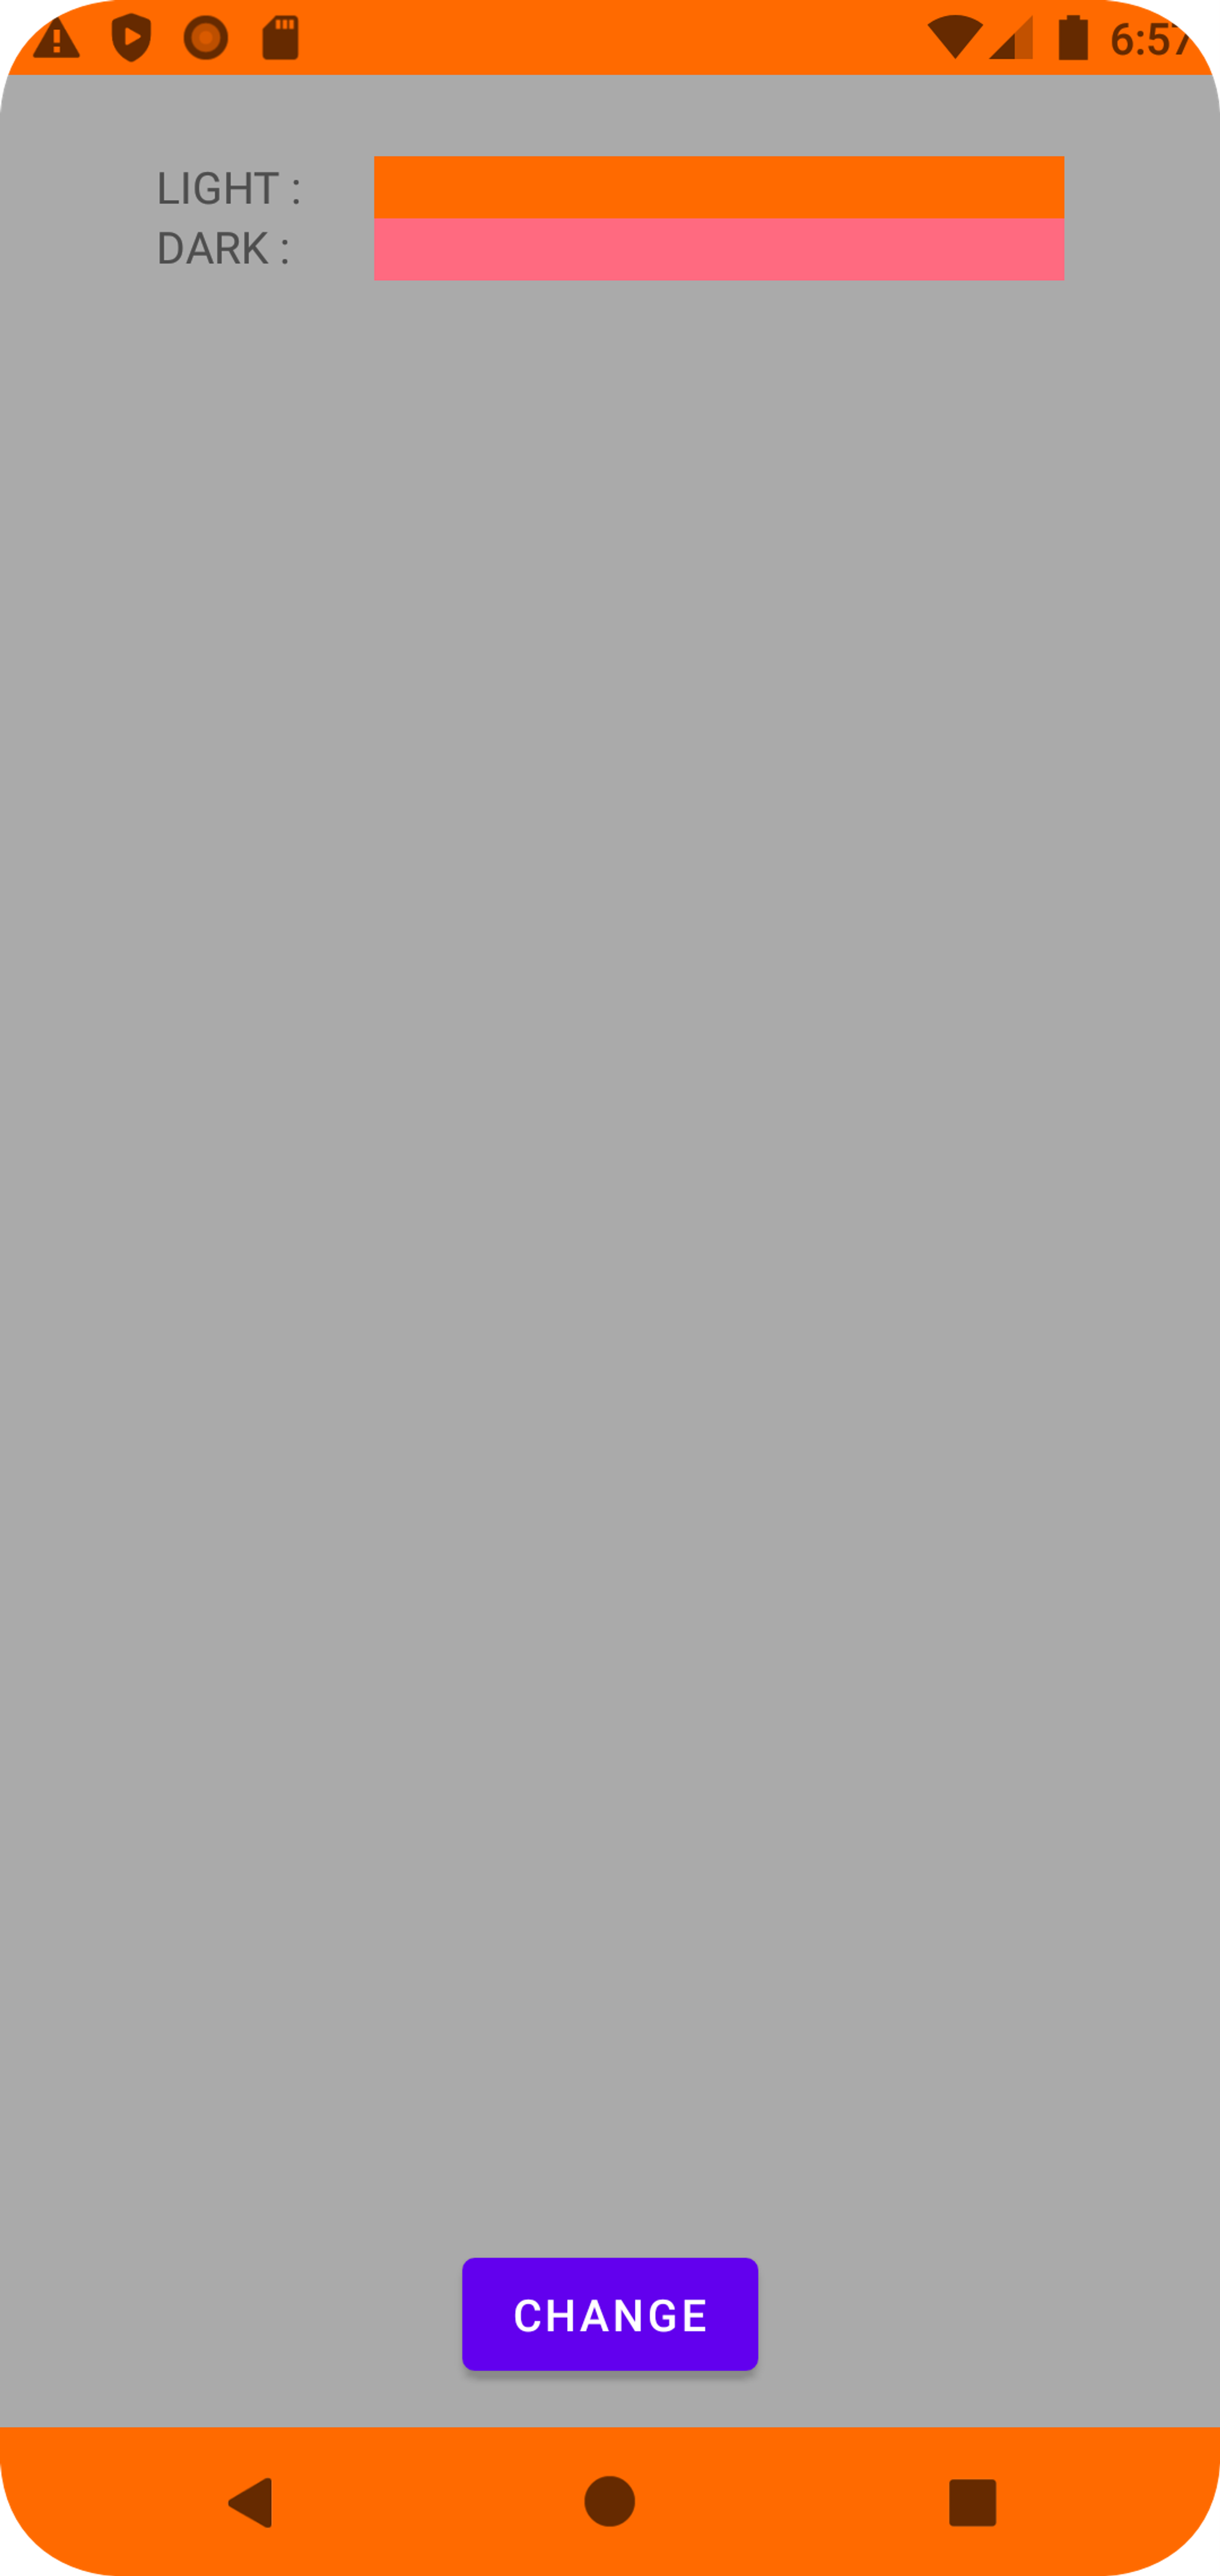
binding.vDark.setBackgroundColor(darkColor)정말로 그런지 테스트를 해봤다. auto 팩토리 함수로 SystemBarStyle을 생성하면서 라이트는 주황색, 다크는 핑크색으로 지정해주었다.
정말로 API 29 이상인 33에서는 StatusBar, NavigationBar가 전부 색상 지정이 되지 않는 것을 확인할 수 있었다. 심지어 API 23 이상인 24에서는 NavigationBar가 darkColor로 지정되었다.
아까 위의 팩토리 함수들을 보면 어떤 함수를 사용하느냐에 따라 SystemBarStyle에 들어가는 인자 값이 달라진다는 것을 확인할 수 있다. 특히 MODE가 중요했다.
auto를 사용해서 style을 생성하는 경우, nightMode가 MODE_NIGHT_AUTO로 들어가게 된다는 것을 먼저 알아두자.
API에 따라 달라지는 EdgeToEdge
API 23 ~
@RequiresApi(23)
private class EdgeToEdgeApi23 : EdgeToEdgeImpl {
@DoNotInline
override fun setUp(
statusBarStyle: SystemBarStyle,
navigationBarStyle: SystemBarStyle,
window: Window,
view: View,
statusBarIsDark: Boolean,
navigationBarIsDark: Boolean
) {
// decor view를 WindowInsetsCompat를 위해서 root-level content view에 맞출지 결정
// WindowInsetsCompat : 시스템 UI 요소와의 간격을 관리하기 위해 사용하는 클래스
// false : content view를 inset에 맞추지 않고 WindowInsetsCompat을 content view에 그대로 전달
WindowCompat.setDecorFitsSystemWindows(window, false)
window.statusBarColor = statusBarStyle.getScrim(statusBarIsDark) // <<< isDark에 따라 적용
window.navigationBarColor = navigationBarStyle.darkScrim // <<< 무조건 darkScrim 적용
// API 26 아래에 설명
WindowInsetsControllerCompat(window, view).isAppearanceLightStatusBars = !statusBarIsDark
}
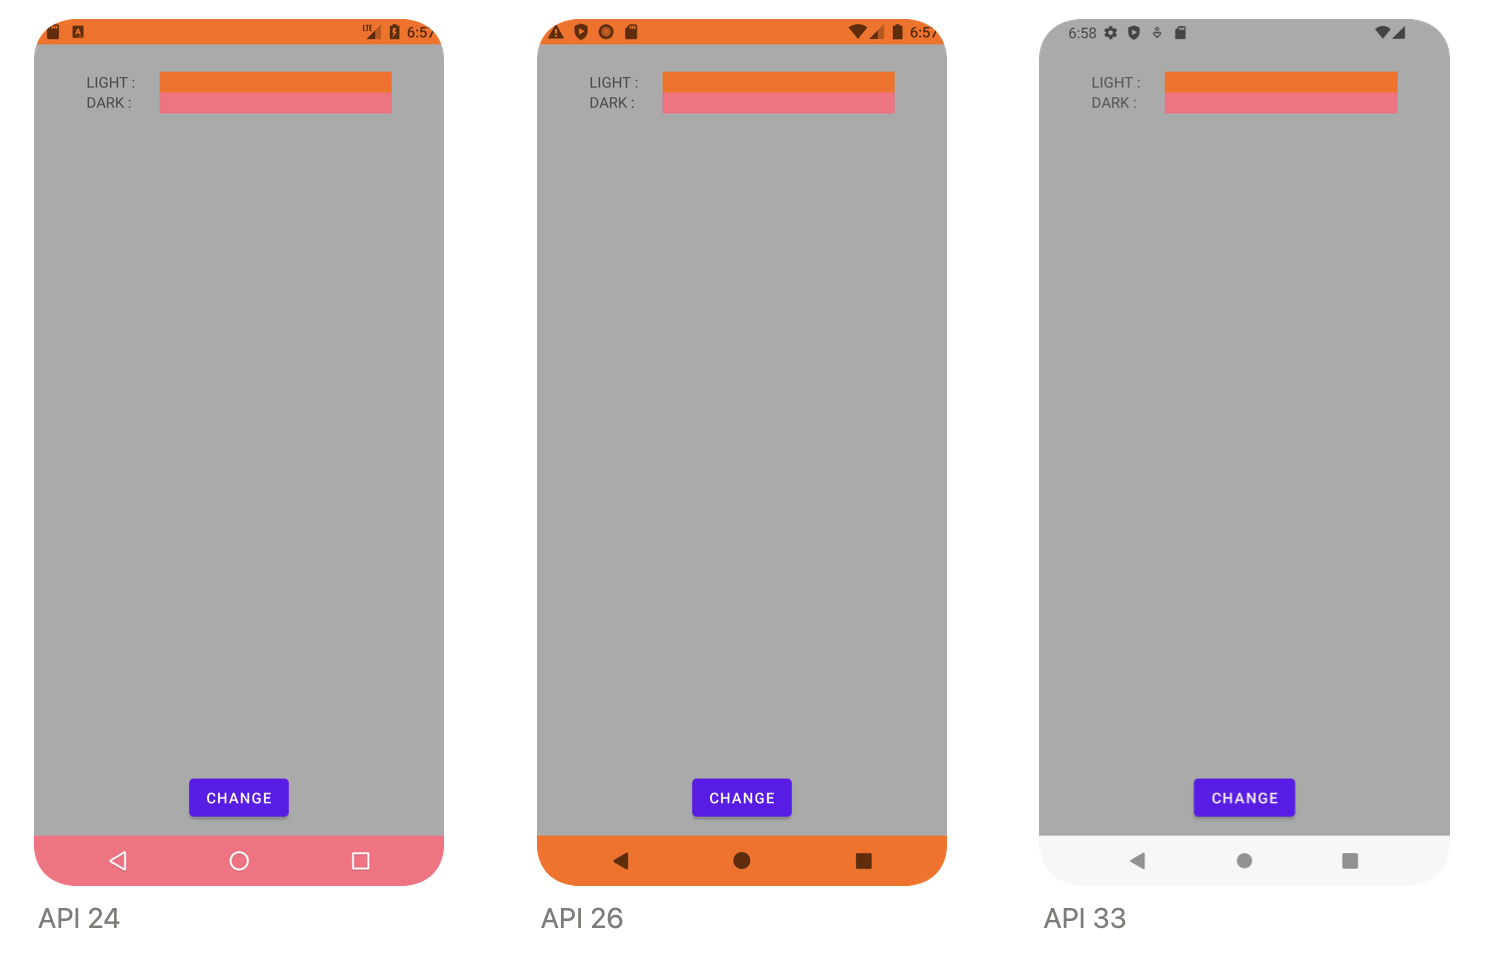
}internal fun getScrim(isDark: Boolean) = if (isDark) darkScrim else lightScrimgetScrim 함수를 사용하여 isDark에 따라 다른 scrim을 리턴하고 있다. 이 예제 같은 경우에는 isDark가 false이기 때문에, getScrim 함수는 lightScrim을 리턴하고 있다.
statusBarColor는 getScrim을 사용해서 상황에 따라 다른 색상을 받도록 되어있는데, navigationBarColor는 무조건 darkScrim을 받도록 되어있다.
그래서 결과 화면을 보면 NavigationBarColor가 핑크색인 것을 확인할 수 있다.
API 26 ~
@RequiresApi(26)
private class EdgeToEdgeApi26 : EdgeToEdgeImpl {

	@DoNotInline
	override fun setUp(
		statusBarStyle: SystemBarStyle,
		navigationBarStyle: SystemBarStyle,
		window: Window,
		view: View,
		statusBarIsDark: Boolean,
		navigationBarIsDark: Boolean
	) {
		WindowCompat.setDecorFitsSystemWindows(window, false)
		window.statusBarColor = statusBarStyle.getScrim(statusBarIsDark)
		window.navigationBarColor = navigationBarStyle.getScrim(navigationBarIsDark) // API 23과 다르게 isDark에 따라 적용
		WindowInsetsControllerCompat(window, view).run {
			isAppearanceLightStatusBars = !statusBarIsDark
			isAppearanceLightNavigationBars = !navigationBarIsDark
		}
	}
}
API 23 버전 함수와 거의 동일하나, NavigationBar 세팅에서 조금 달라진 것을 확인할 수 있었다.
isAppearanceLightNavigationBars, isAppearanceLightStatusBars
isAppearanceLightStatusBars, isAppearanceLightNavigationBars에 true를 적용하면, foregroundColor를 light로 바꾸어서 항목이 잘보이게 한다. false면 원래 모양으로 되돌린다.
이 설명이 주석에 있던 내용인데, light로 바꾼다는 의미는 light mode의 light로 보인다. light mode에서는 상태표시줄이나 네비게이션의 background 색상이 밝으니, 아이콘이 어두운 색상일 수 밖에 없기 때문이다.
// In onCreate...
window.statusBarColor = Color.parseColor("#FF6a00")
window.navigationBarColor = Color.parseColor("#FF6a00")
WindowInsetsControllerCompat(window, binding.root).run {
isAppearanceLightStatusBars = true
isAppearanceLightNavigationBars = true
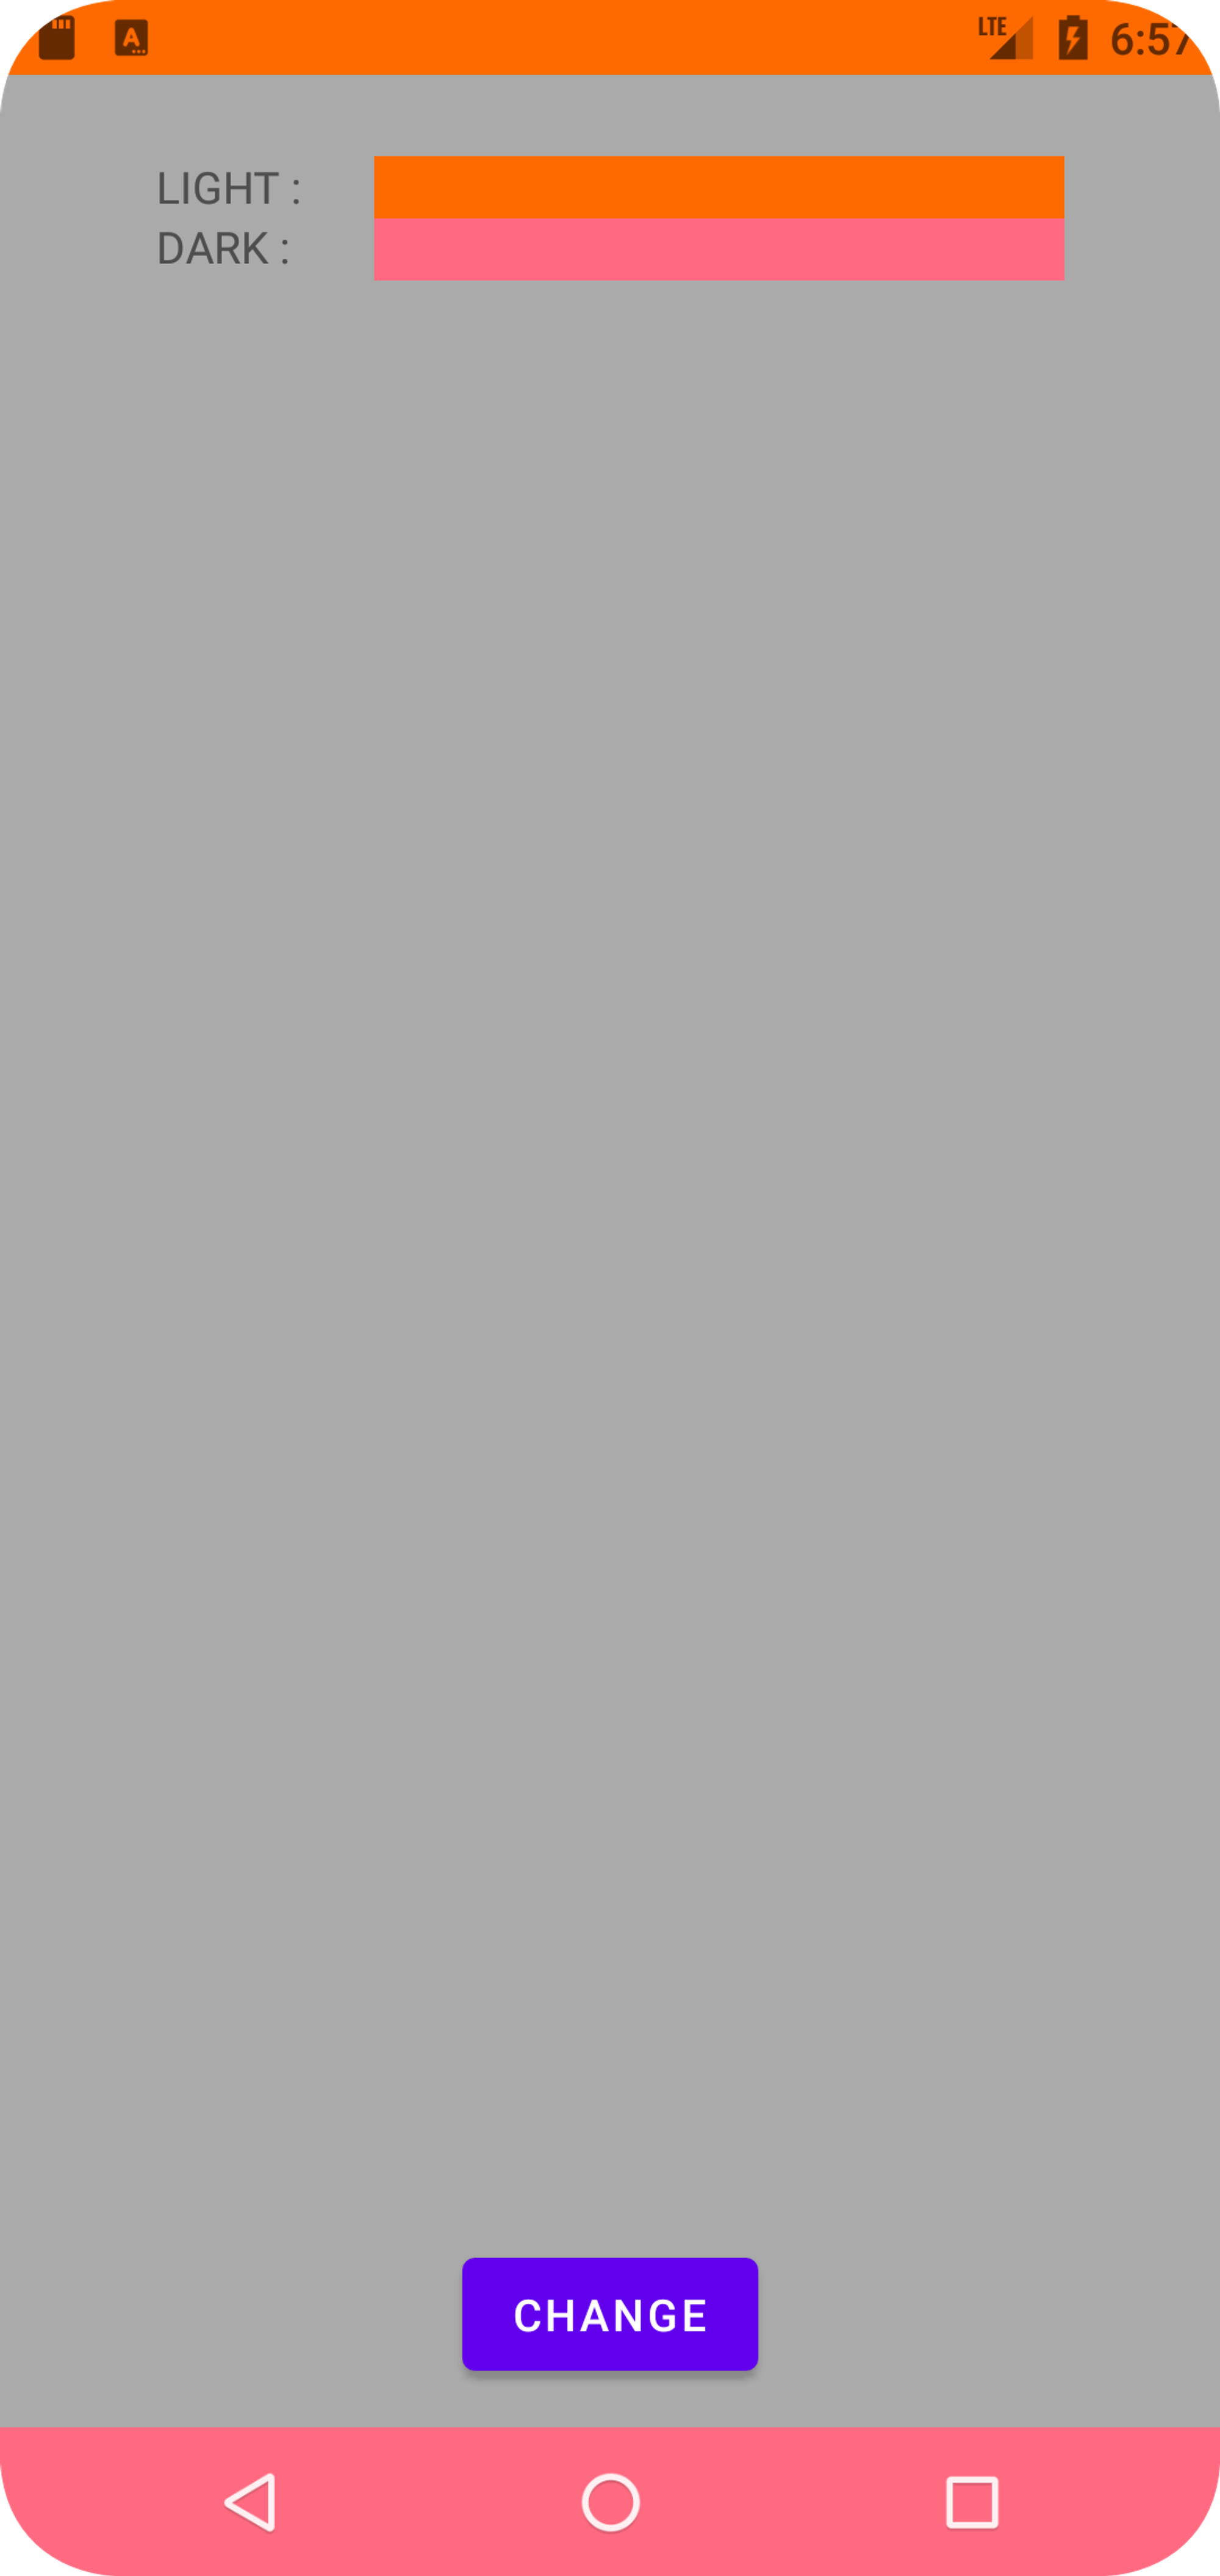
}위와 같이 코드를 작성해서 테스트를 해보았다.
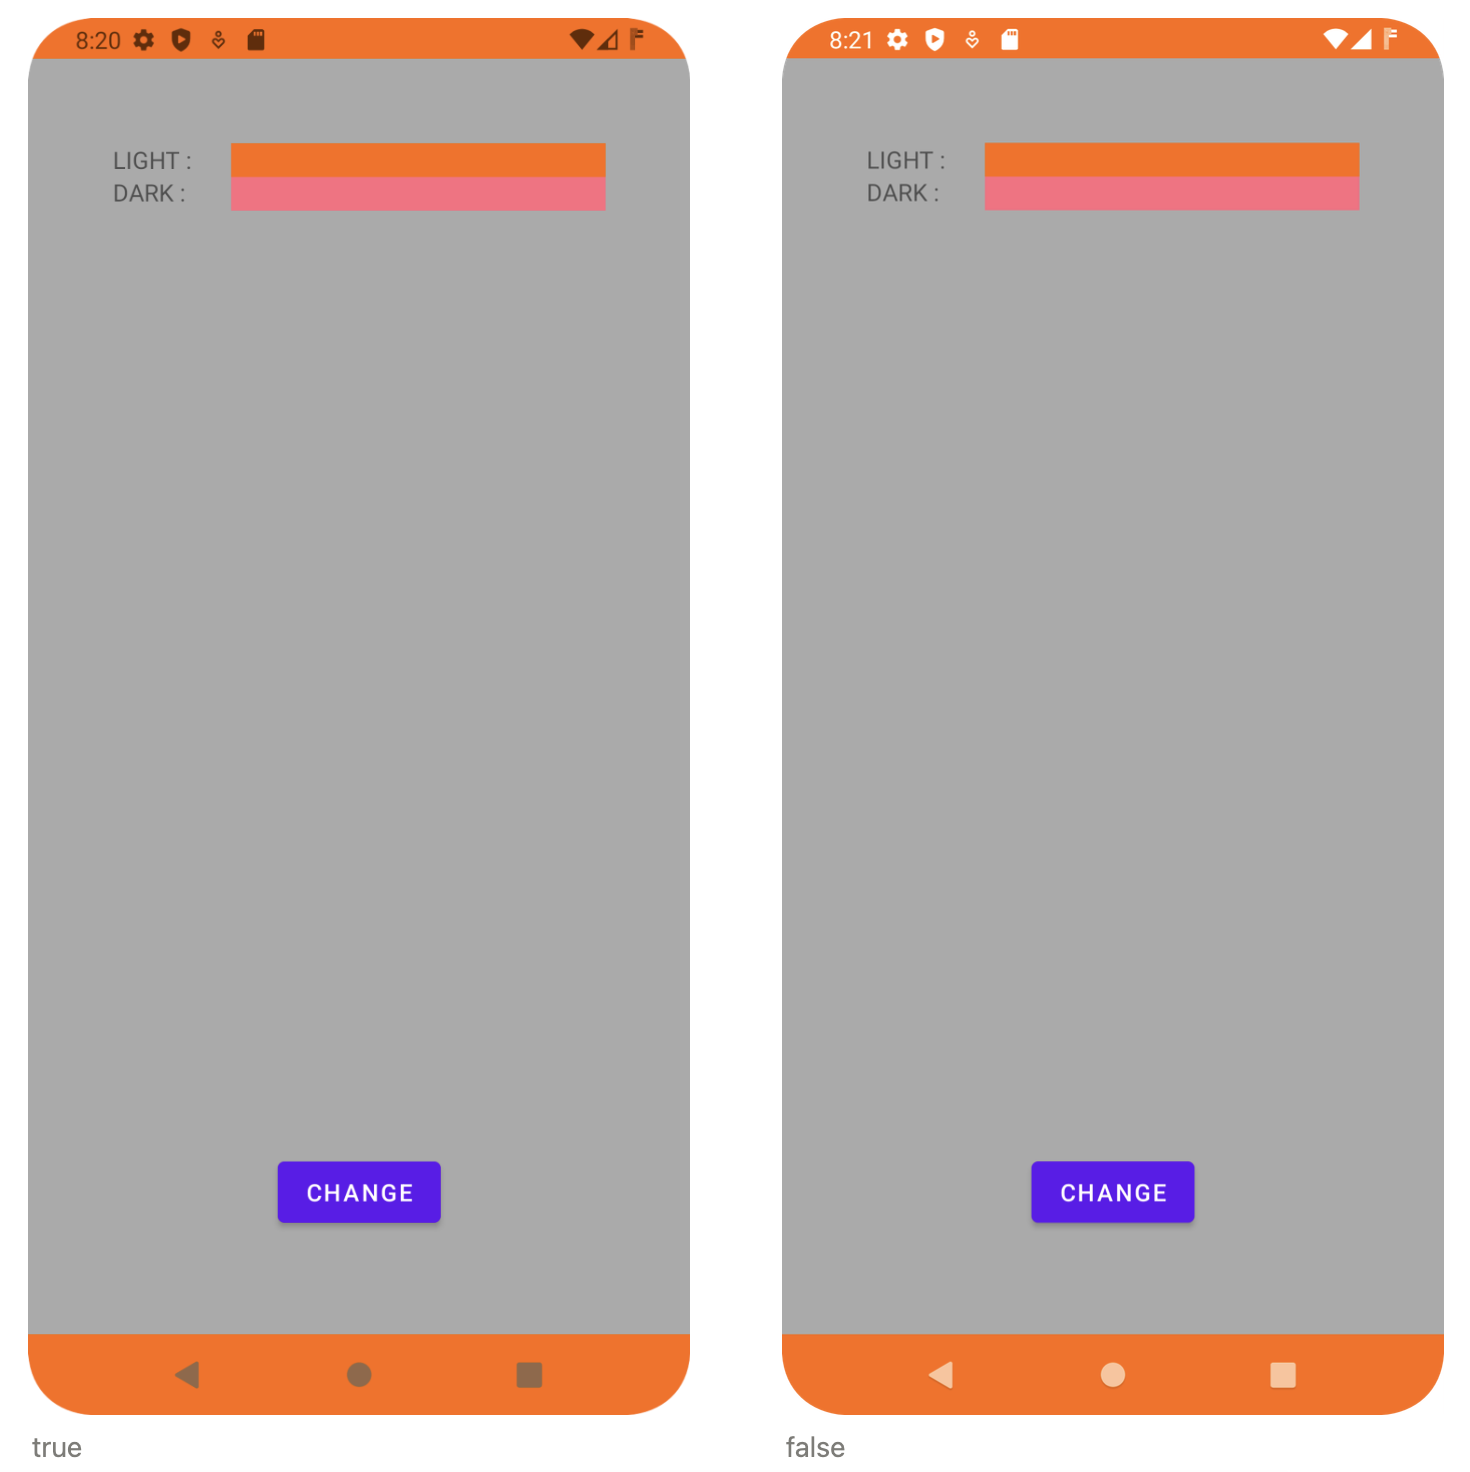
StatuBars/NavigationBars가 Light인지 여부를 적용한다고 생각하면 쉽다. true인 경우 아이콘의 색상들이 어둡고, false인 경우 밝아진다.
API 29 ~
@RequiresApi(29)
private class EdgeToEdgeApi29 : EdgeToEdgeImpl {

	@DoNotInline
	override fun setUp(
		statusBarStyle: SystemBarStyle,
		navigationBarStyle: SystemBarStyle,
		window: Window,
		view: View,
		statusBarIsDark: Boolean,
		navigationBarIsDark: Boolean
	) {
		WindowCompat.setDecorFitsSystemWindows(window, false)
		// isDark 뿐만 아니라 MODE도 판단 기준에 추가!
		window.statusBarColor = statusBarStyle.getScrimWithEnforcedContrast(statusBarIsDark) // <<< 다른 버전과 다른 함수를 사용
		window.navigationBarColor =
			navigationBarStyle.getScrimWithEnforcedContrast(navigationBarIsDark)
		window.isStatusBarContrastEnforced = false
		window.isNavigationBarContrastEnforced =
			navigationBarStyle.nightMode == UiModeManager.MODE_NIGHT_AUTO
		WindowInsetsControllerCompat(window, view).run {
			isAppearanceLightStatusBars = !statusBarIsDark
			isAppearanceLightNavigationBars = !navigationBarIsDark
		}
	}
}
internal fun getScrimWithEnforcedContrast(isDark: Boolean): Int {
return when {
nightMode == UiModeManager.MODE_NIGHT_AUTO -> Color.TRANSPARENT // AUTO면 투명처리
isDark -> darkScrim
else -> lightScrim
}
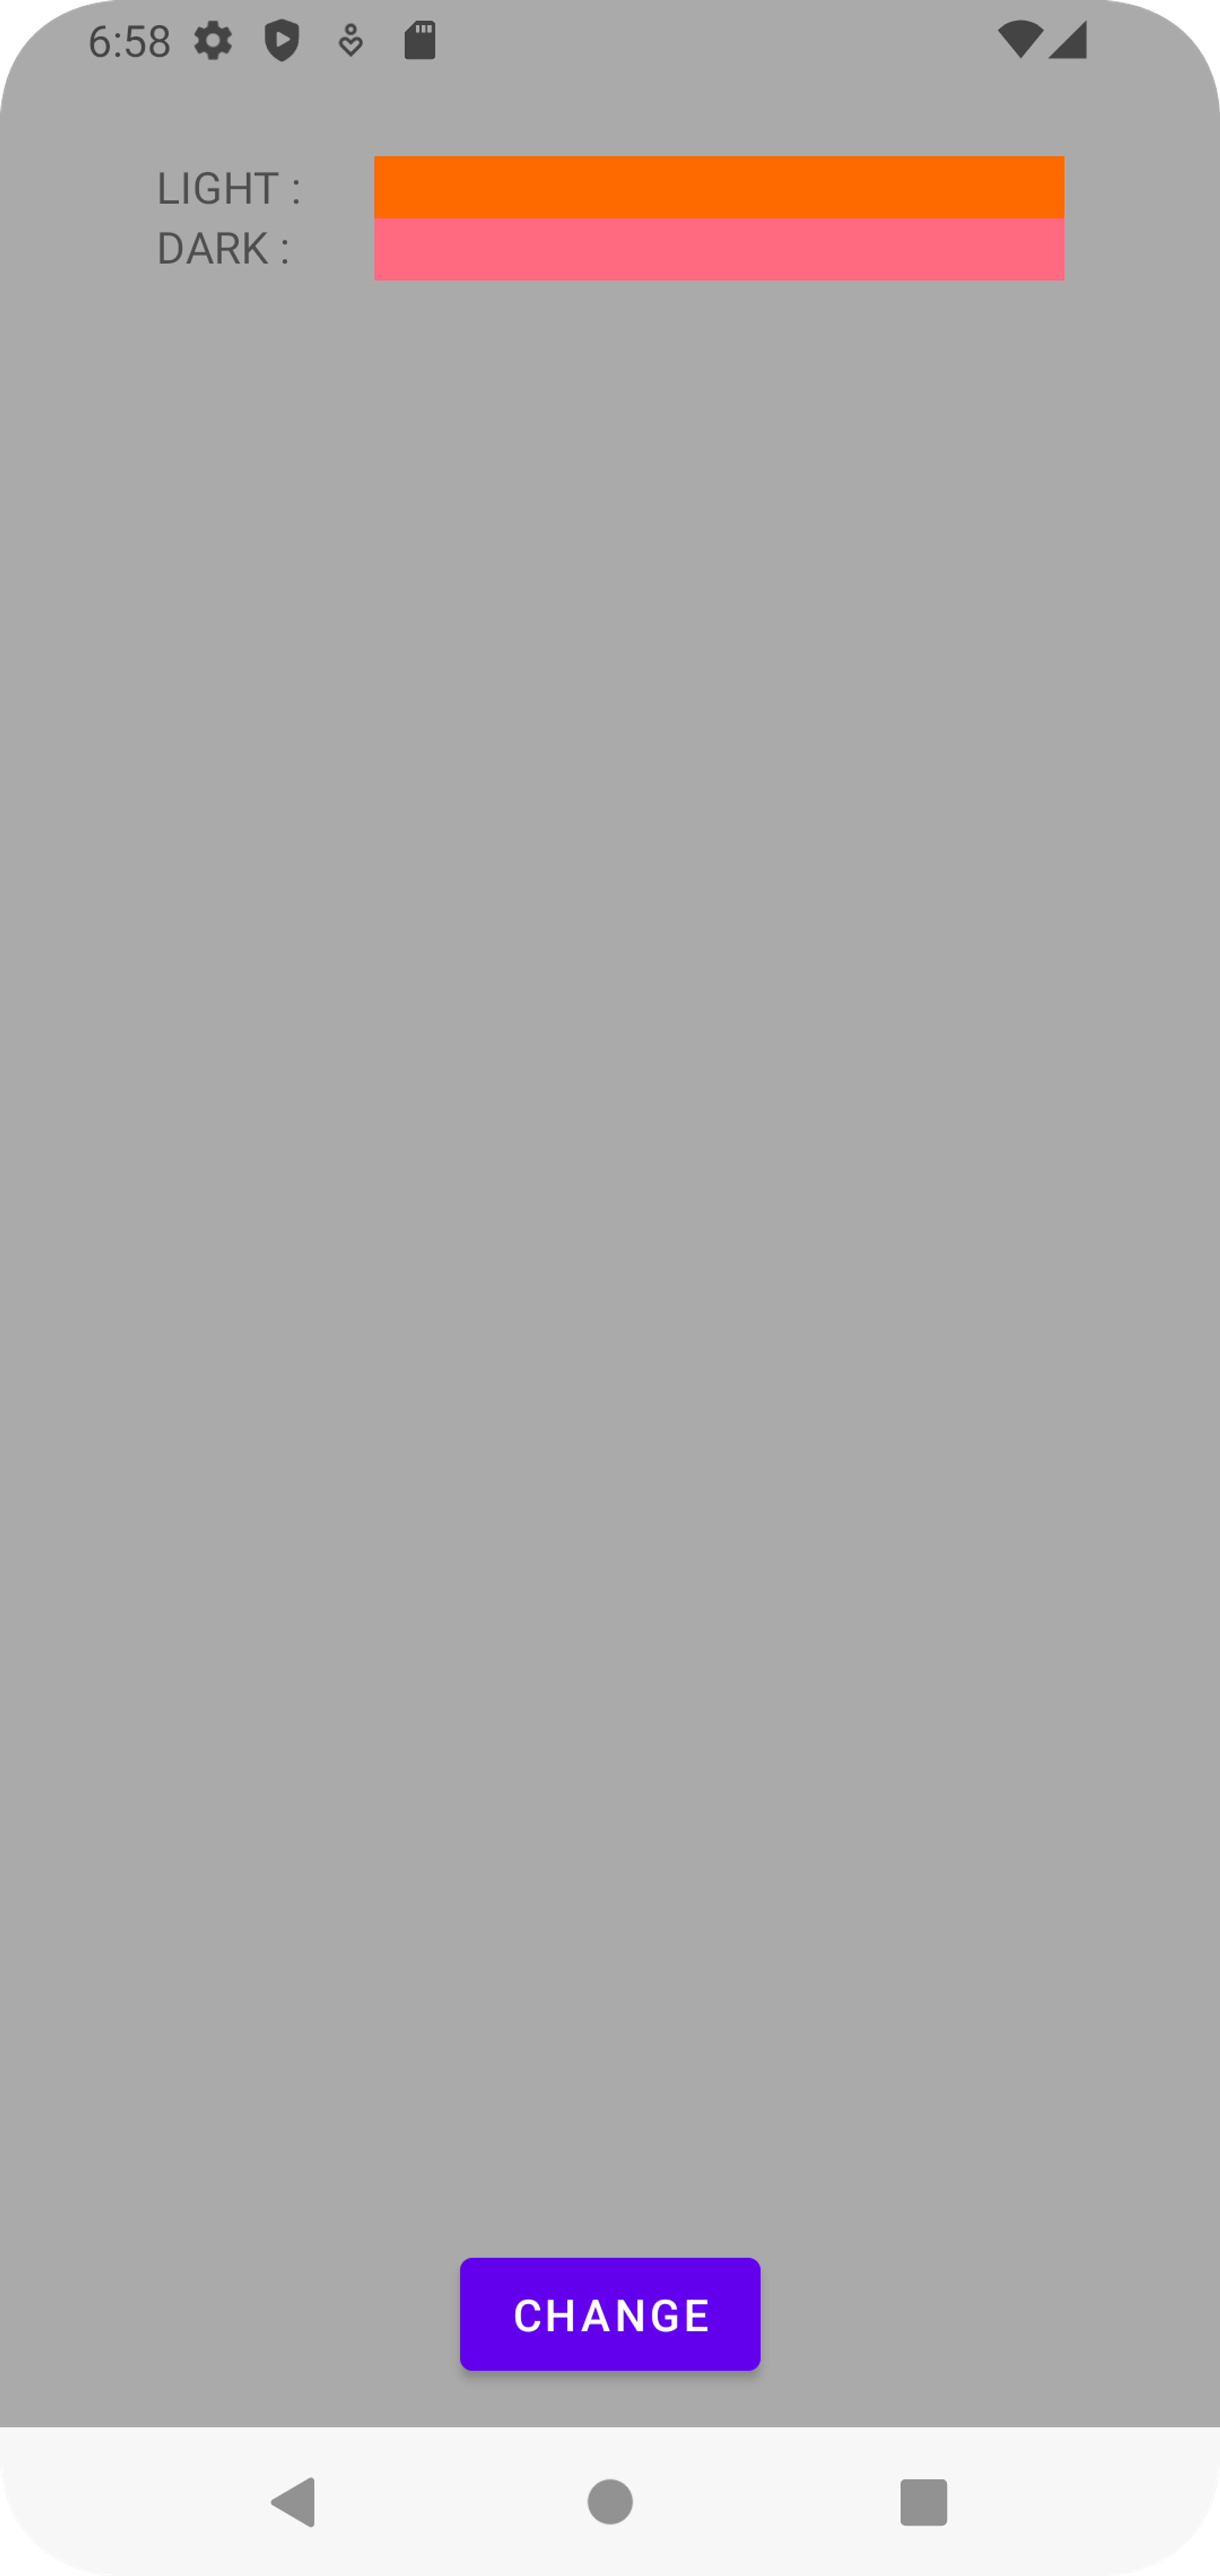
}SystemBarStyle이 가지고 있는 getScrimWithEnforcedContrast(isDark) 라는 함수를 사용하는데, isDark값을 판단하기 전에 MODE_NIGHT_AUTO이기에 Color.TRANSPARENT가 리턴되는 것을 확인할 수 있었다.
따라서 어떤 값을 지정해도, auto 팩토리 함수로 SystemBarStyle을 생성하면 MODE_NIGHT_AUTO이기 때문에 투명이 들어가게 되는 것이다.
window.isStatusBarContrastEnforced, window.isNavigationBarContrastEnforced
StatusBar, NavigationBar의 background 색상이 완전 투명하게 설정되어 있을 때, 아이콘과 텍스트가 배경 콘텐츠와 구분될 수 있도록 시스템이 자동으로 대비를 조절하게 하는지 여부를 의미한다.
// In onCreate...
window.statusBarColor = Color.TRANSPARENT
window.navigationBarColor = Color.TRANSPARENT

WindowCompat.setDecorFitsSystemWindows(window, false) // system bar 영역까지 확장
window.isStatusBarContrastEnforced = true // 대비 조절을 하겠다!
window.isNavigationBarContrastEnforced = true
위와 같이 코드를 작성해서 해당 변수에 대한 테스트를 해보았다.
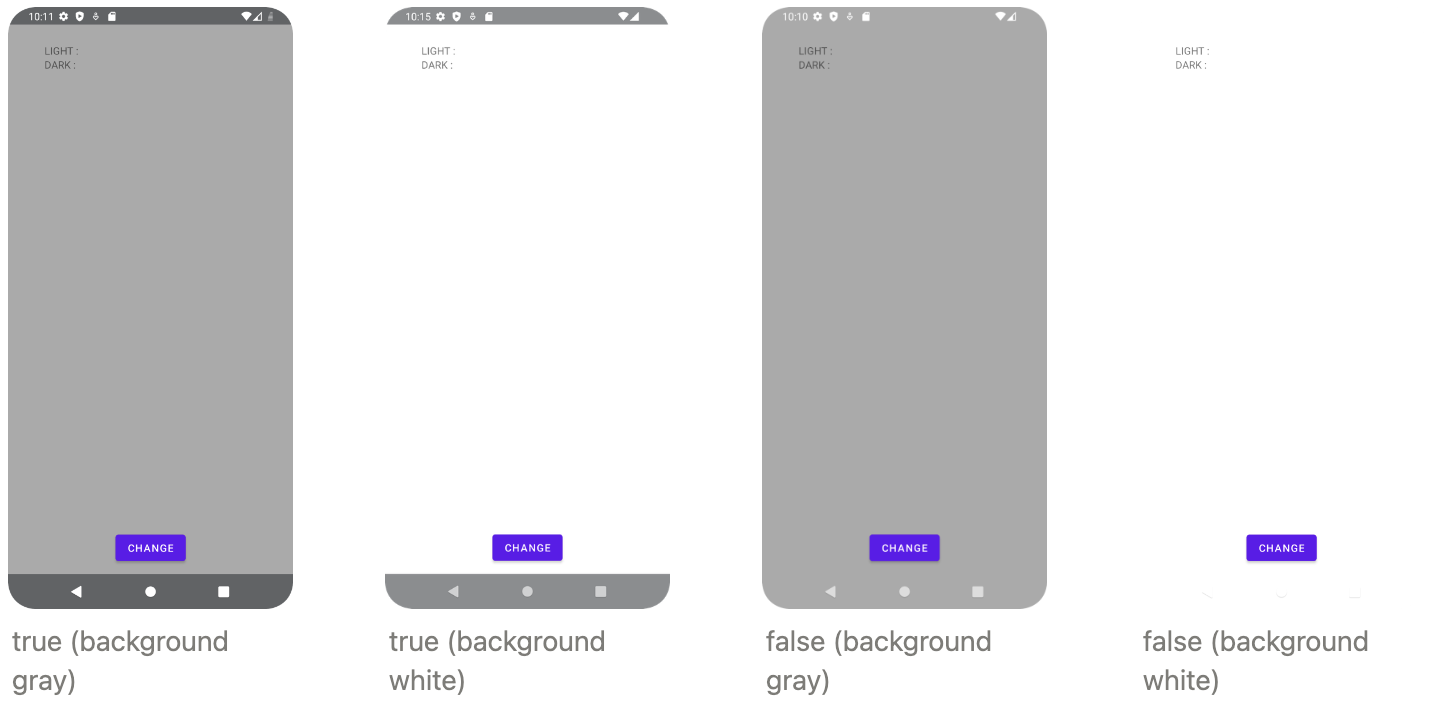
true인 경우에는 뒷배경 대비 조절이 되어서 아이콘이 잘 보이는 모습을 확인할 수 있었다. false인 경우에는 뒷배경이 어떻든 아이콘이 흰색이었다. 참고로 시스템 설정 테마가 다크모드라고 하더라도, 아이콘은 그대로 흰색이었다.
소감
StatusBar와 NavigationBar까지 decor view의 영역을 확장할 일이 있어서 deep dive를 하게 되었는데, 코드 한줄씩 분석하면서 버전별로 처리되는 영역, 각 함수의 역할을 알아볼 수 있었다.
enableEdgeToEdge()가 정말 편한 함수인 것 같은데 내부 동작 원리를 이해하지 못하면 그 이상의 커스텀을 하려고 할 때 어려움이 있을 듯 하다.


붐업!