
🤖 GPT-LOG
🔍 긴 소감 한마디
GPT-LOG는 GPT OPEN API를 이용해서 자동 생성 일기장 같은 걸 만들어 보고 싶어서 시작했다.
일단 GPT API를 사용하려면 프롬프트를 알아야 한다. 근데 프롬프트 이 녀석에 대해 아는 거라곤 [인공지능에게 특정 작업을 수행하도록 지시하는 명령어나 질문] 밖에 없다...
Who are You?

프롬프트를 잘 작성하는 방법이라든가, 프롬프트의 종류라든가 AI와 소통하는 방법을 몰라 검색을 해서 찾아보았고, GPT-LOG는 인프런 도도(코딩루팡) 님의 무료 강의를 참고했다.
늘 그렇듯 영상이 올라온 지 시간이 꽤 지나서 현시점과는 일치하지 않는 부분이 있다는 걸 알고 있어야 한다.
예를 들어, Unsplash 무료 이미지 제공 방식이 https://source.unsplash.com/1600x900/?<키워드> 이런 식으로 쉽게 가져올 수 있었는데, 더 이상 지원되지 않고 OPEN API로 전환되었기에 썸네일을 가져오는 부분은 강의와 다르다.
또한, 데이터를 요청할 때 Fetch 대신 Axios 라이브러리를 사용해 조금 더 간편하고 직관적이게 처리했다.
이 외에도 로직/데이터 분리, 합성 컴포넌트 추출, 로딩 컴포넌트, 미디어 쿼리, 스크롤 탑 버튼, 에러 페이지 등 강의와는 조금 다르지만, 나의 정체성이 추가된 GPT-LOG를 만들어 보았다 🤖
그래서 강의는 GPT OPEN API를 어떻게 사용하고, 프롬프트를 잘 작성하는 방법을 중점으로 해서, 스스로 생각하고 자신만의 웹 애플리케이션을 만들어 보는 게 좋을 것 같다!
※ antd 라이브러리를 통해 아이콘과 스타일을 적용했고, 그 외에 메인 로고, 에러 로고 등 전부 Canva에서 직접 만들어서 사용했습니다.
| 홈 | 에러 |
|---|---|
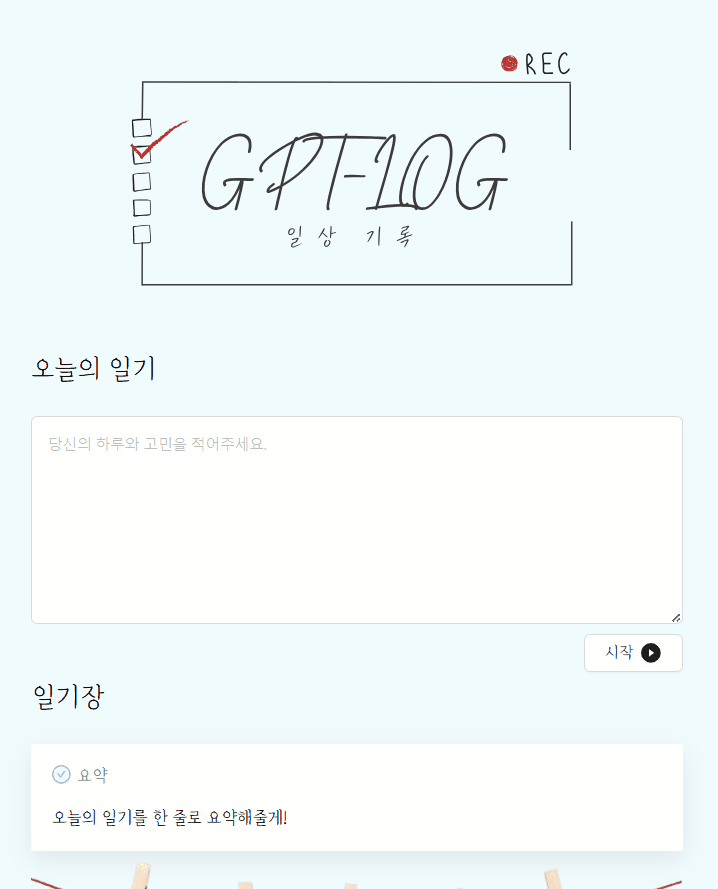 | 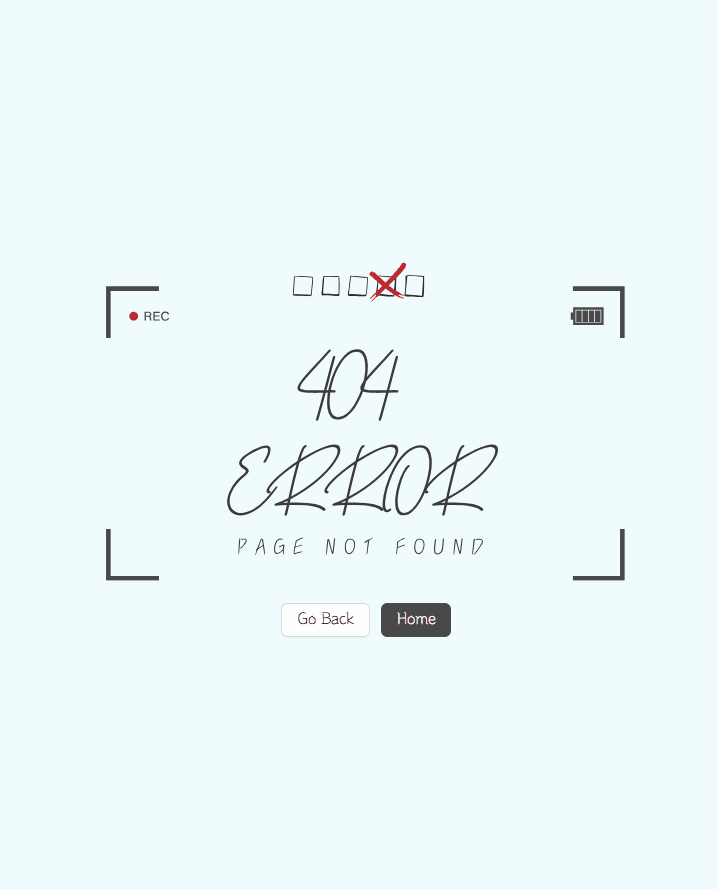 |
🔍 폴더 구조
🤖 GPT-LOG
├─ 📦 public
├─ 📦 src
│  ├─ 📂 api
│  │  ├─ 📜 gpt.js
│  │  └─ 📜 image.js
│  ├─ 📂 assets
│  ├─ 📂 components
│  │  ├─ 📂 Button
│  │  │  └─ 🧾 ScrollTopButton.jsx
│  │  ├─ 📂 Diary
│  │  │  ├─ 🧾 DiaryCard.jsx
│  │  │  ├─ 🧾 DiaryDisplay.jsx
│  │  │  └─ 🧾 DiaryInput.jsx
│  │  ├─ 📂 Loading
│  │  │  └─ 🧾 Loading.jsx
│  ├─ 📂 data
│  │  └─ 📜 dummyData.js
│  ├─ 📂 pages
│  │  ├─ 📂 ErrorPage
│  │  └─ 📂 HomePage
│  ├─ 📂 routes
│  ├─ 📂 styles
│  │  ├─ 🧾 CommonStyles.jsx
│  │  └─ 🧾 Theme.jsx
|  ├─ 🧾 App.jsx
|  ├─ 🧾 axios.jsx
|  ├─ 🎨 index.css
|  └─ 🧾 main.jsx
🔍 사용 기술
[ FrontEnd ]

[ BackEnd ]
Chat GPT OPEN API , Unsplash OPEN API
[ Version ]
"@ant-design/icons": "^5.5.2",
"antd": "^5.22.5",
"axios": "^1.7.9",
"react": "^18.3.1",
"react-dom": "^18.3.1",
"react-router-dom": "^7.1.0",
"styled-components": "^6.1.13"
🔍 기획
✔️ 문제
-
많은 사람들이 SNS나 블로그에 일기를 쓰고 미니 브이로그 처럼 기록하고 싶어 하지만, 글을 길게 작성하는 것이 번거롭고 귀찮아한다.
-
생각을 정리하거나, 바쁜 일상 속에서 매일 꾸준히 긴 글을 작성하는 일이 쉽지 않다.
✔️ 가설
-
AI의 도움을 받아 GPT 같은 인공지능을 이용하면 간단한 문구나 감정만 입력해도 개인화된 글을 자동으로 만들어줄 수 있다.
-
더 나아가서, 감정 분석을 통해 기분에 맞는 구체적인 조언도 해주고, 그에 맞는 이미지도 같이 제공할 수 있다면, 글 쓰는 부담을 크게 줄일 수 있다.
✔️ 해결 방법
-
사용자가 짧은 문구나 자기감정을 입력하면, AI가 그걸 분석해서 나만의 GPT-LOG를 자동으로 작성해 주는 서비스를 제공할 수 있다.
-
이 앱은 단순히 글만 쓰는 게 아니라, 감정 분석을 통해 사용자의 기분을 파악하고, 그에 맞는 조언이나 격려를 해줄 것이다.
🔍 Chat GPT API 및 개발 과정
✔️ GPT 잘 다루기 위해 프롬프트 짜는 법
- 역할 설정 전제로 깔기 - 시스템 설정
- 해야 할 일 순서 정해주기 - 넘버링
- 출력 형식 명시해 주기
- 변수 지정하기
✔️ 개발 과정
-
https://chat.openai.com/
Chat GPT OPEN API 공식 페이지에서 프롬프트를 개발하고 테스트 진행 -
OPEN API KEY 발급 후 연동 (.env 설정)
-
프롬프트를 코드로 변환
시스템(System), 보조자(Assistant), 사용자(User), 기능(Function)로 구분
  - 시스템: Chat GPT에게 전제, 배경 설명
    e.g. "너는 친절하고 공감 능력이 뛰어난 상담자 역할을 해줘."

  - 보조자: 이전 내용을 바탕으로 프롬프트에 요청하고자 할 때 사용
    e.g. 사용자가 "오늘 기분이 별로야."라고 말하면, 보조자는 "왜 기분이 좋지 않아요?"와 같은 반응

  - 사용자: Chat GPT에 일반적으로 질문하는 질문
    e.g. "오늘 기분이 별로야." 또는 "나의 일정을 알려줘."

- 기능: 외부 시스템 또는 API와 상호작용할 때 사용- GPT API 작성
API 호출할 때 3개의 role로 구분해서 보내기 (System, User, Assistant)
사전 정보 = System, 나머지 = User
import { GPTInstance } from '../axios';
export const CallGPT = async ({ prompt, thumbnail }) => {
const messages = [
{
role: 'system',
content: `## INFO ## You can add images to the reply by URL. Write the image in JSON format. ## DO NOT RESPOND TO INFO BLOCK ##`,
},
{
role: 'system',
content: `You are a psychological counselor who writes and analyzes emotional diaries. Proceed in the following order.`,
},
{
role: 'user',
content: `1. [title] : Think of the diary title after understanding the [events] separated by """ at the bottom.
2. [summarize] : summarize events in order with one line sentence.
3. [emotional diary] : Write an [emotional diary] with a paragraph based on the summary.
4. [evaluates] : The written emotional [evaluates], using explore the unconscious based on the contents of the [emotional diary].
6. [Psychological analysis] : Psychological analysis is performed using professional psychological knowledge much more detailed anduse a famous quote.
7. [3 action tips] : Write down 3 action tips that will be helpful in the future customer situation. The three action tips must beconverted into JSON Array format.
8. [image] : Create an image by making the contents so far into one keyword.
Translate into Korean and Use the output in the following JSON format:
{
title: here is [title],
thumbnail: here is [image],
summary: here is [summarize]
emotional_content: here is [emotional diary],
emotional_result: here is [evaluates],
analysis: here is [Psychological analysis],
action_list: here is [3 action tips],
}
[events]:`,
},
{
role: 'user',
content: `"""
${prompt}
"""`,
},
];
if (thumbnail) {
messages.push({
role: 'system',
content: `Thumbnail URL: ${thumbnail}`,
});
}
try {
const response = await GPTInstance.post('', {
model: 'gpt-4o-mini',
messages,
temperature: 0.7,
max_tokens: 1_000,
});
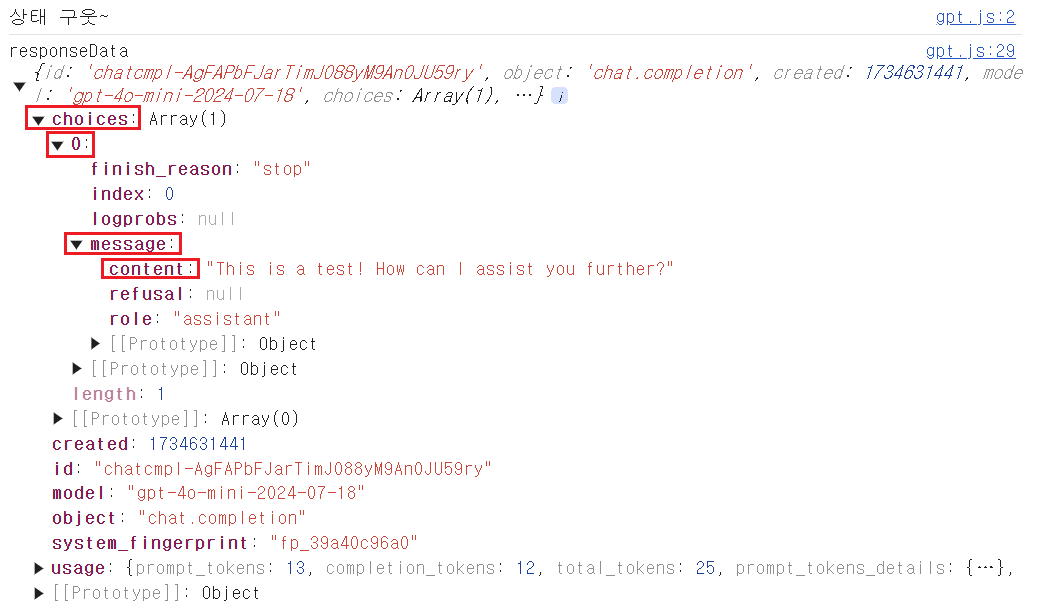
const message = response.data.choices[0].message.content;
return message;
} catch (error) {
const errorMessage = error.response?.data?.error?.message || error.message || 'GPT 응답 실패';
console.error('GPT API 에러 발생:', error.response?.data || error.message);
throw new Error(errorMessage);
}
};
-
사용자 입력 처리, 사용자 입력 결과 화면 컴포넌트 생성
-
https://api.unsplash.com
Unsplash API 공식 페이지에서 OPEN API 키 발급 (.env 설정) -
Chat GPT API 호출 로직에 Unsplash API 호출
  import { useState } from 'react';
  import { message } from 'antd';
  import styled from 'styled-components';
  import logo from '../../assets/logo.svg';
  import { CallGPT } from '../../api/gpt';
  import DiaryInput from '../../components/Diary/DiaryInput';
  import DiaryDisplay from '../../components/Diary/DiaryDisplay';
  import { dummyData } from './../../data/dummyData';
  import { useGetThumbnail } from '../../api/image';

  const Home = () => {
    const [data, setData] = useState(dummyData);
    const [isLoading, setIsLoading] = useState(false);
    const [messageApi, contextHolder] = message.useMessage();

    const handleClickAPICall = async (userInput) => {
      try {
        setIsLoading(true);

        const thumbnail = await useGetThumbnail(userInput);
        const message = await CallGPT({
          prompt: userInput,
          thumbnail: thumbnail,
        });

        const messageData = JSON.parse(message);
        messageData.thumbnail = thumbnail;
        setData(messageData);
      } catch (error) {
        messageApi.open({
          type: 'error',
          content: error?.message,
        });
        return;
      } finally {
        setIsLoading(false);
      }
    };
    const handleSubmit = (userInput) => {
      console.log('userInput', userInput);
      handleClickAPICall(userInput);
    };

    return (
      <HomeContainer>
        {contextHolder}
        <HomeTitle>
          <h2 className="a11y-hidden">로고 타이틀</h2>
          <img src={logo} alt="GPT-LOG 로고" />
        </HomeTitle>
        <DiaryInput isLoading={isLoading} onSubmit={handleSubmit} messageApi={messageApi} />
        <DiaryDisplay data={data} isLoading={isLoading} />
      </HomeContainer>
    );
};- 사용자 입력 처리를 쿼리로 받아 이미지 요청에 보내기
  import { unsplashInstance } from '../axios';

  export const useGetThumbnail = async (query) => {
    try {
      const encodedQuery = encodeURIComponent(query);

      const response = await unsplashInstance.get('/search/photos', {
        params: {
          query: encodedQuery,
          count: 10,
        },
      });

      console.log('이미지 응답', response.data);
      return response.data.results[0]?.urls?.regular;
    } catch (error) {
      console.error('이미지 검색 중 오류 발생:', error.message);
      return null;
    }
};-
antd, styled-components로 스타일, 미디어 쿼리 설정
loading, icon, error message 처리
추가로 사용자 입력 결과 보여주는 부분 합성 컴포넌트 추출 등 다양한 리팩토링 진행
과정을 엄청 상세하게 적진 않았고, 큰 항목들 위주로 핵심만 적어놨슴다! 😮☺️
🔍 CRA vs Vite
항상 CRA (Create-React-App)으로 리액트 프로젝트를 해왔어서 이번에 Vite로 만들어 보니, 확실히 차이점을 알았다.
느낀 점을 비교하면 좋을 것 같아서 마지막으로 들고 와 봤으니 참고하면 구웃! 👍🏻👍🏻
✔️ CRA
-
CRA는 React 애플리케이션을 빠르게 설정하고, 기본적인 빌드 도구와 구성 옵션을 자동으로 제공하는 도구
-
CRA는 웹팩(Webpack), Babel, ESLint 등 여러 개발 도구를 기본적으로 설정하여, 가장 적합한 설정을 자동으로 제공
-
CRA는 웹팩을 사용하기 때문에 개발 빌드 속도가 느릴 수 있는데, 특히 프로젝트가 커지면 빌드 시간이 늘어날 가능성 있음
장점
- 설정이 간단하고 바로 시작 가능
- 기본적으로 많은 설정이 자동으로 처리되어 사용자가 빠르게 프로젝트 집중
- React 및 관련 도구들에 대한 기본적인 최적화가 포함단점
- 빌드 성능 느림 (큰 프로젝트)
- 설정을 변경하려면eject해야 하므로 구성 변경 어려움
✔️ Vite
-
Vite는 차세대 프론트엔드 빌드 도구로, 빠른 개발 환경과 빌드 제공에 중점
-
Vite는 ES 모듈(ESM)을 사용해 브라우저가 직접 모듈을 로드하도록 하여 빠른 개발 빌드가 가능
-
Vite는 플러그인을 통해 필요에 따라 설정을 추가하거나 변경할 수 있음
-
Vite는 Rollup을 사용해 생산 빌드를 최적화하며, 빌드 성능이 CRA보다 훨씬 빠름
장점
- 개발 빌드와 생산 빌드 모두 빠름
- 파일을 즉시 로드하고, 핫 리로딩도 매우 빠름
- 간단한 설정과 최신 웹 표준을 기반으로 하며, 다양한 기능을 자동으로 처리단점
- CRA와 달리 구성 파일이 더 많은 경우가 있음
- 일부 레거시 라이브러리나 환경에서는 호환성 문제가 발생할 수 있음
🔍 크게 보는 결과물