리액트 시작하기
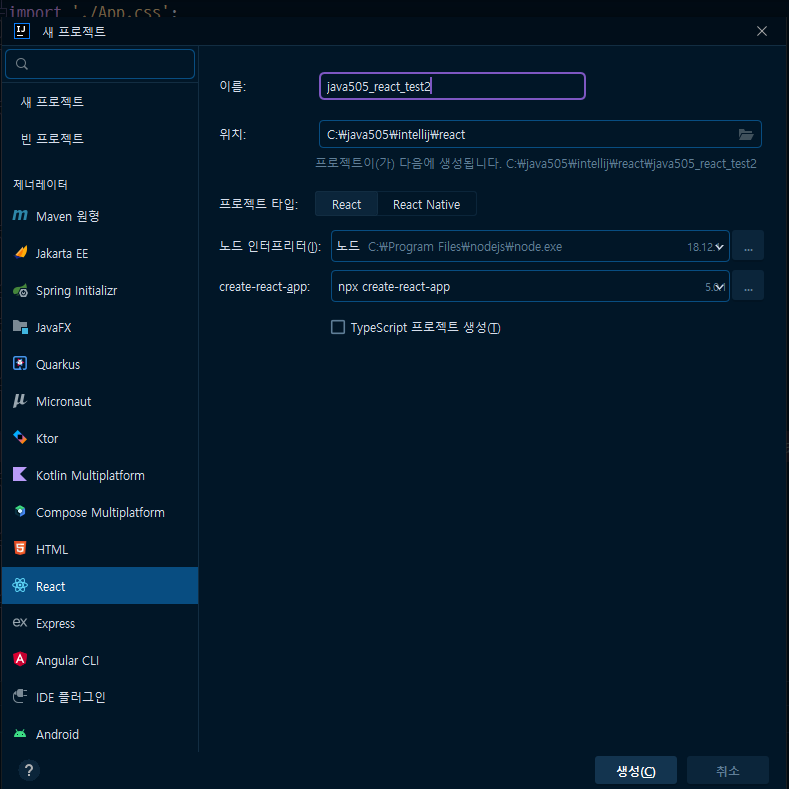
프로젝트 생성
java505_react_test2
리액트 공식 홈페이지(Docs)
문서 : https://ko.reactjs.org/docs/getting-started.html
자습서 : https://ko.reactjs.org/tutorial/tutorial.html
JSX : 클래스형/함수형 두가지가 있다. 현재는 대부분 함수형을 사용함! (쉽고 편하다)
Potato.jsx 파일 생성
import React from "react";

function Potato() {
  return (
    <h3>I LOVE POTATO</h3>
  );
}

export default Potato;
React에서의 가상돔 개념
https://velog.io/@mollog/React%EC%97%90%EC%84%9C%EC%9D%98-%EA%B0%80%EC%83%81%EB%8F%94-%EA%B0%9C%EB%85%90
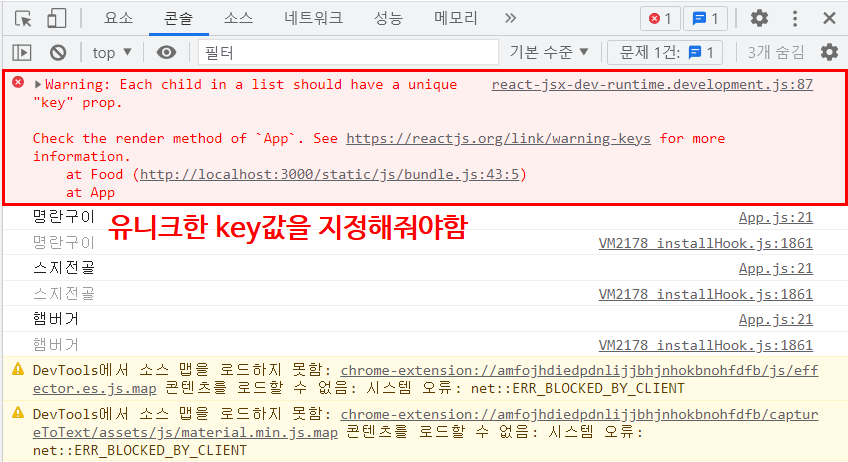
Key 에러메세지 해결
const foodList = [
  {
    id : 1,
    name: "명란구이",
    image: "https://search.pstatic.net/common/?src=http%3A%2F%2Fblogfiles.naver.net%2FMjAyMjAzMjlfMjY0%2FMDAxNjQ4NDg2ODg0ODU1.-FRGEeH6bSjWmCQFcNs4R1Q9LourkkzdhePYtuaFNtkg.oswpp9T0mq36Y4SzZoMdKK-jdeWvxUkJmku5F7EDjj8g.JPEG.shorty_%2FIMG_5551.jpg&type=a340",
  },
  {
    id : 2,
    name: "스지전골",
    image: "https://search.pstatic.net/common/?src=http%3A%2F%2Fblogfiles.naver.net%2FMjAyMjEwMjBfMjAy%2FMDAxNjY2MjYzNTA0MTU0._Kjn-tBFmMvbUWZPzD5ZhGXyIhAsFrytrYwIB1wMwkUg.pw7tmJ716ZKS6X6Tsmo-BsWRRMr11LnCv9fWjkbgc4og.JPEG.yeslhong%2FIMG_2835.jpg&type=sc960_832"
  },
  {
    id : 3,
    name: "햄버거",
    image: "https://search.pstatic.net/common/?src=http%3A%2F%2Fblogfiles.naver.net%2FMjAyMjEyMDRfMjg5%2FMDAxNjcwMTU1MzEwMTky.kp-QjbGuXA8-ypXo7SNodq01L0f_TqP6C1u9nt6wO7gg.aGwN6d1_SaeK21S6Vfy3obRDwH_NvpjBqqM7nsB5xsIg.JPEG.ssaounara%2F1670155306339.jpg&type=sc960_832"
  }
];
위와 같이 id값 추가해주고
function renderFood(dish) {
  return (
    <Food key={dish.id} name={dish.name} pic={dish.image} />
  );
}key={dish.id}도 추가해주면 에러 메세지 사라짐
prop-type
터미널에서 다운로드

- App.js
function Food({name, pic, rating}) {
  console.log(name);
  return (
    <div>
      <h3>I LOVE {name}</h3>
      <h4>점수 : {rating}</h4>
      <img src={pic} alt="..."/>
      <p>-----------------------------------------------------------------------------------------------------------</p>
    </div>
  );
}
raing의 타입을 검사 하기 -> import 먼저
- App.js
import PropTypes from "prop-types";export 바로 윗줄 (코드의 마지막쯤)
- App.js
// 매개변수로 사용되는 데이터를 체크
// 매개변수의 이름까지 체크할 수 있음
// isRequired : 해당 부분이 반드시 필요하다는 의미, 없으면 오류 발생
Food.propTypes = {
  name: PropTypes.string.isRequired, // 값 안들어오면 오류체크 하라는 뜻
  pic: PropTypes.string.isRequired,
  rating: PropTypes.string.isRequired
}
데이터형이 잘못들어갔을때 이렇게 오류 확인이 가능함
코드 수정
rating: PropTypes.string.isRequired → rating: PropTypes.number.isRequired
- App.js
// 매개변수로 사용되는 데이터를 체크
// 매개변수의 이름까지 체크할 수 있음
// isRequired : 해당 부분이 반드시 필요하다는 의미, 없으면 오류 발생
Food.propTypes = {
  name: PropTypes.string.isRequired, // 값 안들어오면 오류체크 하라는 뜻
  pic: PropTypes.string.isRequired,
  rating: PropTypes.number.isRequired
}- App2.jsx
// App2.jsx
import React from "react";

// 클래스 타입의 컴포넌트(잘 사용 안하지만 개념은 이해하자)
class App2 extends React.Component {
  render() {
    return(
      <div>
        <h1>클래스 컴포넌트 App2</h1>
      </div>
    );
  }
}

export default App2;- index.jsx import
import App2 from './App2';- index.jsx 코드 추가
root.render(
  <React.StrictMode>
    {/* 시작 태그와 끝 태그는 jsx 문법에서 무조건 !!! 있어야 한다.*/}
    {/* <App />  ==  <App></App> */}
    {/* jsx 문법에서 화면을 렌더링 하기 위한 태그의 이름은 반드시 첫글자가 대문자이어야 함 */}
    {/* 대문자를 사용하는 이유는 일반적으로 html 태그를 모두 소문자로 사용하기 때문에
        일반 html 태그인지 jsx 문법으로 생성된 태그인지를 구분하기 위함*/}
    <App />
    <br/><hr/><br/>
    <App2/>	<---!!!!!!!!!
  </React.StrictMode>
);
클래스 컴포넌트
- App2.jsx
// App2.jsx
import React from "react";

// 클래스 타입의 컴포넌트(잘 사용 안하지만 개념은 이해하자)
// 클래스 컴포넌트는 React.Component 를 상속받아 사용함
class App2 extends React.Component {
  // state : 현재 컴포넌트에서 사용하는 상태 값
  // props 는 부모 컴포넌트에서 전달되는 값이지만 state 는 현재 컴포넌트에서만 사용되는 값으로, 수정 가능함(읽기전용 X)
  // state 의 값이 변경되면 리액트는 화면을 다시 렌더링 함.
  // state의 값을 직접적으로 변경하는 것은 불가능, setState() 함수를 사용하여 값을 수정
  state = {
    count: 0,
  }

  plus = () => {
    this.setState({count: this.state.count + 1});
    console.log('plus');
  }

  minus = () => {
    console.log('minus');
    this.setState({count: this.state.count - 1});
  }

  // render() : 클래스 컴포넌트에서 화면을 렌더링하기 위한 메소드
  // render 은 함수 컴포넌트와 사용 방법이 동일함
  render() {
    return(
      <div>
        <h1>클래스 컴포넌트 App2</h1>
        <h3>카운트 수 : {this.state.count}</h3>
        <button onClick={this.plus}>plus</button>
        <button onClick={this.minus}>minus</button>
      </div>
    );
  }
}

export default App2;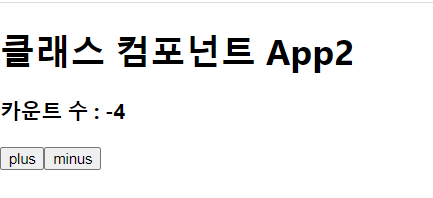
리액트의 생명주기
constructor( ) 함수
componentDidMount( ) 함수
componentDidUpdate( ) 함수
componentWillUnmount( ) 함수
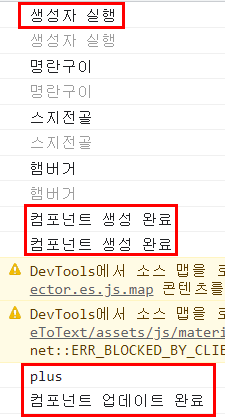
ComponentDidMount( ) 예제
- App2.jsx 코드 추가
constructor(props) {
    super(props);
    console.log("생성자 실행");
  }

  componentDidMount() {
    console.log("컴포넌트 생성 완료");
  }

  componentDidUpdate(prevProps, prevState, snapshot) {
    console.log("컴포넌트 업데이트 완료")
  }

  componentWillUnmount() {
    console.log("컴포넌트 제거 완료")
  }
위코드만 써놓고 실행하면
경로 및 파일 생성
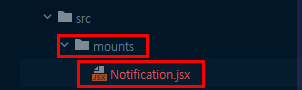
- Notification.jsx
// Notification.jsx
import React from "react";

const styles = {
  wrapper: {
    margin: 8,
    padding: 8,
    display: 'flex',
    flexDirection: 'row',
    border: '1px solid gray',
    borderRadius: 16
  },

  messageText: {
    color: 'black',
    fontSize: 16
  },
}

class Notification extends React.Component {

  constructor(props) {
    super(props);

    this.state = {};
  }

  render() {
    return (
      <div style={styles.wrapper}>
        <span style={styles.messageText}>{this.props.message}</span>
      </div>
    );
  }
}

export default Notification;- NotificationList.jsx (기본형)
// NotificationList.jsx

import React from "react";
import Notification from "./Notification";

const reservedNotifications = [
  {message: '안녕하세요, 오늘 일정 알려드립니다.'},
  {message: '오후 수업 시간입니다.'},
  {message: '이제 곧 쉬는 시간입니다.'}
];

var timer;

class NotificationList extends React.Component {
  constructor(props) {
    super(props);

    this.state = {
      notifications: [],
    };
  }

  render() {
    return (
      <div>

      </div>
    );
  }

  componentDidMount() {

  }
}

export default NotificationList;- NotificationList.jsx (수정)
// NotificationList.jsx

import React from "react";
import Notification from "./Notification";
import {func} from "prop-types";
import notification from "./Notification";

const reservedNotifications = [
  {message: '안녕하세요, 오늘 일정 알려드립니다.'},
  {message: '오후 수업 시간입니다.'},
  {message: '이제 곧 쉬는 시간입니다.'}
];

var timer;

class NotificationList extends React.Component {
  constructor(props) {
    super(props);

    this.state = {
      notifications: [],
    };
  }

  render() {
    return (
      <div>
        {
          this.state.notifications.map((item) => {
            return <Notification message={item.message} />;
          })
        }
      </div>
    );
  }

  componentDidMount() {
    const {notifications} = this.state;

    timer = setInterval(() => {
      if (notifications.length < reservedNotifications.length) {
        const index = notifications.length;
        notifications.push(reservedNotifications[index]);

        this.setState({
          notifications: notifications,
          });
      }
      else {
        clearInterval(timer);
      }
    }, 2000);
  }
}

export default NotificationList;
index.js 로 가서 바로 사용
- index.js
root.render(
  <React.StrictMode>
    <App2/>
    <NotificationList/>	<----!!!!!!!!!
    <br/><hr/><br/>
    <App />

  </React.StrictMode>
);
// NotificationList.jsx

import React from "react";
import Notification from "./Notification";
import notification from "./Notification";

// 댓글 데이터 생성
const reservedNotifications = [
  {id: 1, message: '안녕하세요, 오늘 일정 알려드립니다.'},
  {id: 2, message: '오후 수업 시간입니다.'},
  {id: 3, message: '이제 곧 쉬는 시간입니다.'}
];

// 자바스크립트 타이머 객체 정보를 저장하는 변수 : 2가지(setTimer, setInterval)
// setTimeout : 1회용 타이머, 지정된 시간 이후에 1번 동작, 실행 시 타이머 정보를 반환, 타이머 삭제 시 clearTimeout() 을 사용
// setInterval : 지정된 시간마다 동작하는 타이머, 실행 시 타이머 정보를 반환, 타이머 삭제시 clearInterval() 을 사용
let timer;

class NotificationList extends React.Component {
  constructor(props) {
    super(props);

    // 현재 컴포넌트의 상태인 notifications 선언( == notifications 이 빈 배열 타입의 멤버변수가 됨)
    this.state = {
      // 빈 배열 타입인 state 가 생성됨
      notifications: [],
    };
  }

  // 화면에 처음 그려질 내용
  render() {
    return (
      <div>
        {
          // state 의 notifications 배열을 가지고 화면을 그려줌
          // notifications 배열의 기본값이 비었기 때문에 화면에 아무것도 그리지 않음(F5 누르면 아무것도 없다가 나중에 생기는 이유임)
          this.state.notifications.map((item) => {
            return <Notification key={item.id} message={item.message} />;
          })
        }
      </div>
    );
  }

  // render() 함수 실행 후 동작
  componentDidMount() {
    // object 타입의 '확장 표현식'을 통해서 변수 notifications 에 state 가 가지고 있는 notifications 의 데이터를 대입함
    // 확장표현식 : const/let [변수명1, 2, 3, ...] = [원본_배열] → 변수1, 변수2, 변수3, ... 생성
    // object형 확장표현식 : const/let {키이름과같은변수명_1, _2, _3, ...} = {object 타입} → 키 이름과 동일한 변수명에 값이 대입이 됨
    // 여기서 state 자체가 { } 로 감싸져있기때문에 object 타입이고, notifications 가 키이름임.
    const {notifications} = this.state; // == const notifications = this.state.notifications;
    // state 의 notifications 의 데이터가 비어있음 -------> length : 0

    // 타이머를 사용하여 지정된 시간마다 동작하도록 설정함
    timer = setInterval(() => {
      if (notifications.length < reservedNotifications.length) {  // 0 < 3
        const index = notifications.length;
        // 배열 notifications 에 데이터 추가
        notifications.push(reservedNotifications[index]);

        // state 의 상태 수정
        this.setState({
          // this.state 에 있는 notifications 에 현재 componentDidMount 안에 있는 지역변수 notifications 의 데이터를 저장
          notifications: notifications, // 키(←state 의 notifications) : 실제데이터(←componentDidMount() 안의 배열 notifications[...])
          });
      }
      else {
        clearInterval(timer);
      }
    }, 2000);
  }
}

export default NotificationList;
omponentDidMount( ) 예제 << C 빠졌어용